One thing I don’t like about decorating for holidays is that I feel like I am constantly putting it up and then taking it down and putting new holes in the walls. Sometimes I just get lazy and don’t decorate for holidays. Well I saw this idea to use gift boxes for holiday decor, so after Christmas this year, I got a package of gift boxes for $.75.
As I was thinking about it, I decided that I wanted to do this for every holiday and just switch the front of the box. So I don’t have to redo everything, just put the front of the box onto the wall. I did a set of boxes that go with my home decor for the time that there isn’t a holiday. Since these are in between my boys’ rooms, I’m going to have them help me make them with me too.
Here’s what I did:
1)Took a normal gift box, this size is the lingerie size
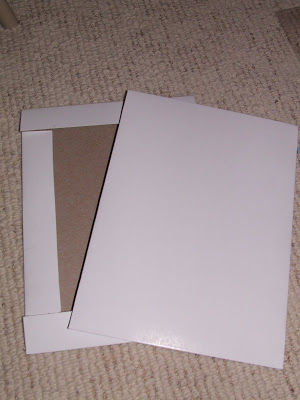
2) Decorated the lids of the boxes

3) Nailed the bottom of the box directly to the wall. I actually put a thumb tack on the bottom too, just for extra support.

4) Put the boxes together and added pictures


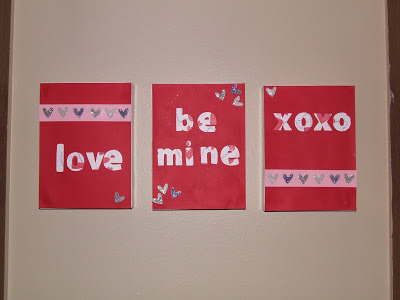
Here are the ones that I did for Valentine’s day. Remember that my boys helped me, so they aren’t the cutest. They got to do the glitter on the hearts.

 They is a really easy and really cheap way to have some holiday decor. I’m excited to actually have something to put up each holiday and something to do with my boys!

This is very cute and clever! I love glitter!
This is just so cool! Beautiful and thrifty enough so that you don't feel bad when you take them off..Clever use of gift boxes!
What a cute idea! I love them!
What a cute idea!! Thanks for sharing! 🙂
Sarah @ http://www.sarahsew.blogspot.com/
Wow! That is a good cheap way to have holiday decor. I think the boys did well on their hearts:)
Wow!! That is super duper cute!!!
Very creative!!
Jenn
What a great idea! I just bought some huge gift boxes on clearance at Wal-Mart today to make some for my bedroom! I can't wait!
what a great idea! i might have to give it a try! thanks for sharing!
What a smart idea! Love it!!
So cute 🙂 I love the idea!!!
I like it! Cute idea!
Lynea
What a great idea! A fabulous upcycle for all of those gift boxes leftover from the holidays. Thanks for linking up!
I want to do this for over my sons crib. I don't' want anything that could fall and hurt him! This is just the thing! Thanks for the cute idea. Also thanks for featuring me that means the world to me!
So clever! I decorate around nail holes in the walls. If my husband ever decided to take some things off the walls, he would have a stroke!! I have to strategically hang things because I am too lazy to patch nail holes. LOL…your tip is great!!
That is awesome and clever! I want some! Eventually I'll make some.
How clever is that! Great job – I love the boys will be boys – fabulous colors!
Such a cute idea…I'm going to let my readers know about this awesome tutorial!
I just found your blog. Cute idea. Thanks for Sharing!
so clever and fun!
That is so smart! A great frugal way to decorate for all the individual holidays- you could even do one for your kids birthdays- ahhh- I am really liking this idea!
What a great idea…. it is making me think of so many cute ways to decorate the top over the year.
Very cute! Love the simplicity.
Linda
oh what a great idea! and they totally look like canvas prints b/c of the depth. I LIKE it!
How clever! I love the ones for the boys!
I love when you can reuse "trash" to make something new–this is an awesome idea that I have never seen before! Thanks for sharing!
Very awesome idea!!!
Wow, that's such a cute and EASY idea!!!
Thank you for sharing your awesome project at Thursday’s Treasures last week! Come share your crafty projects in this week’s Thursday’s Treasures too!
http://treasuresfortots.blogspot.com/2010/02/thursdays-treasures-week-8.html
I think this is an adorable idea! I am going to share your site in my blog…way too cute!
http://floridafrugalfamily.blogspot.com/
On my favs list
Cheri