I am loving having a sewing machine, there is so much you can do!!! I’m still a beginner, but I’m getting a little better. I was so excited when I came up with this idea in my head and it actually worked, on the first try even! 🙂
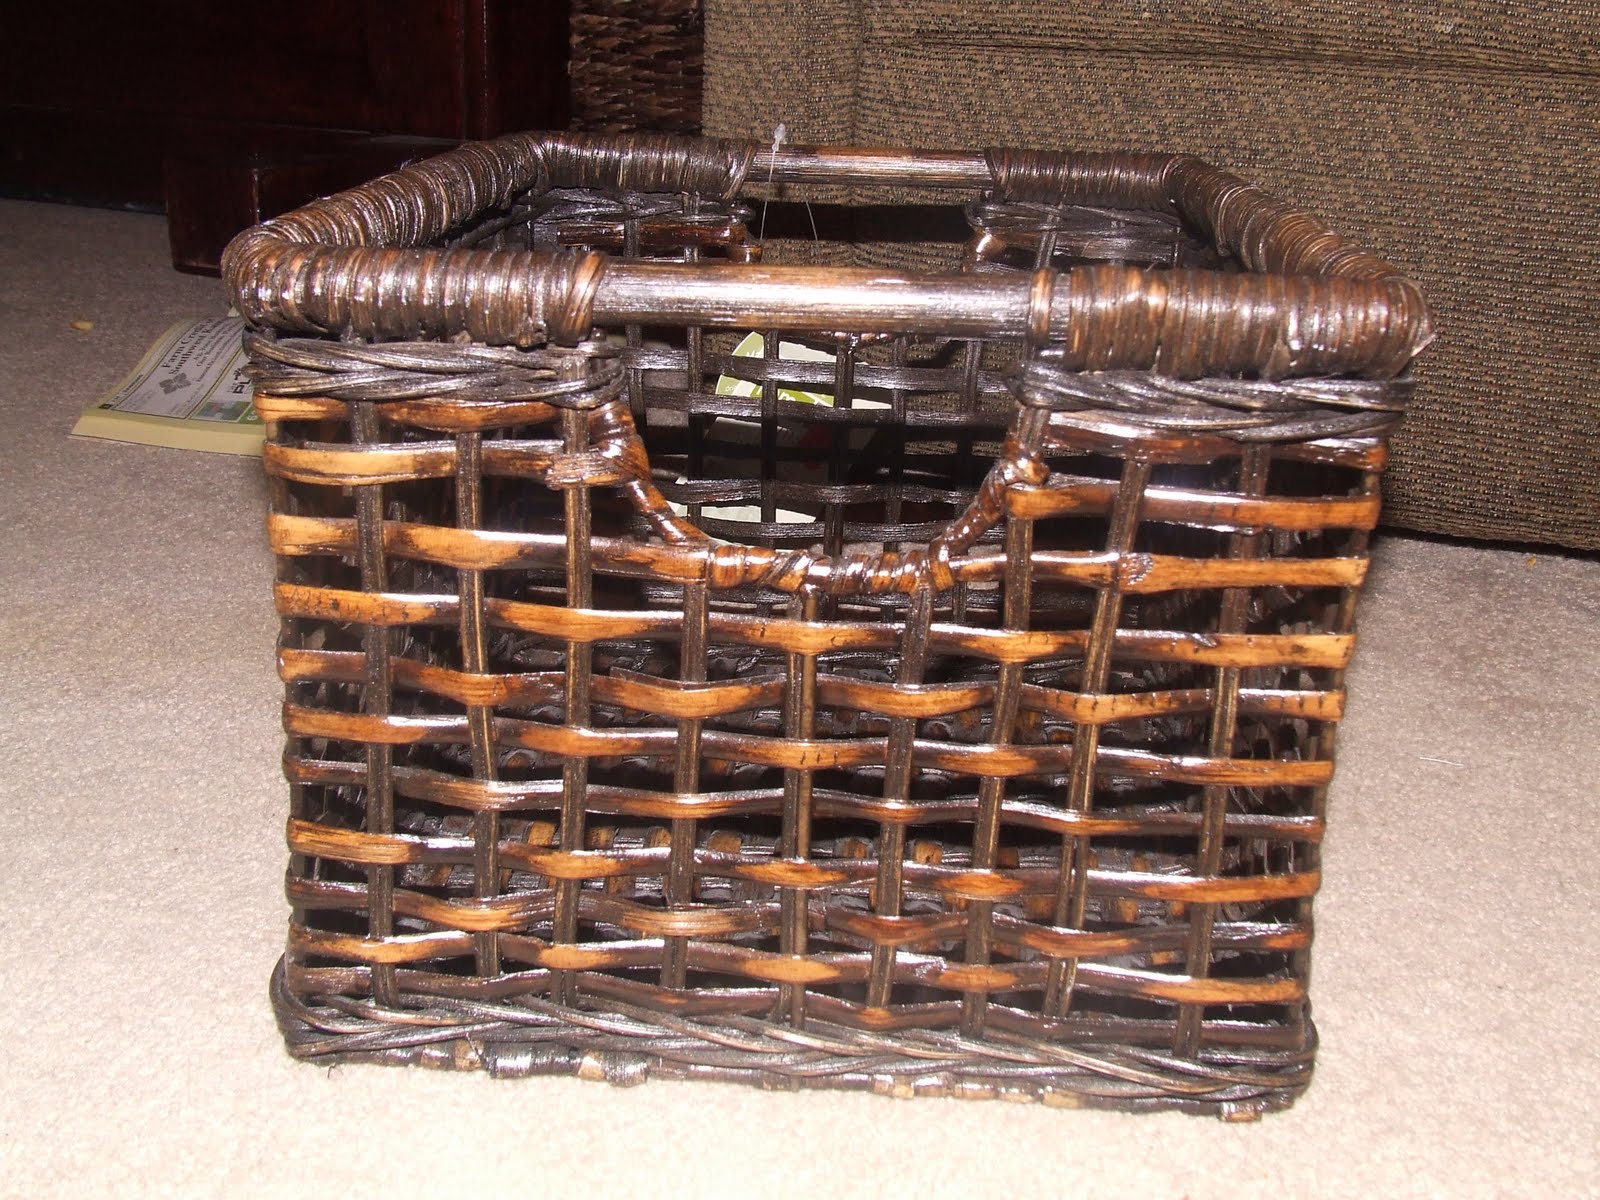
I have a few baskets in my family room. They are just some “caught all” baskets. So I wanted to make a lining for them, so you can’t see all the toys that are in them when they don’t make it back to my boys’ rooms.
Although there are a lot of steps, it’s pretty simple (remember I am still a beginner at sewing)
So this is how I made the lining
1) I took a cute basket
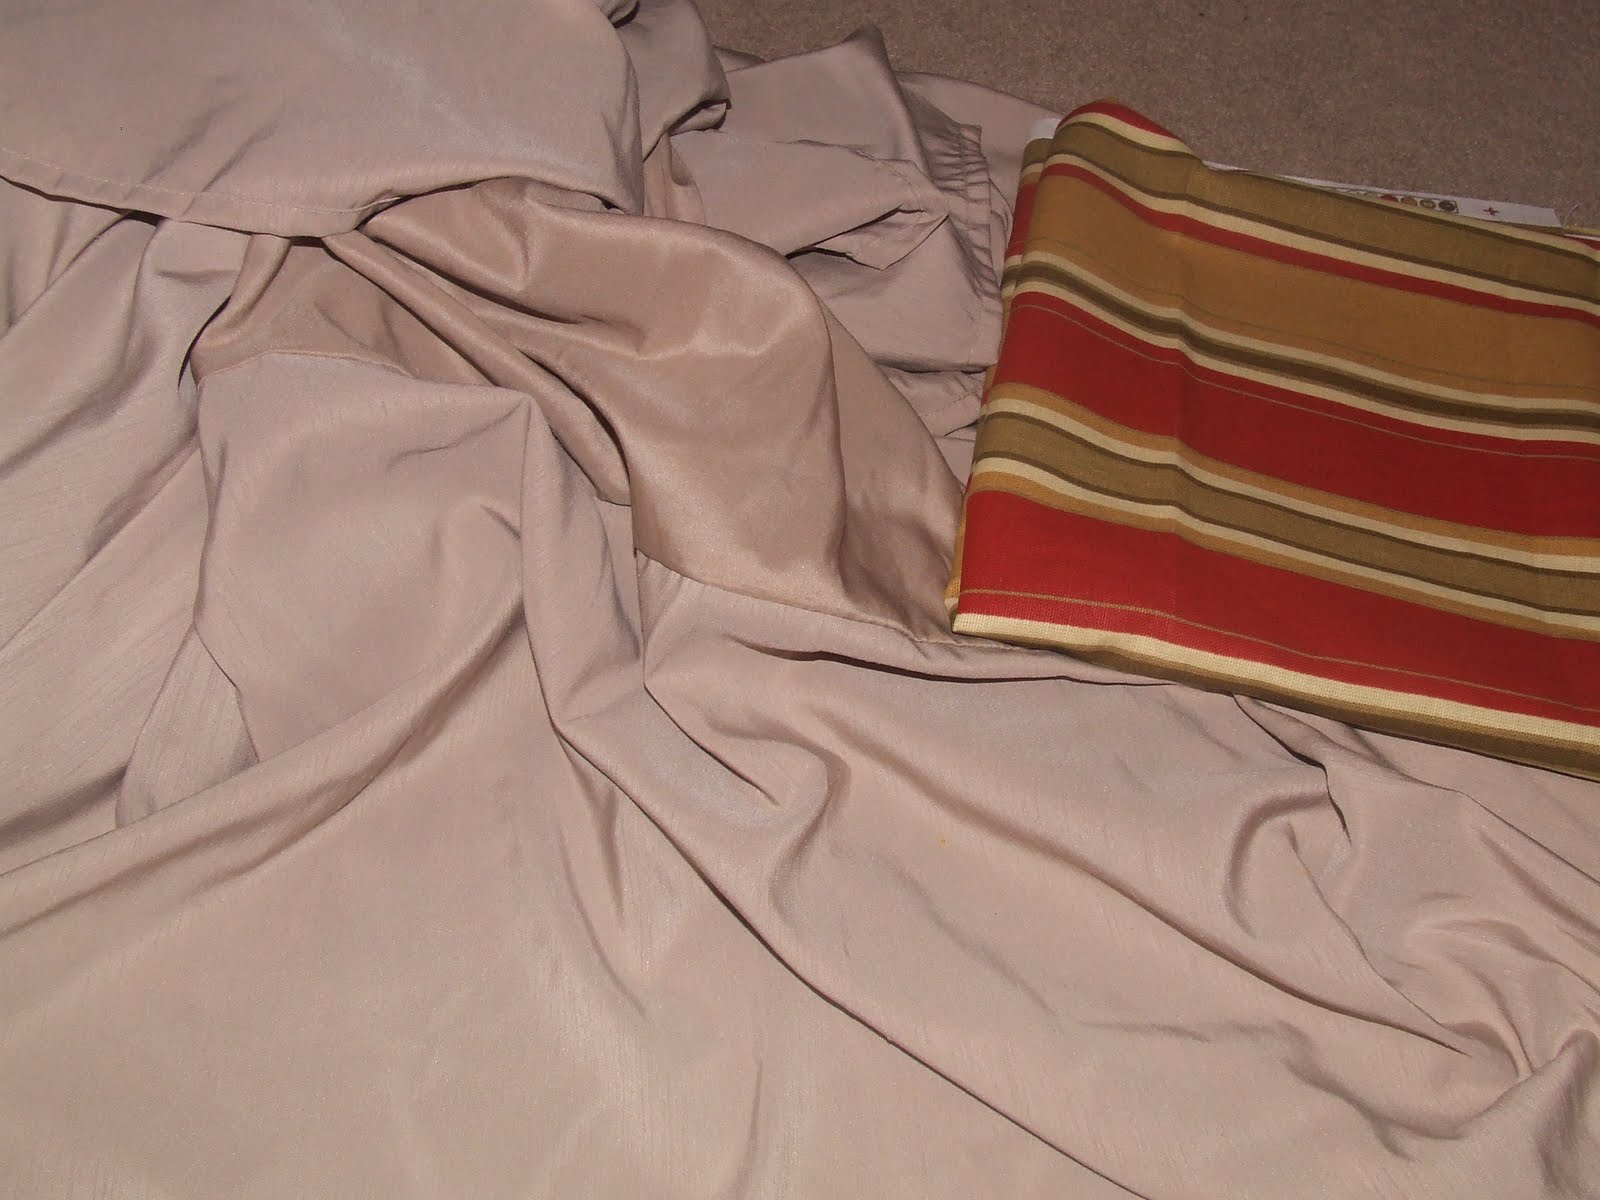
2) I picked out my fabric. I found the striped one on clearance and the cream fabric is actually a bedskirt I picked up for a garage sale for $.50 ( I just couldn’t pass it up even though I knew it wasn’t the right size, glad that I did)
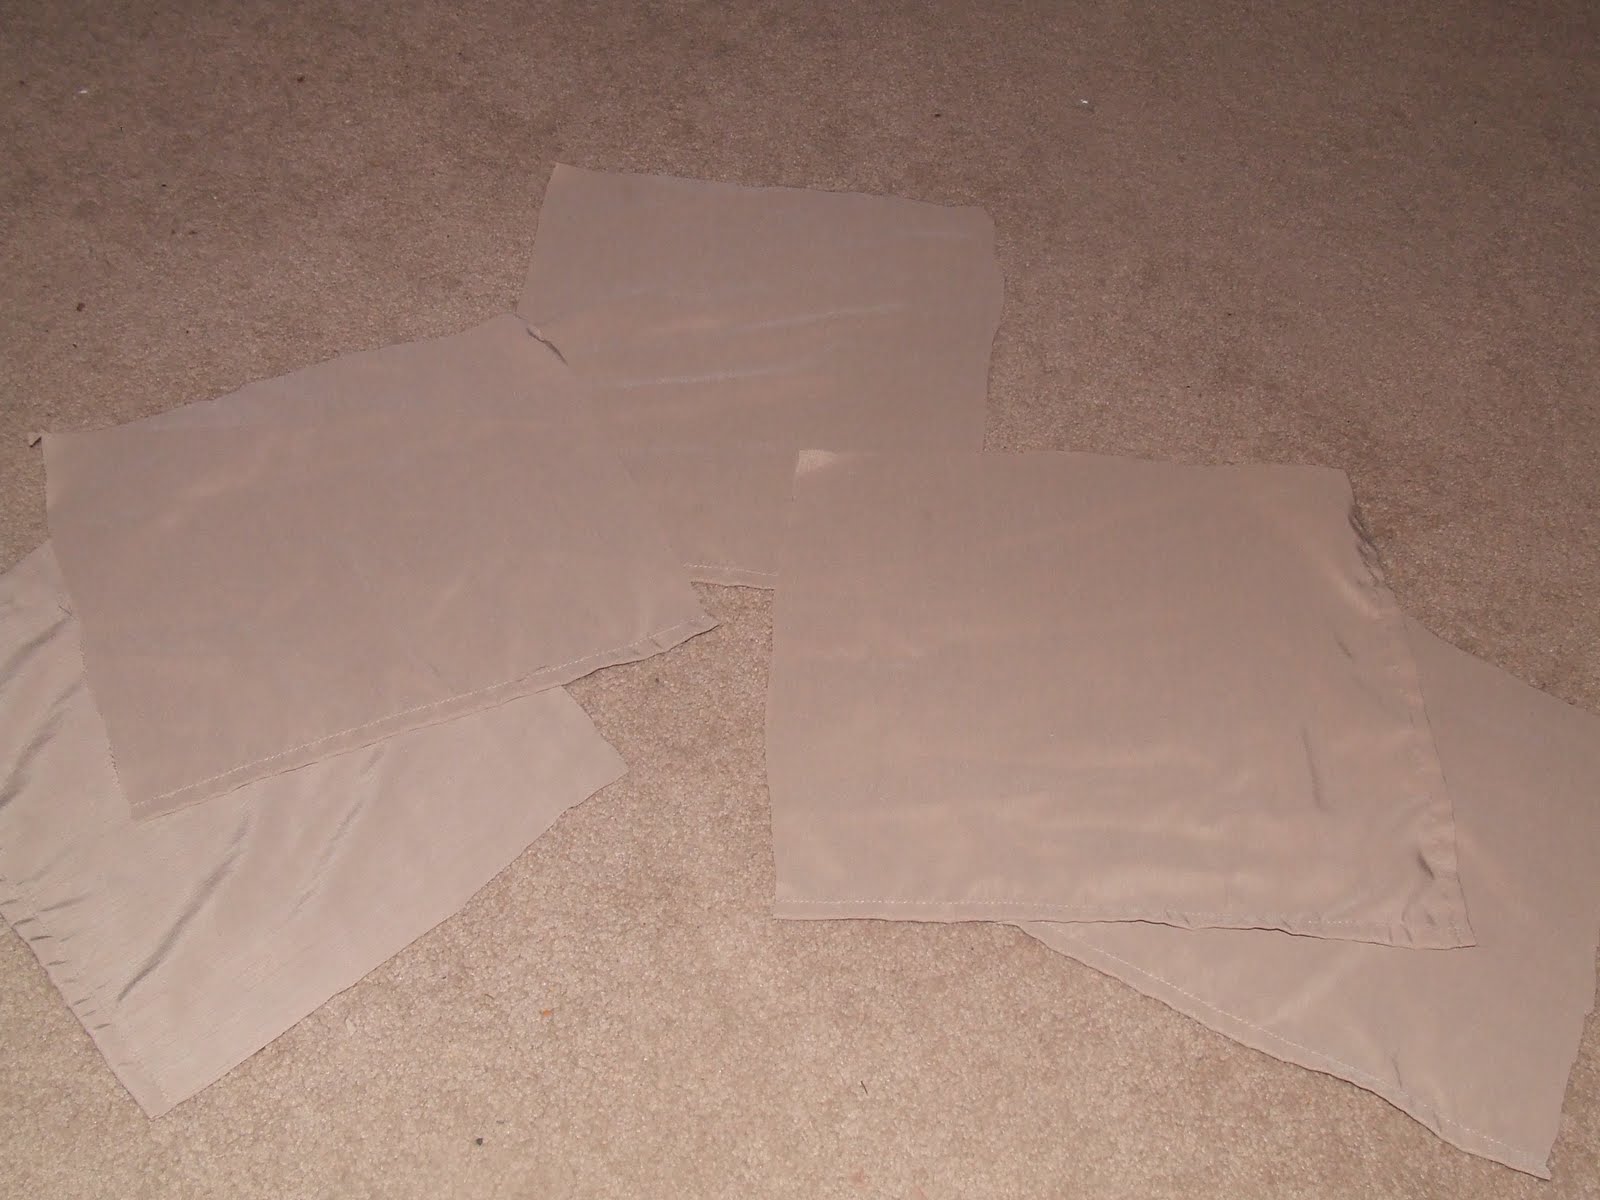
3) I measured my basket and then add about 1/2 inch to each side and then cut out all of the pieces
4) Putting the fronts together and making sure that I had the correct sides, I sewed a straight line to sew them together. My stitch was about 1/4 inch from the side. Make sure that the back of the fabric is facing up when you sew. Do that to all four side pieces
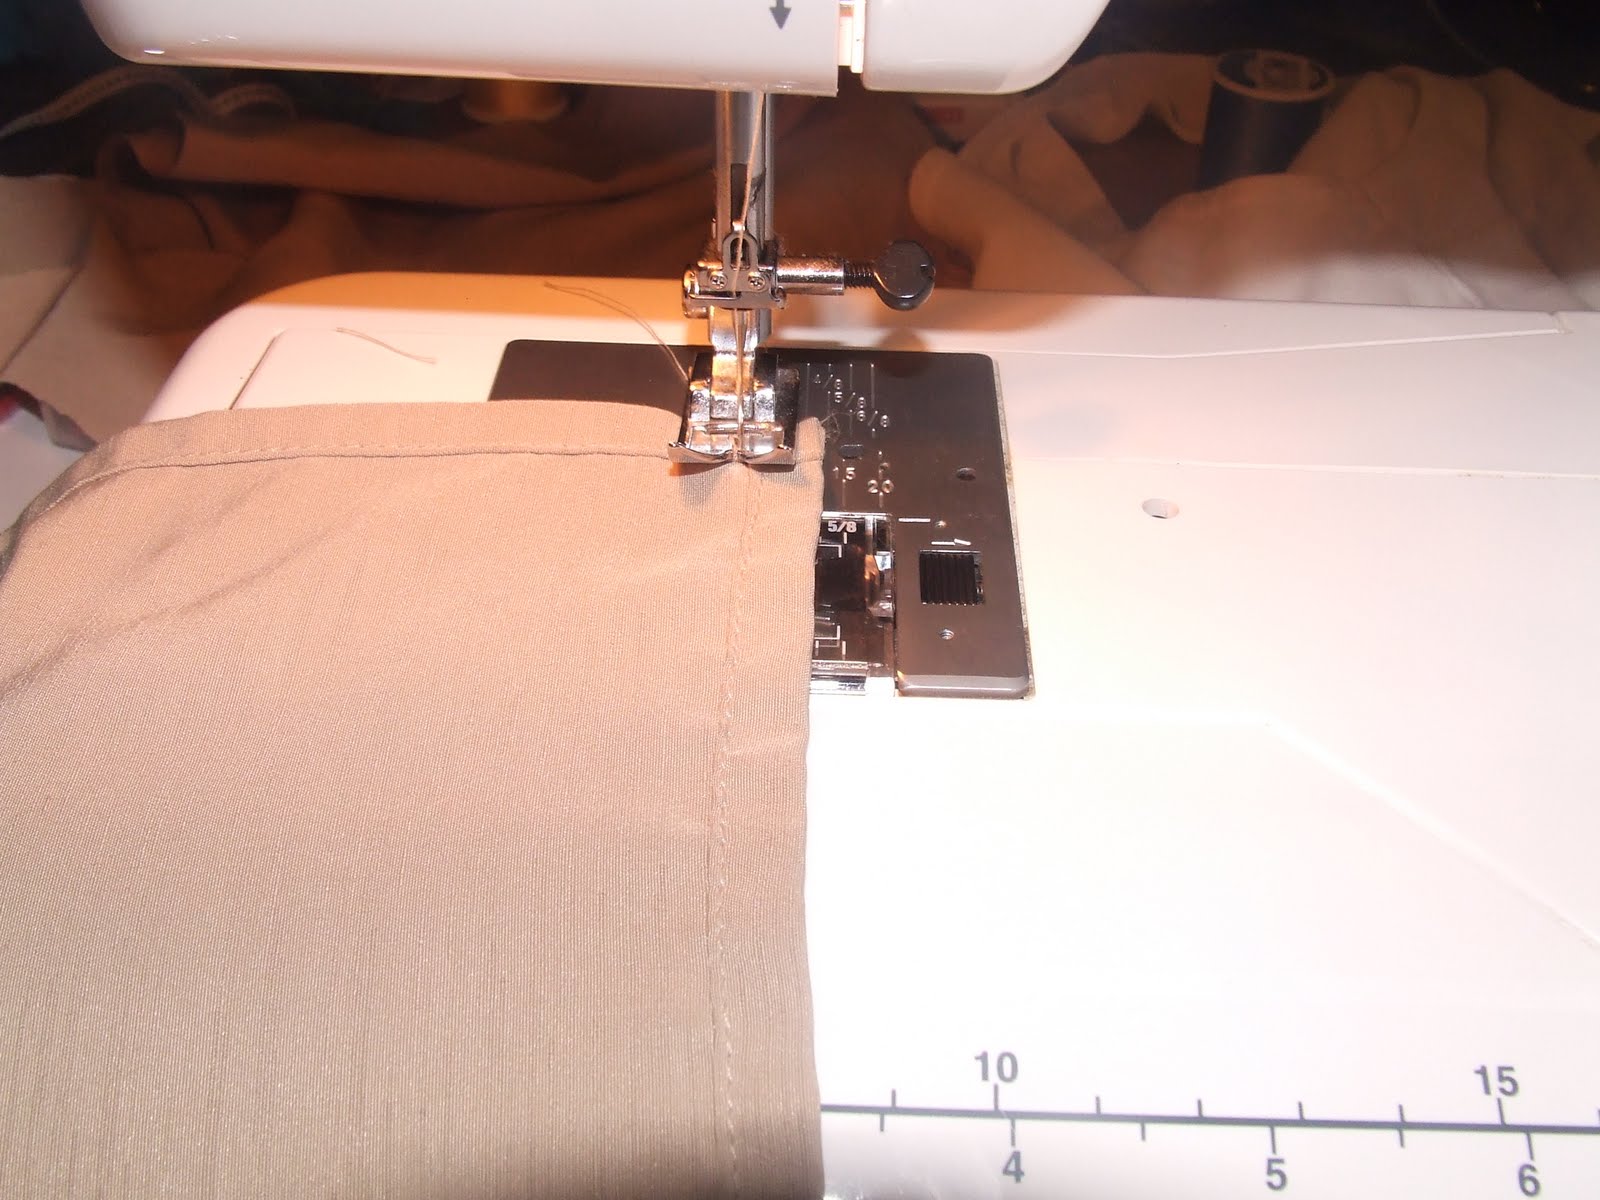
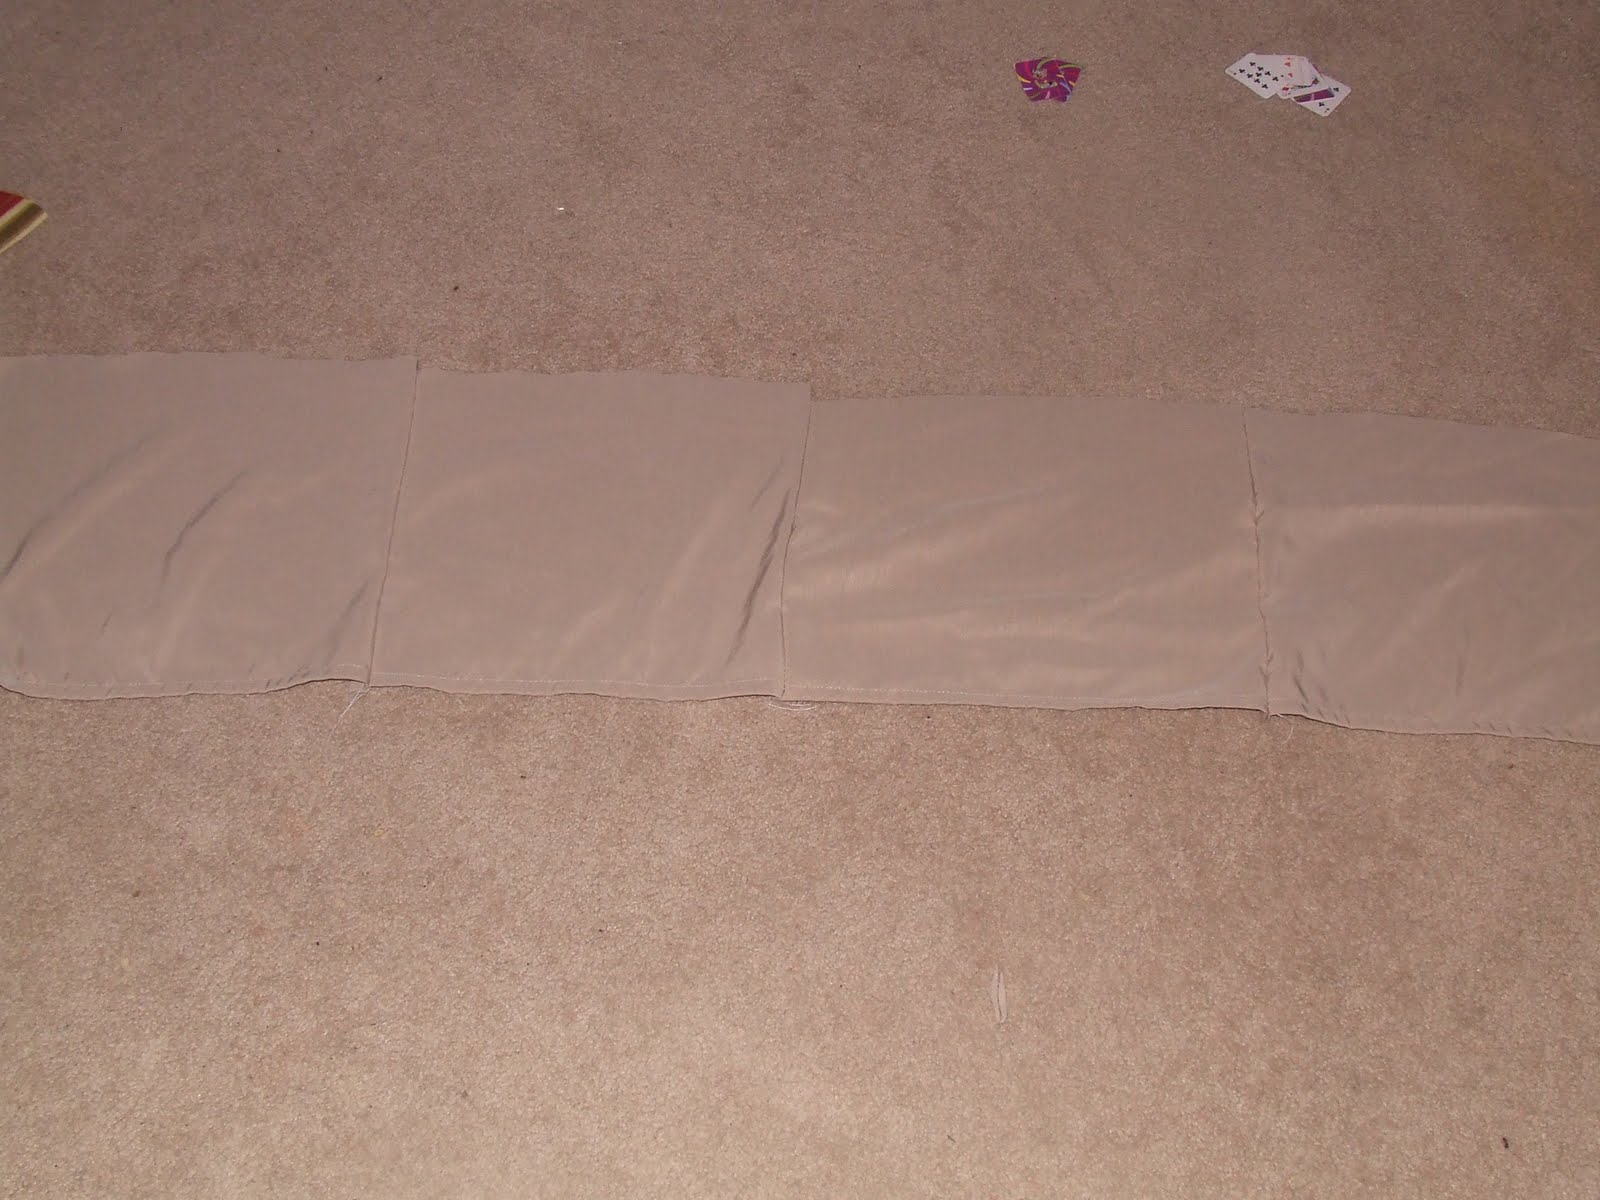
5) Once I sewed all four pieces together, it looked like a long piece of fabric
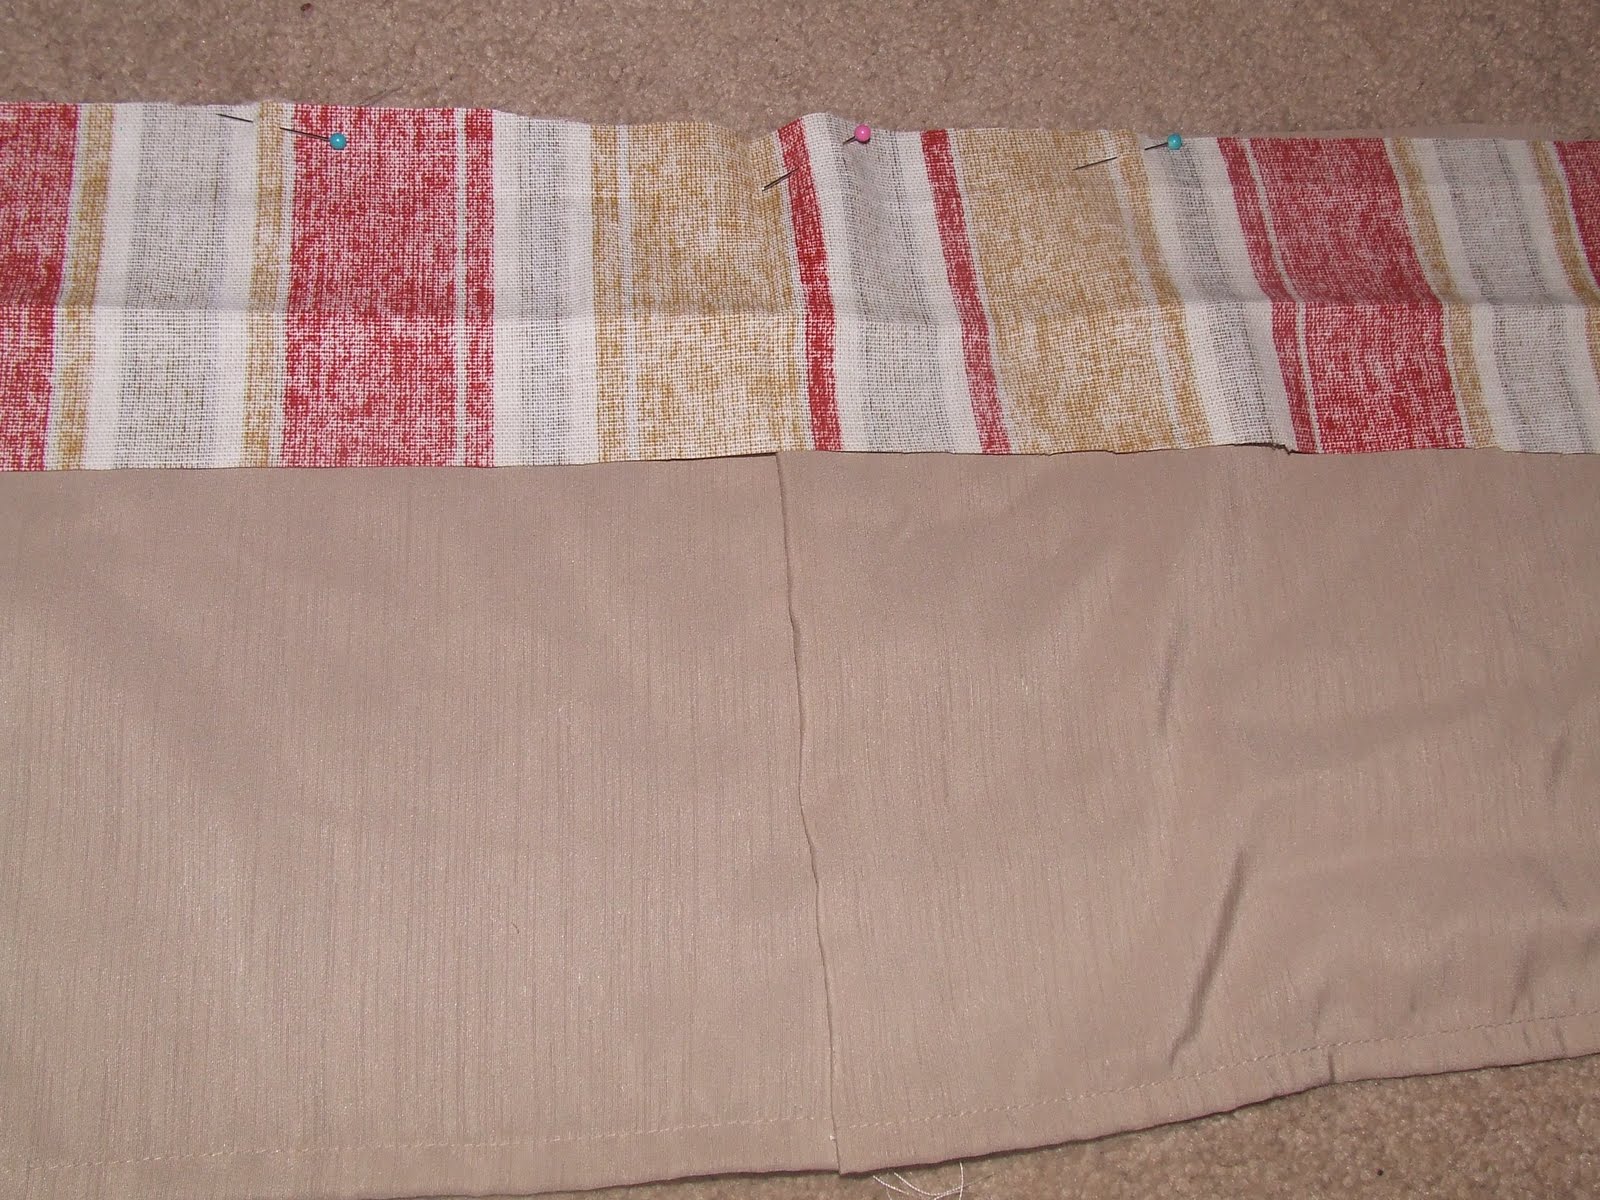
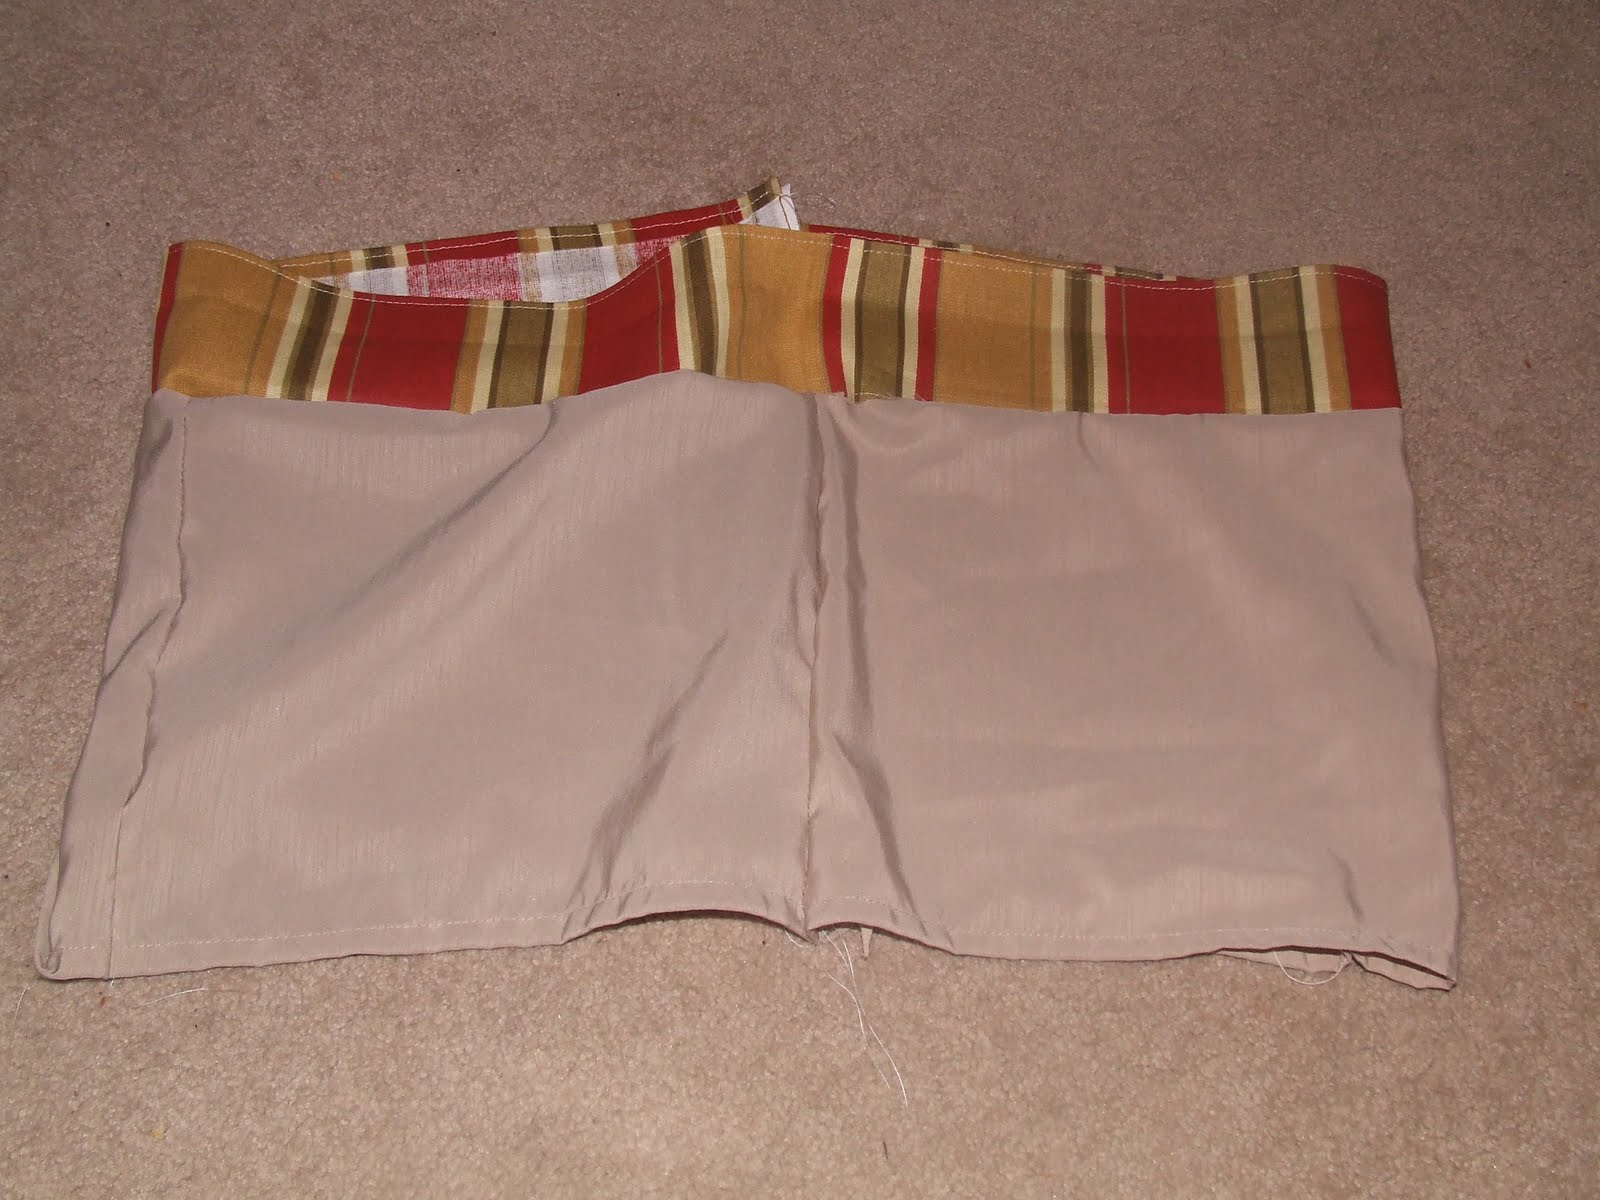
6) I then cut the strip of striped fabric (mine is 4 inches wide) and pinned it to the whole length of the inside fabric. Make sure to pin the front facing each other
7) I then sewed those two together, with the back of the fabric facing up
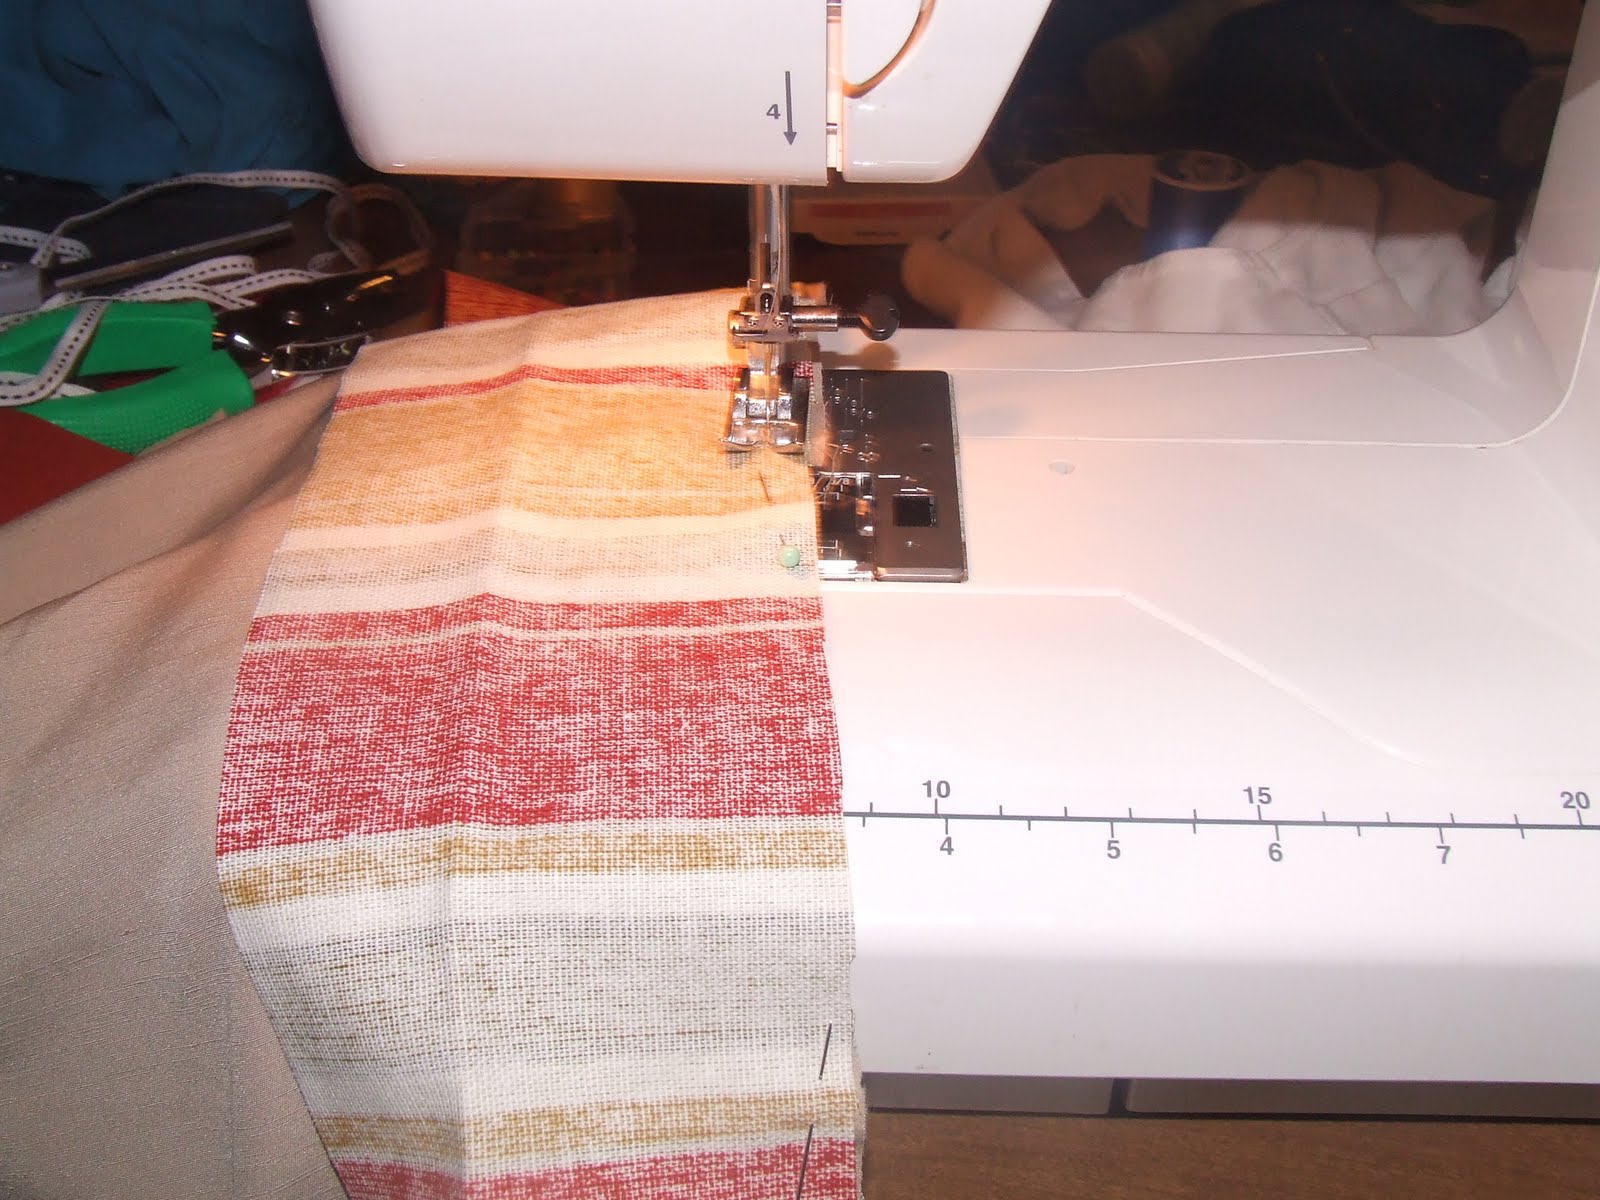
8) I then ironed a little section, to make sure it was nice a straight and then I sewed that.

9) I then put together the last two side and sewed them together

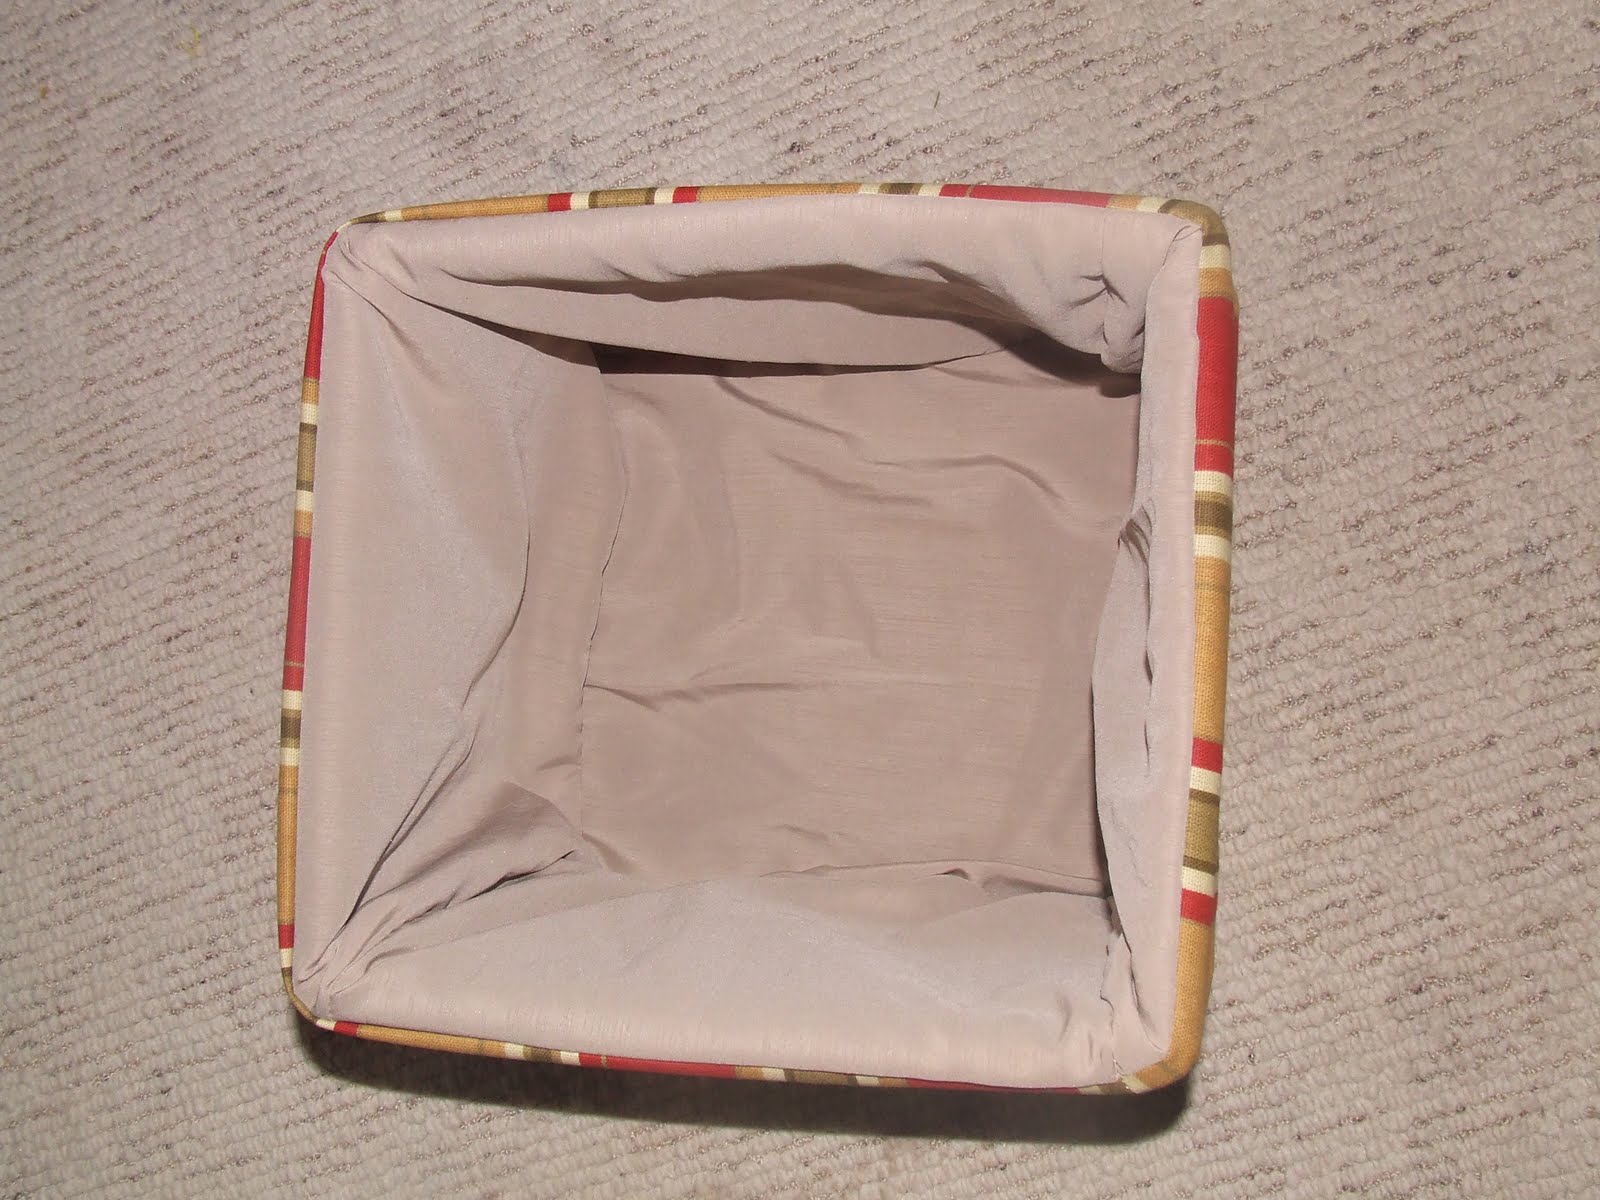
10) So now here is my “rectangle” without the bottom sewed on yet
11) Take the bottom piece and sew it to all four sides. Doing it the same way as before, putting the fronts together and sewing on the back. (sorry no picture, guess I forgot)
12) Put the lining into the basket and admire it!! You will want it to be a snug fit about the edges so when you put things in, it doesn’t fall in too.
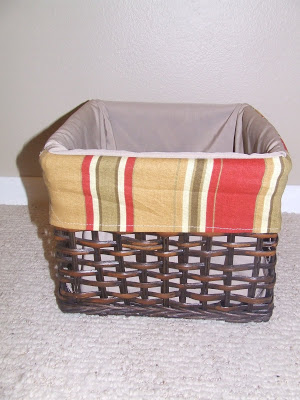
 And there it is! I love the color that it adds to the basket! I loved it so much that I did it for 4 baskets and plan on doing two more for my living room. I even want to do it for my boys’ containers in their rooms. Just to hide the toys!!


This is adorable–love the colors and fantastic job!!!
To me liners MAKE a basket. Thanks for sharing.
ooohhh… that looks easy. I might give it a shot.
That's too cool! I have a ton of plain old baskets I would dress up with this… if I could sew worth a flip. LOL!
Hi, hope it's OK to contact you here. We would love to include your blog on our giveaway search engine: Giveaway Scout (http://www.giveawayscout.com). Have a look and if interested, use our online form to add your blog (http://www.giveawayscout.com/addblog/ ). thanks, Josh
This looks very easy to do but I am not sure if this "sewing challenged" crafter can do it. Thank you for the tutorial.
So cool! Great job for a first time seamstress! 🙂 I am your newest follower! Please follow me back at hickory dickory home on blogspot! Thanks -Tina
I have wanted some basket liners, but didn't want to pay for them! This is such a great idea. You should link up over at mycraftielife.blogspot.com!
That look great! And you did your the proper way! Here's mine I did with my glue gun!
http://lessonsofanewlywed.blogspot.com/2010/07/lesson-69-cool-glue-gun-project.html
I've been meaning to do this too – great tutorial!
Hi Kaysi, I love the fabric. I'm hosting We're Organized Wednesday and would love for you to join the party. Hope to see you there.
http://organizeyourstuffnow.com
Turned out beautiful! Nice to have you join us for Anything Related! ~Bridgette
Very cute! I love to use baskets myself.
Nothing beats a beautifully lined basket!
I love these. Thank you so much for linking up to Upcycled Awesome!
http://tinyurl.com/Upcycled8
I love it! I love adding a little flair to something like that! What a great and easy idea!
I love it! I love adding a little flair to something like that! What a great and easy idea!
I have been looking for something like this! Can't wiat to try it! I've done a little feature about your project on my blog!
Enjoy your weekeknd!
Sharon@KeenInspirations
Wow, what a great tutorial! I always see baskets for next to nothing at garage sales and I love the fabric lined basket look!
I love this!!!
You make it look 'sew' easy. LOL (I'm not a sewer…but I wish I were!)
Great work! Sewing is a blast! Thanks for linking up to Mad Skills Monday!
And link up all you want for more chances to win 30 days FREE ad space!
That's pretty amazing. 🙂 I've always wanted to do that but just didn't want to try and figure out how. lol Great Tutorial. 🙂
SEW cute! I love the fabric you used! Thanks for the tutorial and for linking up to Hoo's got talent!
I have the fabric ready to line a couple of baskets in my bathroom. Your post will be my inspiration to get it done. Thanks for sharing.
Love this and you've made it look so easy, I might actually try it.
These are so cute! I love fabric and the idea of a catch all basket. I need about 10 of these (okay maybe just one big one:)
Outstanding. And on the first try? WOW. Great job!
Thanks for the tutorial – I might be able to do this even with the challenge of attaching the bottom.
Thanks!So simple.:)))
Hey, very nice site. I came across this on Google, and I am stoked that I did. I will definitely be coming back here more often. Wish I could add to the conversation and bring a bit more to the table, but am just taking in as much info as I can at the moment. Thanks for sharing.
Pediatric Wheelchair
Keep Posting:)