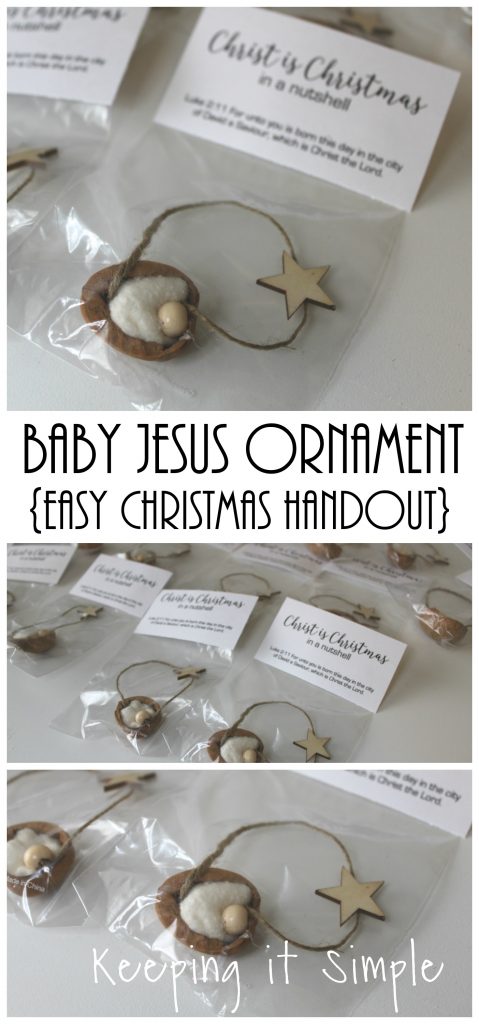
Baby Jesus Walnut Ornament- Easy Christmas Handout
This year we headed home for Thanksgiving to be with my family. While we were there, my mom showed me this super cute baby Jesus walnut ornament that my sister had made (she is the Relief Society president in their ward). I just loved how cute it was and how perfect it would be for a Relief Society handout or a neighbor gift (that’s what I used it for). So I got to talking with my sister and she taught me how to make these super cute baby Jesus ornaments. I headed home and immediately started making them. They are so easy to make and super inexpensive to make, so that is a win-win in my book! My sister said that she got the idea from here.
Here is a quick video to show you how to make the baby Jesus Walnut shell ornament. It’s one of those crafts that makes more sense to watch it and then read the tutorial.
This is how I made them:
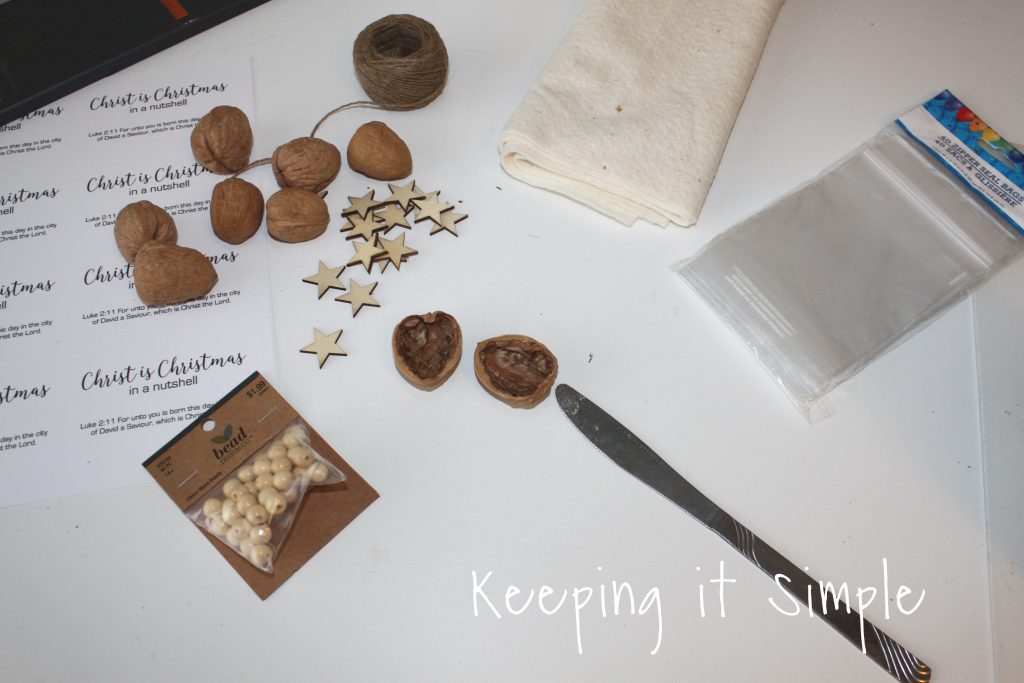
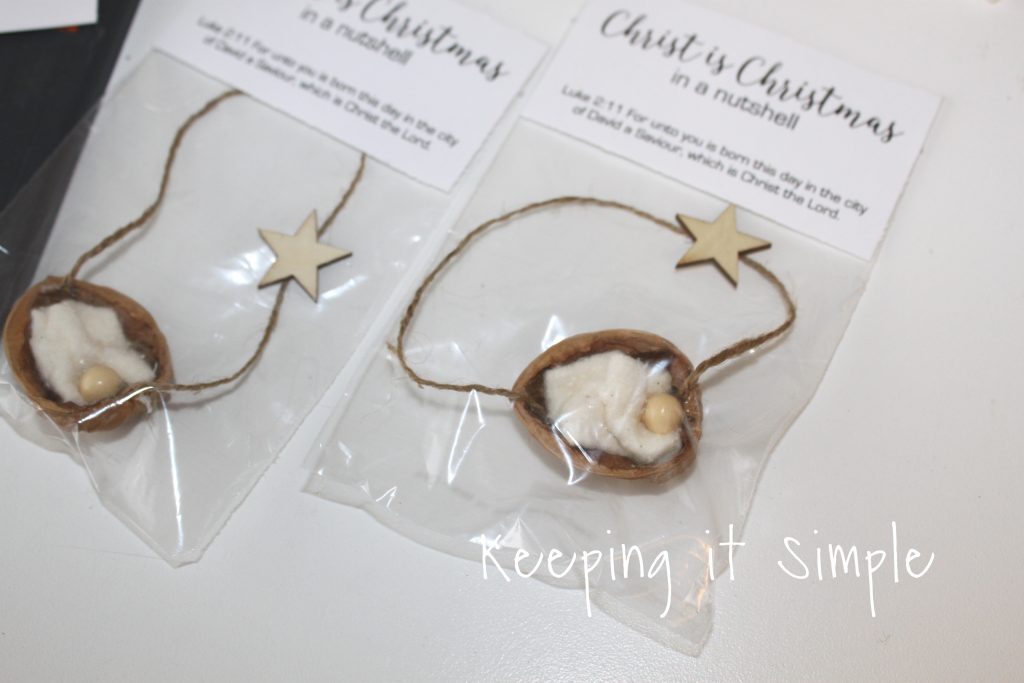
I used walnuts shells for the manager, 100% cotton fabric that was thick like wool (I got it from Hobby Lobby), 10 mm wooden beads for the head (also from Hobby Lobby), twine (Hobby Lobby), wooden stars (from amazon) and little bags that I got from the Dollar Tree.
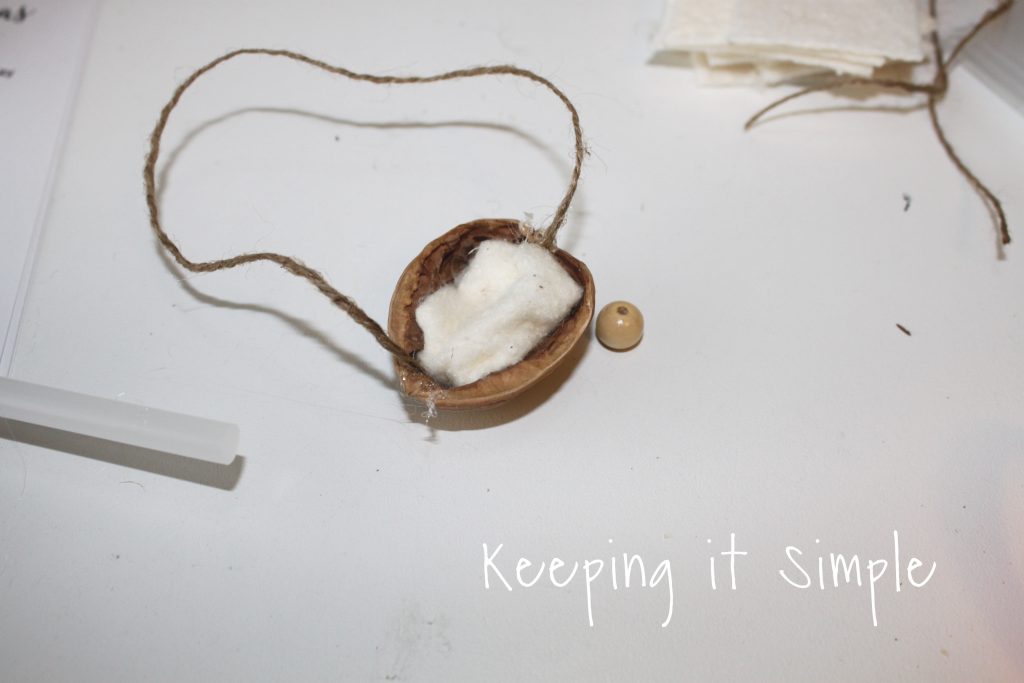
The first thing I did was opened up the walnut shell. I got those from bbulk section from Winco. I found them in some open boxes in the middle of the bulk section with the other shelled nuts. I actually looked for ones that were already open because some of them were tricky to open so I was happy to get empty shells without the walnuts. To open the walnut, I took a butter knife and inserted it into the top of the walnut (the flat area, not the tip). I then jiggled the knife around until the shell opened. Then with the knife I cleaned out the inside. You can of course save the walnuts if you want, I just don’t care for them so I just put them into the trash. There is a little piece at the very top of the shell, you will want to break that off too. Sometimes I had to take the knife to it to break it (you can see that in the video).
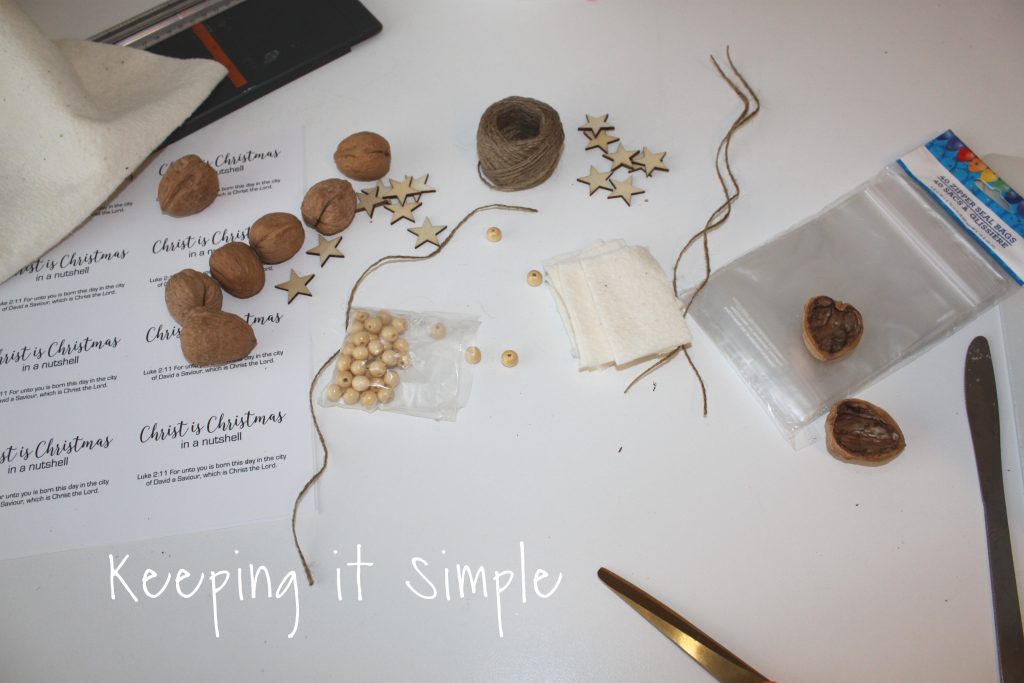
Once the walnut shell was open and cleaned out, I then got the other pieces ready. I cut the twine to be about 12 inches long and then I cut the fabric to be about 2 1/2 inches by 1 1/2 inches.
I tied a knot into the twine to make a loop and then I put a dab of glue at the bottom of the shell and then placed the knot onto the glue. You will want to make sure that the twine is going the right direction, as you can see in the picture.
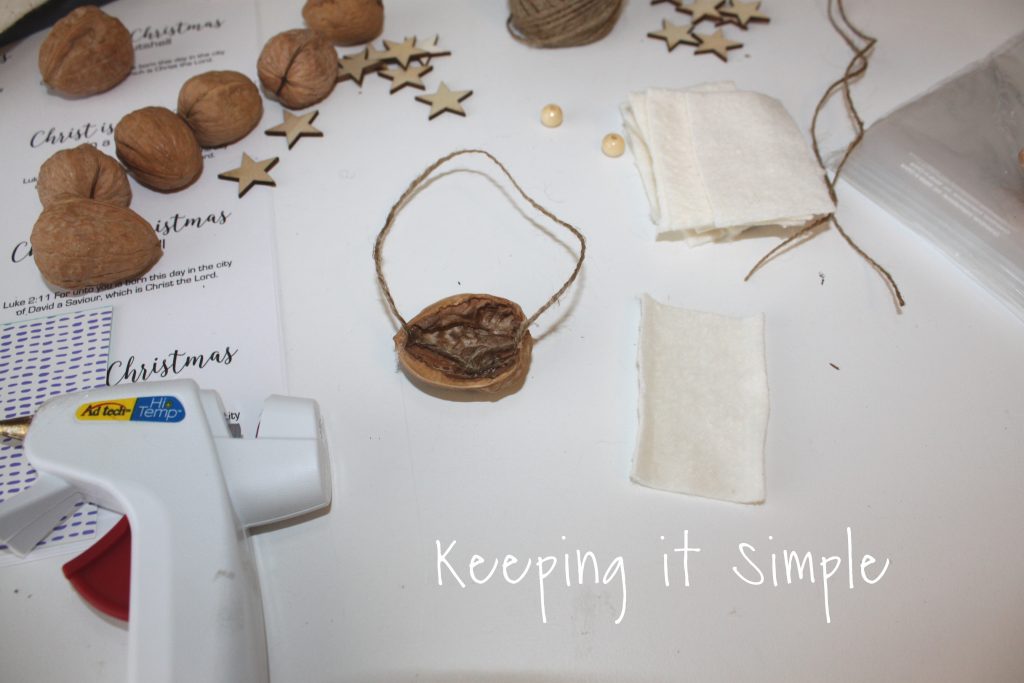
I then put the fabric into the shell. To do that, I folded the longer sides in and then the shorter sides over that. I then put a generous amount of glue into the shell and put the fabric in, with the folded sides down. I tucked the fabric into the bottom of the walnut (the tip part) and then tucked the top in. Then using the knife, I tucked the fabric in around the edges. You can pull at the fabric to make it more full looking if you need to. When I put bead in for the head, I made the hole be the top of the head. I then put a dab of glue at the top of the fabric and then really tucked the bead into the fabric. Sometimes the hole of the bead fits perfect into that piece that is at the top of the walnut that you break off.
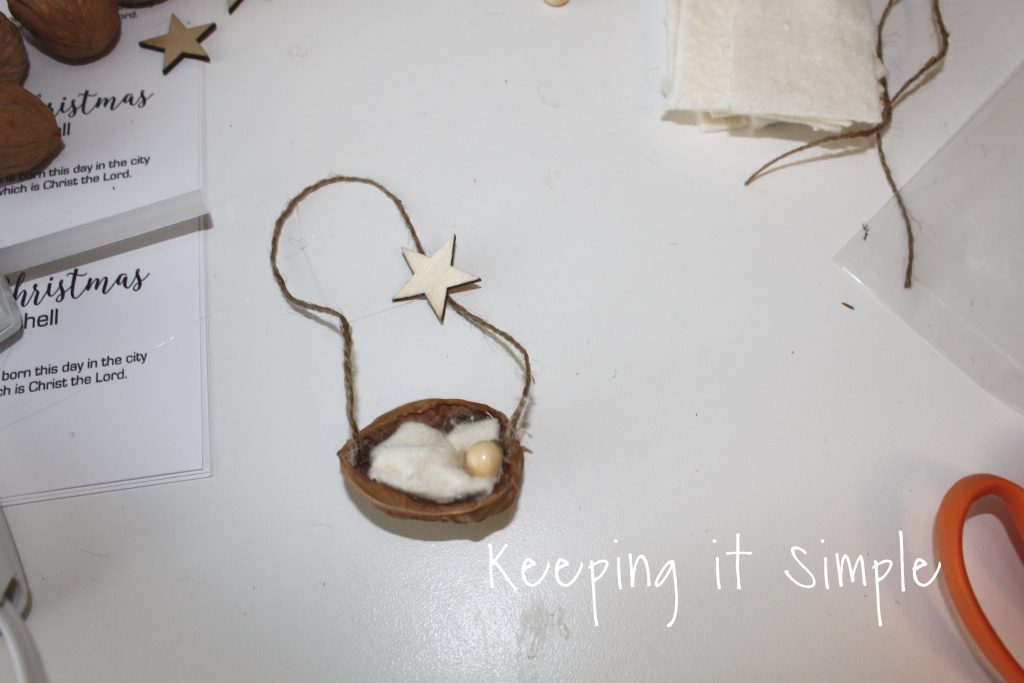
I then glued the wooden star onto the twine. I just put a dab of glue onto the star and then put the twine on it and pressed the glue onto the string with my finger.
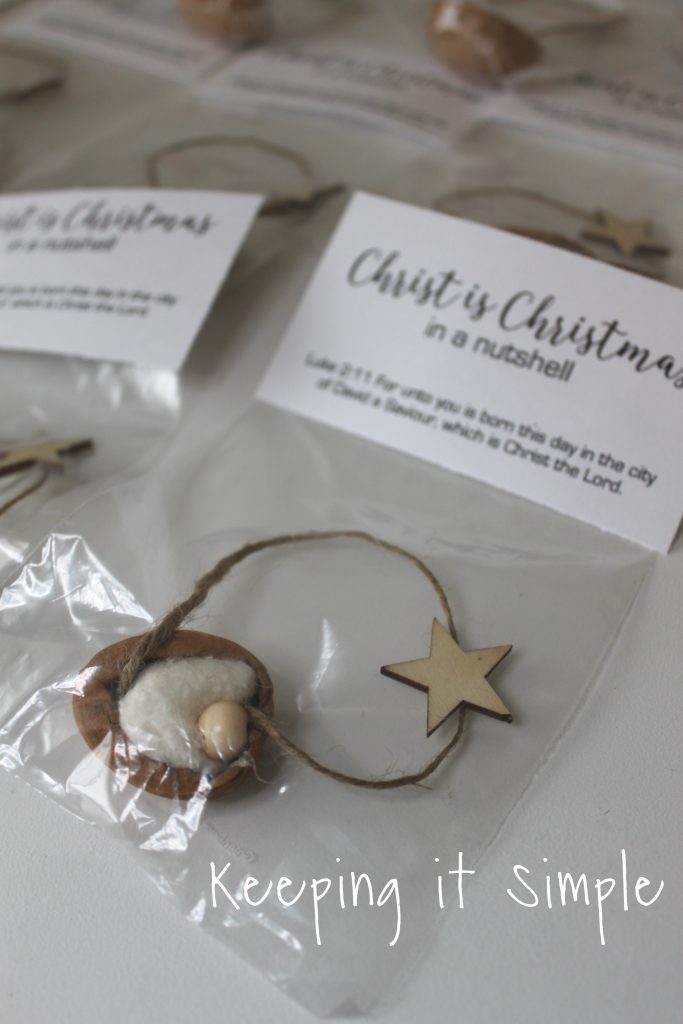
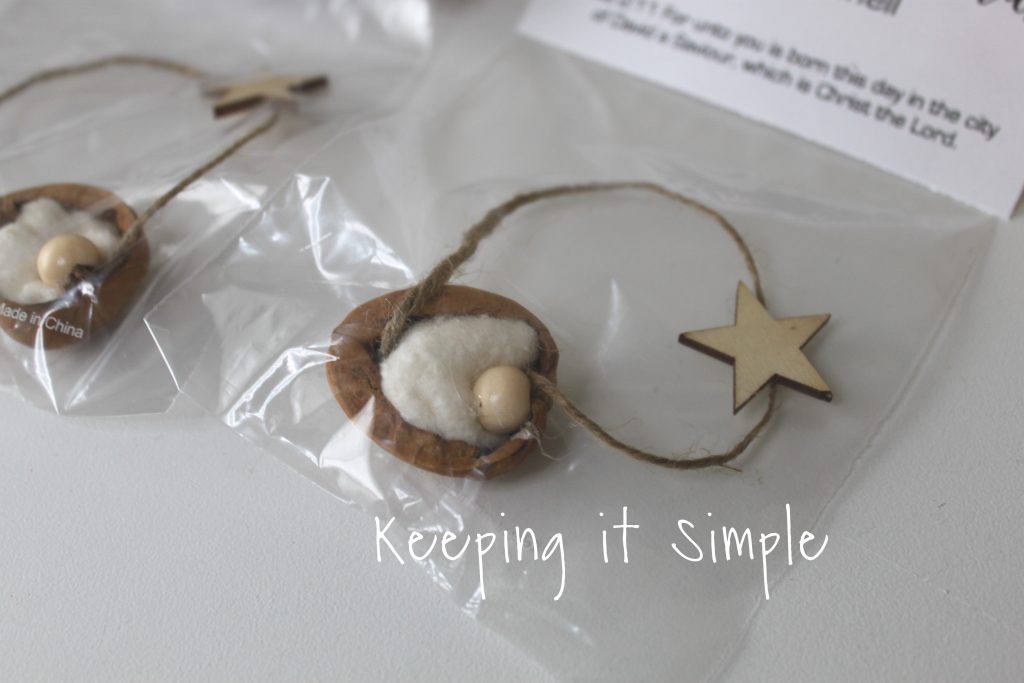
I put the cute baby Jesus ornaments into these little bags. They fit perfectly and they were only $1 for 40 bags!
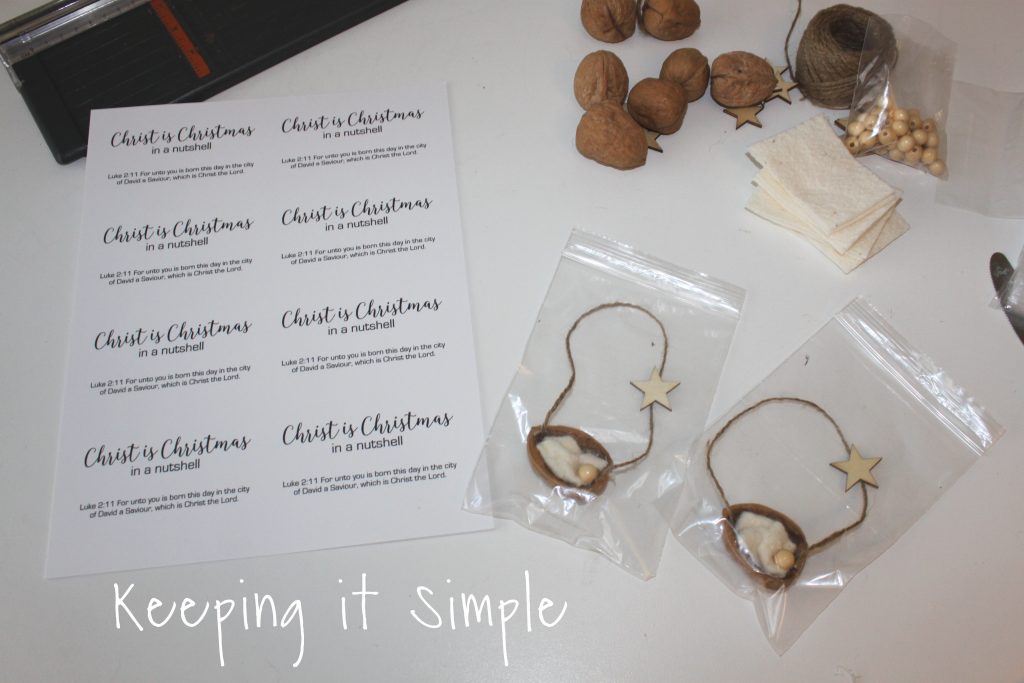
I made a little printable to go onto the bag. You can get the printable here. I cut them to be 4 inches wide and 2 1/4 inches high.
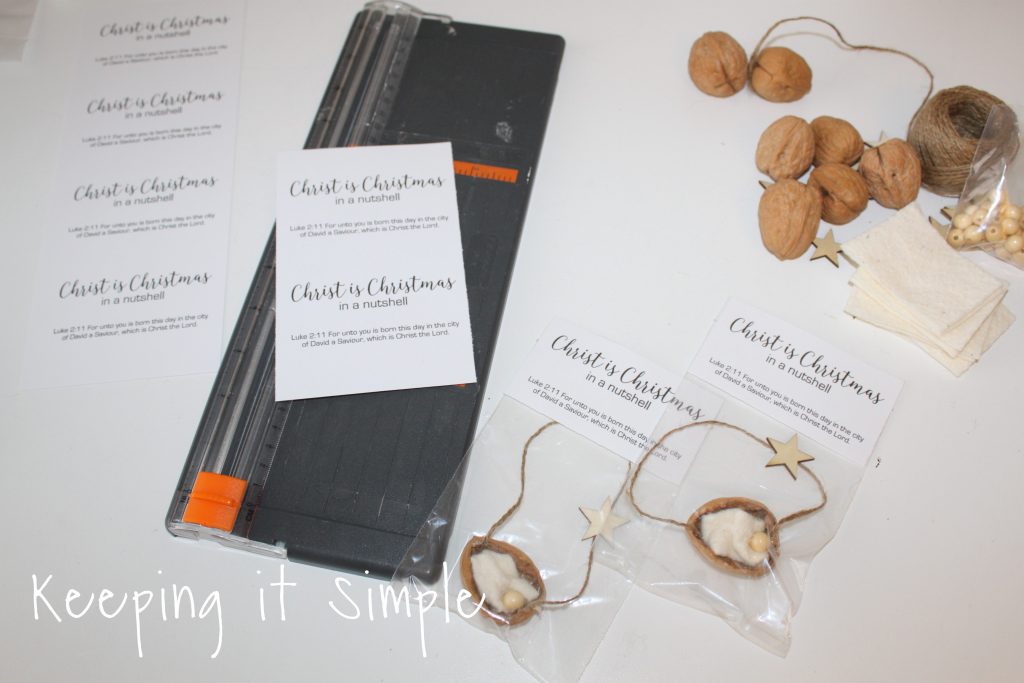
I then glued the saying onto the top of it and that’s it! Seriously, so easy to make!
I especially love how the little ones look with the small walnut shells.
I made more than 50 of them and didn’t cost much at all, so they are great for a Relief Society handout or for your ministering sisters or for any church group or like I said before, neighbor gifts :).

Here is a close up of one of them, I love it so much!
Make sure to check out my other Christmas ornament ideas.


This post contains affiliate links.
Leave a Reply
You must be logged in to post a comment.