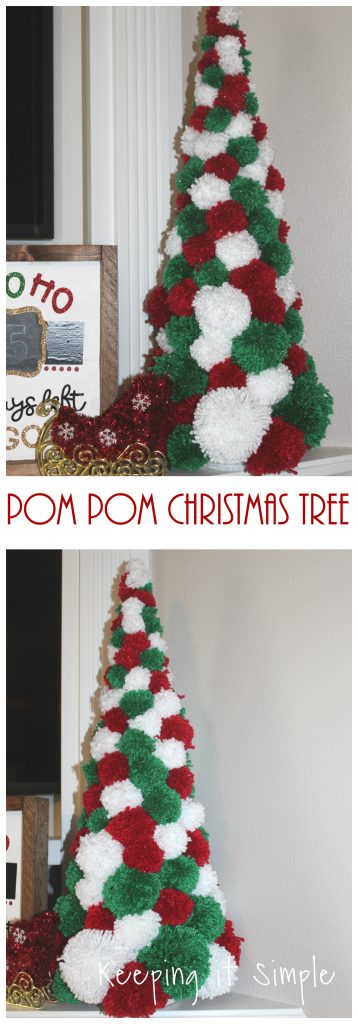
Pom Pom Christmas Tree- How to Make Mini Pom Poms with a Fork
A couple days ago I made a super fun Christmas pom pom wreath and I loved making it so much that I wanted to make something else to match it. It turned out so great that I did it the same way and even used the same yarn. Because the Christmas tree gets smaller on the top, I had to make some pom poms that were even smaller than what the smallest pom pom maker makes, so I made some mini pom poms with a fork :). Now it’s time to get to all the details!
Here is a quick video to show you the process of how to make this pom pom Christmas tree.
In this post I’m going to show you how to make mini pom poms with a fork, to see how to make pom poms with the pom pom maker, check out this post.
This is how I made it:
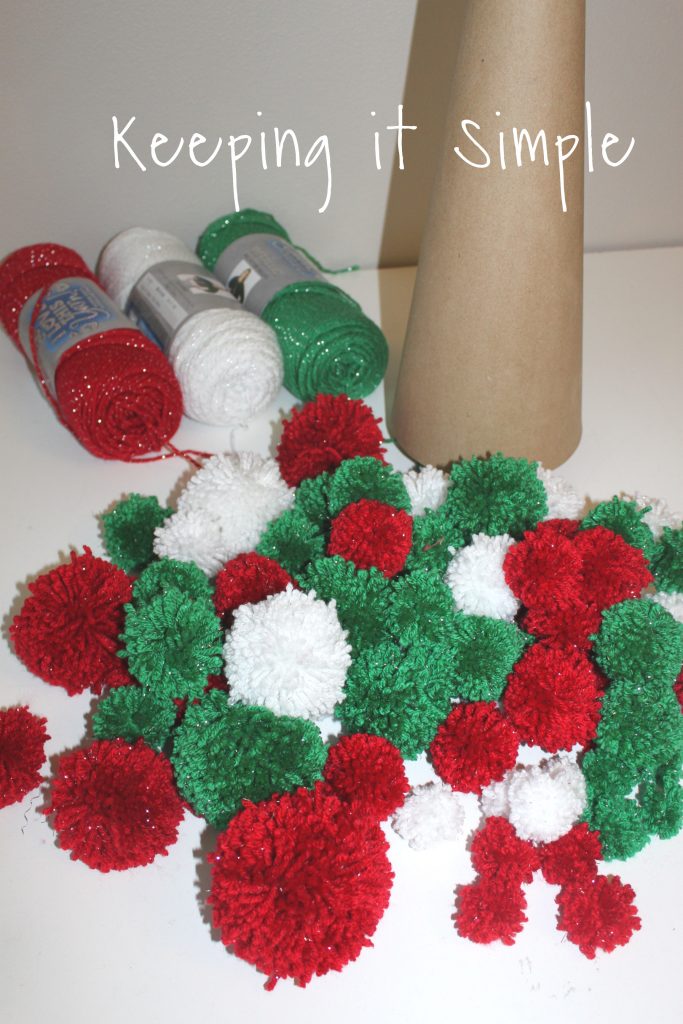
I started with a big Christmas tree cone (I got it from Hobby Lobby) and then some yarn. I also used some pom pom makers and then a fork :).
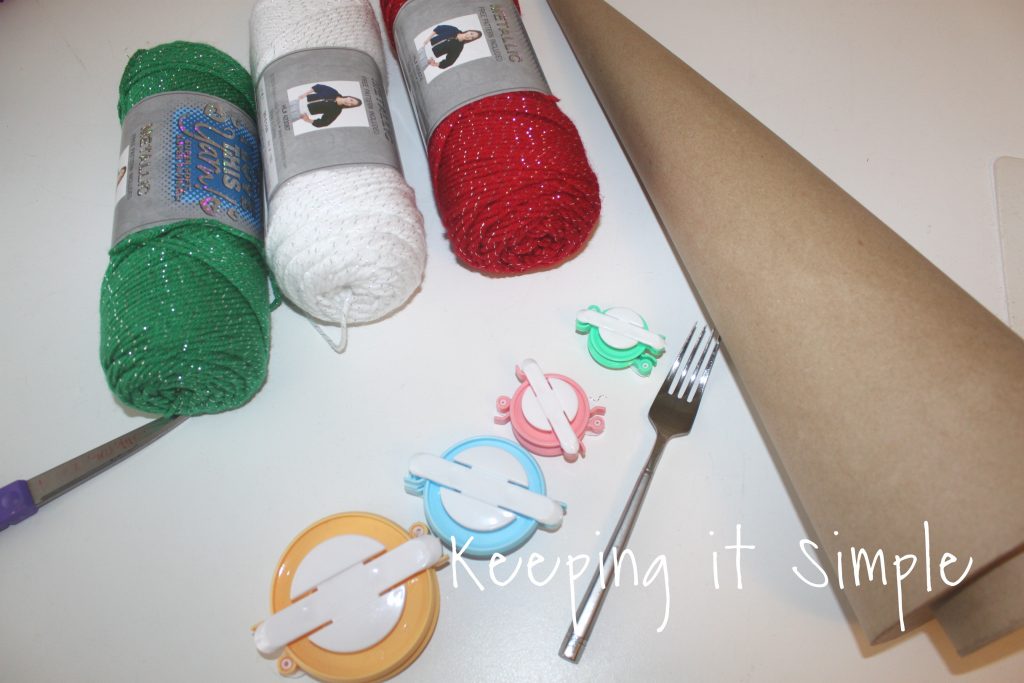
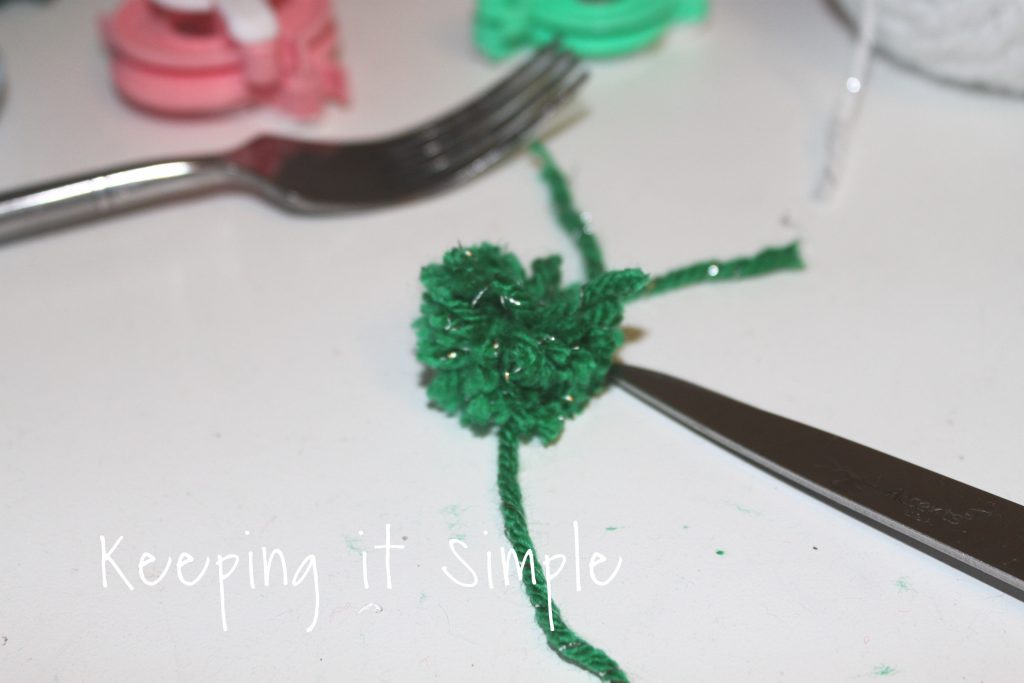
To make the pom poms with a fork, first you will wrap the yarn around the fork. Leave about two inches on the end when you wrap it around the fork. I wrapped it around 20-35 times. The more you go, the bigger the pom pom. When I was done wrapping, I cut the yarn and then tied the end with the beginning.
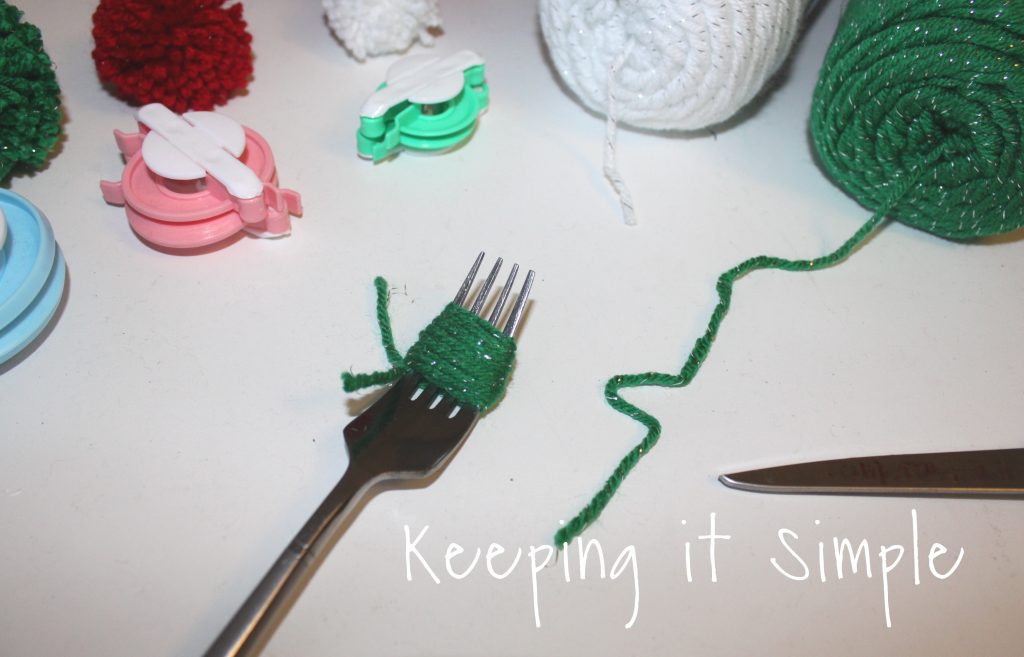
I then took another piece of yarn to tie off the pom pom. To do that I put the yarn through the middle prong under the yarn and the other side on the top of the yarn. I then tied it together. I then did the same thing to the other side of the fork, once again putting the yarn through the middle prong.
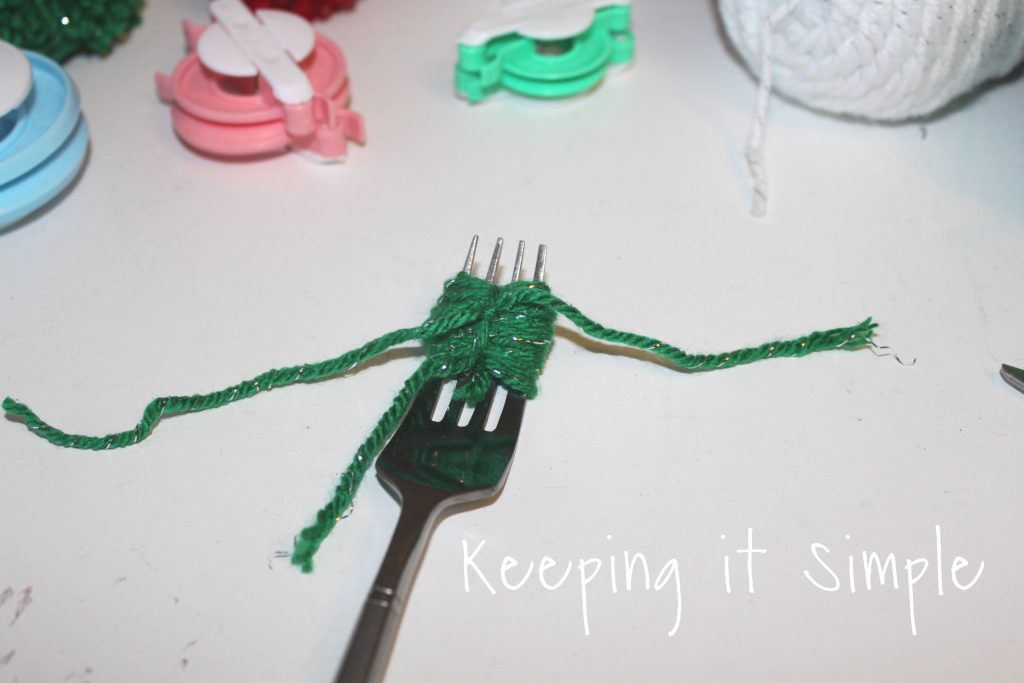
Once it was tied, I took the yarn off of the fork and then cut the loops of the yarn. I then cut off the loose and longer pieces.
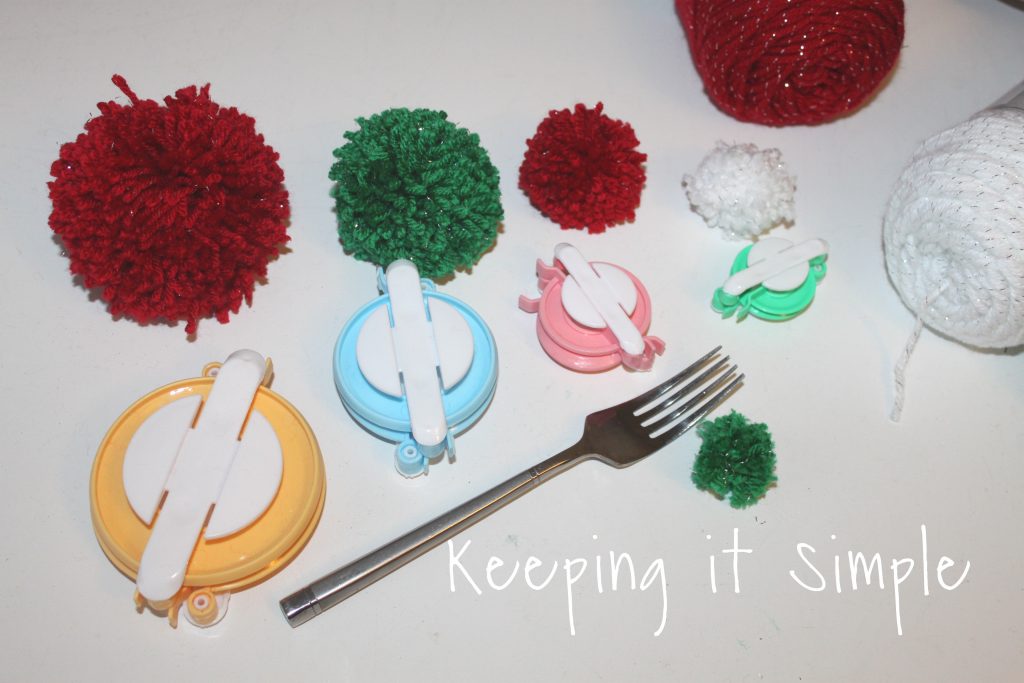
Here’s a picture to show you the different sizes of the pom poms compared to the different sized pom pom maker. The size also depends on how much yarn you use. The more you use the bigger the pom pom. And then there is the cute little mini pom pom that I made with the fork.
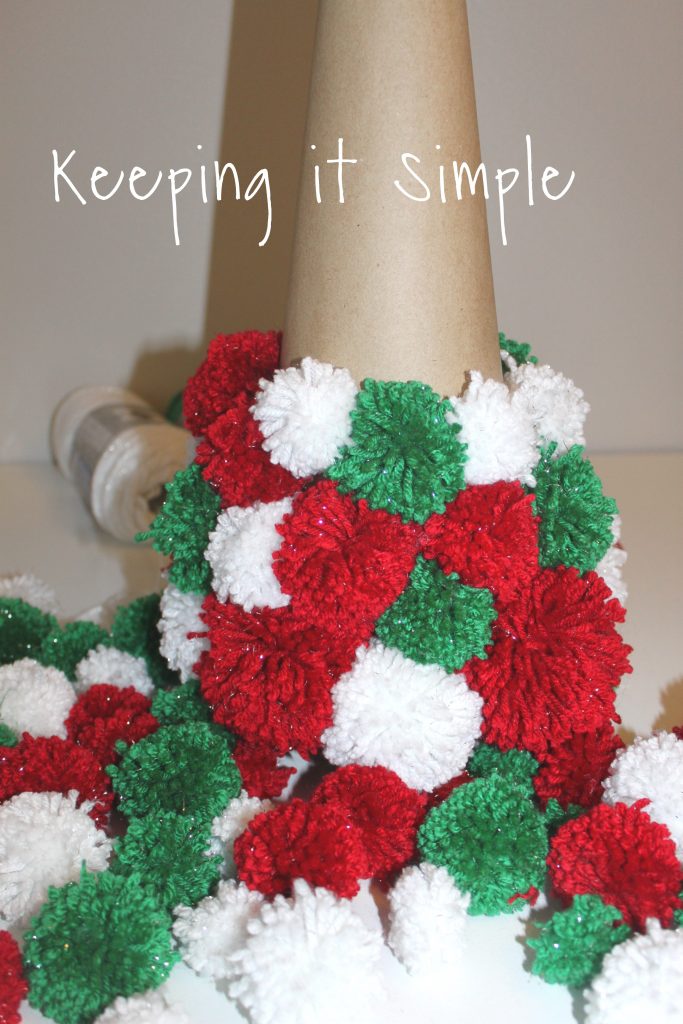
Now to get to the pom pom Christmas tree. Once I made lots of pom poms, I started to put them onto the tree form.
When I was working on the tree, I used the bigger pom poms on the bottom and then as I moved up I used smaller ones. I glued them onto the form with a glue gun.
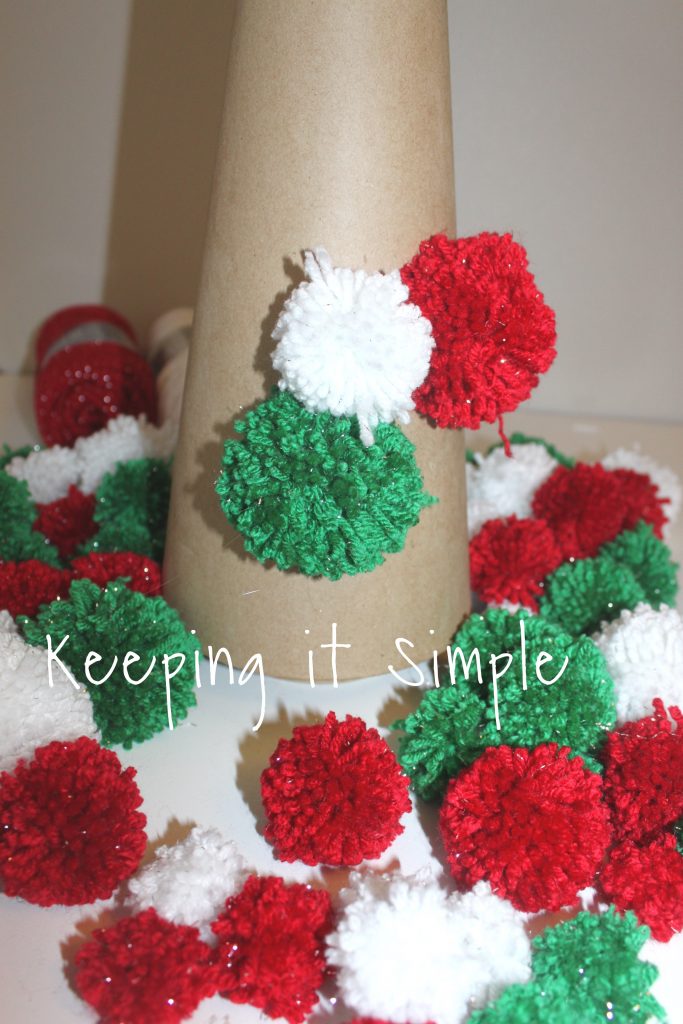
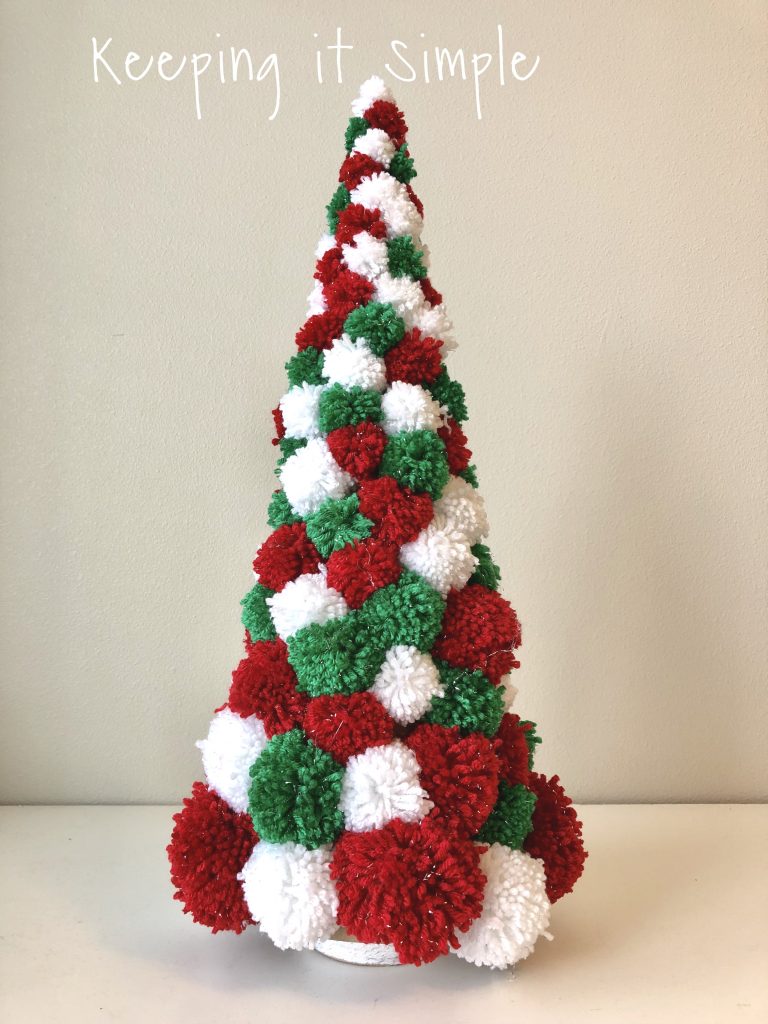
I continued to work on the tree and kept putting on the pom poms. Make sure you use enough glue to make sure that they stay still. When I got to the top, I was using the mini pom poms at the very top of the cone.
When I finished putting the pom poms onto the cone, I then wrapped the base with white yarn. And that’s it! You could put a fun gold or silver star at the top. I went with a white pom pom.
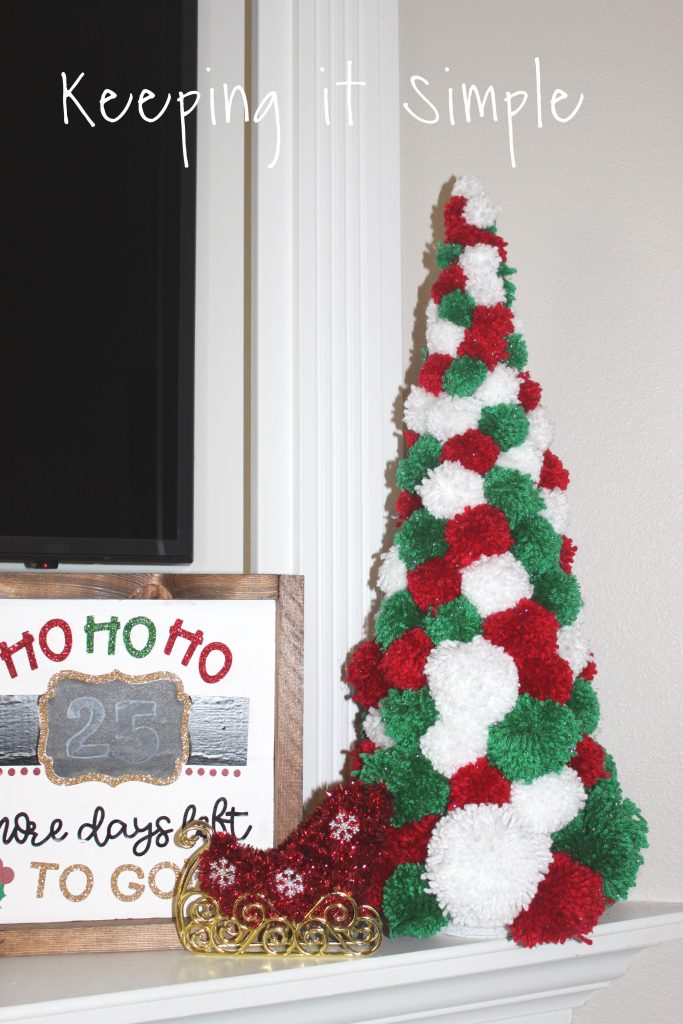
I have the perfect place for it too, right on my mantle. I love how tall it is because I have 9 foot ceilings, so I am always looking for taller decorations. It goes perfectly with my countdown sign too.
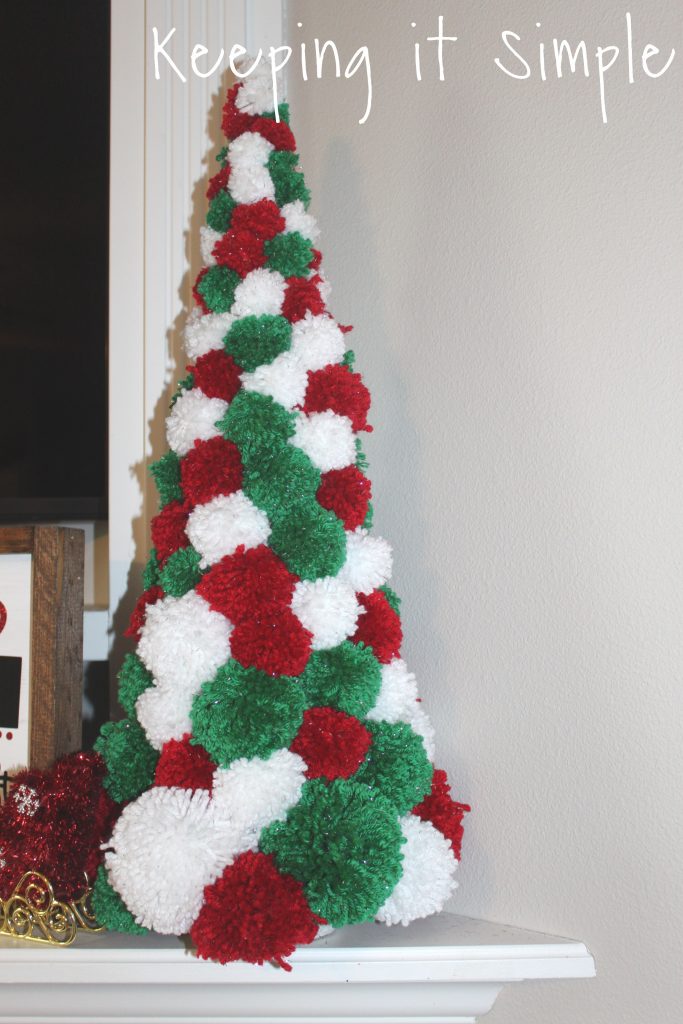
Here it is on the other side, still looks amazing! I love how it turned out!
Make sure to check out my other Christmas decoration ideas!

Leave a Reply
You must be logged in to post a comment.