Small Bathroom Remodel Ideas- Bathroom Shelves with Board and Batten
We have a 3/4 bathroom downstairs and it is a very small bathroom. When we first moved in, there was ZERO storage space and it drove me crazy. It was definitely built to be a guest bathroom and not be a bathroom that someone uses regularly. Well my oldest son has the downstairs bedroom, so he used it all the time. We needed to have some solutions for the small bathroom. We ended up building some awesome bathroom shelves, put in a larger vanity and then put board and batten on the walls. I love all the changes and how it turned out!

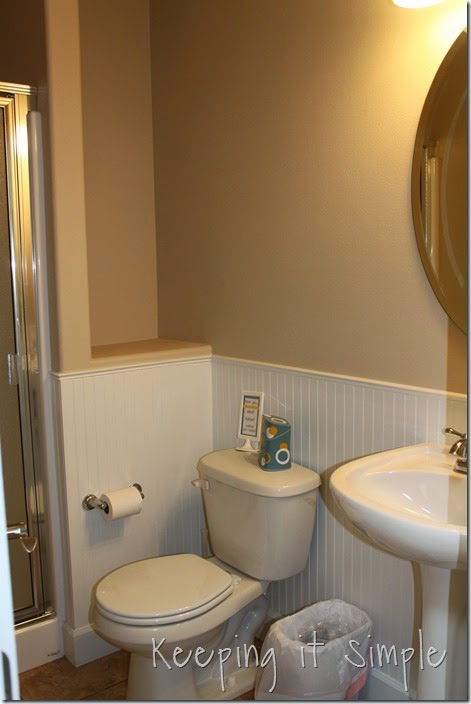
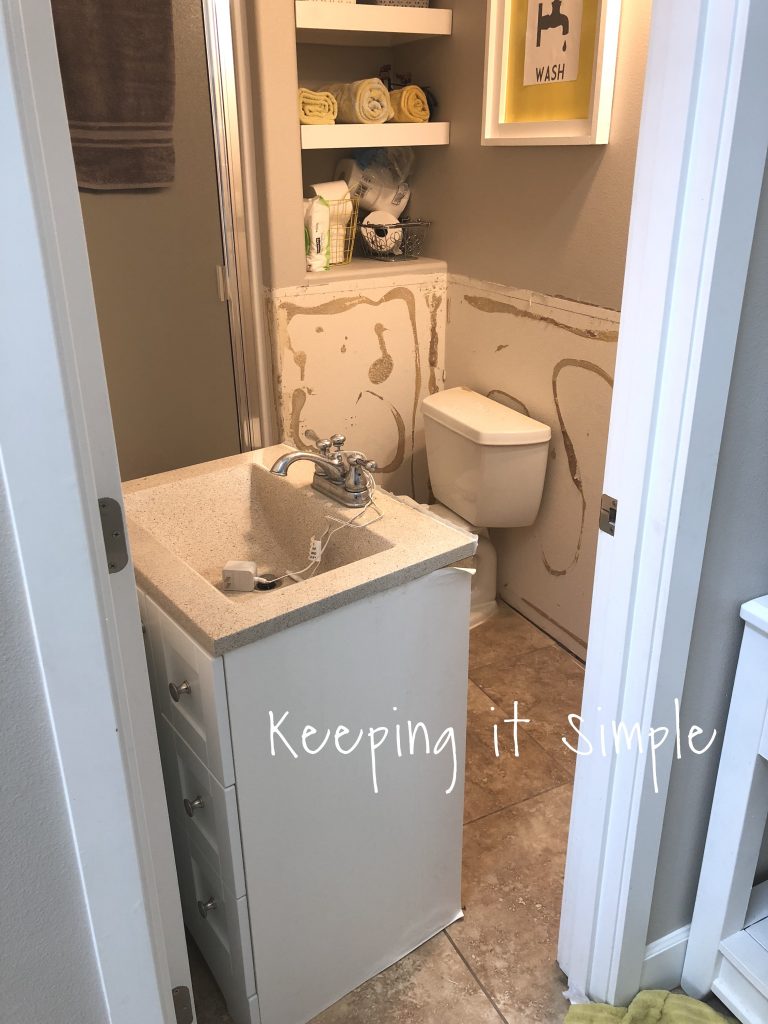
This is what the bathroom looked like when we moved in….. not very functional.
Within a year of living here, we added some shelves and took out the pedestal sink and put in a small 24″ vanity. Then I painted the walls a gray color called Worldly Gray and painted the ceilings white. We had it that way for about a year and I liked it but there were a couple issues still.
When we changed out the pedestal sink, it was caulked to the bead board on the wall. We had to rip it off and it left a pretty hole in the bead board. We tried to sand it down, put wood filler in it and then paint over it, but it just didn’t cover it up. If you look closely, you can see the hole (right behind the faucet).
Another issue we were having is that bead board is a pain to clean, all of those lines and grooves. Plus we have 4 boys…. so the bead board right by the toilet was especially gross and hard to clean. So since the bead board was damaged, we decided to replace it. And since it we were doing that, we figured that we would get a new, bigger vanity that was gray and white so it would match the color scheme of the house better.
This is what we did in our small bathroom remodel:
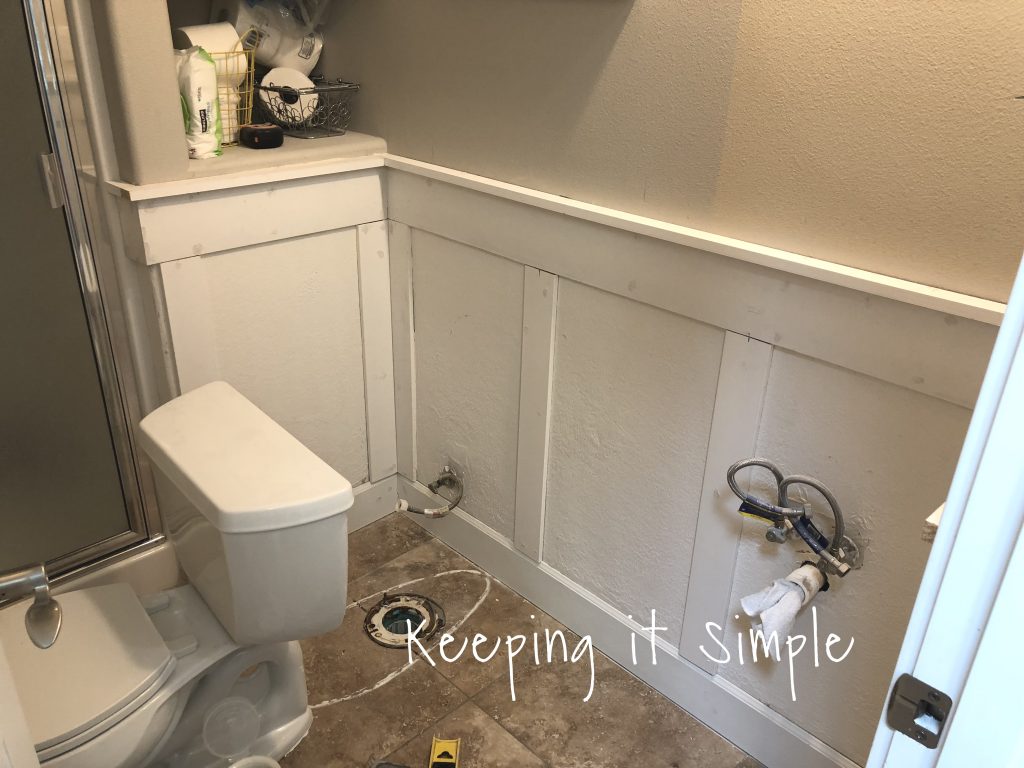
The first thing we did was took off the bead board. We used a trim remover and a rubber mallet to take it off. Since the bead board was put on when the house was built, it was put in really well, there was a lot of glue and the board was even behind the plumbing for the toilet and the sink. We had to cut the wood around it to get it off. Let’s just say that we weren’t really prepared for it to take that long and be that hard, but that’s one thing that I have learned about home improvement, it’s always takes more time and cost more money than you expect :).
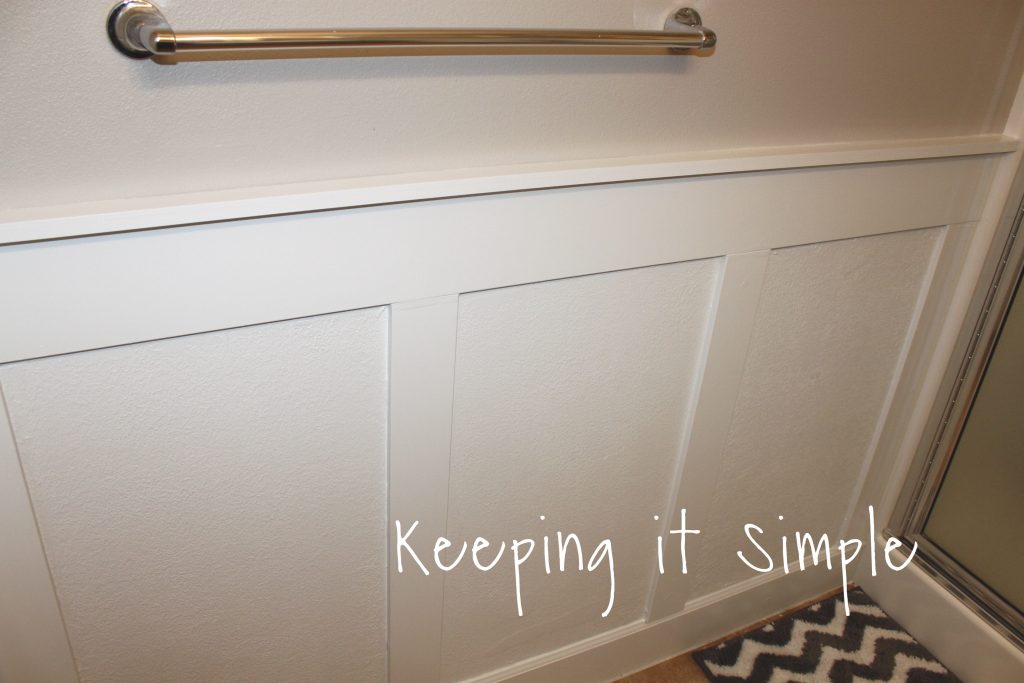
Once the bead board was off, it was time to work on the board and batten. We used 1/2″ thick MDF boards for the board and batten, with a 1×2 board (that was 3/4″ thick) for the top. The top of the board and batten is a 1×6 board. Before putting it onto the wall, we nailed the 1×2 board into the top of it.
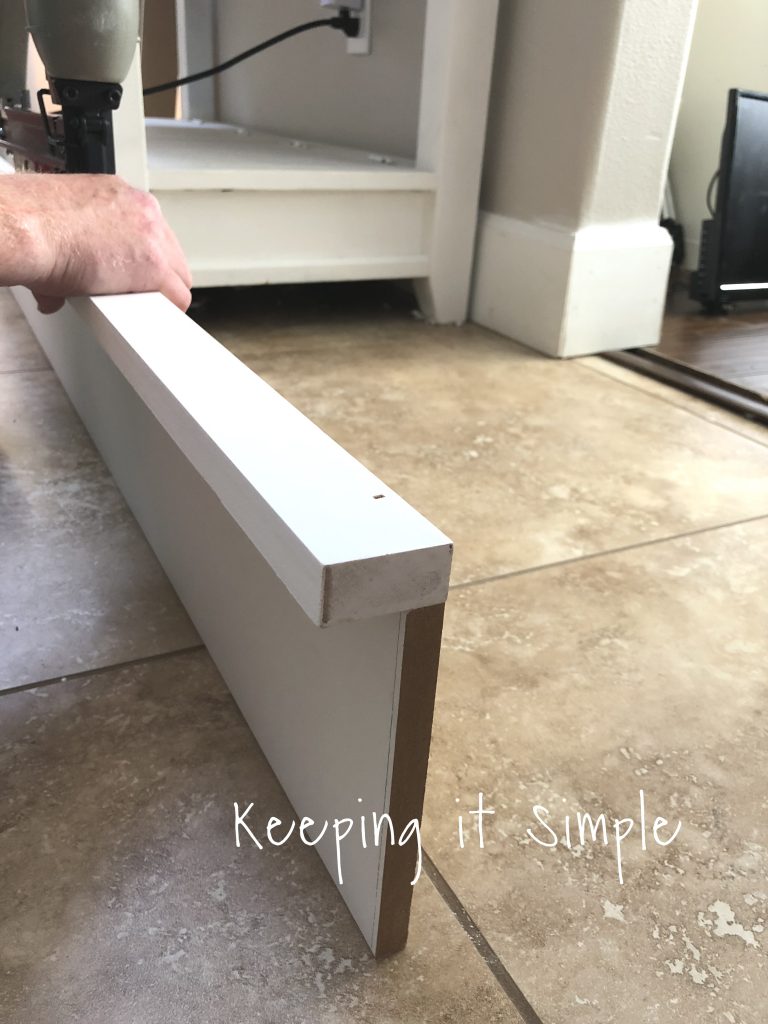
First we put on the 1×6 board with the 1×2 board on it and then put on the sides board of the vertical pieces. The vertical pieces are 1×4 of the 1/2″ thick MDF board.

Once the side boards were on, we measured the distance between the two sides and then divided it by 3, that’s how we got the space in between the boards. For this wall, I measured from the middle of the board on the left to the middle of the board on the right, then divided by 3. The distance was about 62″, making the space in between about 20 2/3″. That is the distance between the middle of one board, to the middle of the next board.
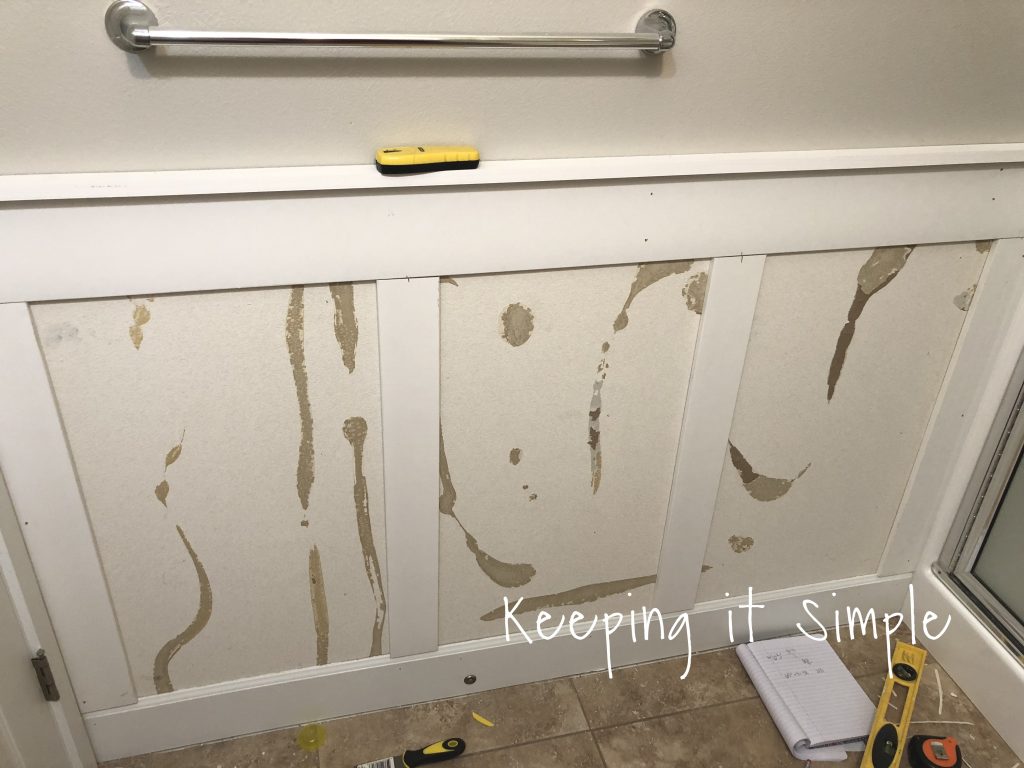
One problem that we ran into was all the glue that they used to put on the bead board. What happened was they sprayed the wall texture onto the whole wall and then put the bead board on, before painting the texture and sealing, so when we took off the bead board and tried to take off the glue, the texture came with it. So long story short, we had to retexture the wall. We got a roll texture that we put onto the wall (this something that we should have done before putting on the board and batten…). I didn’t take any pictures of the process, but basically all we did was use a texturing compound, put it on the wall with a putty knife and then textured it with a paint roller. Then after 24 hours, I sanded it down to be smooth.
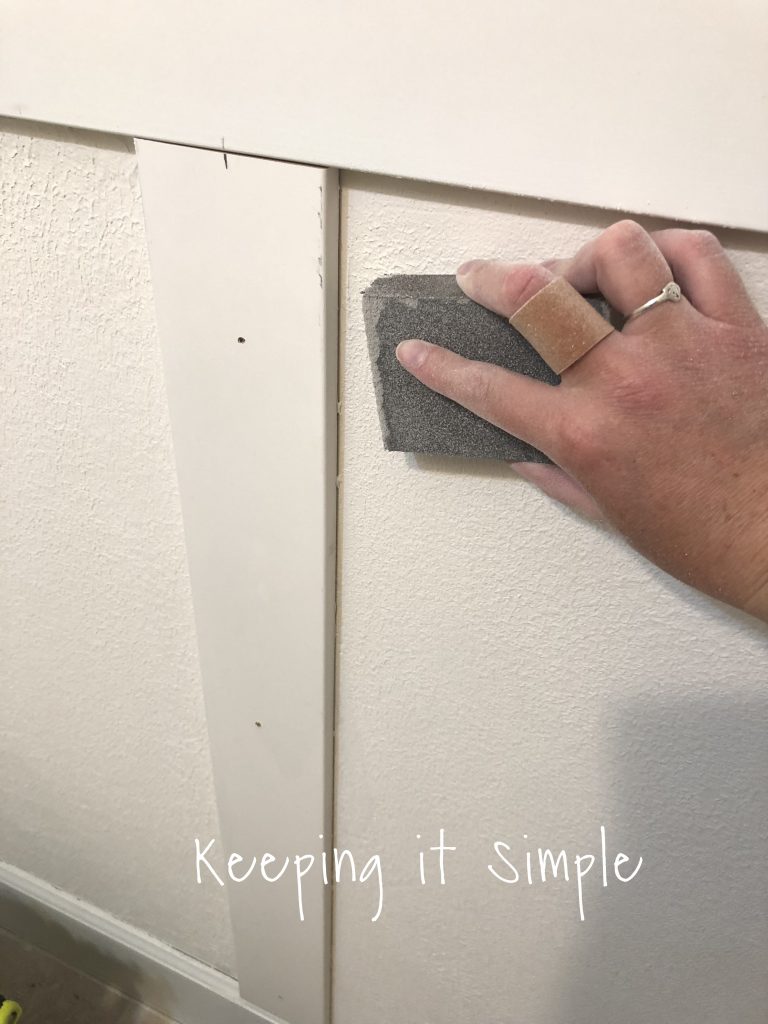
Here is the other side with the board and batten on the wall and the new texture. Using a wood filler, I filled up the nail gun holes. When the vertical board wasn’t on a stud, we used liquid nails to glue it onto the wall and then put a couple nails into it so it could keep it still until it was dry.
I sanded down the wood filler and then used a primer on everything (you have to use a primer with the texture). Then I used a semi gloss white paint and painted the wall and board and batten. The semi gloss is so it will be easier to clean.
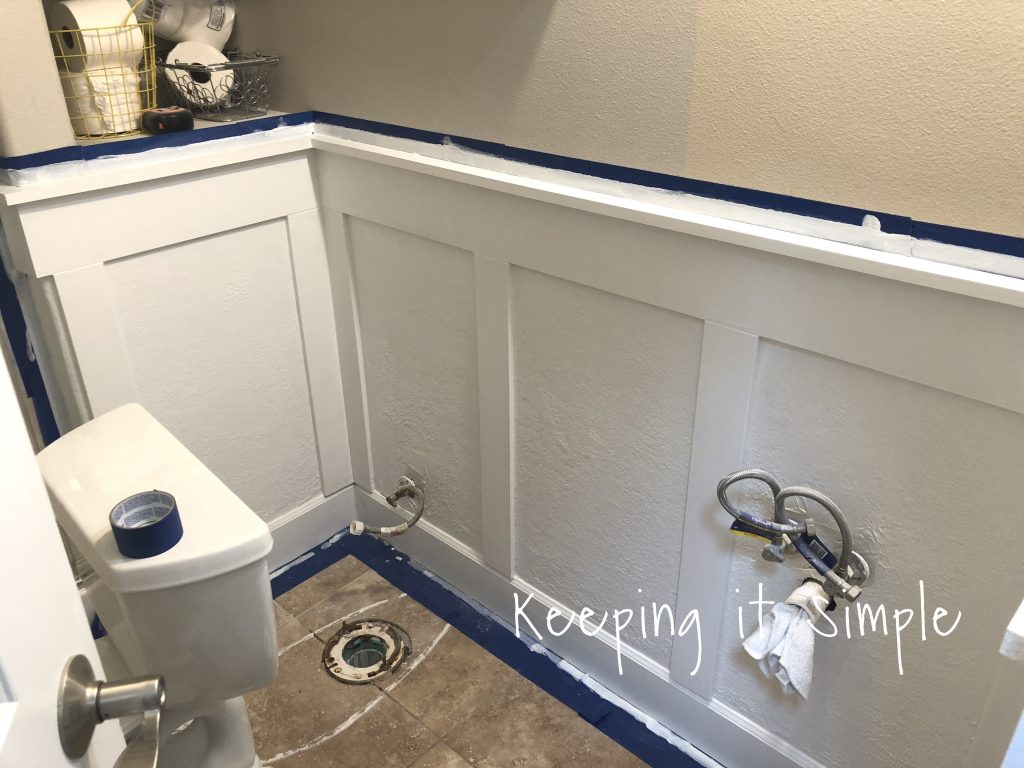
After the first coat of paint, I used a paintable caulk and filled in all of the holes and cracks. Then after it dried, I did a second coat of paint over everything, including the caulk. For the baseboards and floor, I used a waterproof caulk.
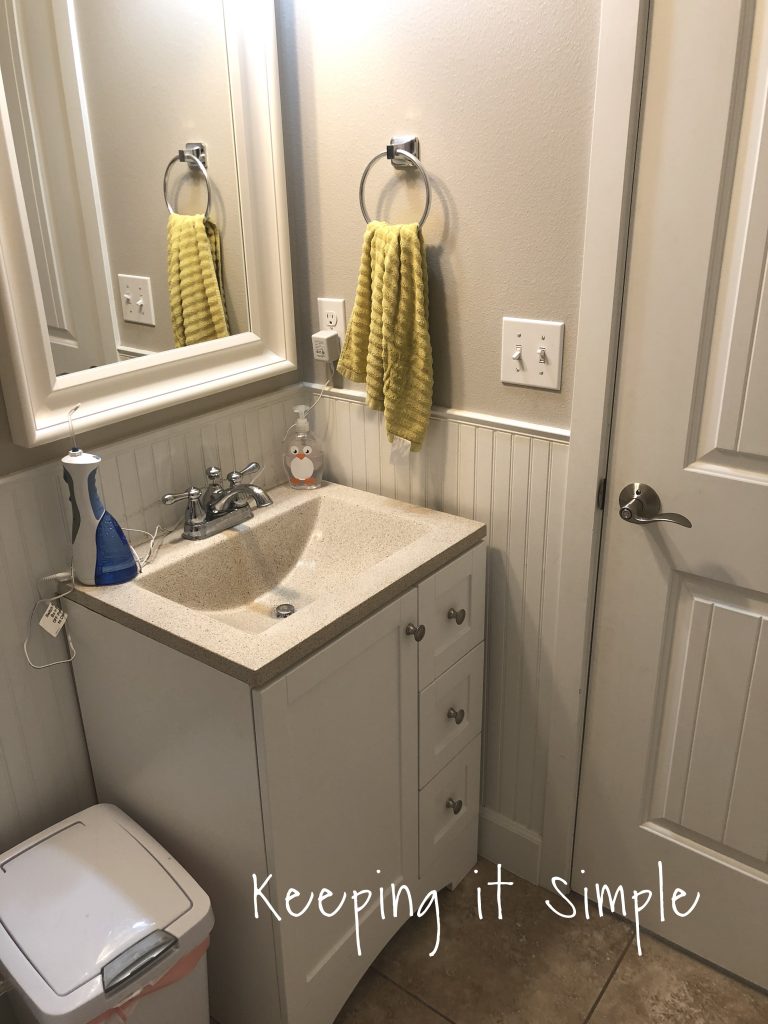
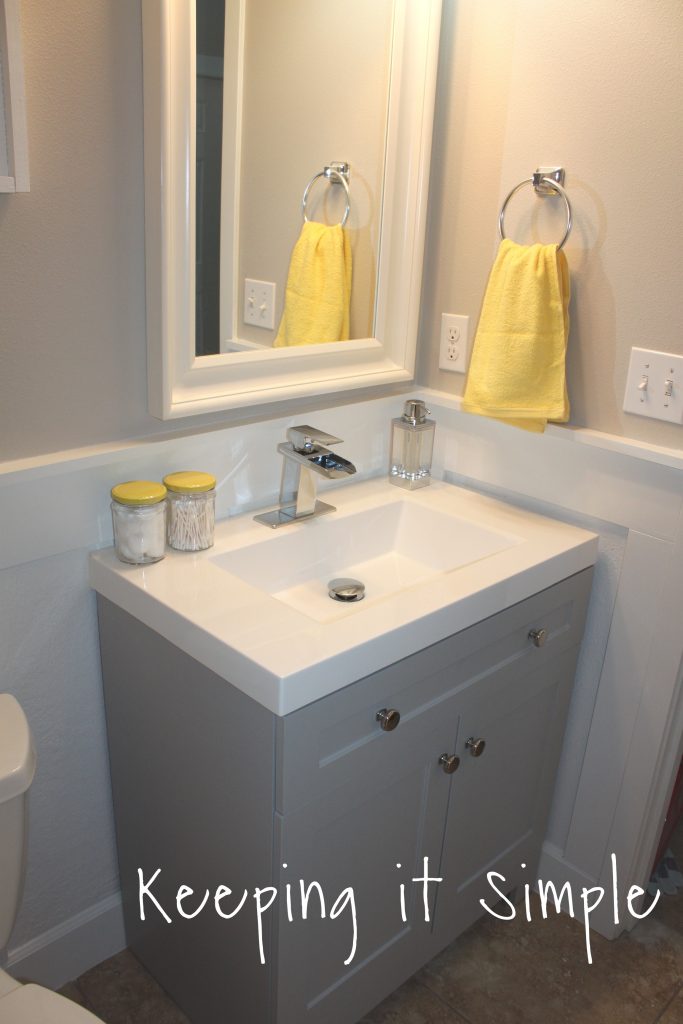
Now time for the vanity. We found a 30″ vanity that was perfect, I loved the light gray color, the shaker style cabinets and the white counter top. Since the board and batten isn’t even, we had to put a couple horizontal boards in between the vertical boards, so that we could caulk the counter top to the wall (so there isn’t any water leak behind the vanity). So we put a couple boards right at the same level of the top of the vanity.
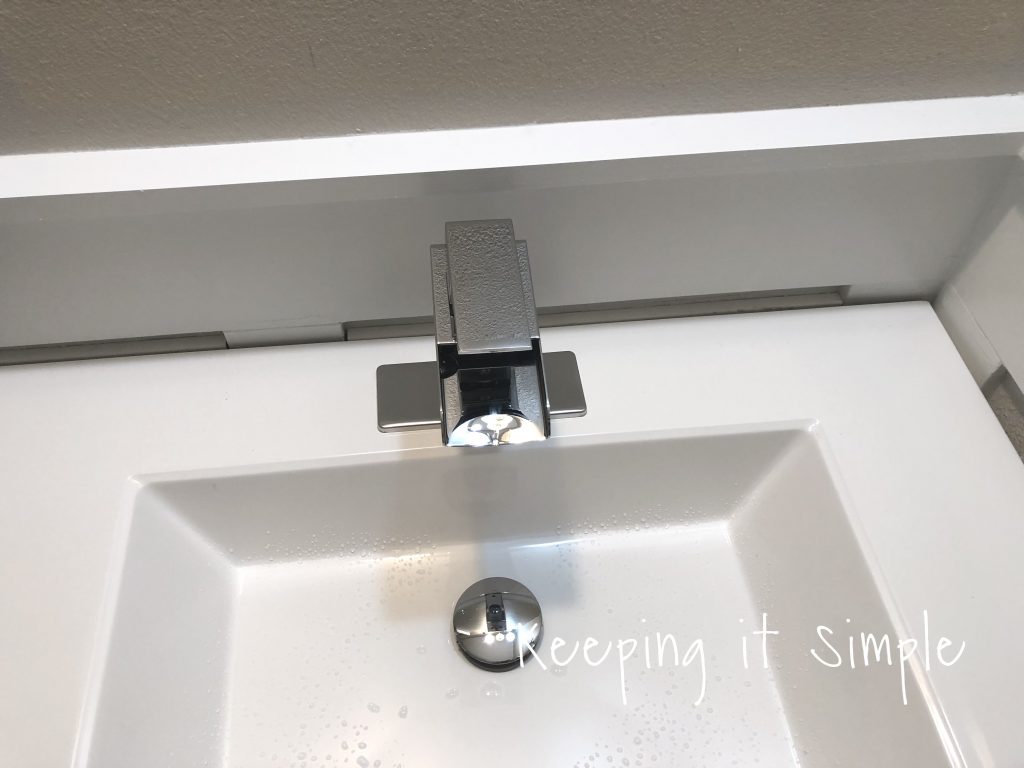
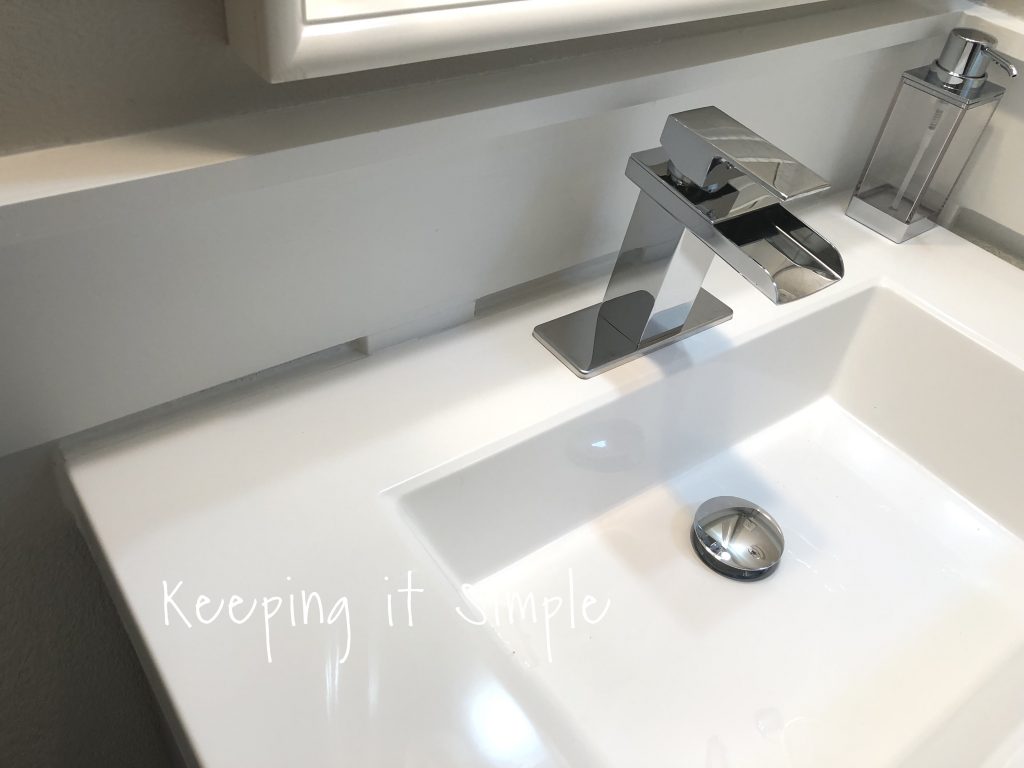
Then using the waterproof caulk, I caulked the vanity to the wall. Then we added a gorgeous modern waterfall faucet and pop up drain to the vanity, I love it!
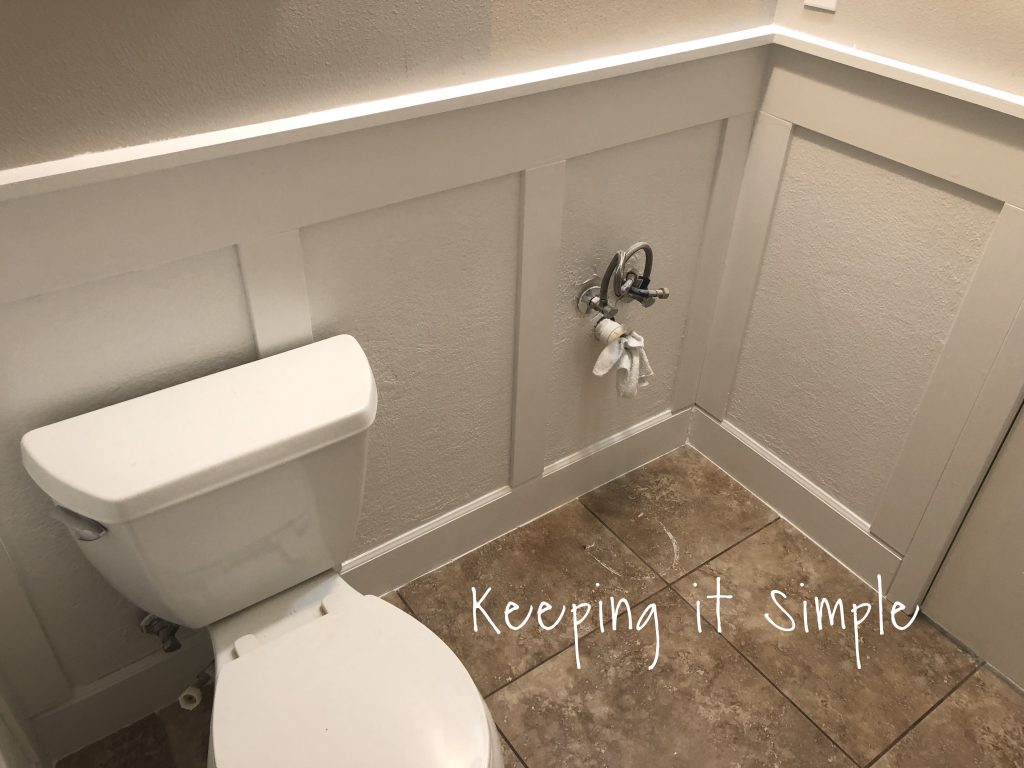
And that’s it!! I love how the bathroom turned out!
There is so much more storage now, and I love how much hidden storage in the vanity.
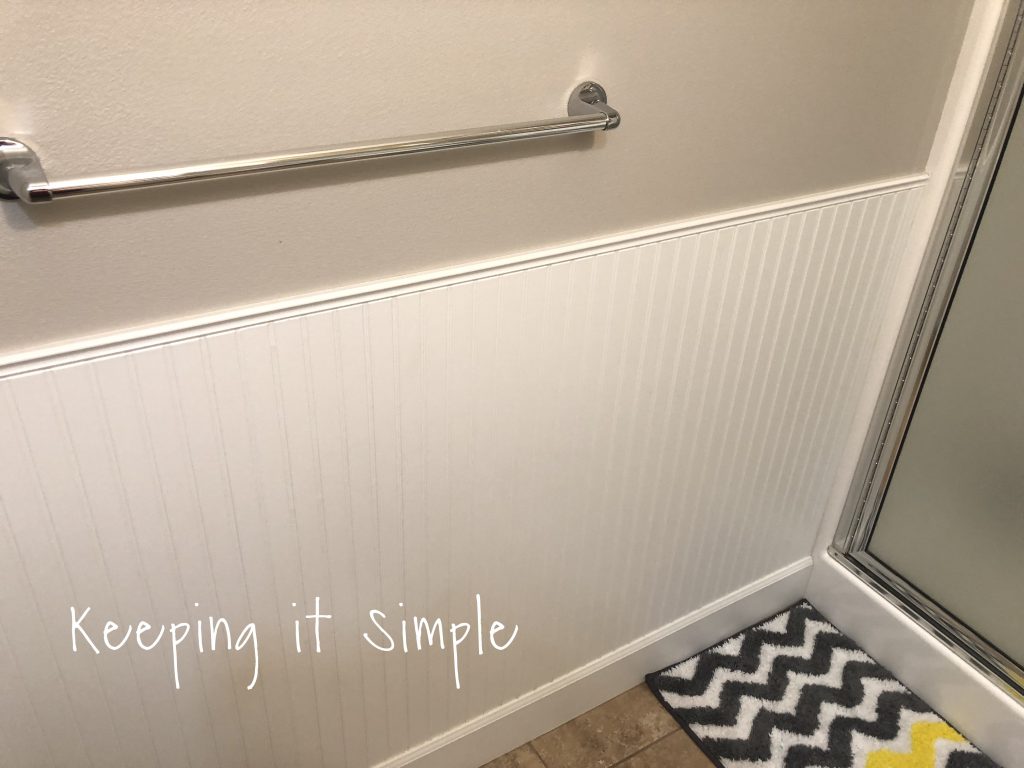
Here is the board and batten on the other side, I love it!
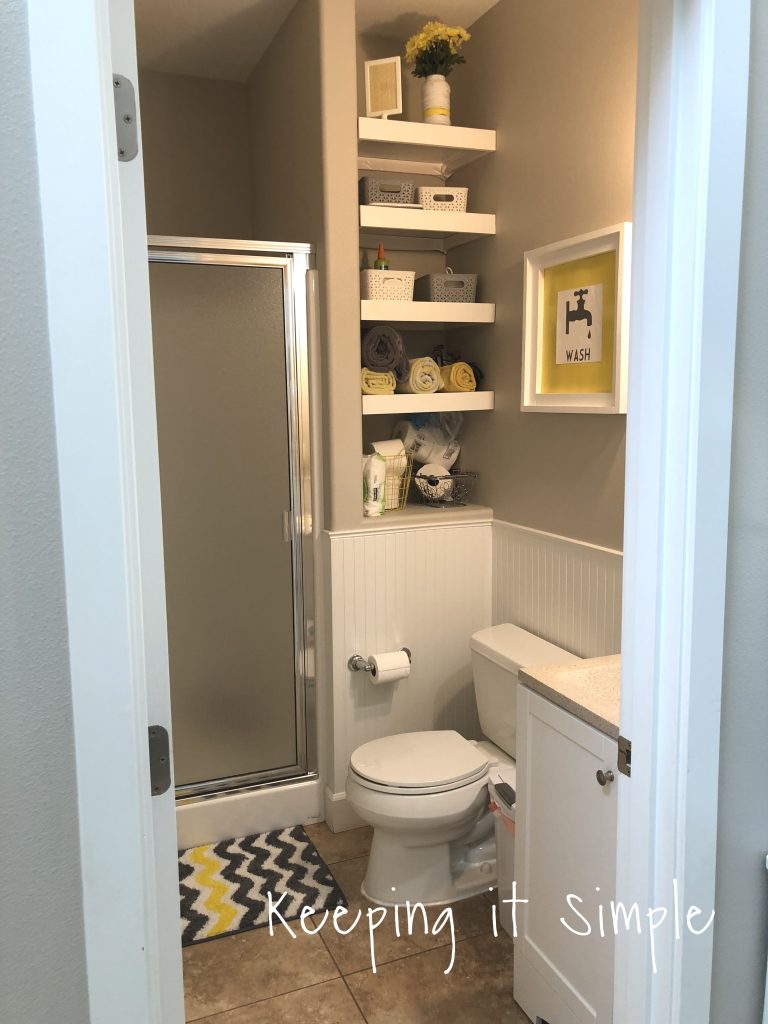
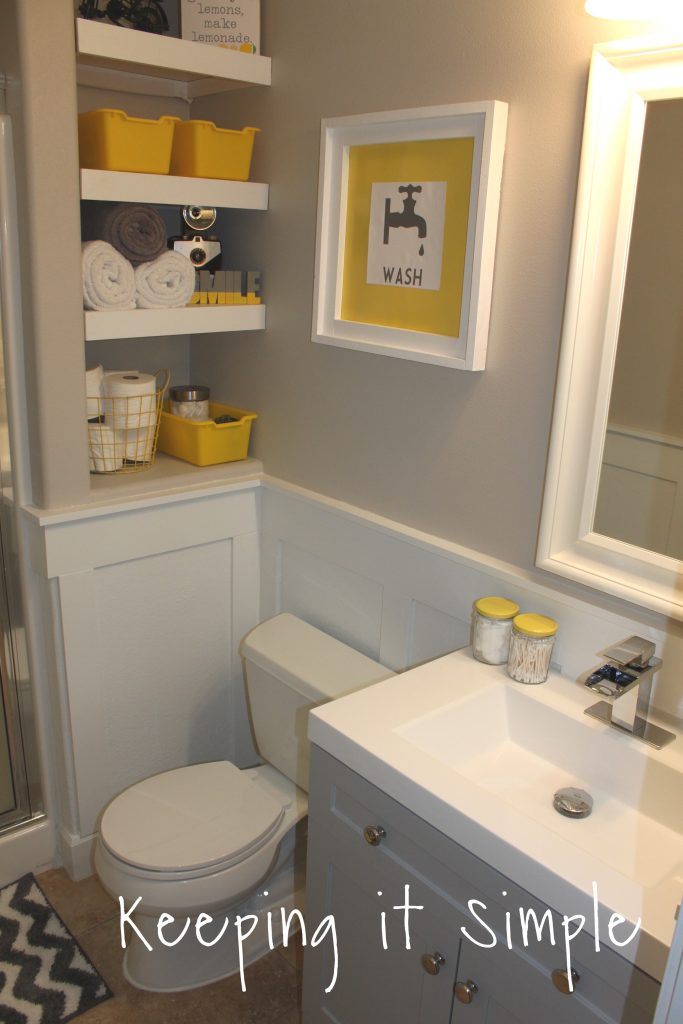
These shelves have been so great for this bathroom. It was wasted space before and now it’s functional and fun! I love the pop of yellow that I have in there!
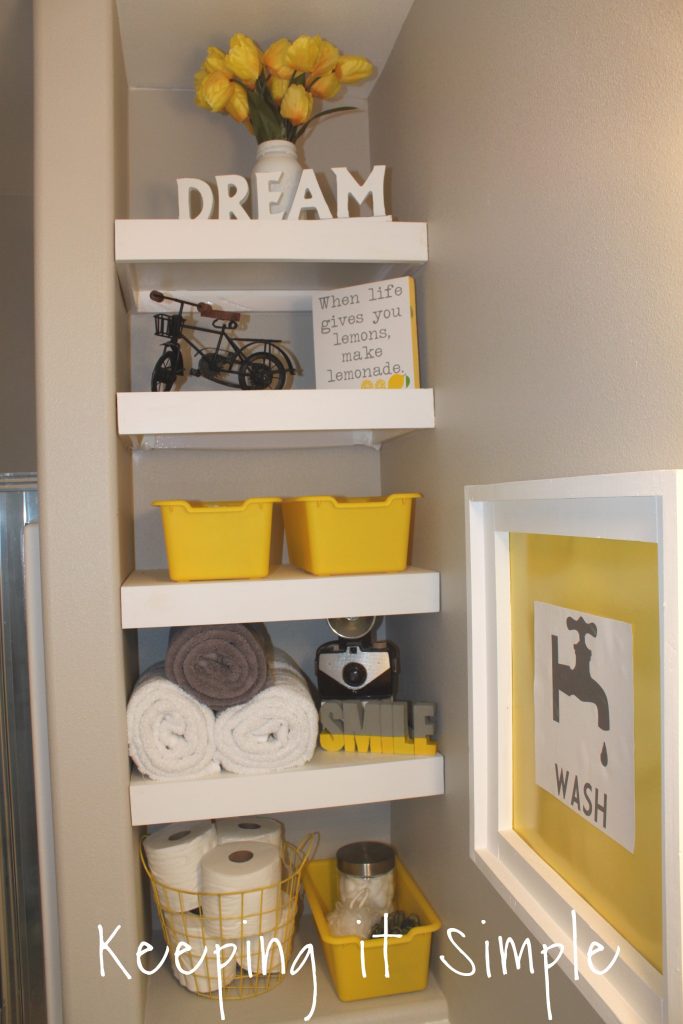
What’s nice about the shelves is how much I can put on them now. I can store towels on them, toilet paper and even some cute decor like this antique camera and SMILE sign.

The board and batten will be so much easier to clean than the bead board was.

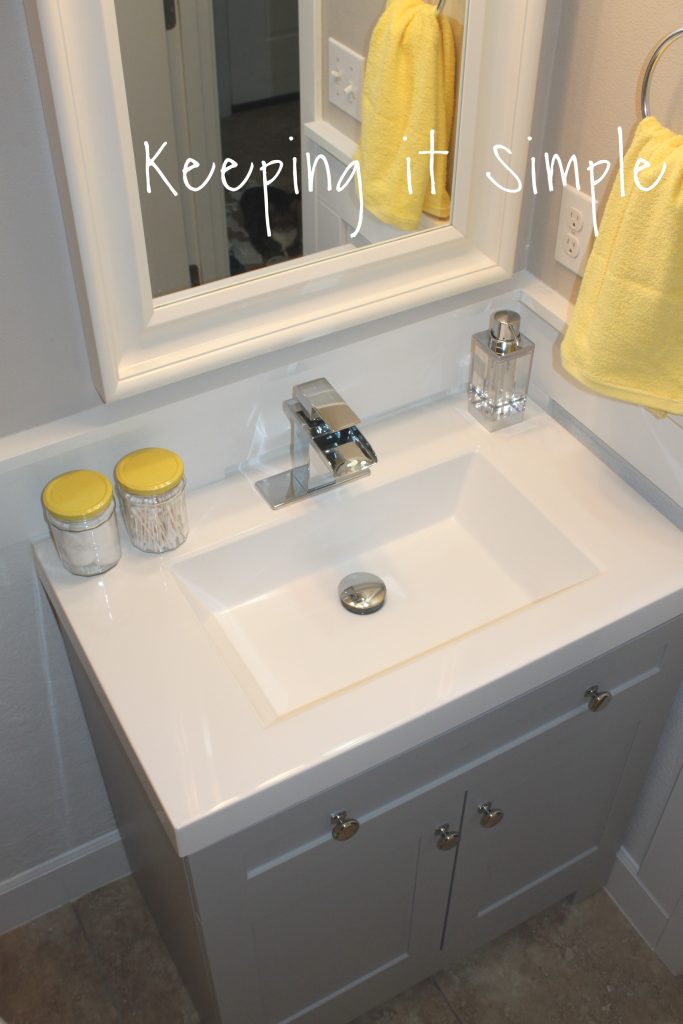
This waterfall faucet is so much fun, I love how it looks and water coming out is so cool. My kids love it!

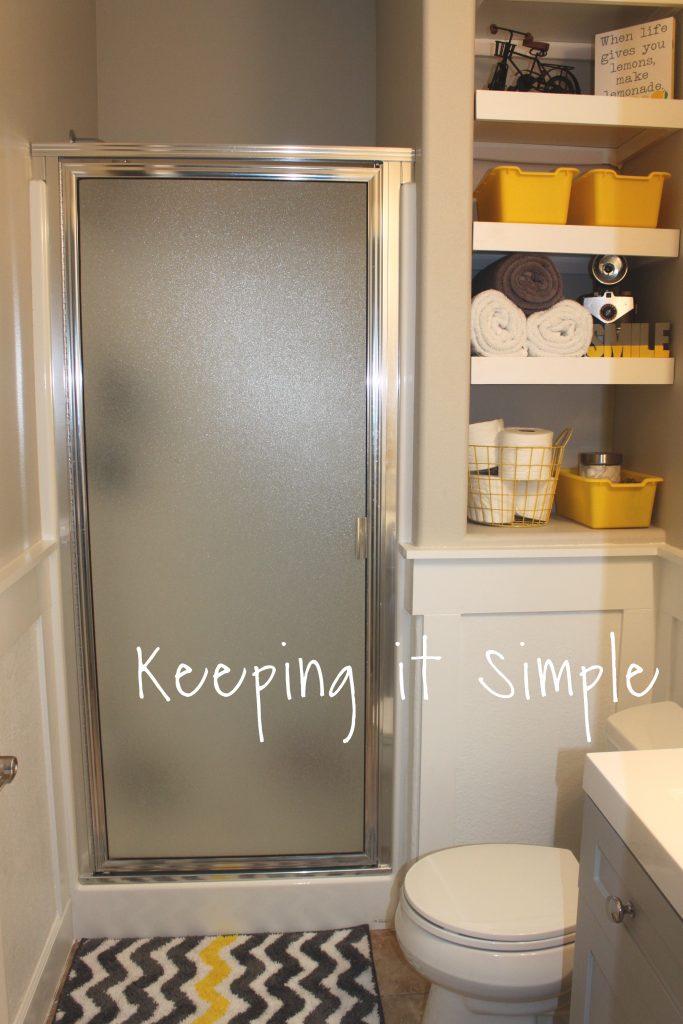
Here is another view of the bathroom with the shower. Even though it’s a small bathroom, it’s functioning!
Like this post, then check out my other home improvement posts.
This post contains affiliate links.
Leave a Reply
You must be logged in to post a comment.