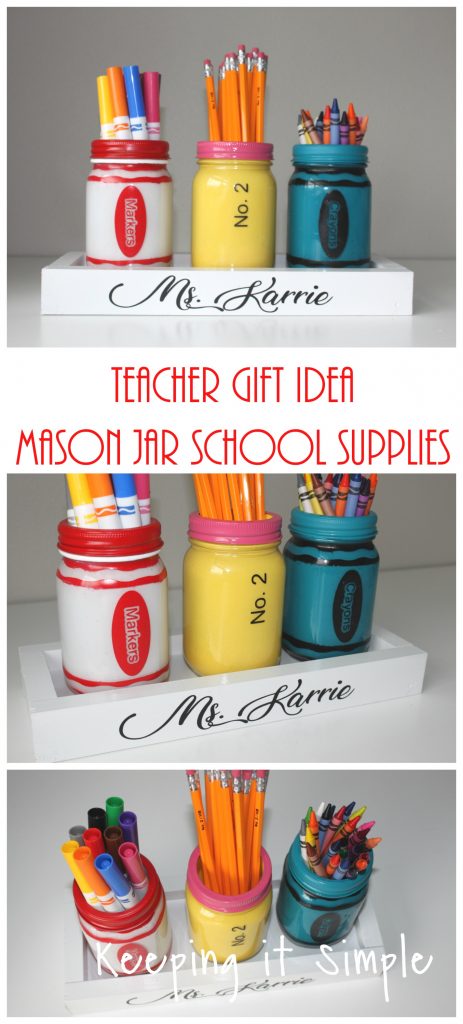
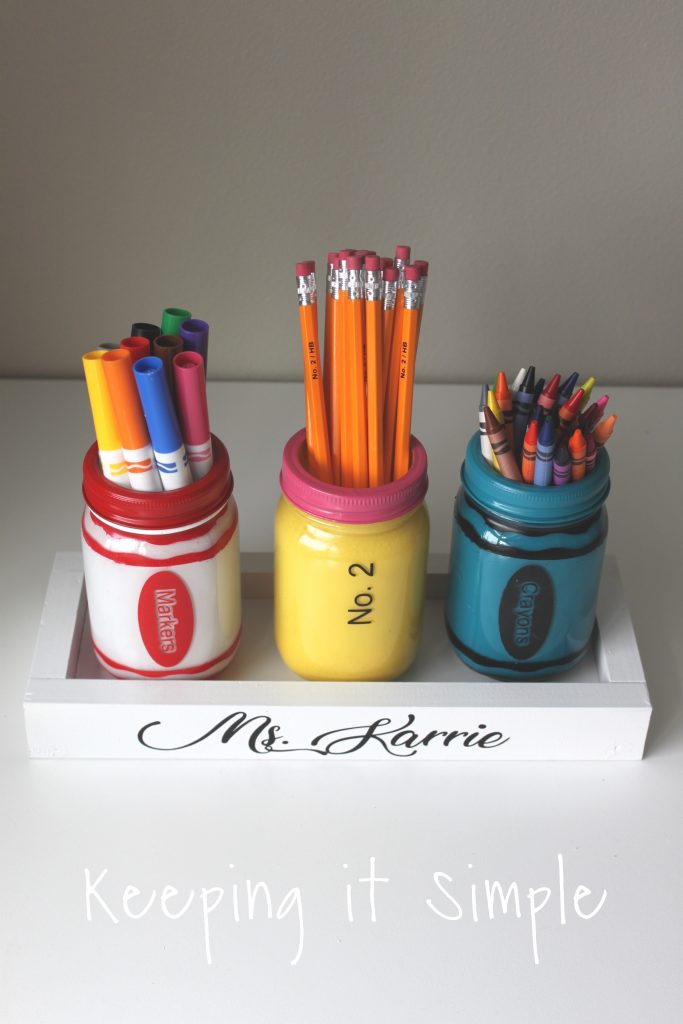
Teacher Gift Ideas- Painted Mason Jar School Supplies Holder
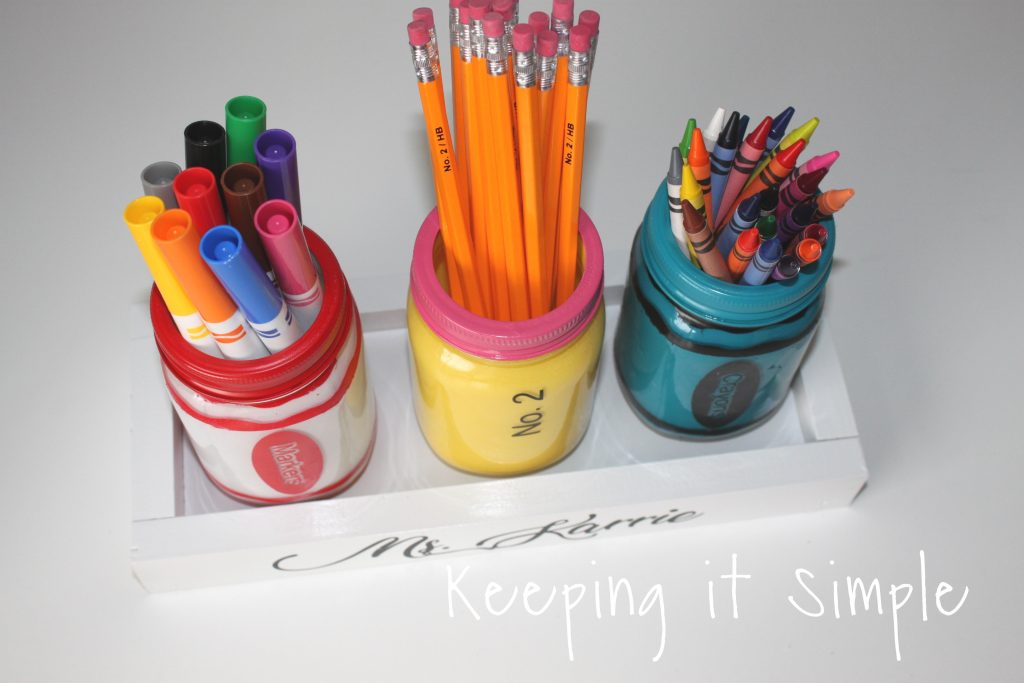
For a lot of people school is out, but we still have two weeks so I am now getting to the end of the school year gifts, but this teacher gift idea is perfect for teacher appreciation or for back to school teacher gifts. My youngest son had his last year of preschool this year and he had an amazing teacher so I wanted to do something really special for her. Since she is a preschool teacher I know that she can always use more school supplies. I wanted to give her something cute and functional, so I made up these adorable mason jar school supplies. These painted mason jars are so much fun, cute and are perfect for keeping her supplies in. I made up a marker mason jar, pencil mason jar and a crayon mason jar and I love how they all turned out!
This is how I made them.
I got the smooth mason jars, the ones that have a logo on them won’t work because you can’t get a good smooth surface to work with when you are using the vinyl and tape. I then cut out the designs out of stencil vinyl with my Silhouette CAMEO. For the words I took out the actually image so I could use it as a stencil but for the waves, I took off the excess vinyl and used it as a reverse stencil.
Here are the cut files for the design, I have a Silhouette file and one that is SVG.
Mason jar school supplies file • SVG
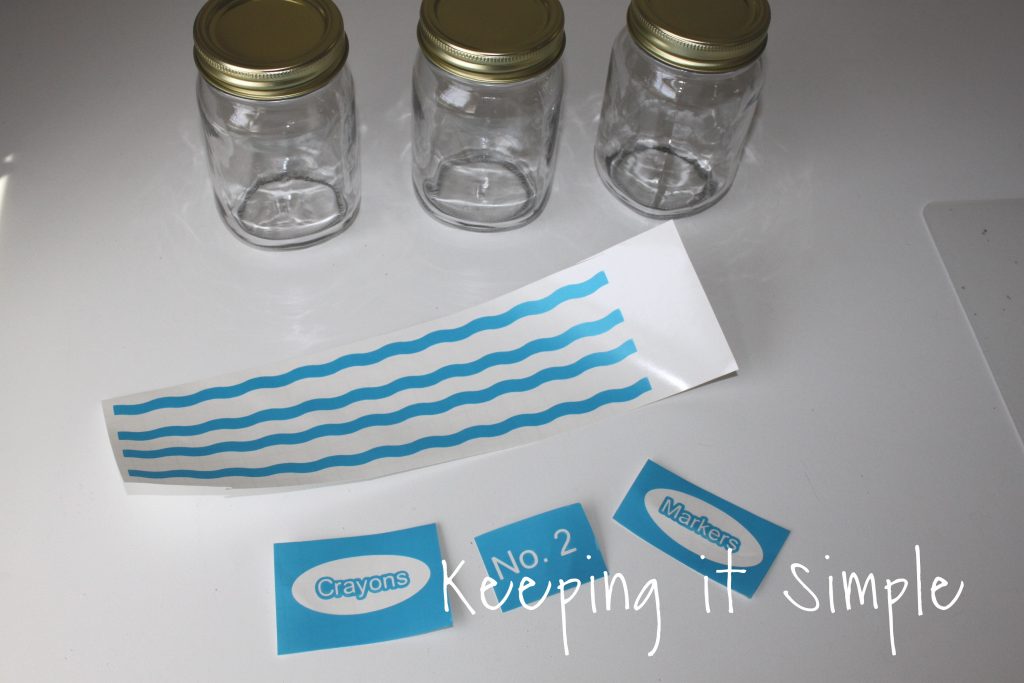
The first thing that I did was put on the words, I found the center of the jar and placed the vinyl onto the jar using transfer tape.
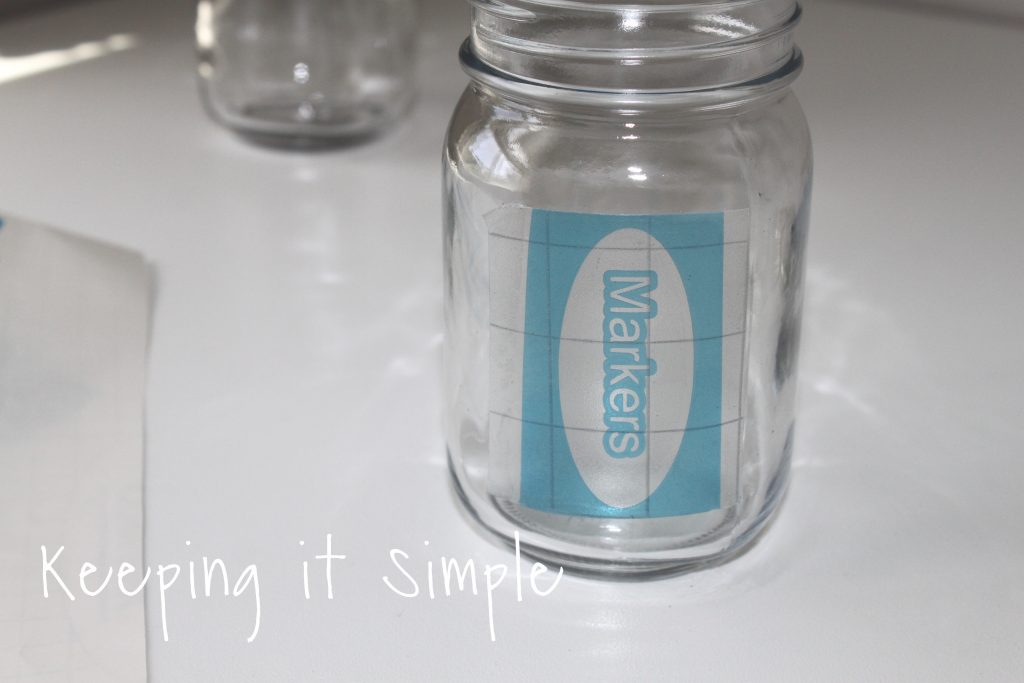
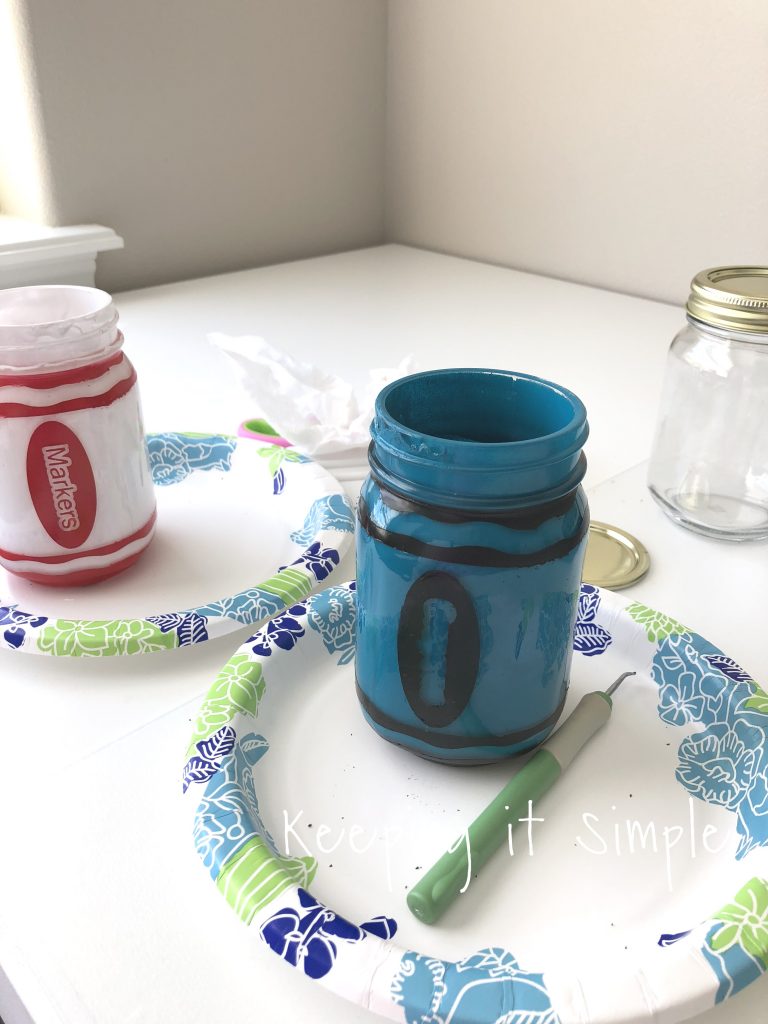
Then using painters tape, I taped off the rest of the design making sure that only the area I wanted painted was visible. The stripes at the top and bottom of the crayon mason jar and the marker mason jar are about 3/4″, just to give you an idea of where to place everything. When putting on the wave vinyl, try to have as little bubbles as possibly. Since it’s a curved surface, it’s harder to put on. Also just a quick note about the pencil mason jar, I didn’t end up using the vinyl as a stencil, I ended up just making the No. 2 out of black vinyl and putting it onto the jar.
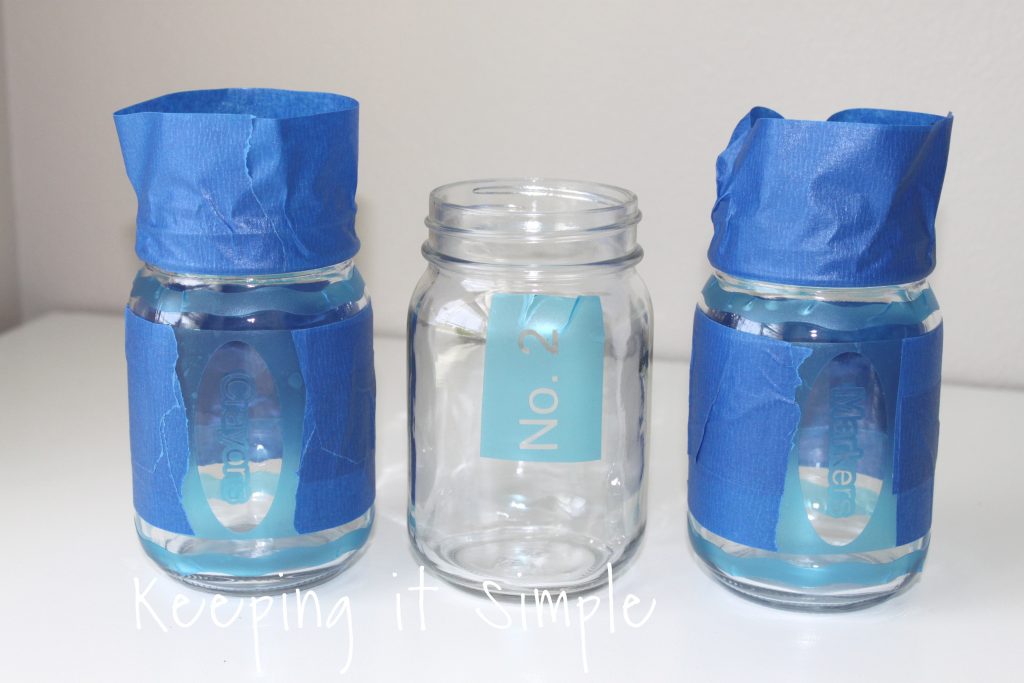
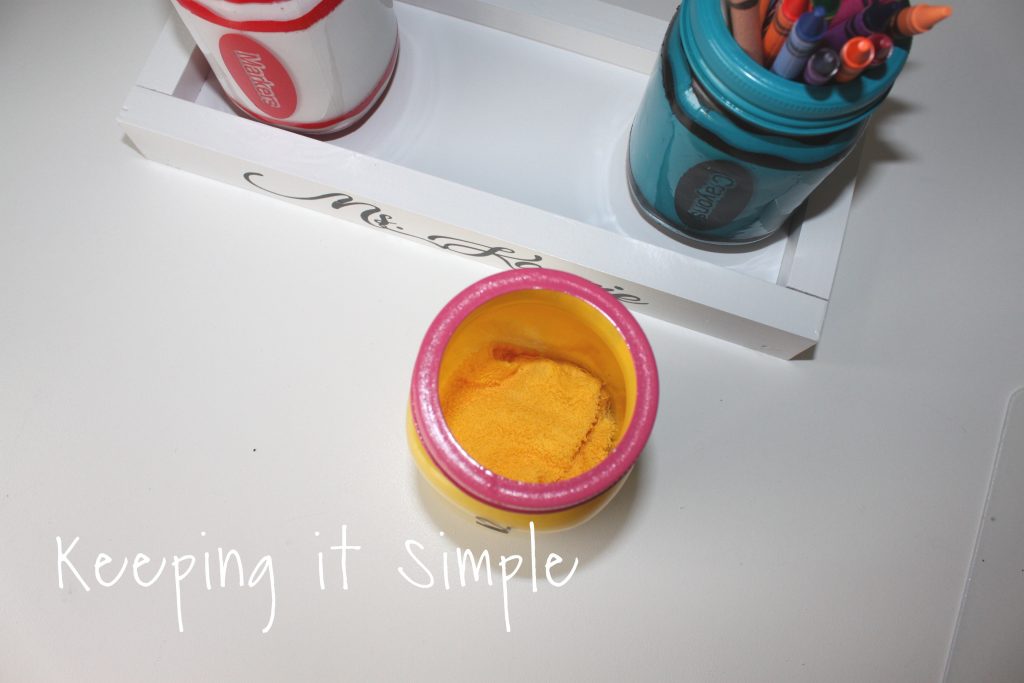
Using spray paint, I painted the inside of the jars. For the pencil mason jar I used a sun yellow paint, for the marker mason jar I used a white paint and for the crayon mason jar I used a teal paint. I used spray paint because I didn’t want the brush stokes and I painted in the inside of it so the glass was shiny on the outside.
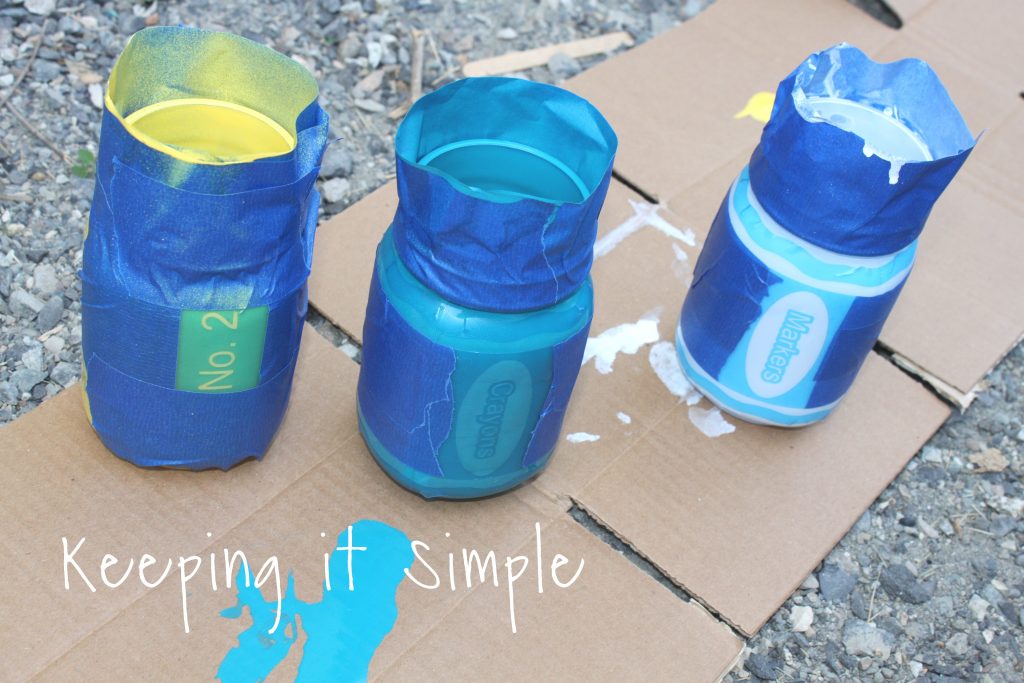
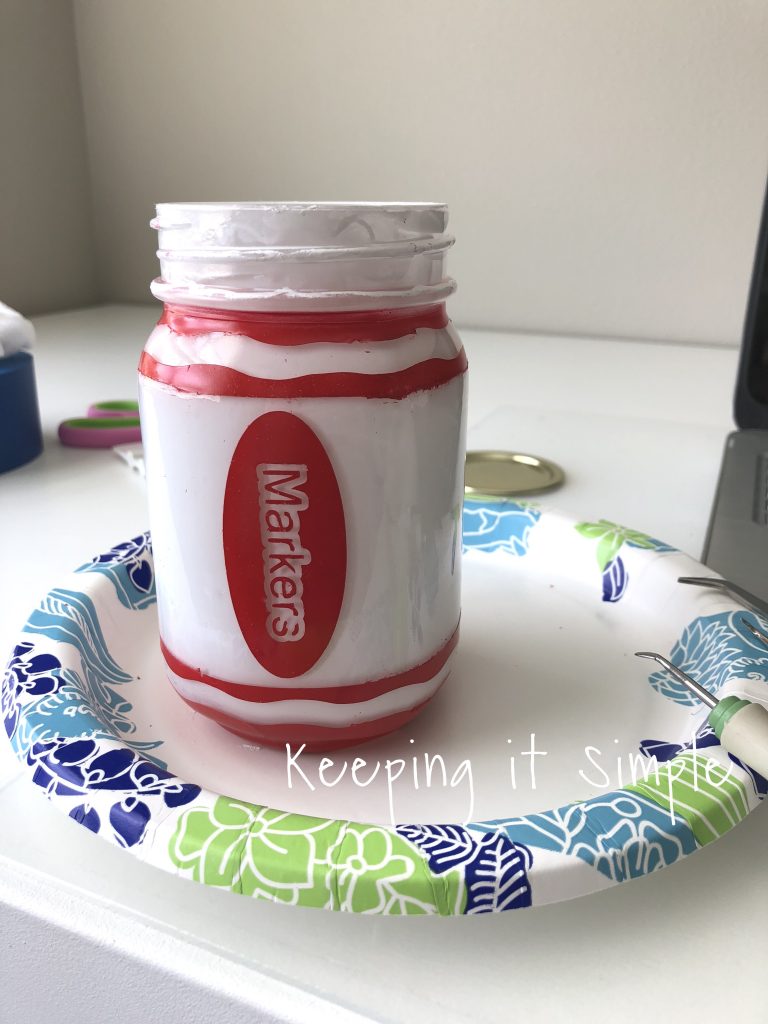
Now for the outside design. I used the lid of the mason jar and put it into the tape so I didn’t get any paint in the inside of the mason jar. I then painted the outside. You have to be careful not to do too thick of a coat so it doesn’t drip too much. For the marker mason jar I painted the outside an apple red spray paint. For the crayon mason jar I used a black spray paint and like I said before, I just used black vinyl for the pencil mason jar (I attempted to do the paint but it didn’t work out).
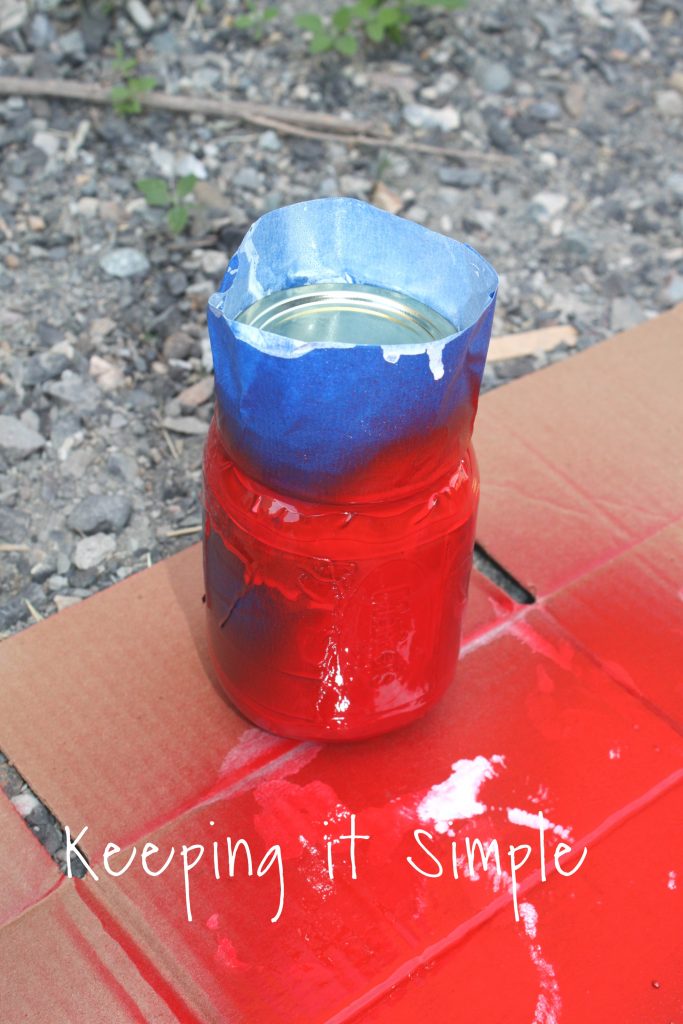
Once the paint was completely dry I took off the tape and vinyl. Because it is a curved surface there was some drips but I was able to fix them pretty easily. I do have to say that if you wanted, you could easily do the oval and the word in a red vinyl because that is on a flat surface but the top and bottom would be tricky with vinyl because it is not flat, it’s curved and there would be a lot of bubbles in the vinyl. Either way you do it, it will look cute!
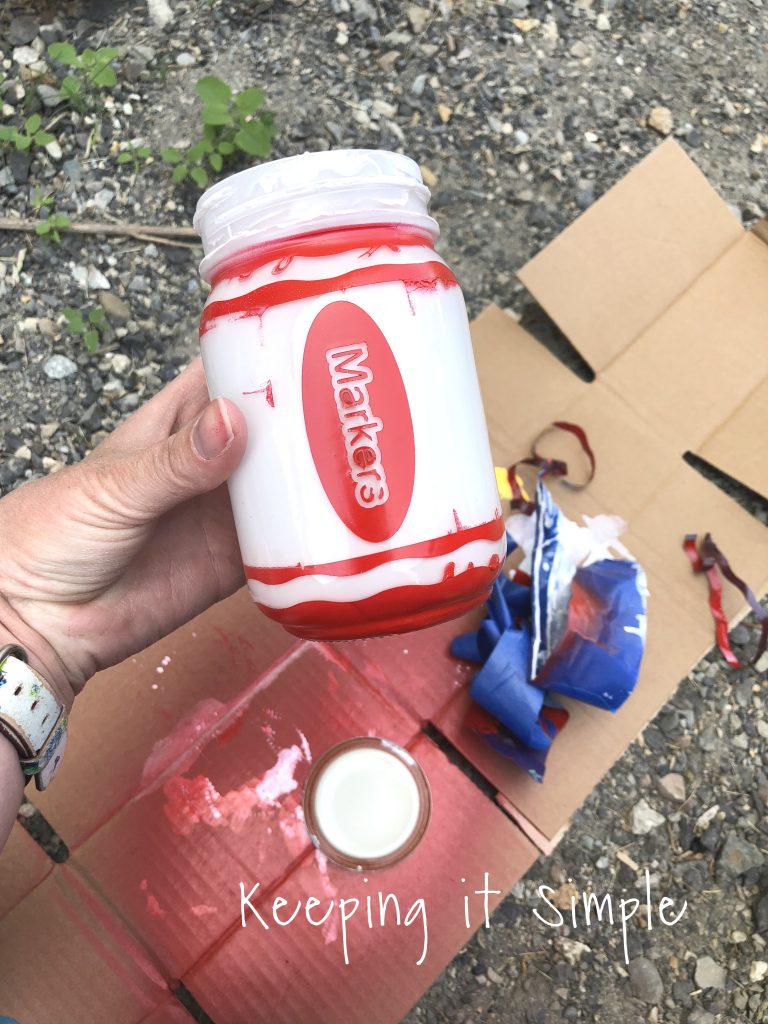
Using a variety of tools I scraped off the paint that had gotten under the tape and cleaned it up. I used some baby wipes to wipe away the paint too. Then I used a little paint brush and the spray paint (I sprayed it onto a paper plate) and did some touch ups around the words.
As for the crayon mason jar, the word didn’t work so I completely took it off and then cut out the word crayon out of black vinyl.
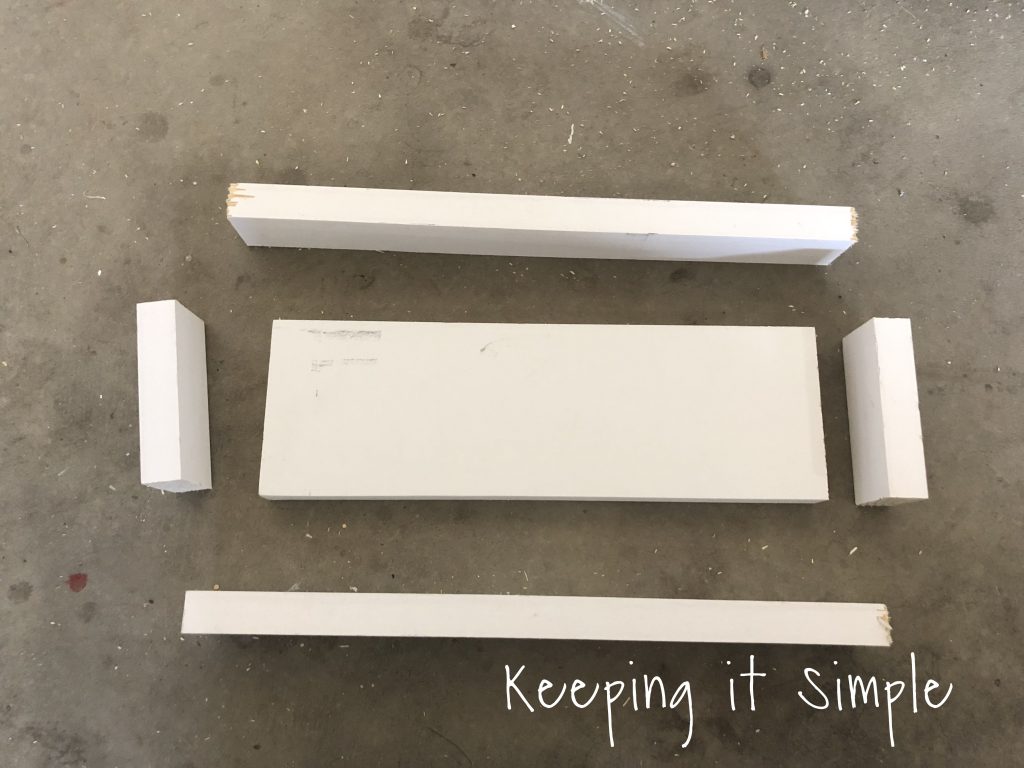
Now for the little tray to hold the mason jars. I used a 1×4 for the bottom and then 1×2 for the sides. I used a primed white board because I knew I wanted to paint it white but you can use regular wood too. I cut the front and back 1×2 boards 12.5″ wide and then base board (the 1×4 board) 11 inches. The side pieces are the width of the 1×4, so roughly 3.5″.
Using a nail gun, I nailed the side pieces into the base piece using 1 1/4″ finishing nails.
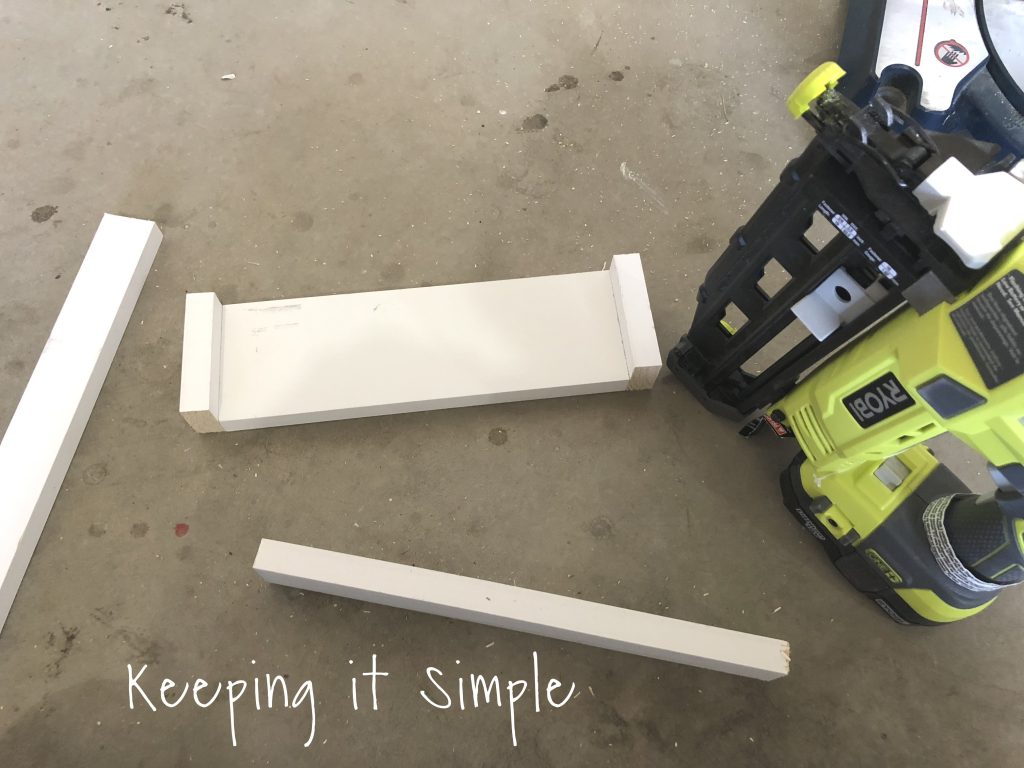
I then nailed the front and back pieces onto the base and sides. Super easy and cute! I then filled in the nail holes and painted it all white.
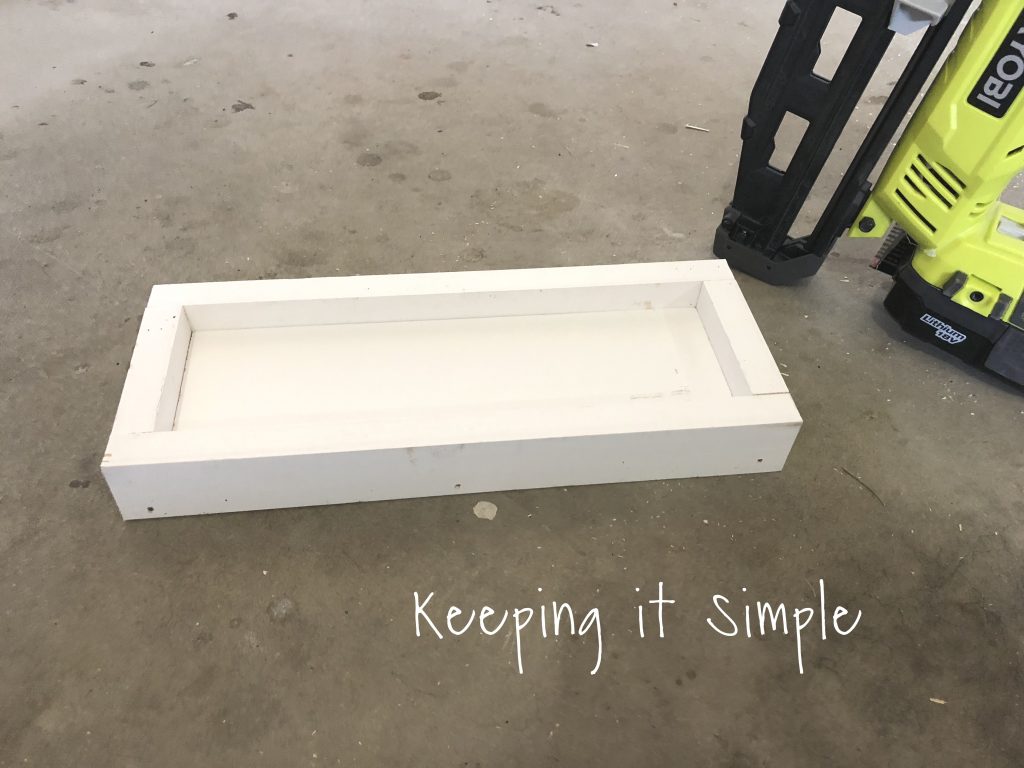
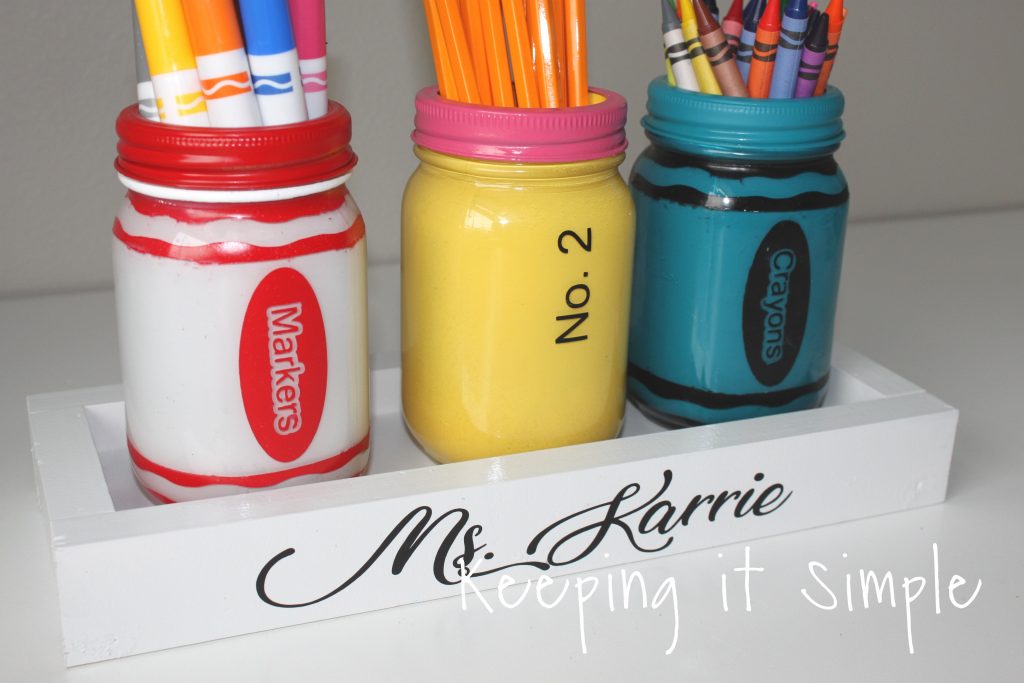
I added some black vinyl to the tray and then added the lids to the mason jars. I painted each lid with spray paint.

Before putting in the school supplies, I added a wash cloth to the bottom of the jar. This is for protection (so the paint doesn’t get scratched) and to give the crayons and markers some height. *** Before you put in the supplies you will want to let the paint completely dry and cure overnight *** For the crayon mason jar I used 1 1/2 wash cloths, for the marker mason jar I used 1 wash cloth and for the pencil mason jar I used 1/2 wash cloth.
And that’s it!! Isn’t it super cute?!?! I love how this teacher gift idea turned out!
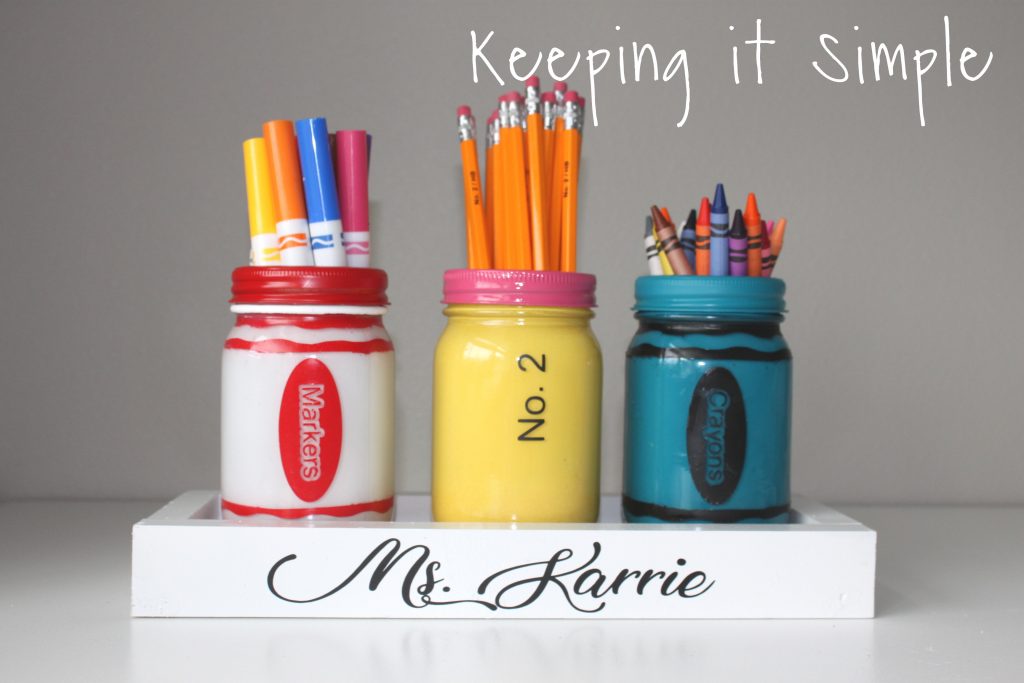
The mason jars are perfect for storing the school supplies.
Here is a close up of the mason jars. As you can see the No. 2 is vinyl and the rest of them is paint.
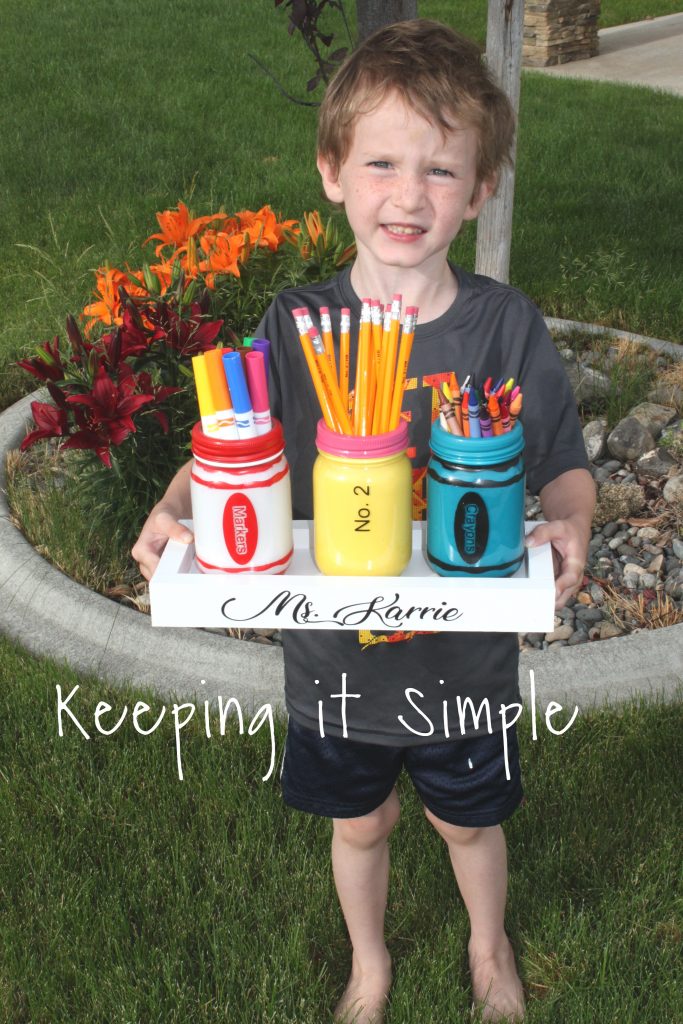
Here is my cute boy all ready to give the teacher gift to his teacher on his last day of preschool.
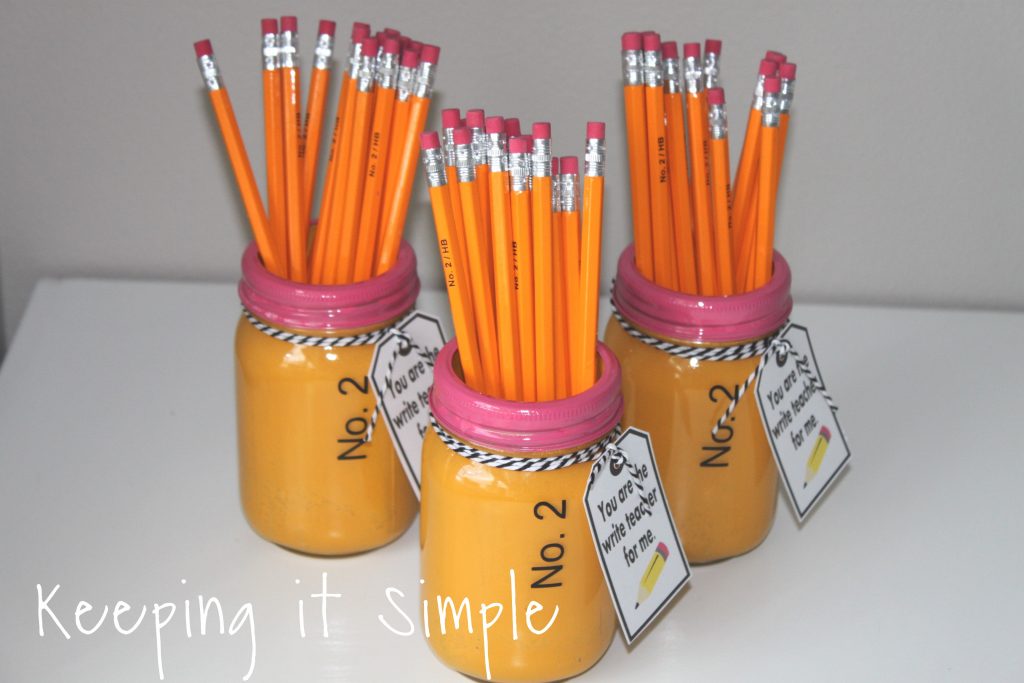
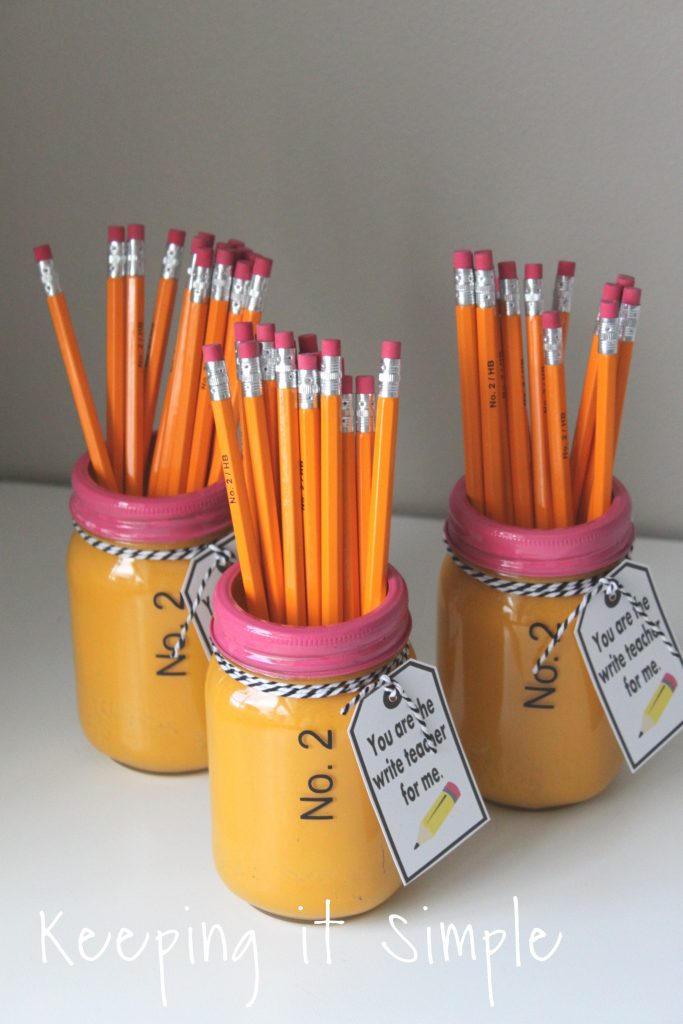
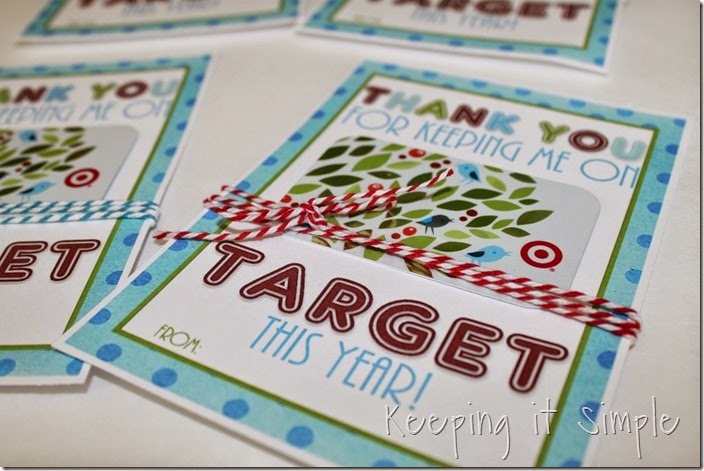
For my other kids’ teachers, I just made the pencil mason jar. I then added a cute little tag to go with it. You can get that here.
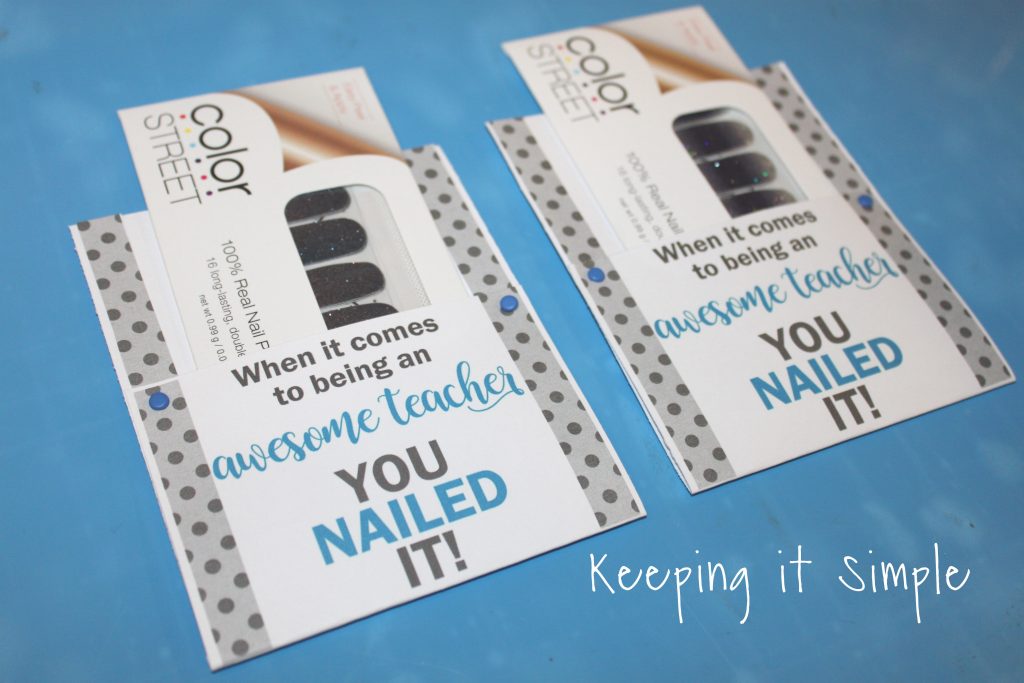
Check out my other teacher gift ideas here.

This post contains affiliate links.
Leave a Reply
You must be logged in to post a comment.