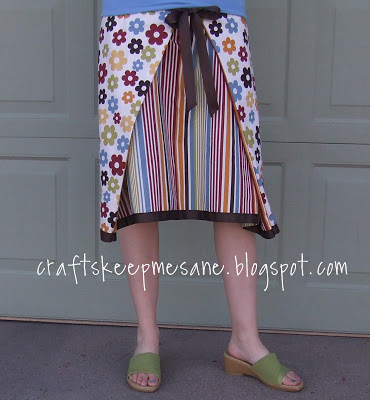
I am loving this sewing right now, I decided to make a cute skirt. This is the first skirt that I have even sewn, so it’s not prefect, but I really like it! I saw the idea at Sew a Straight Line. I didn’t follow her tutorial exactly (I just don’t like following instructions sometimes :D). I had to switch it a little so it would work for me because I really don’t know how to sew and so I do it the way is easiest for me.
If I could make this, with little sewing experience, than it must be easy and I know you can do it too 🙂
2 coordinating fabrics (about 3/4 yard of each)
Lots of ribbon (about 6-10 yards)
This is how I made it:
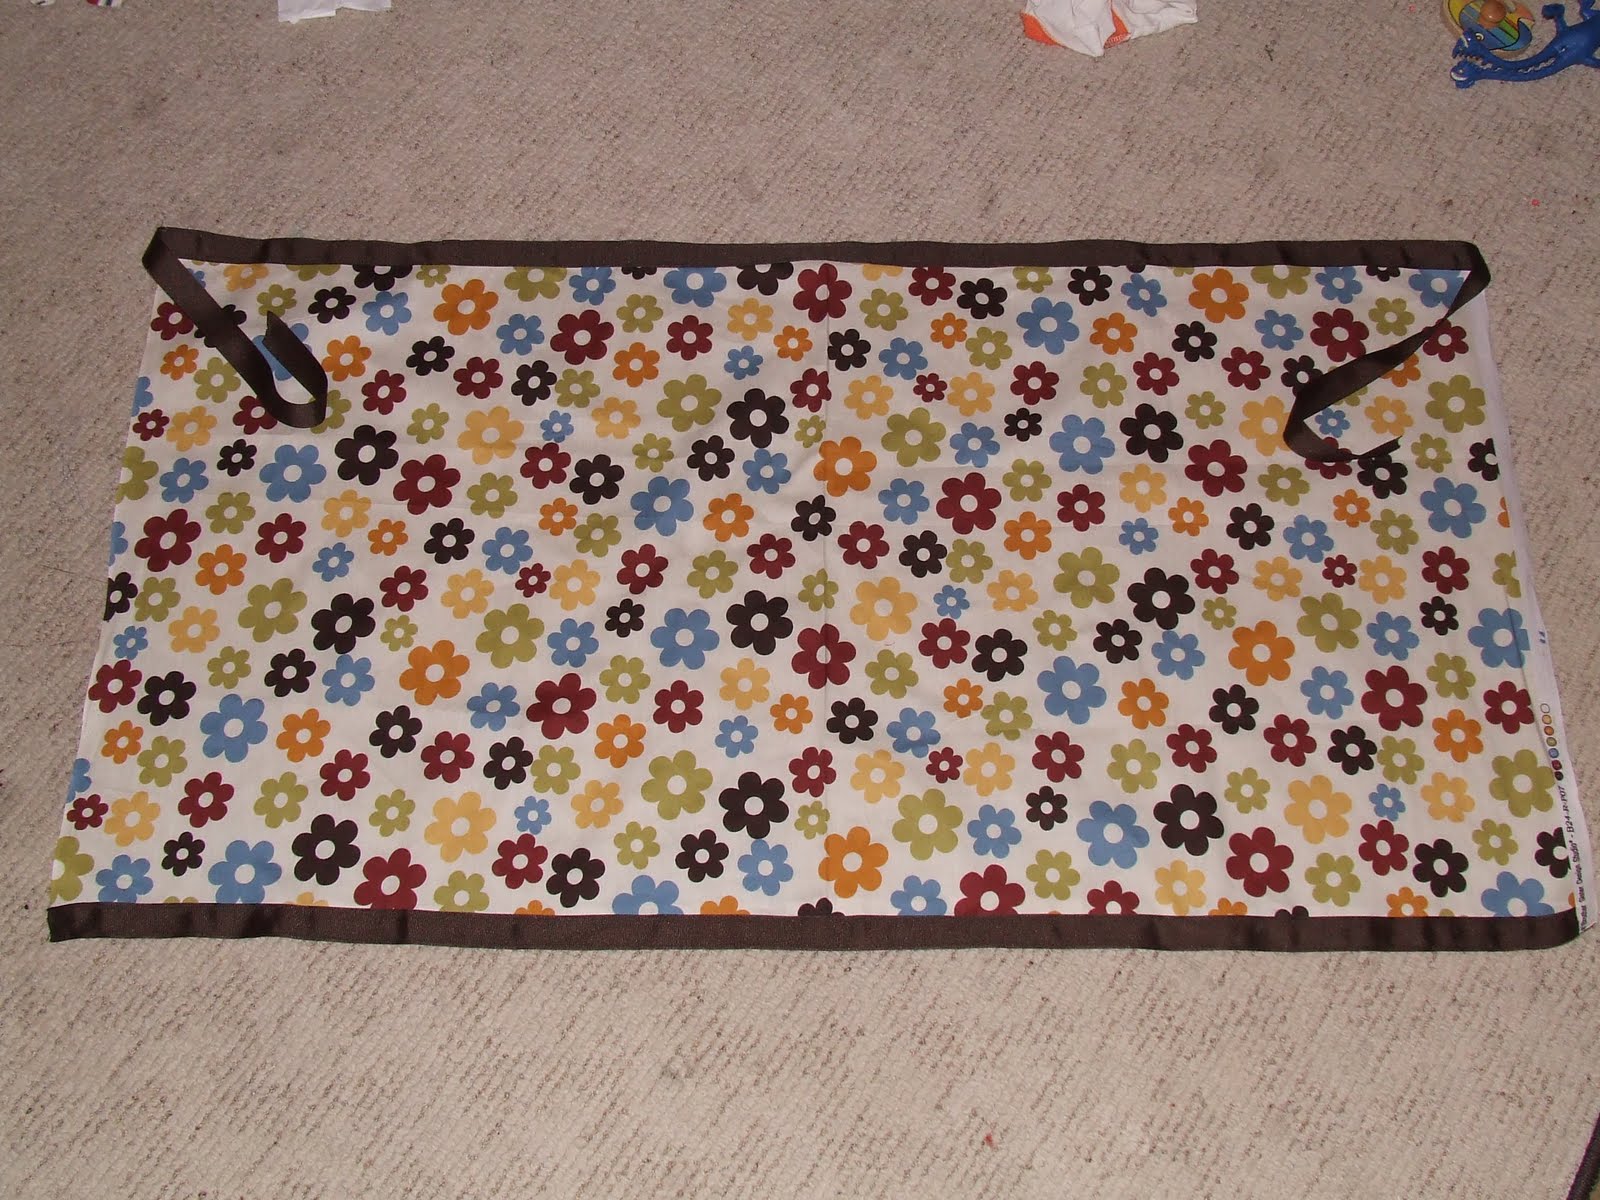
1) Measure your waist, where the skirt will lie. I measured it loosely. This is the width of the skirt. Then measure the length you want it to be, I wanted mine to be a couple of inches past my knees. So my skirt is 34 in x 22 in
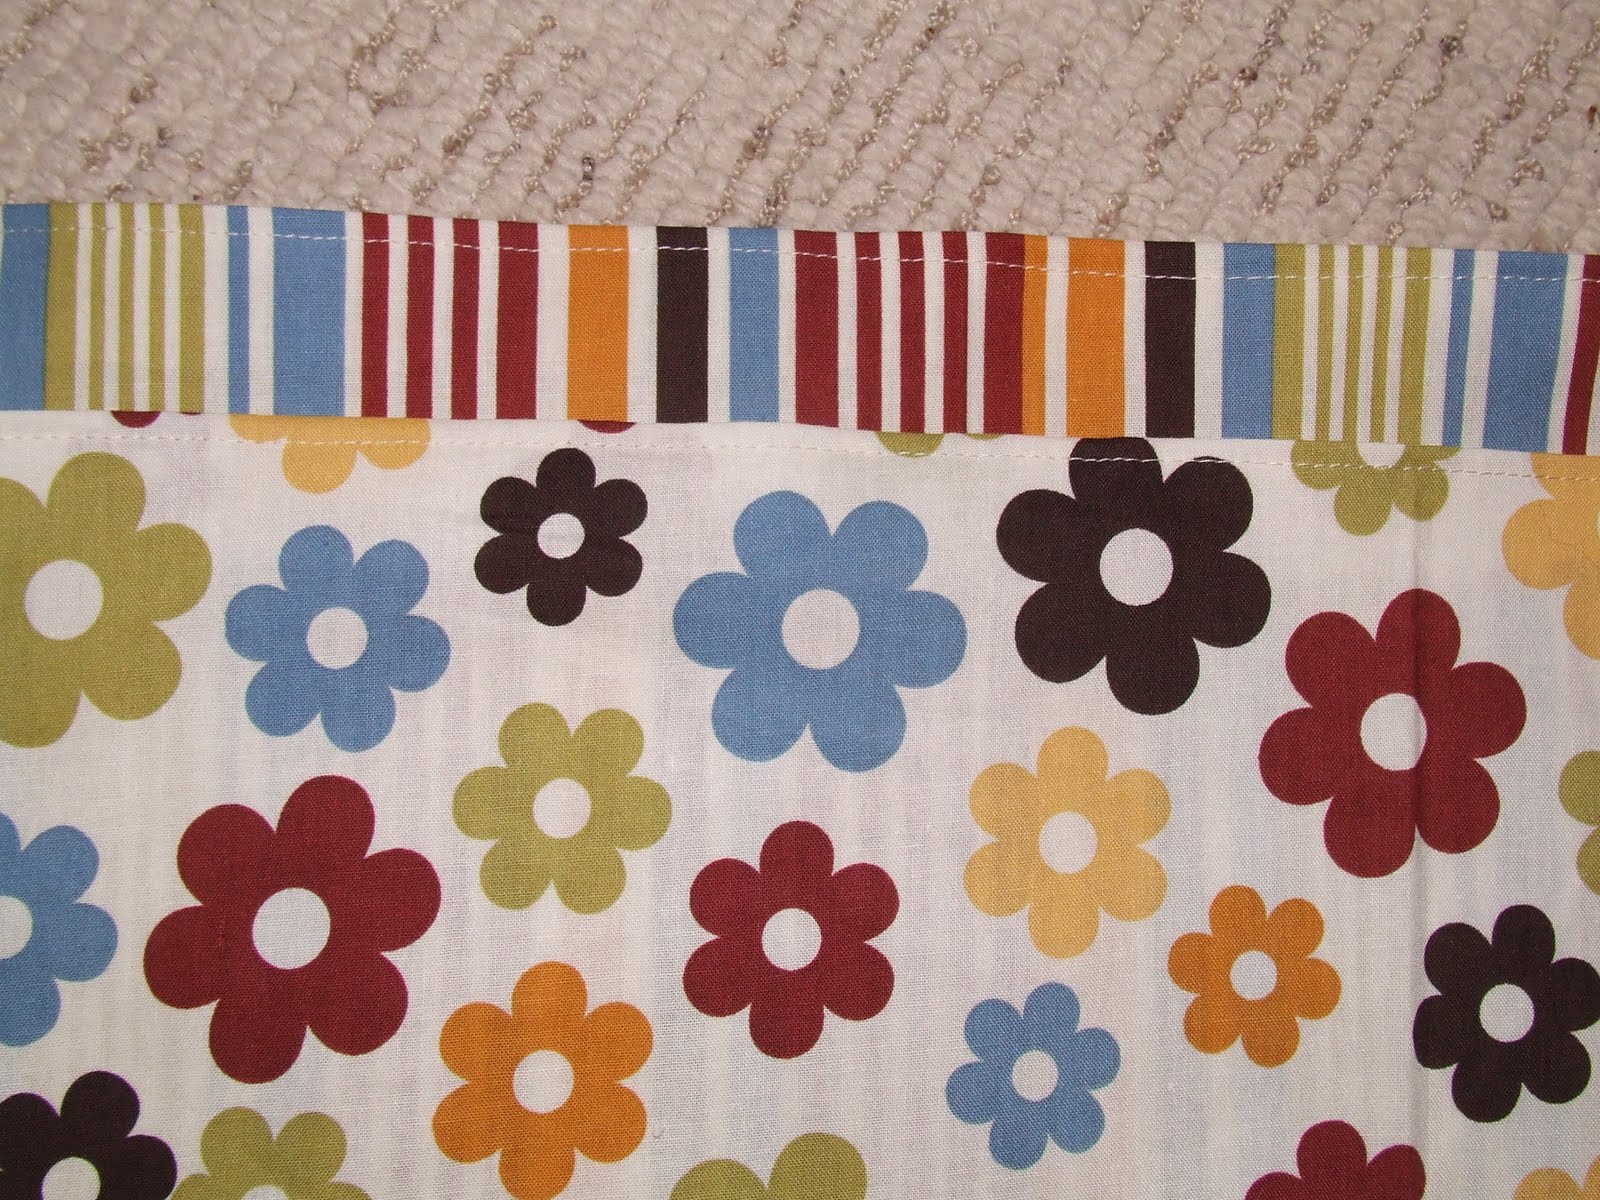
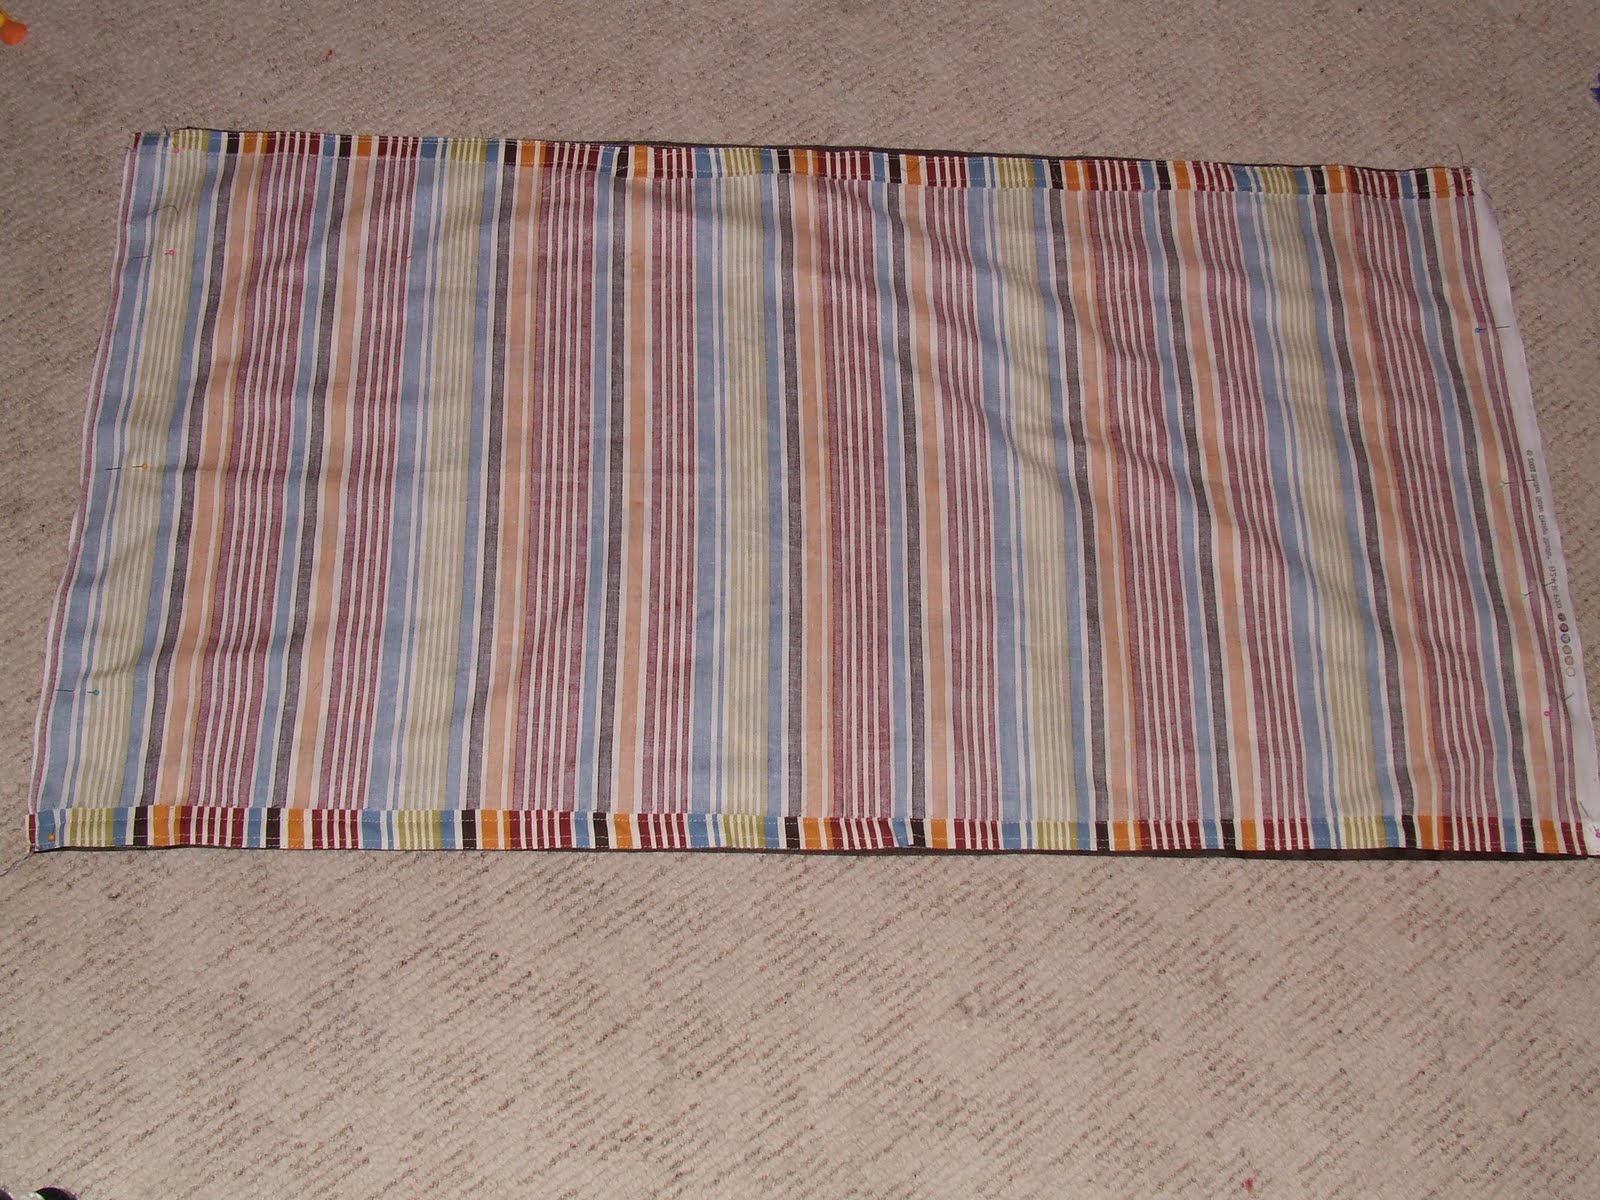
2) Cut the two fabrics. Make sure you cut the fabric a little longer so when you hem it and sew them together. So mine is 36 in x 24 in
3) Hem the edges to make straight lines (I don’t know what is with the fabric store, but they cannot cut a straight line!)
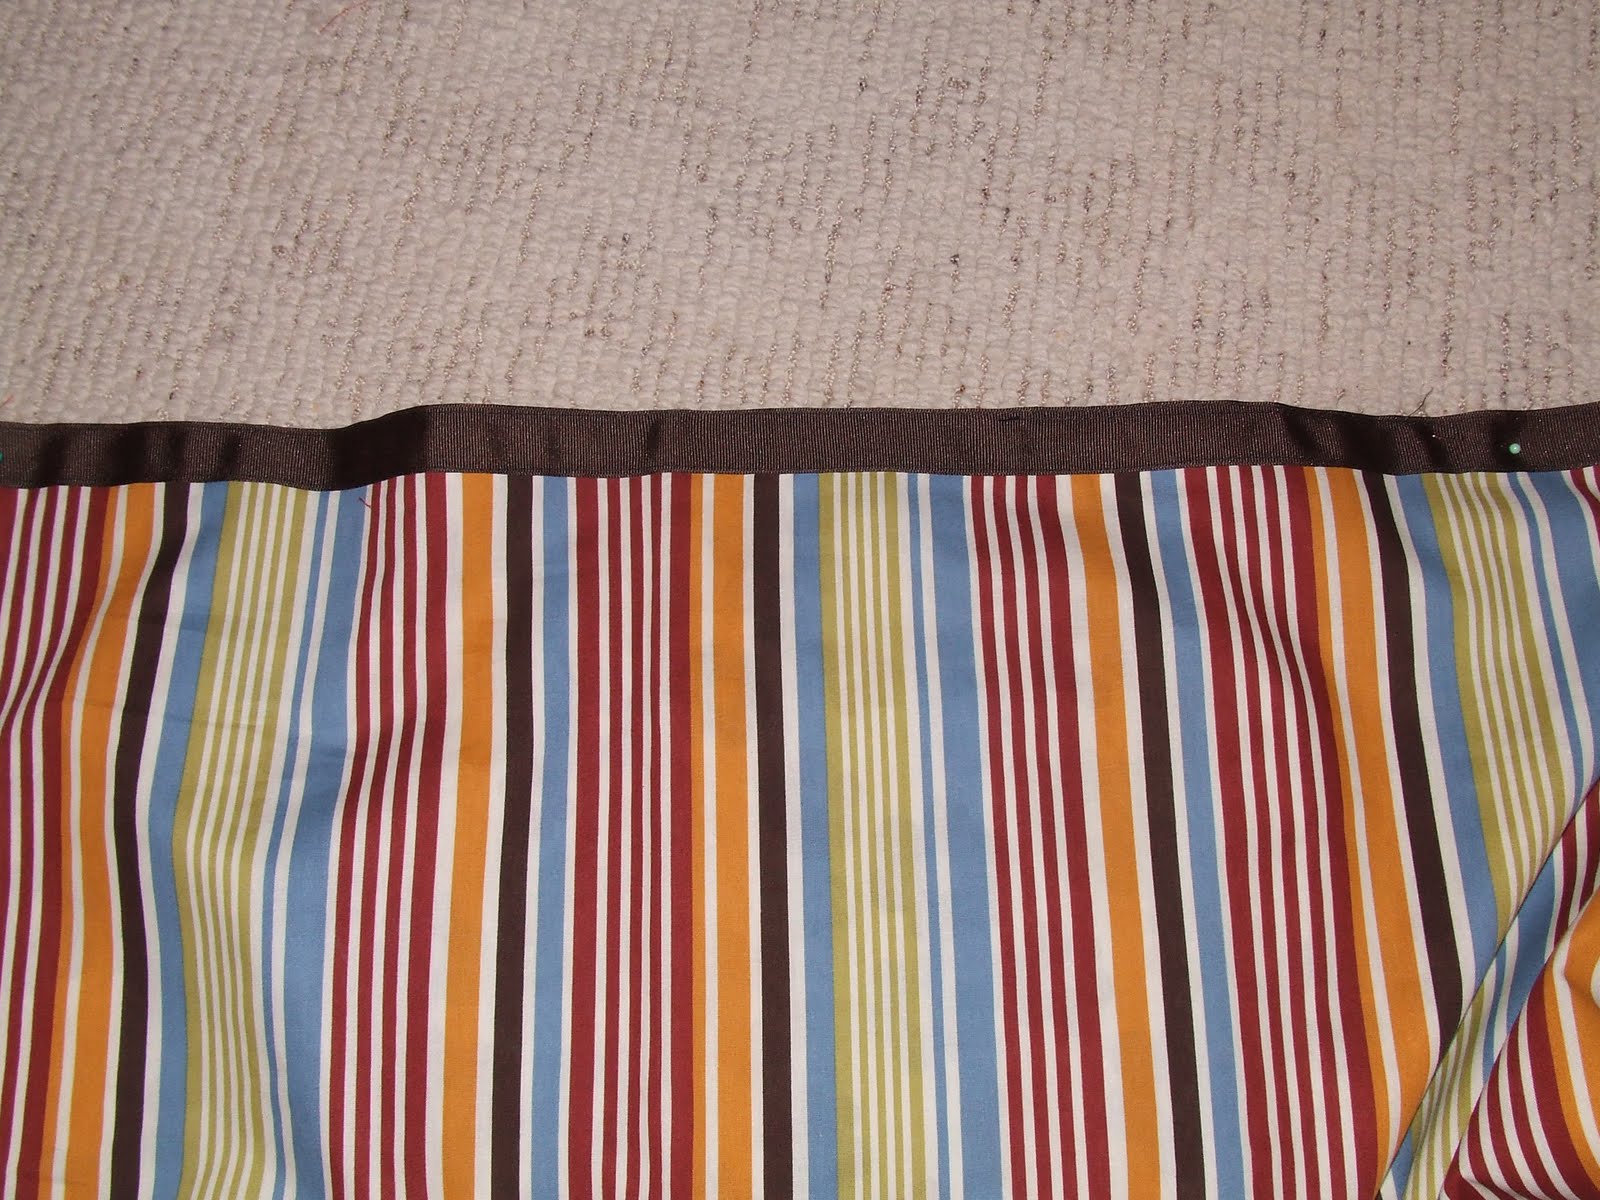
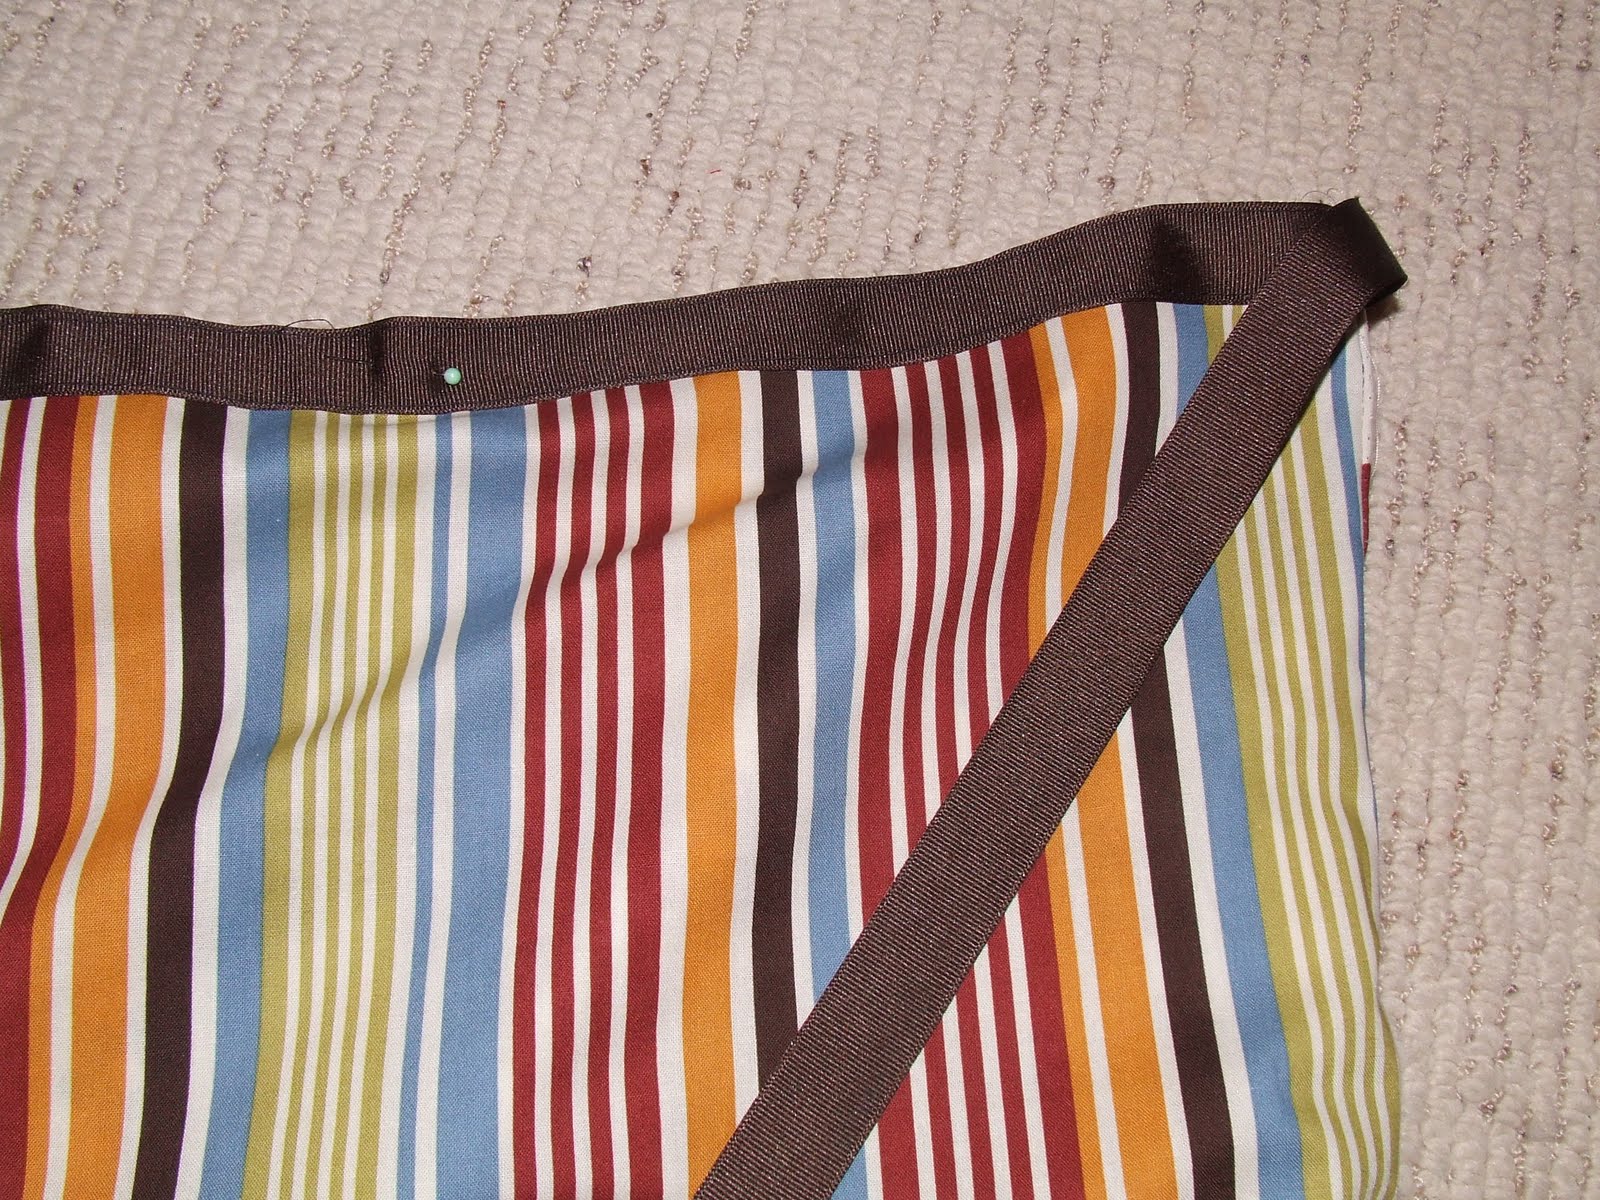
4) Now add the ribbon. The top of one fabric you need to have extra ribbon, this will be the tie. I think mine ending up being about 12 inches. I have found whenever I use ribbon, it’s safer to burn the edges, just in case it frays.
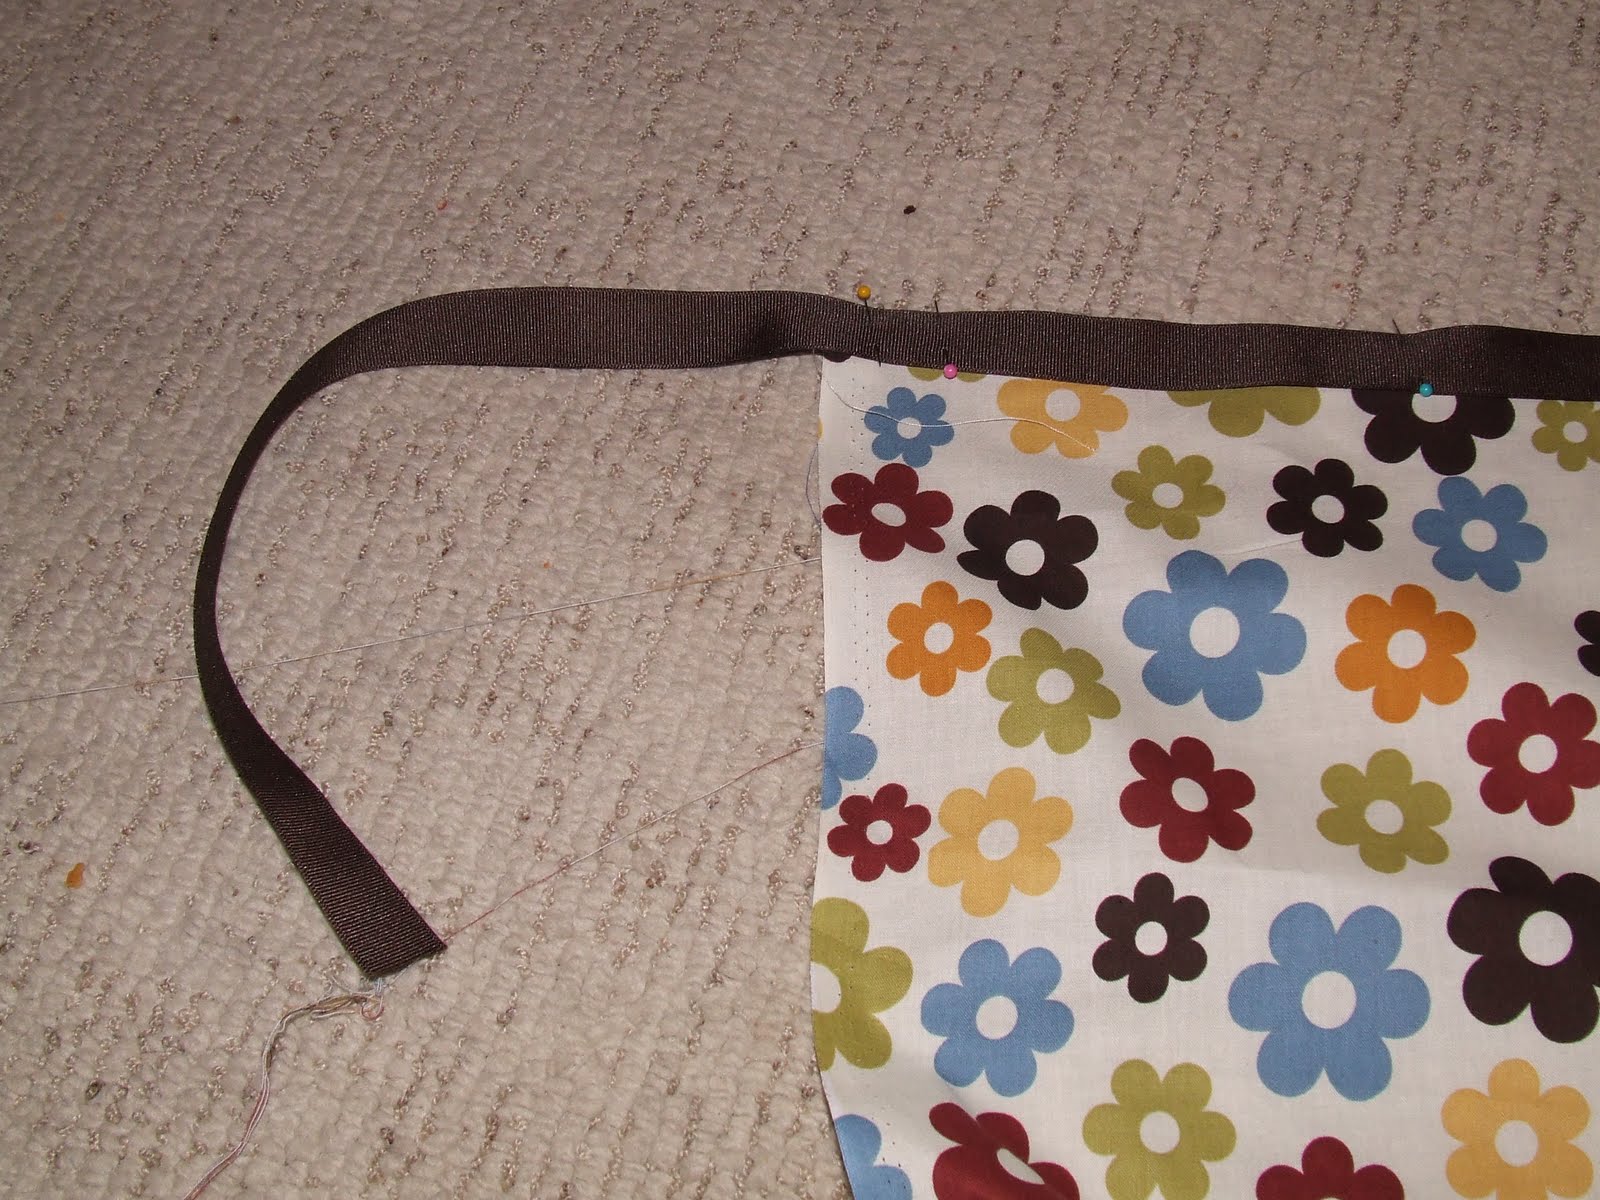
** Make sure you are sewing this, don’t sew all the way to the end of the fabric. Leave about an inch, so when you sew the two fabrics together, you aren’t sewing the ribbon inside the skirt. I made this mistake and had to go back to redo it.
5) Add ribbon and sew to the bottom of the fabric
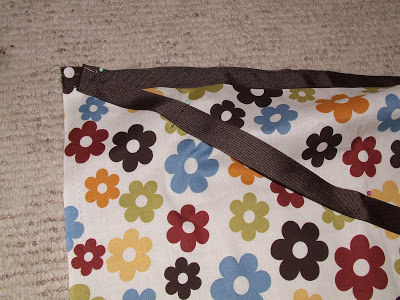
6) Sew ribbon to both fabrics, top and bottom
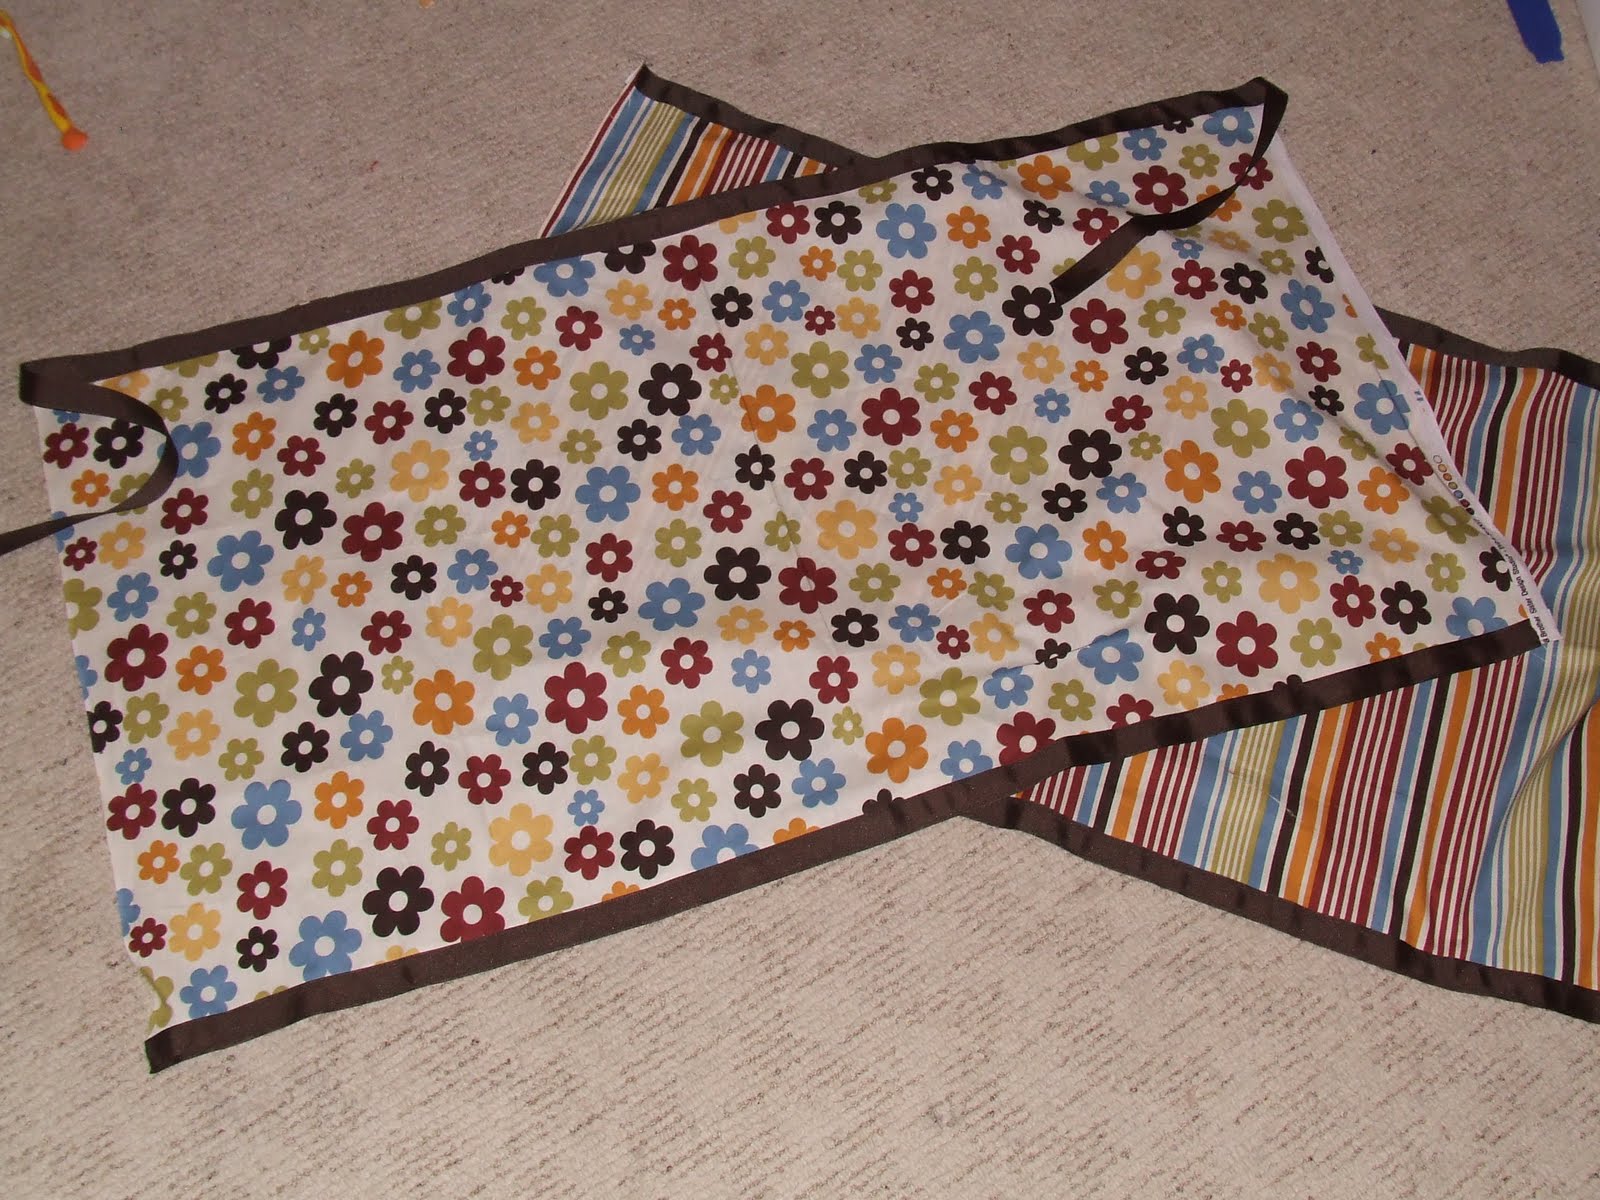
7) Pin the ribbon to the middle, so it doesn’t get the way when you are sewing the two fabrics together

8) Pin the two fabrics together. Make sure you have the fronts facing each other and then sew the two together
9) Flip it inside out and admire your work, you’ll almost done!! Then try it on and pin the top so it fits about your waist loosely (or tight, whichever way you like it). Remember to take in account your hips, this hole must go over your hips.
10) Sew a straight line from the outside to the pin, directly on the ribbon. This will make the top hole not as big and it will be much easier to put on
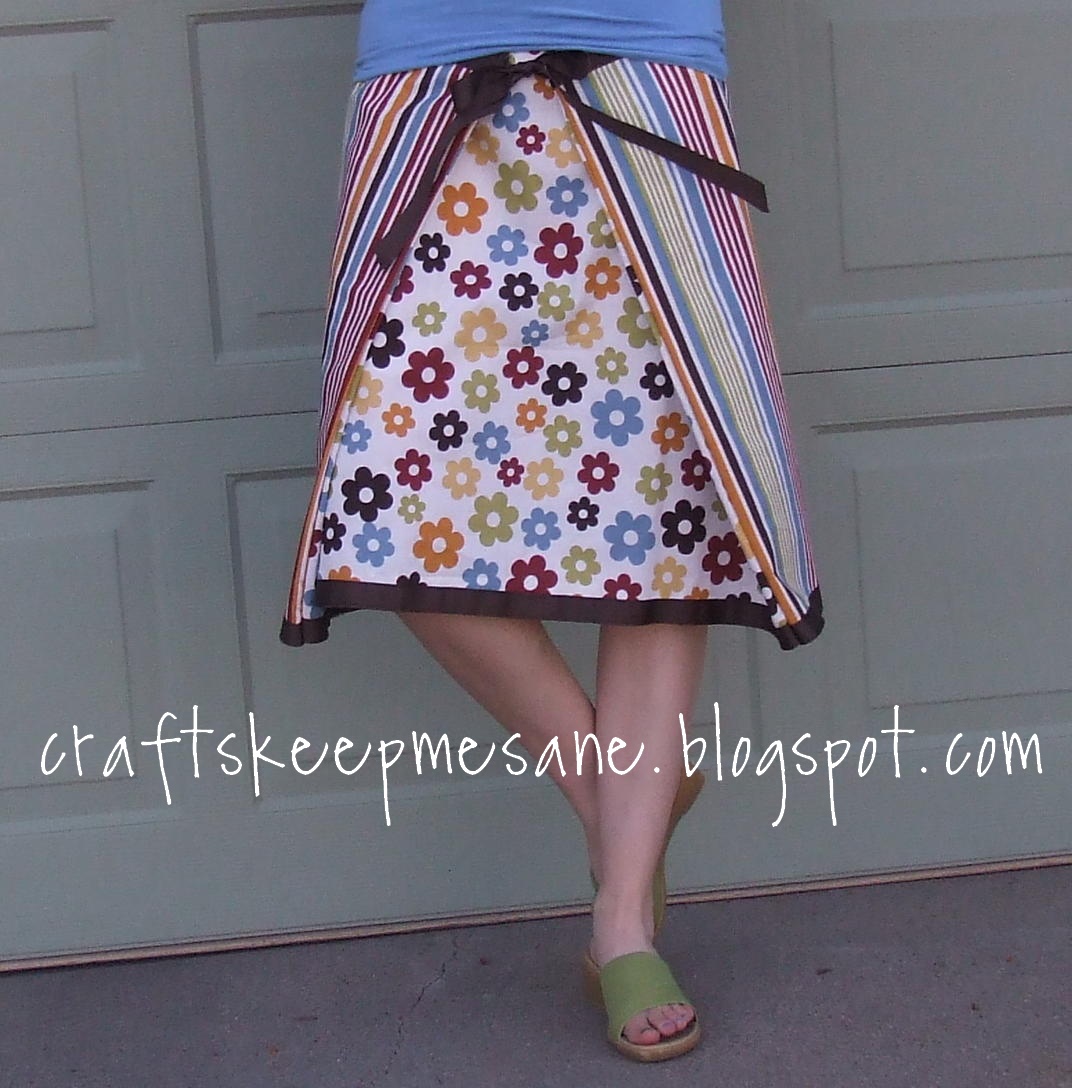
11) Put on the skirt, wrap the sides around and tie. And just like that you have a cute a-line skirt.
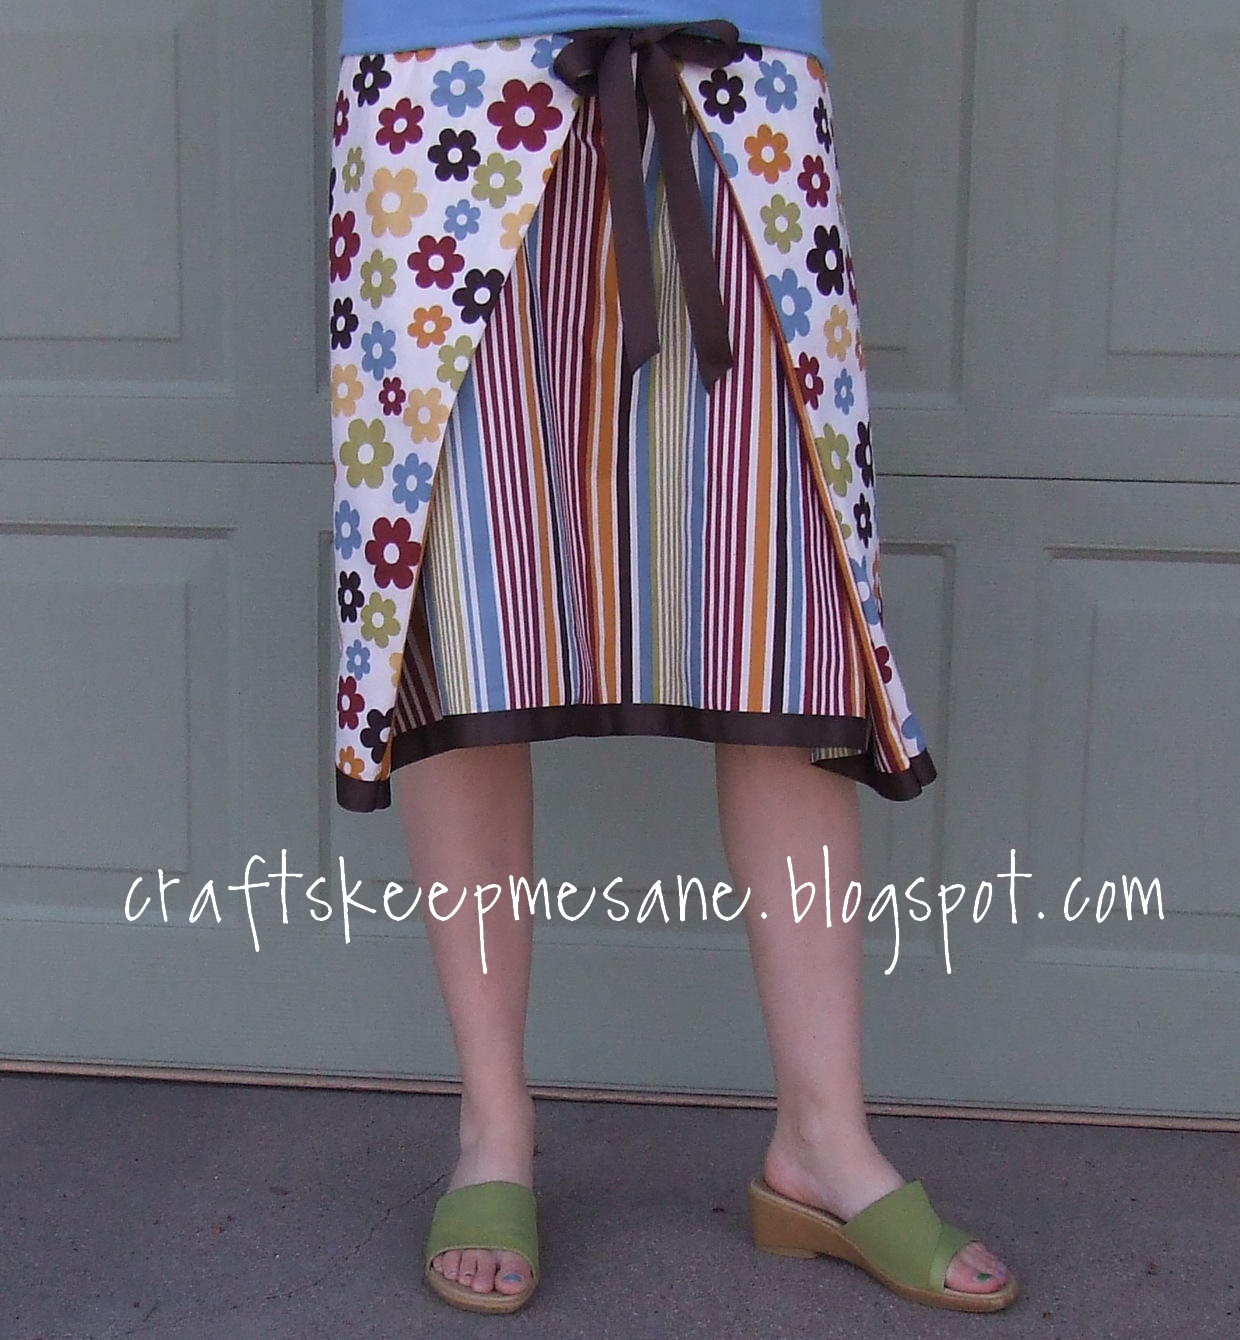
Want a different look or it gets messy. Then flip it around and tie it again!
I had so much fun making this, that I made three more, for little girls 🙂


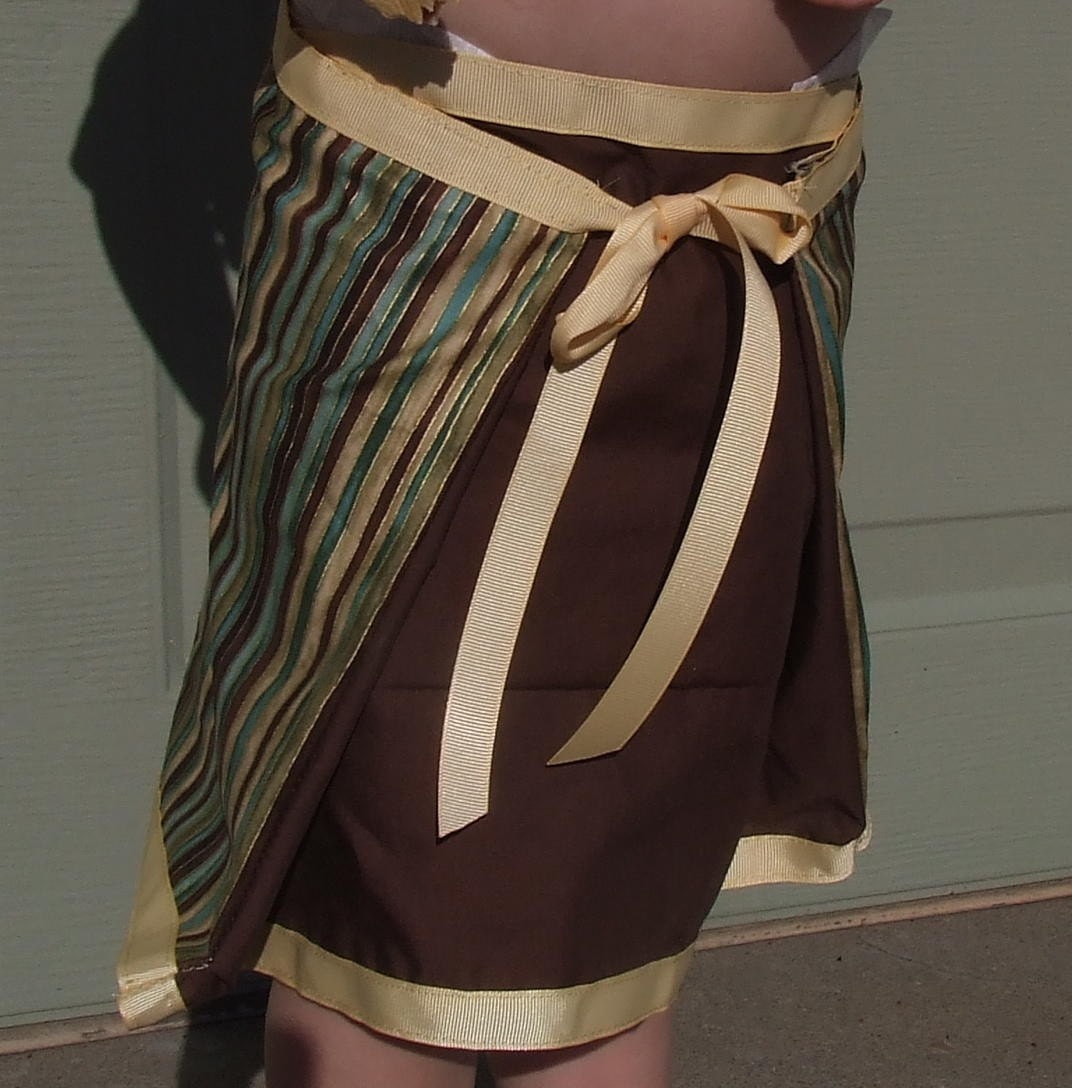
I just love my baby’s belly button hanging out 🙂 All three of these skirts are for sale at my etsy shop!
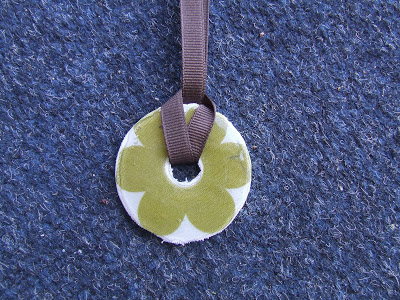
I didn’t stop there though, I thought it would be fun to have a matching accessory, so I made a washer necklace with the fabric.

that is so cute! Great idea. and you're right, sometimes we need to adjust things so they work for us.
Love the skirt and the cute little baby belly. Thanks for all the comments you leave on my blog. Don't miss out on my first ever giveaway. minutestospare.blogspot.com
Count me impressed! You did a terrific job!
love all the skirts! and your green shoes!
Great idea! I've got a skirt tutorial for a baby skirt over on my blog you might like. http://helpinglittlehands.blogspot.com/2010/04/recycled-pants-into-ruffle-skirt.html
Thanks, Polly 🙂
Oops, just noticed you have boys…maybe not so interested in my skirt tutorial after all. I've got some great boys applique projects that I've started and will be on my blog in the next couple weeks if you're interetsed though. 🙂
Cute skirts! I love the baby belly button!
☺ Celeste
I love it! Yours is cute, and the mini me ones are ADORABLE! I will have to try and make a skirt like this as I am kind of terrified after my first experience!
I'm so glad you liked the skirt pattern/tutorial. I love your fabric. And your baby versions are super cute, too.
Sabra
sewastraightline.blogspot.com
You don't know how to sew much and you made those???? Wow, I'm impressed, and I've been sewing about 40 years! Good job!
Fun! Great job. I always say "the more your sew the more you'll know" That is how I have learned. Just kept going. These are cute.
Adorable and thanks for sharing how you made it. We might need a bunch of these.
Wow, this skirt is too cute!
I've begun sewing clothes as well – however, I've only stuck to kids clothes. Nervous to try something for me. But this looks cute! Does it stay on well?
Jenn:
I wore it for about 3 hours and it felt loose but it never felt like it was going to fall off. It even stood up to Kansas wind :). My shirt was tighter and that helped to keep it still. You can make it tight though, I just wanted mine to be looser.
Kaysi
The floral/stripe combination is so cute.
Love the fabric you used!!! And I love the little girl skirts!!! I hope you link this up to my party tonight/tomorrow:)
That is so cute! I want to try it really bad!!
Kaysi!! These turned out so stinking cute! Way to go girl!!
~Morgan
Meet Virginia Crafts
Meet Virginia's Etsy Shop
so cute! I Love the fabric and I love the look!!!!
These turned out so cute.
Very cute!! What is better than getting two outfits out of one item. I just might be adding a new skirt to my wardrobe soon. Thanks for sharing!!
–Amy
http://www.thebutcherthebakerthecraftmaker.blogspot.com
Thanks for coming to my PAR-TAY with your CUTE skirts!
Blessings,
Linda
Kaysi…these turned out SO CUTE!! Great job!! I'm going to have to try making some of these for my girls!!
Thanks for linking @Creative Itch's "Sew Cute Tuesday"!!
I love these skirts! Adorable fabric too!
I love the baby belly hanging out too – Super cute! The fabric you used for your skirt is so pretty – they look really nice together 🙂
Thanks for linking at Lucky Star Lane!
SOOO CUTE!! I want to make one!
Super cute! I would botch it all up, but you certainly made it look and sound fairly simple….I love the pattern!
Very cute! I've been meaning to make myself something like this so thanks for sharingg the tutorial!
I also love this skirt. Sabra did a great job designing it!
This is darling, Kaysi!!
How cute, jumped over from Somewhat Simple
So cute! I especially love it on your little one. And that matching washer is adorable.
Thank you for linking this to A Little Craft Therapy with Life in the Pitts
Super cute! And you did that without a pattern! I love making skirts, I may have to give this a try.
Thanks for linking up to Make it Yours Day!
I think you have more sewing skills then you let on! I love the little baby bellies. Too cute.
Thanks for linking up with Sugar & Spice.
Kim
I love it! It is so cool that it is reversable! : ) Great fabric choices too!
This is great!
Thanks for sharing!
I'm featuring this today at somedaycrafts! So cute!
Creative ideas! Thanks for linking up this week. I hope you'll join me tomorrow for another great party!
Very cute! Love your fabric choices
Super cute! Dropping by from BNOTP.
LOVE these… I especially love the baby version- seriously, how cute!
We have a Friday Fun Finds party- if you're interested, we'd love it if you'd link to this!
Cute fabric choices! Thanks for linking up to Mad Skills Monday at SSB! Link up as many projects as you want and see you nest week!
Blessings,
Ginger
SSB
What a great little creation. A fun way to have a reversible skirt! Thanks for sharing with Made it Monday! Jules
Your skirt turned out so cute!
Thanks so much for linking up!
Hope to see you on Friday for another link party!
Too cute!!
Thanks for joining Get Your Craft on Thursday! Please join me this week for another great party!
Sorry, it's taken me a while to come and visit, but i was out last week!
I'm featuring this 🙂
I loved your skirt so I tried it (with only one fabric). I love the way my skirt turned out. Thanks for the tutorial. http://iwant2trythat.blogspot.com/2010/04/my-first-skirt.html
I loved the skirt that you made so I tried it myself. It turned out really cute and your tutorial was very easy to follow. Thank you so much!
so cute… mother and DD with the same skirt….
You've inspired me to make a couple for my two girls. I'm not much of a sewer myself but this looks really doable. Thanks!
I made my first one the other day, lots of ripping out thread, cutting and recutting. But that was all due to me not paying attention and measuring right. Once I put my head on straight this was so fun and easy to make! I whipped out another one tonight and have plans for 2 more!
I did have a problem with my hips being bigger than my waist so I made my own fix. I sewed up one side right to my waist and left the other side sewed up with 2 inches left open. I then added two snaps to the inside of the skirt and this way I am able to pull the skirt up over my hips and it will still be snug on my waist!
I hope you don't mind that I loved your version so much that I featured yours on my blog:
http://sourkrautkrafts.blogspot.com/2010/06/easy-peasy-domesticated-skirt.html
I totally stole the ribbon idea from you because I think it really makes the skirt.
very cute, i need to try this. i am taking up sewing again after many years
I made the skirt this morning! Thanks for your simple directions. Now my 6 year old daughter wants one!
Keep up the tutorials. They are great