My FREE Friday isn’t really working out, so I’m going to be changing Friday again. If you have any suggestions of what to do, let me know! As of right now, I’m just going to have my Silhouette stuff be on Friday until I figure something else out.
Silhouette is having a promotion going on and you won’t want to miss it!! From now until May 25th, you can get the Silhouette SD machine, 1 roll of white flocked heat transfer paper, 1 roll of teal smooth heat transfer paper and 1 roll of dark pink smooth heat transfer paper, all for $219! That is a savings of over $125!! Just use the code SIMPLE at checkout!
Don’t need the machine, well all heat transfer paper is 25% off, just use the code SIMPLE!
I just love this heat transfer stuff!! Remember when I told you that I got a bunch of $1 shirts at Walmart, well I’m finally doing things with them!! My 4 year old loves Star Wars. Actually loves is an understatement! So I wanted to make him a Jedi shirt. Luke “the Skywalker” is his favorite, so I made him a shirt with Luke on it.

This is how I made it:
1) I found a picture online and copied it

Photo courtesy of The Indepentent
2) Then I pasted the picture into Silhouette Studio. Next I pressed the trace page button, it’s in the upper right hand corner.
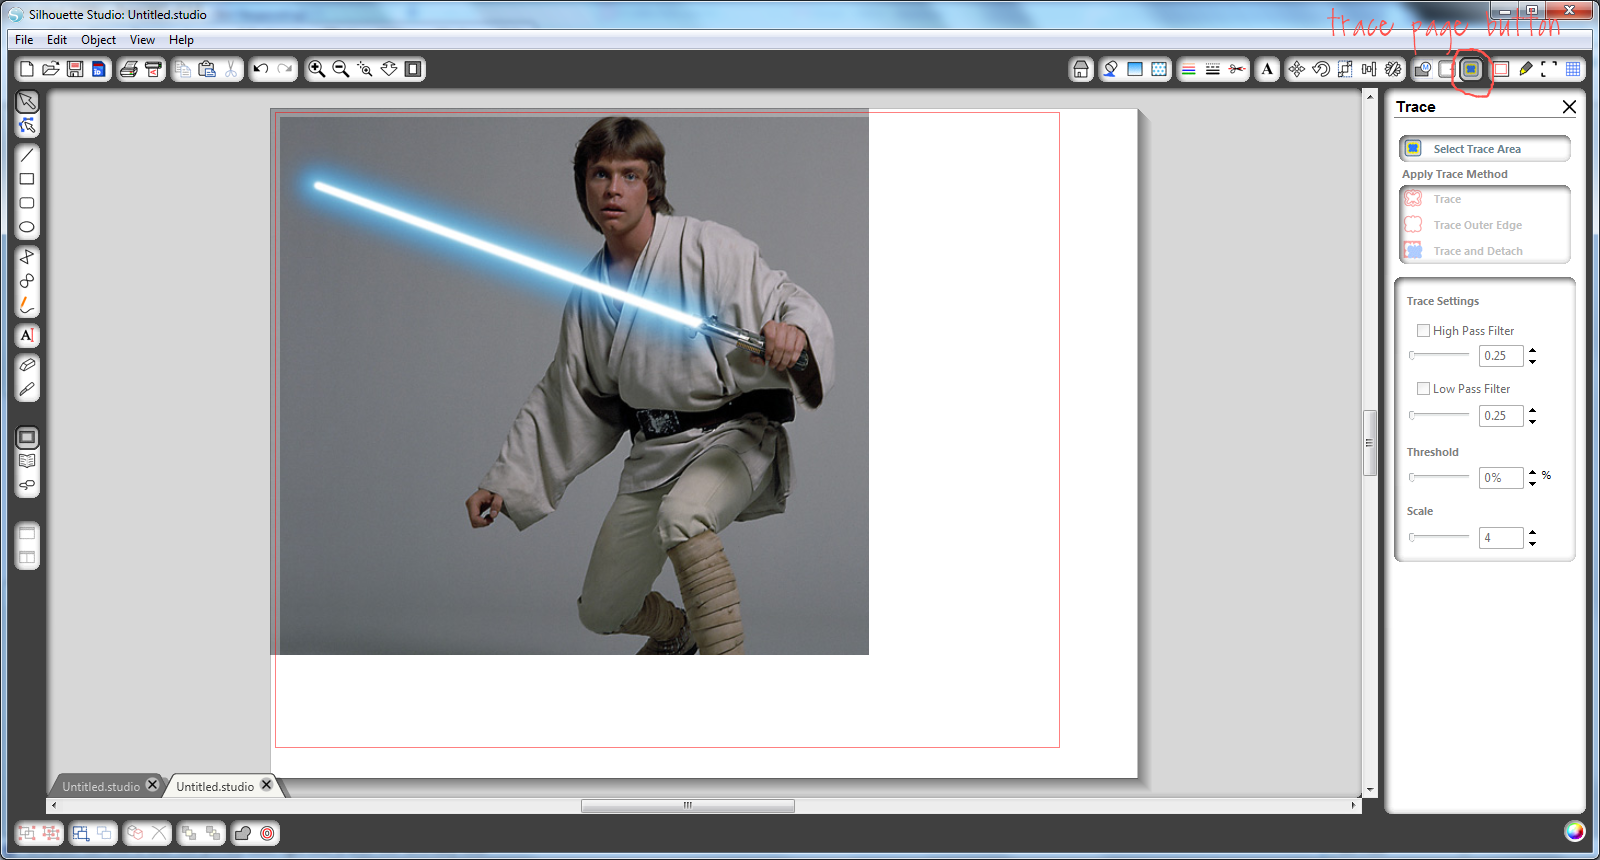
3) Then I selected the area that I wanted to race. I just highlighted the whole picture.

4) I then adjusted the threshold and scale levels. I played with this for a long time.
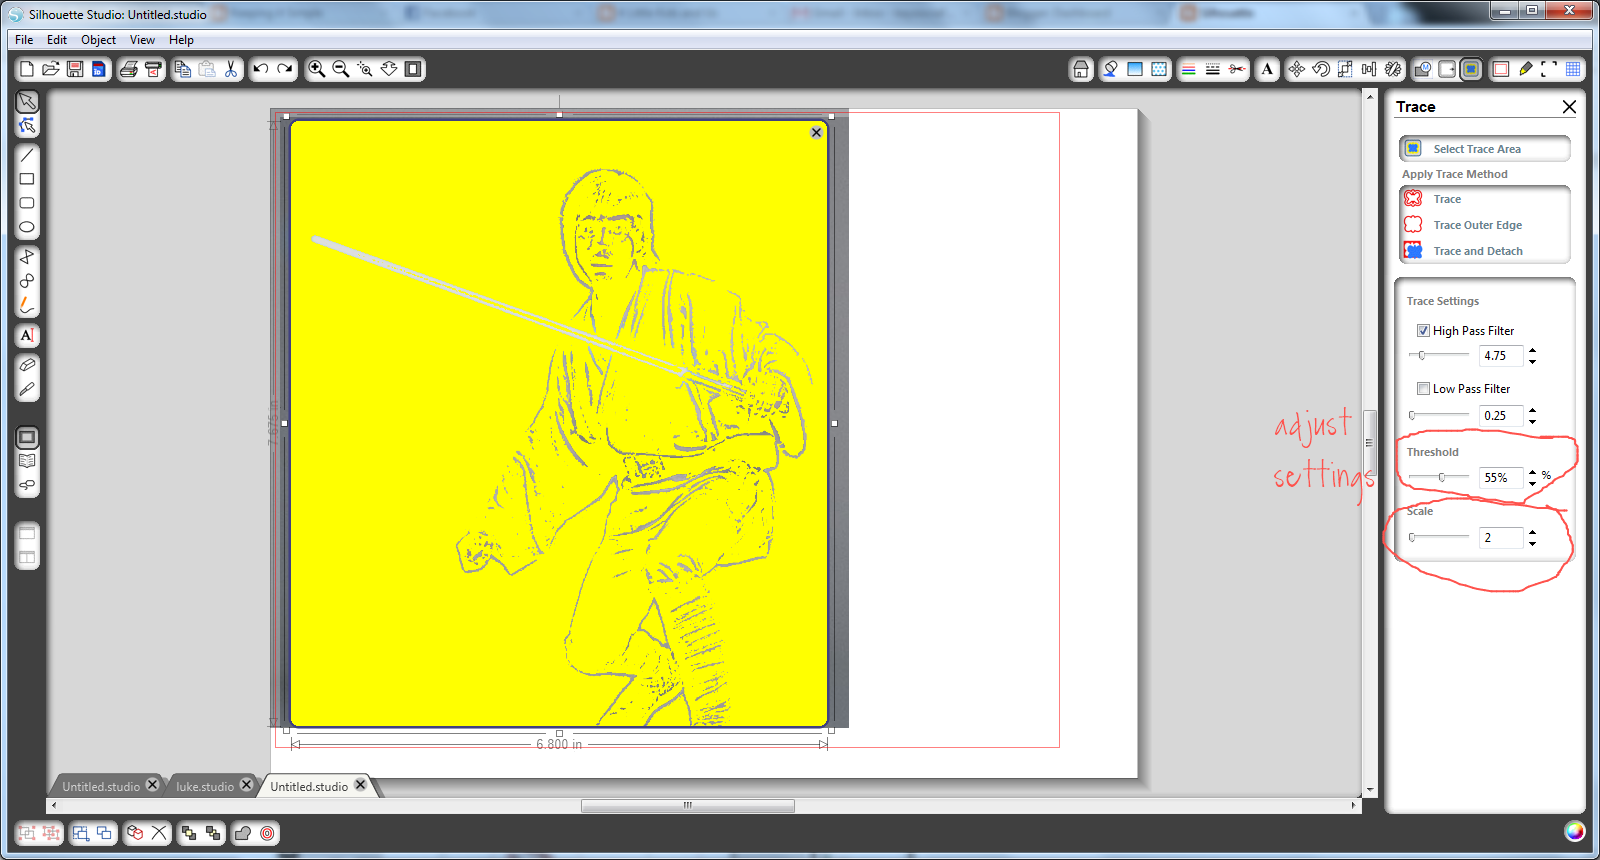
5) I pushed the trace button and then moved the original picture away from the traced picture.

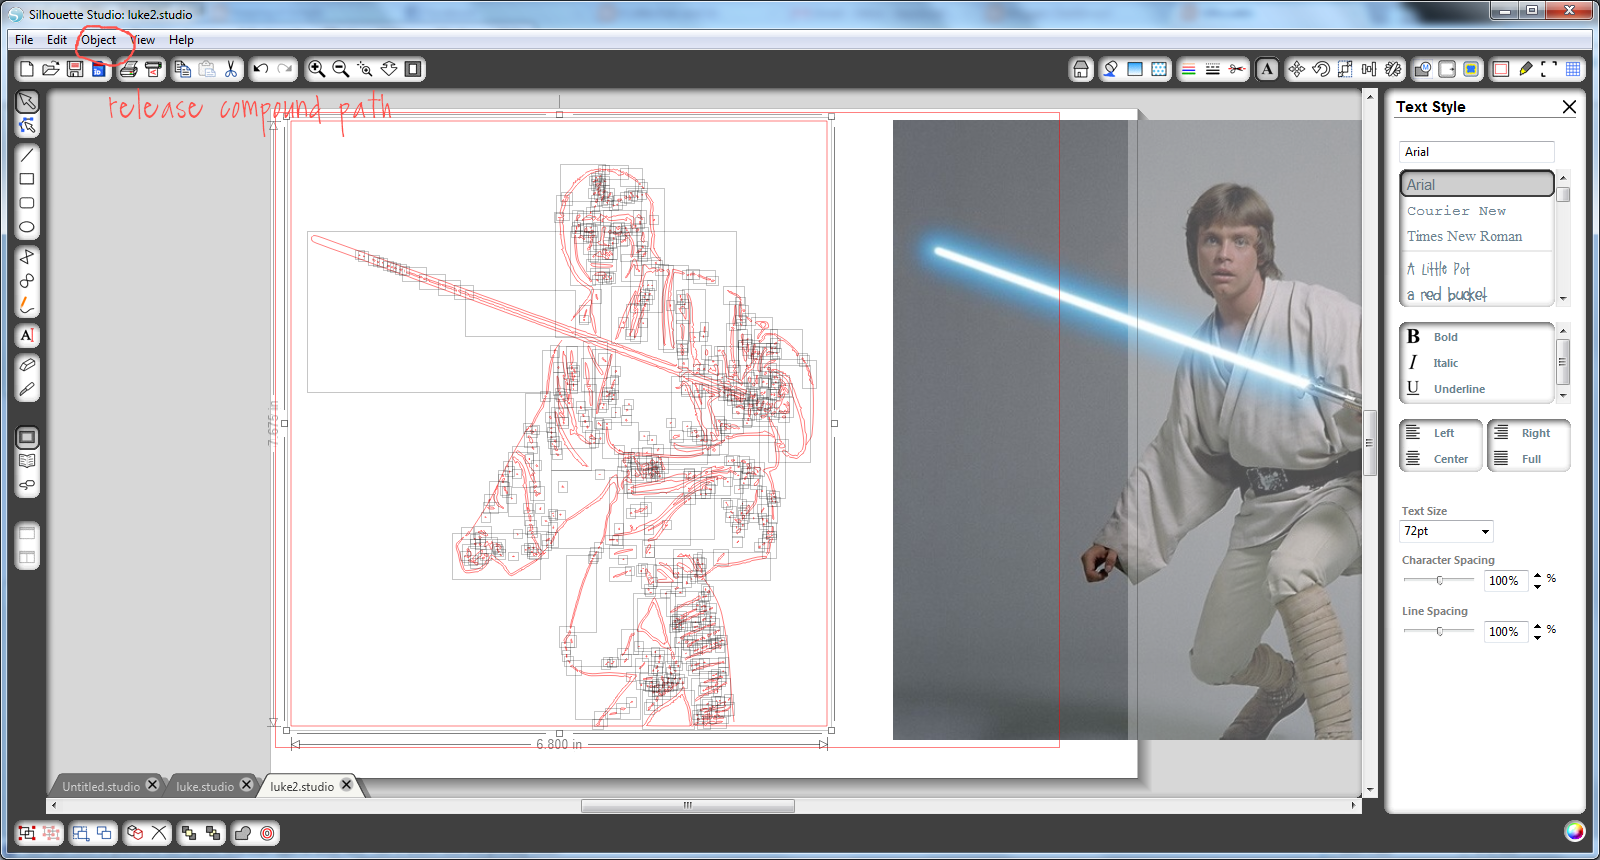
6) As you can see, there are a ton of little spots that I don’t want, so I went to object folder and clicked to the release compound path. That will separate all the parts, so you can delete what you don’t want. As you can see, this took awhile for me 🙂
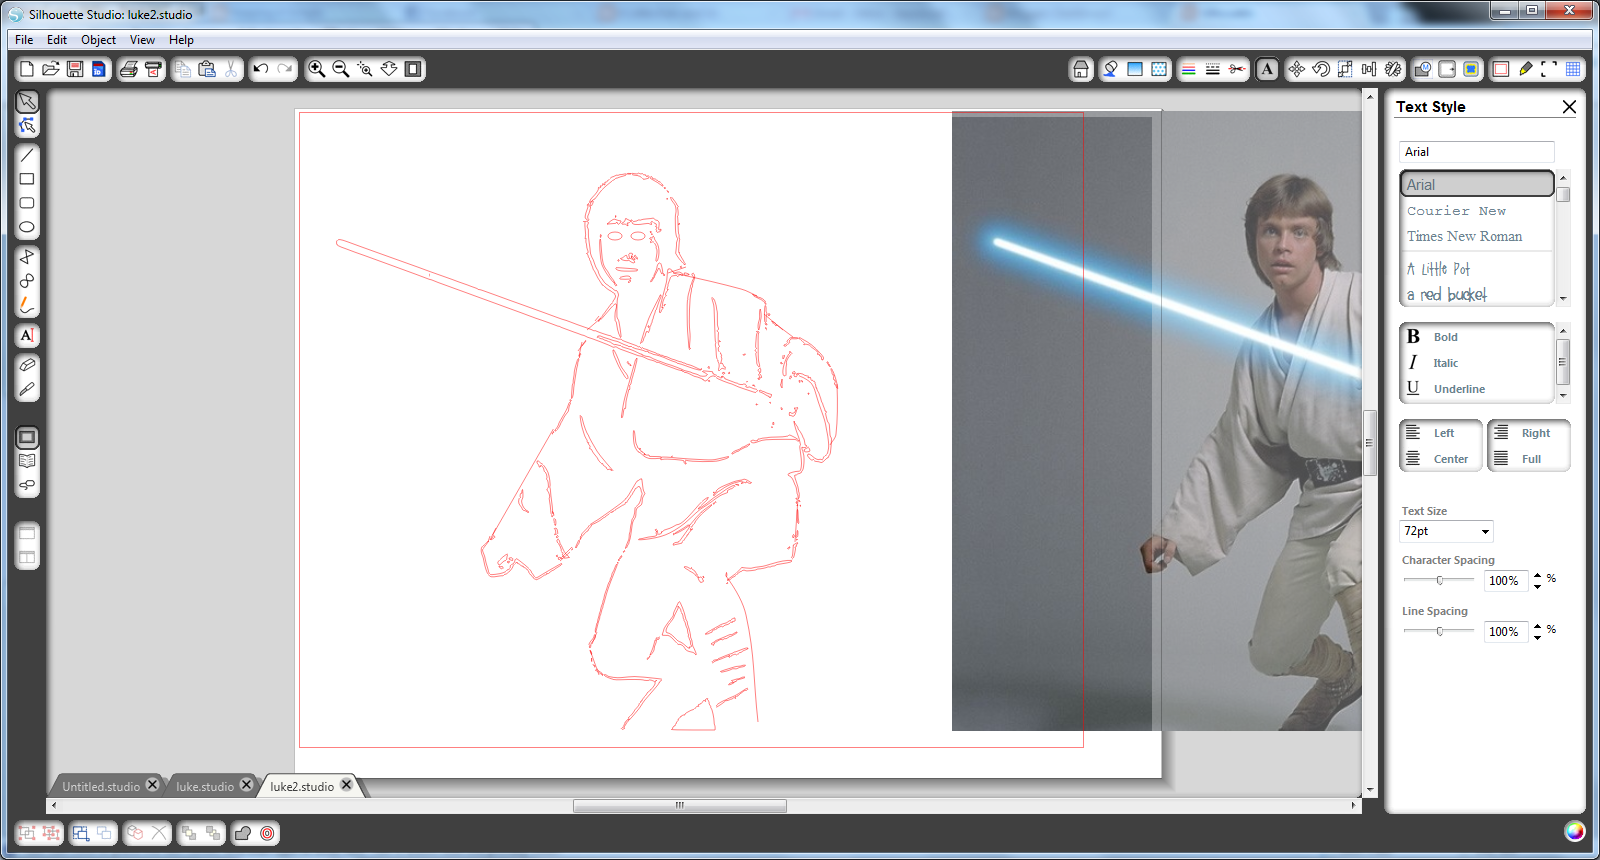
7) I then had to fix some of the lines, so I used the drawing tools for this like his eyes and a few other things.
8) Next I typed in my words and then right clicked the area. I then clicked onto the mirror horizontally. You have to do this for the words in the heat transfer.

I used black heat transfer for the Jedi and teal heat transfer for the words. I did move the words off of the white area when I was cutting it. I then ironed it onto a shirt and just like that, he has a fun Jedi shirt! For a full tutorial on how to cut and iron the heat transfer paper, go here.
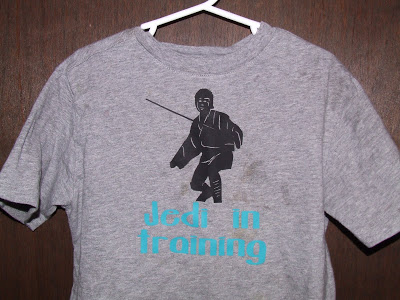
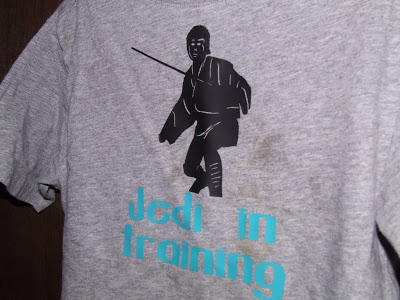
When I showed my son his shirt, his eyes just lit up! It’s such a great feeling when you make something for your child and just love it! 🙂
Don’t miss the Silhouette promotion, check it out now!


I love this idea! I didn't know the silhouette had this option! My son loves Star wars and would totally love this! I just hope I can figure it out! Thanks for posting this!!
alove2create.blogspot.com
Love it! Thanks for telling each step of the process, I've been wanting to do some personalized pictures and you really made it simple.