As part of my partnership with GE, I received coupons for my GE light bulbs. All opinions posted about my GE Lighting experience are my own.
One of the first things I did in my craft room was replace the light in there. It was just so dark and needed some much needed light. I liked the shape of the old fixture, so instead of getting rid of it, I decided to reuse it and use it for a decoration. Recycling and reusing things is a great way to save money too.

I love changing out light fixtures, it’s an easy way to update a room and it’s a fairly inexpensive thing to do. Here is the light before and after. Much better, right?


This is how I made it:
I took the light fixture apart from the bulbs.

I loved the little glass on the edge, so I put painters tape around the edge to save that.

I cut out various sizes of the a swirl out of vinyl.

I put the vinyl onto the plate. You could easily just paint it and then put vinyl on it, but I loved the frosted feel and texture of the plate, so I wanted to expose it.

I spray painted the whole thing.

Carefully I took off the vinyl. Make sure you let it dry completely so it doesn’t tear the paint.

And that’s it! Super easy and quick!

I love how it looks in my craft room! I love being able to reuse something and make it pretty!

Reusing, reducing and recycling are great ways to save money. But another great way is to use energy saving light bulbs. I use energy efficient bulbs around the house, but I never thought about replacing the ones in my chandeliers. Honestly, I didn’t even know that they made them. So I headed to Walmart and checked out the GE lighting section. They had a variety of different kinds of bulbs. For my whole shopping trip, check out my Google+ album.

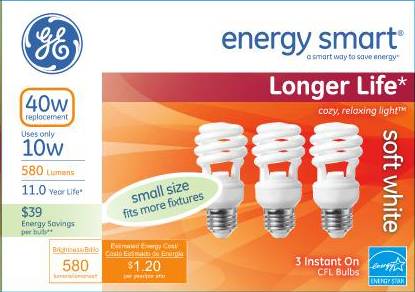
Since there are so many lights in chandeliers, it’s a great way to start saving money and saving energy. I have 6 bulbs that are 40w each. That’s 240w going at the same time and I’m in my craft room a ton, so they are on a lot! The #GELighting bulbs that I picked up use only 9w, so that’s only 54w, just a little more than one bulb was using. It really starts to add up! Woohoo for saving money and energy!

I’m thinking I need go and replace some more bulbs in my house. In the ceiling fans, vanities and other light fixtures. Find the right energy-efficient bulb for you.
In the Apirl 14th paper, GE will have a coupon for $1 off any energy efficient product. So watch for that. Walmart will have these bulbs on an end cap so you can easily find them.

I am a member of the Collective Bias® Social Fabric® Community. This shop has been compensated as part of a social shopper insights study for Collective Bias® and GE Lighting #cbias #SocialFabric. All opinions and content are 100% my own.
I would love it if you followed along.




How clever! What an awesome way to reuse something. It turned out beautifully.
That looks great! I love the idea!
Very cute idea! I wish I had old light fixture plates I could recycle like that! All of ours were the round bowl type. I love those light bulbs too. We don't use anything but energy efficient light bulbs. The investment in the beginning seems like a lot but they last forever!
My parent's house has one of those light fixture plates in every room. It would be fun to spruce them up a bit. Love the color you picked for yours.
very cool! I got a Silhouette for Christmas so I might have to try this. I'm always looking for more things to vinyl.
What a great idea! Thanks for sharing….
You know you are supposed to have a Haz Mat team clean up if you break one of the CFL bulb right?
Love this! I would never thought of doing that in a million years. Very cute design and color, too.
I'd be thrilled if you'd link up at this week's Off the Hook!
Love your light plate idea! I'll give it a try using some of my Big Shot and dies to create the swirls!
Such a clever way to upcycle that old light shade. It's so cute!
This is a great project!! I would love for you to share at my Tasty Thursdays linky party and GIVEAWAY. Going on until Sunday. Hope to see you there and spread the word!! Thanks, Nichi – The Mandatory Mooch
http://www.mandatorymooch.blogspot.com/2013/04/tasty-thursdays-36-giveaway.html
With that hole in the middle you should add a working clock piece–they are cheap and easy. Would make your plate into a perfect clock lol.
So cute!! You've given me a great idea to using my Silhouette! 🙂
Serena
Thrift Diving
Love this!
I really like this idea. How did you attach the decoration to the light before painting it?