
First of all, what is bias tape? Bias tape is fabric that is cut on the diagonal , then has the raw edges folded to the wrong side. Single fold bias tape has the edges folded once, double fold has the edges folded twice. It can be used to finish seams or add a decorative touch to a garment, or both.
Bias tape is sold in packages at the fabric store, but lately I have really enjoyed making my own. To cut the fabric into strips, I always use this tutorial. You can get yards of bias tape out of a fat quarter with this method, and you only have to sew two seams!
I just got some of these bias tape tips, and I love how they help me quickly iron my cut strips into folded bias tape.
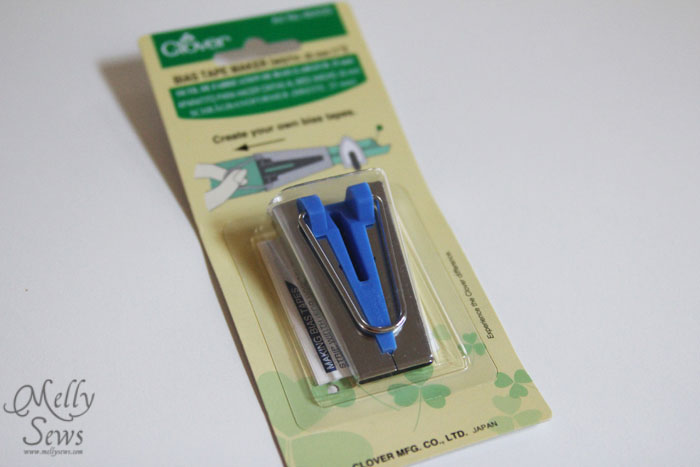
Bias tape tips are usually available in the quilting tools section of the fabric store. But now that I understand how they work, I got to thinking – what if you don’t have one? What if you need a non-standard size of bias tape? Well today I’m going to show you how to make a little jig out of supplies you already have at home to make your tape ironing easier, even if you don’t have one of the handy bias tape makers shown above.
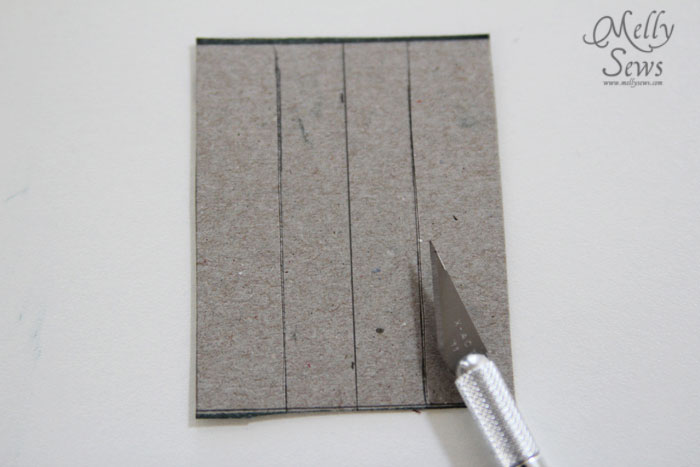
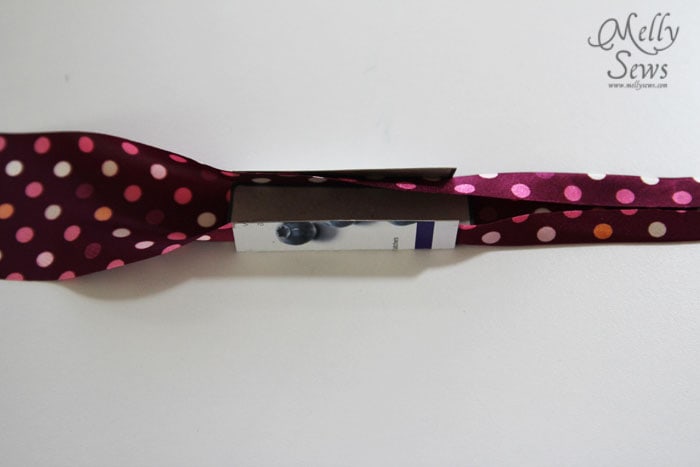
All you need is some lightweight cardboard – I used a cereal box.
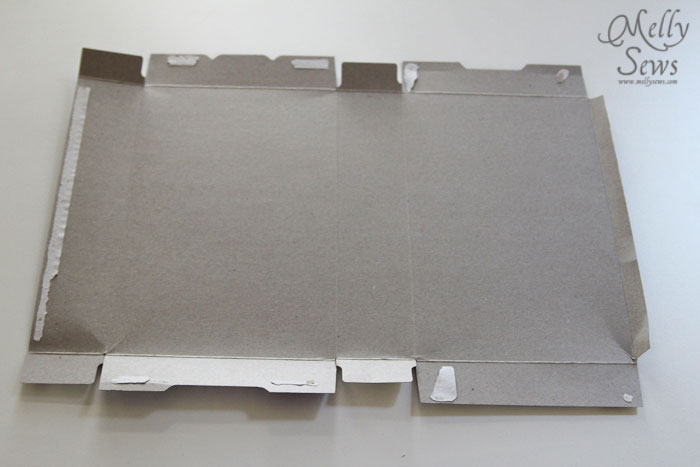
Mark out your jig – it needs to be twice the width you want your final single fold bias tape to be, or 4 times the width you want your double fold tape to be. So I made mine 2 inches wide since I wanted 1″ wide tape. It’s about 3 inches long. You don’t want it to be too long because that makes it harder to move along the fabric.
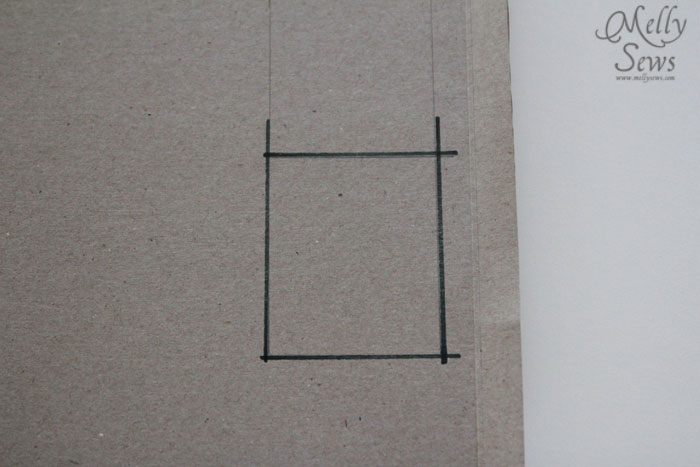
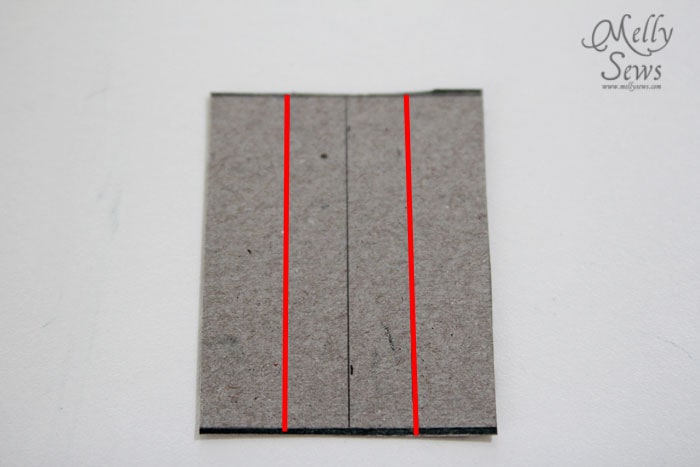
Cut your jig out, and also cut out a piece of cardboard that is the same length, but 1/8″ less wide than you want your finished bias tape to be. So I also cut out a piece that was 7/8″ by 3″.
Mark the center of your jig, then mark out the width of your bias tape – so I marked 1/2″ to each side of my center line to get my 1″ total width.
With an x-acto knife, a utility razor or even carefully using scissors, score but do not cut the lines you marked. This will allow you to easily fold the cardboard in.
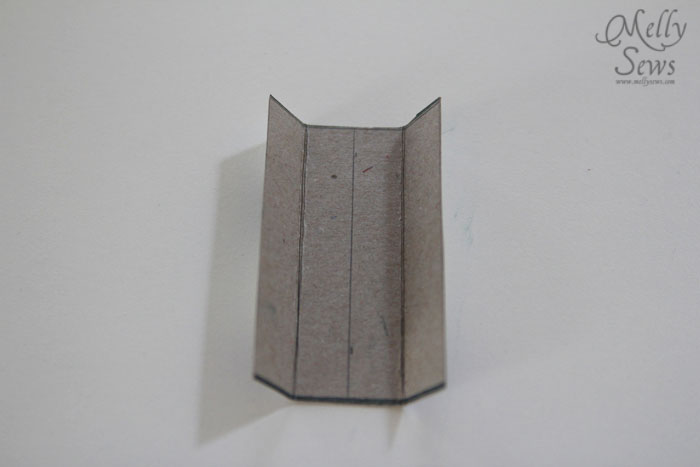
Now fold up your edges.
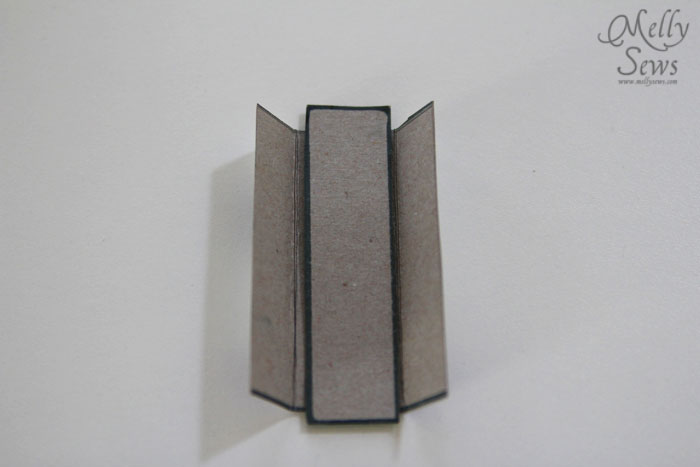
To use this, lay your fabric strip in the jig right side down, and place the other piece of cardboard on top. Fold in the edges. The folded cardboard edges help make your fabric fold, while the other piece of cardboard helps hold the fabric in place.
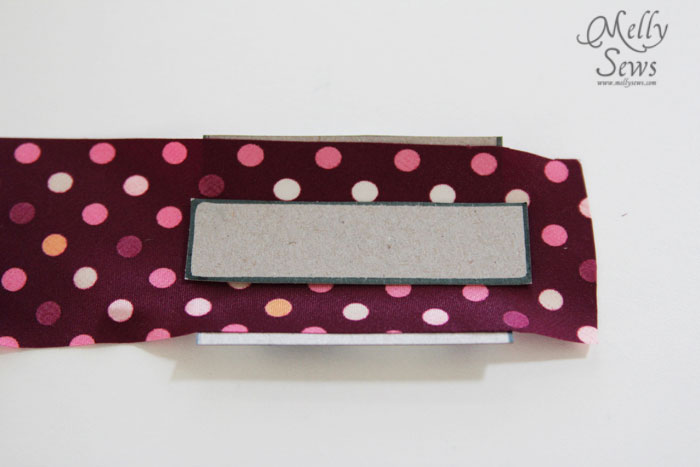
Use this next to your iron, and scoot your jig along the fabric as you iron to make your single fold bias tape.
To make double fold tape you would first make single fold tape, then you fold the single fold in half and line up the edges and iron again. I don’t use a jig or a tip for this part, it’s not too hard to iron in one fold.
Now, how to sew on bias tape. Excuse the ugly scrap colors – I chose them because I thought they were easy to see the right and wrong sides of the fabric, and sewed with contrasting thread for the same reason.
I’m going to show you how to use double fold bias tape, as this is the more commonly used kind to finish edges – think placemats or necklines.
Start by unfolding the tape and pinning it to the wrong side of the fabric with the raw edges even.
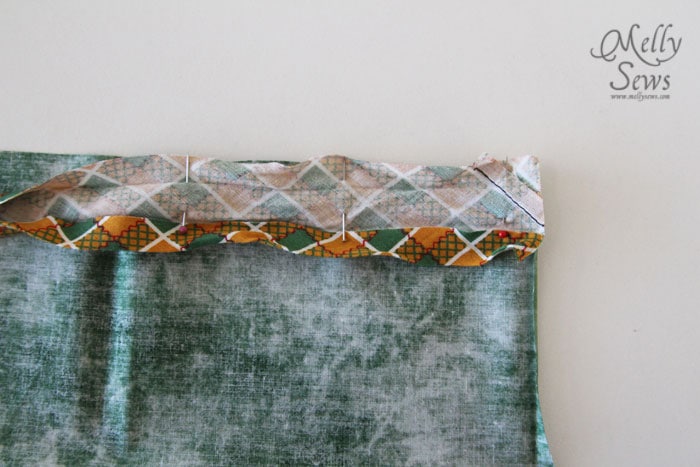
Sew right in the fold of the bias tape.
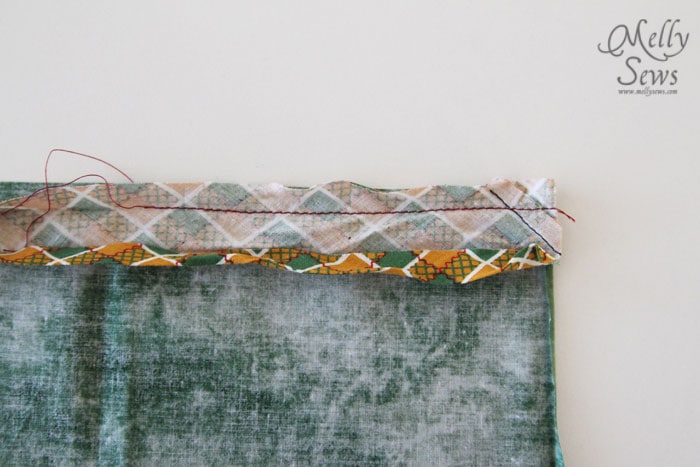
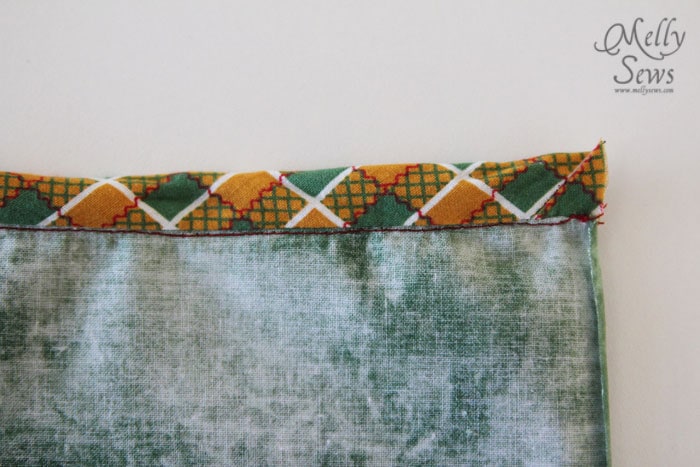
Wrap the tape to the right side of the fabric and pin, just covering the stitching line with the folded edge.
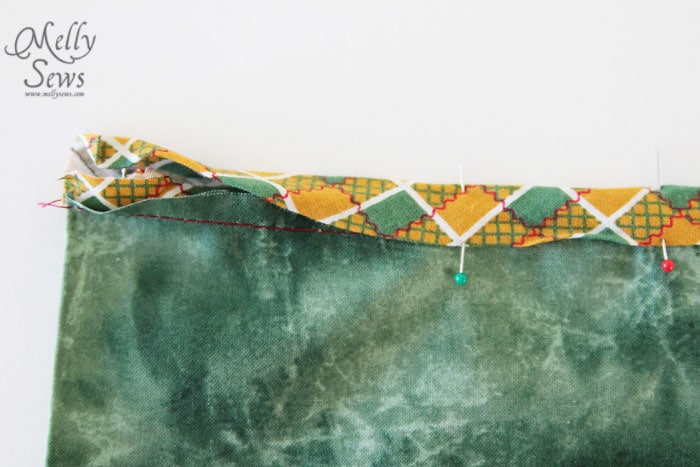
Stitch very close to the edge of the tape.
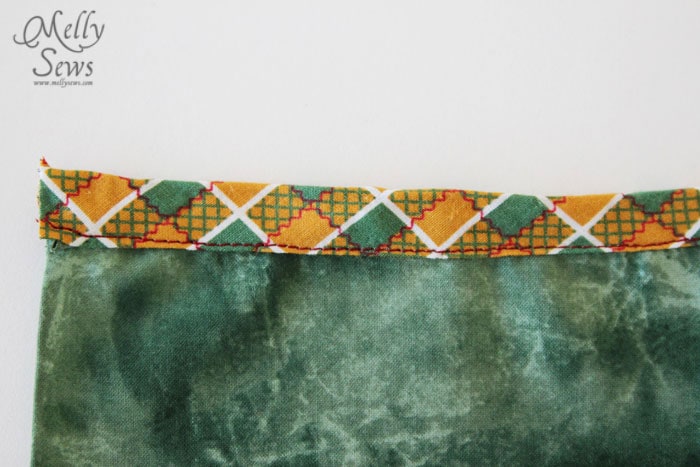
And on the back side it looks like this:
Because bias tape is cut on the diagonal, or bias, you can stretch it around curves. At corners, you’ll want to miter the corner – this is a good tutorial to show you how to do that.
Now have some fun making your own bias tape and using it to add a professional looking finish and a pop of color and pattern to your sewing! Until next time, happy sewing.

How inventive!! I know I could have used this a time or two in a bind, good tip for the next time!
Wow!!! I looove thus idea!! 🙂
Nice 😉 I have found another useful link in this same topic.. sharing it here so that others may find it too..
Printable Bias Tape Maker
This is genius, thanks!
Thank you for sharing this – I see a lot less burned finger tips in my future!
Thank you so much for your tutorial, it has come to me via penterest and just in time. I am currenty working on a project that requires lots of bias tape and I want to make my own. Your little gagit is just what I needed. Thank you once again.
Hi thanks for the tutorial. But I am a bit confused how to use it. I
s it possible to give a video demonstration. I cant envision how it is supposed to work. The middle part is confusing me. Wont it move when you pull the fabric through?
Thank you very much. Your tetorial was usefull and inexpensive.
Tina from Greece
You are such a life saver!
Wow! Love it
Thanks!!