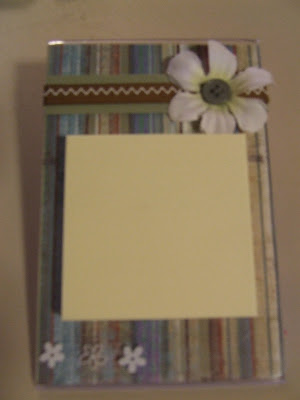
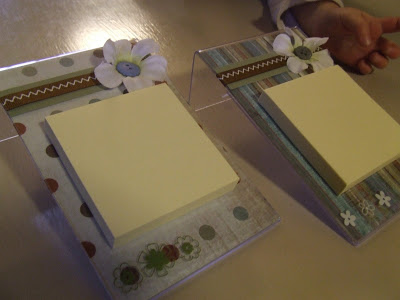
When I saw this idea I knew immediately that I wanted to make them for my son’s preschool and sunbeam teachers. So I went to the dollar store and picked up several 4×6 plastic frames. I cut the decorative paper out 4″x6″. Put some scrapbook supplies to finish it off. Just in case you are wondering, the little flowers on the bottom left side are rub-ons directly on the plastic. Seriously, it was so easy and quick, each took about 5 minutes (if that).
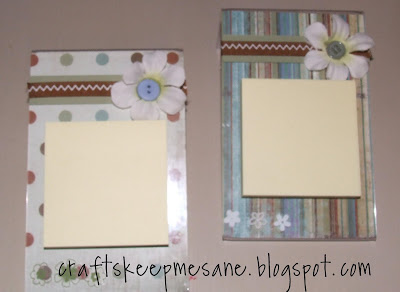
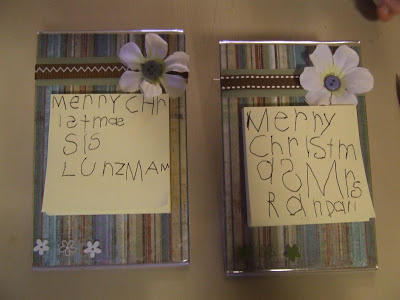
I had my son (who is 4) write on the first post-it note to personalize it. I wanted my son to “make” the gifts, but I also wanted them to be cute so this was my easy solution, it was a win-win 🙂
These are so clever! I'm going to have to make some! I like your blog, you've got some great ideas! I'm following you now. Hey, stop by and visit me!
http://songberries.blogspot.com
very cute, creative and simple…TFS
I love this idea! I really need to do this for some of my peeps here at work. Thanks for sharing.
LOVE this, so cute! I'm confused about how and where you attached the scrapbooking paper and embellishments… Mod podge to the back or it's just on the front? If so, how did you attach it all on the frame?
Thanks!!! 🙂
To Ava's Avenue:
– The paper is just inside the frame, where the picture would go. I just attached the embellishments with photo squares and a glue gun for the flower to the front. You could use mod podge.
Kaysi
Keeping It Simple
Oh my… I'm so embarrassed, lol! Duh! It's a frame… Apparently forgot that part. Haha! Thanks for your response and tips on using the glue gun and photo squares… I have glue dots. Going to try those 🙂
Thanks again! So cute and PERFECT teacher gift for my daughter to give to her preschool teachers on Friday… Yay! I was beginning to stress b/c I was having trouble finding "just the right gift", but this is it!
This is perfect! I bought 100 little clip things on sale at Staples a while back. At the time I only thought of making magnets with them, then decided to make little clipboards for a notepad. But I dadn't figure out what the little clipboards would be on until now. Thanks!!!
I already made some of that as gift for friends and teacher. Very cute!
http://m.facebook.com/home.php#!/photo.php?fbid=470248162723&id=529267723&refid=13
http://m.facebook.com/home.php#!/photo.php?fbid=477275837723&id=529267723&refid=13
I hope the picture will show..