This is one of my favorite projects. I made these boxes for Christmas last year for the grandparents. It is just packed full of pictures but looks stylish just as a box. So here are the instructions to make this awesome box.
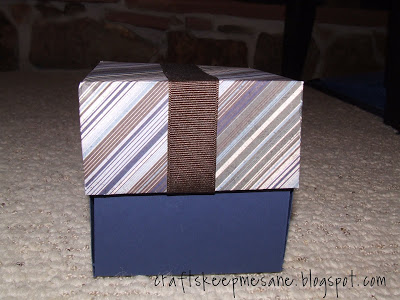
Photo Box Instructions A: Choose paper, you will need 5 pieces of 12×12 paper, 1 for your lid and 4 for the box. 1. Choose what paper you want for the outside and lid of your box.2 Choose what papers you want inside your box (starting from the outside 1st, 2nd, 3rdand 4th. note: the 1st is the outside sheet.) Remember the your 1st paper will be the outside of the box, so choose a double sided paper or solid colorB: Cut paper (1st sheet leave 12×12)1. Cut 2nd sheet to 11 1/2 inch size. (Trim 1/2 inch off 2 sides or 1/4 inchoff 4 sides)2. Cut 3rd sheet to 11 inch size. (Trim 1 inch off 2 sides or 1/2 inch off 4 sides)3. Cut 4th sheet to 10 1/2 inch size. (Trim 1 1/2 inch off 2 sides or 3/4 inch off 4 sides)4. Cut 4 inch square out of all 4 corners of all 4 sheets.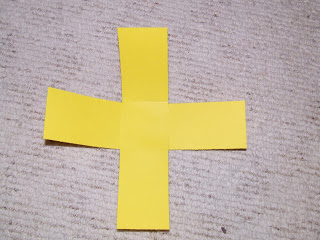 C. Score paper 1. score at 4 inch flaps on all 4 sides on all 4 sheetsD. Adhesive1. Stick all 4 sheets together, in order in center.2. Stick photos on and decorate with scrapsThis is one that I made for a baby shower, I include little flowers and words so they can decorate it when they fill it with pictures.
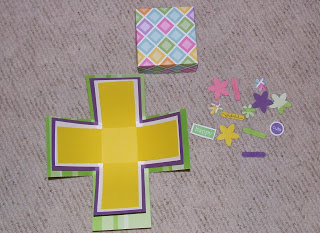
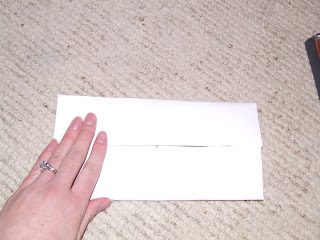
Photo Box Lid Instructions1. Measure exact center of paper (on the side that will not show). Use 6″ square to measure2. Fold 4 corners into center. (Keep corners folded in while following the rest of the directions through step 4)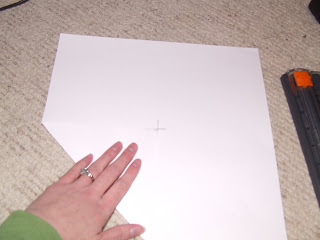 3. Fold 2 sides into center, then unfold. Fold other 2 sides in the same way and unfold.
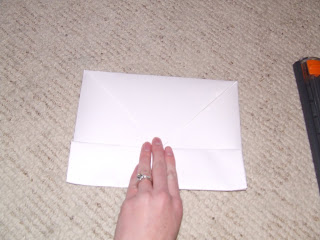
C. Score paper 1. score at 4 inch flaps on all 4 sides on all 4 sheetsD. Adhesive1. Stick all 4 sheets together, in order in center.2. Stick photos on and decorate with scrapsThis is one that I made for a baby shower, I include little flowers and words so they can decorate it when they fill it with pictures.Photo Box Lid Instructions1. Measure exact center of paper (on the side that will not show). Use 6″ square to measure2. Fold 4 corners into center. (Keep corners folded in while following the rest of the directions through step 4)
3. Fold 2 sides into center, then unfold. Fold other 2 sides in the same way and unfold.
4. Cut triangle from sides.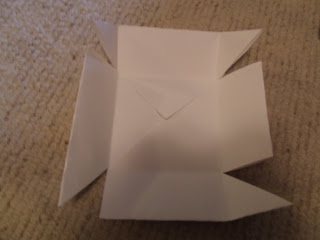 5. Unfold and Refold into Box, glue the triangles onto the other side to form box.
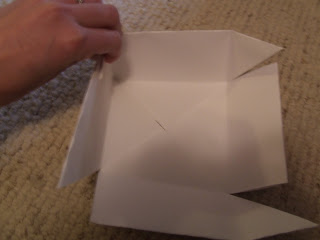
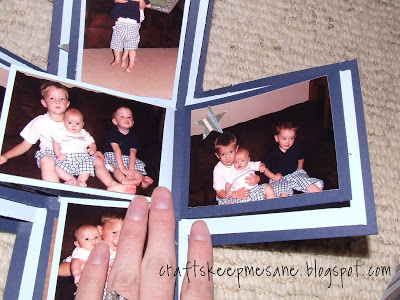
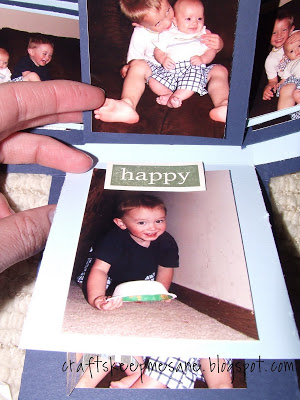
Here is a completed one with pictures and decorations. The pictures are wallet size.
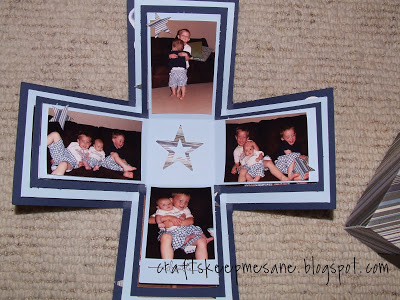
I had so many pictures that I even put pictures on both sides of the paper. I think I was able to put 20+ in there!

Really cute! I love it!
I know I am going to feature you in my favorites. Sorry they are going up late but I have been sick and now have a sick little girl.
Cheri
Good job explaining that especially the lid! On mine, I cut squares instead of triangles for the lid.
i have a problem i din get the lid part clearly
its a beautiful idea…but i'm having a problem understanding the lid part
i got it thnkw 🙂