Christmas Countdown Sign- How to Put Heat Transfer Vinyl on Wood
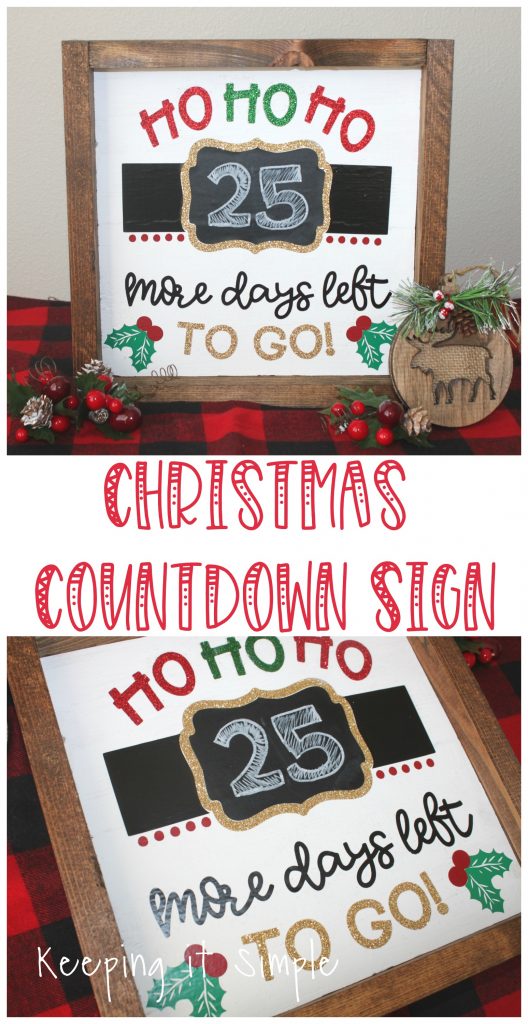
During the holiday season, one of the most common questions for my kids is, “How many more days until Christmas?”. This starts way before December even gets here. So I made up this fun Christmas countdown sign so when they want to know, they can go see for themselves! We love counting down the days until Christmas and this sign is a fun way to do that! Plus the kids can update the sign themselves too :).
Here is a quick video to show you how I made the sign and how to put heat transfer vinyl on wood.
This is how I made it:
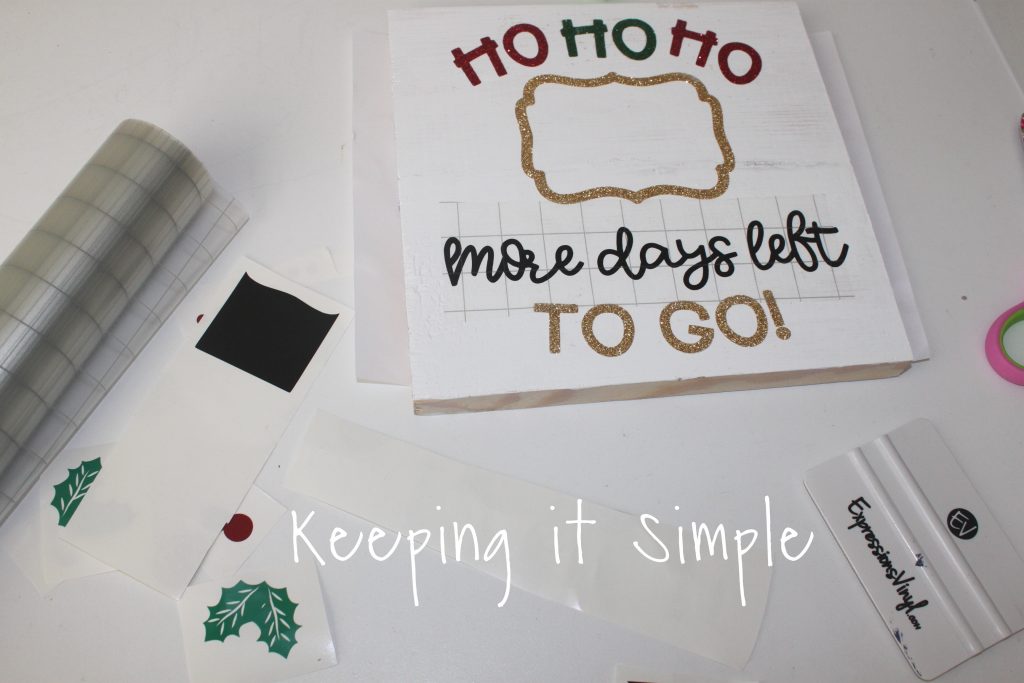
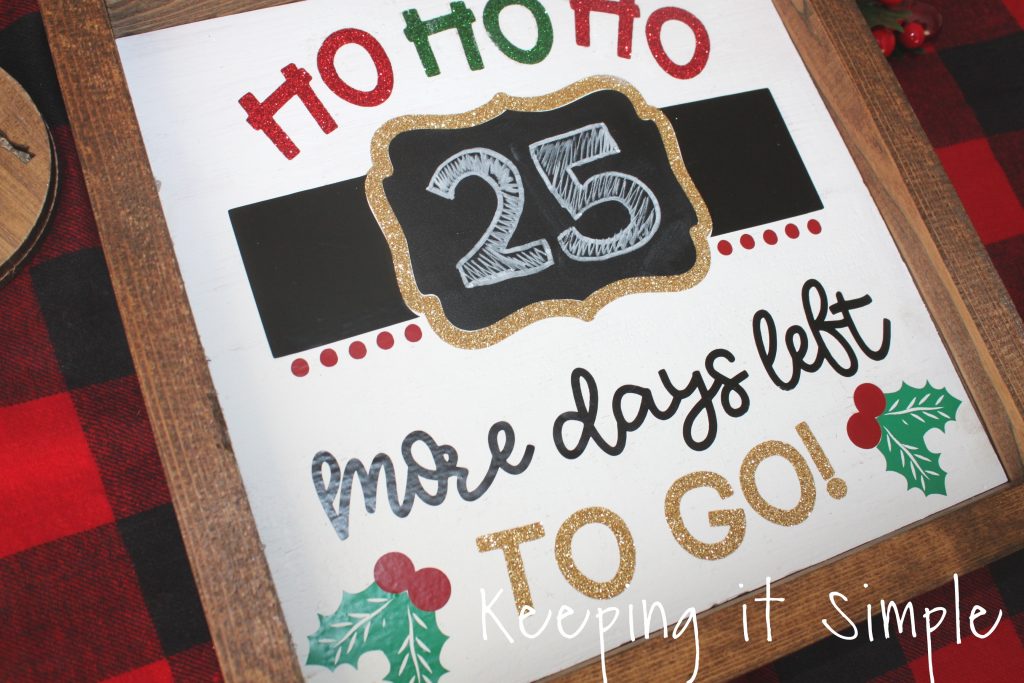
I absolutely LOVE the glitter heat transfer vinyl. Nothing else compares to it, glitter wise. There is a glitter adhesive vinyl, but it just isn’t the same. So I decided that I wanted to put the glitter heat transfer vinyl onto the sign. And yes, you can put HTV on wood, how cool is that?! First I started with a 1 x 10 board and cut it into a square, which was roughly 9 1/4″ by 9 1/4″ and then I painted it white. I then used several different types of vinyl. I used the glitter HTV in the colors old gold, grass and red. I then used the series 31 vinyl in black, warm birch and clover. And lastly I used some awesome chalkboard vinyl.

I cut out the design out with my Silhouette CAMEO. I got the design for an awesome Christmas bundle so all I had to do was separate the colors and cut. For the glitter HTV, I mirrored the image and cut it with the shiny/plastic side down. You can get the cut file here.
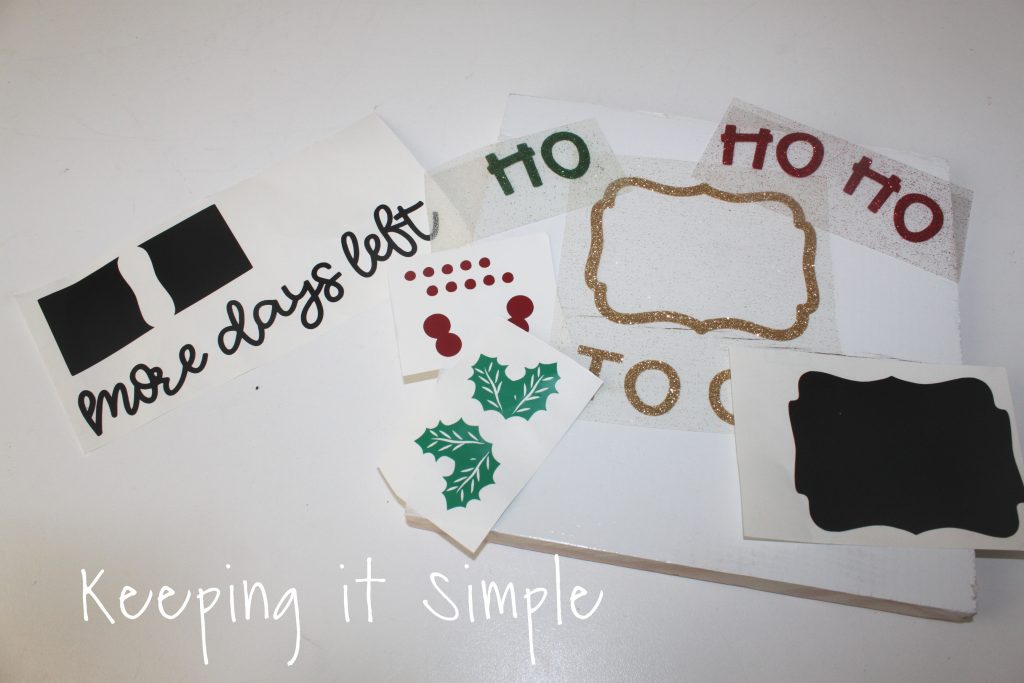
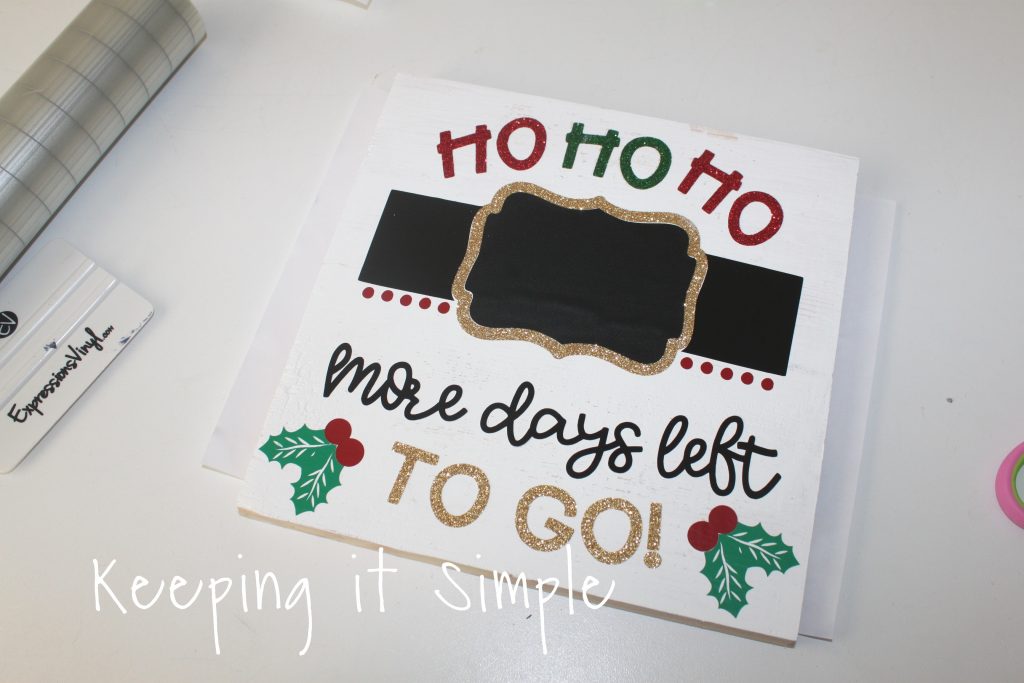
I put the heat transfer vinyl onto the sign first. I used some painters tape to make sure that the vinyl didn’t move when I pressed it with an iron.

I used some multi use paper when I ironed the HTV on. I put a lot of pressure onto the design and then I held the iron onto it for about 10 seconds. The trickiest part about putting the HTV onto wood is getting it off of the carrier sheet. So once it was off, it was super easy to put it onto the wood. So at some points I would just peel off the vinyl and put it onto the board and then put the multi use paper down and ironed it onto the wood if it wasn’t coming off the carrier sheet easily.
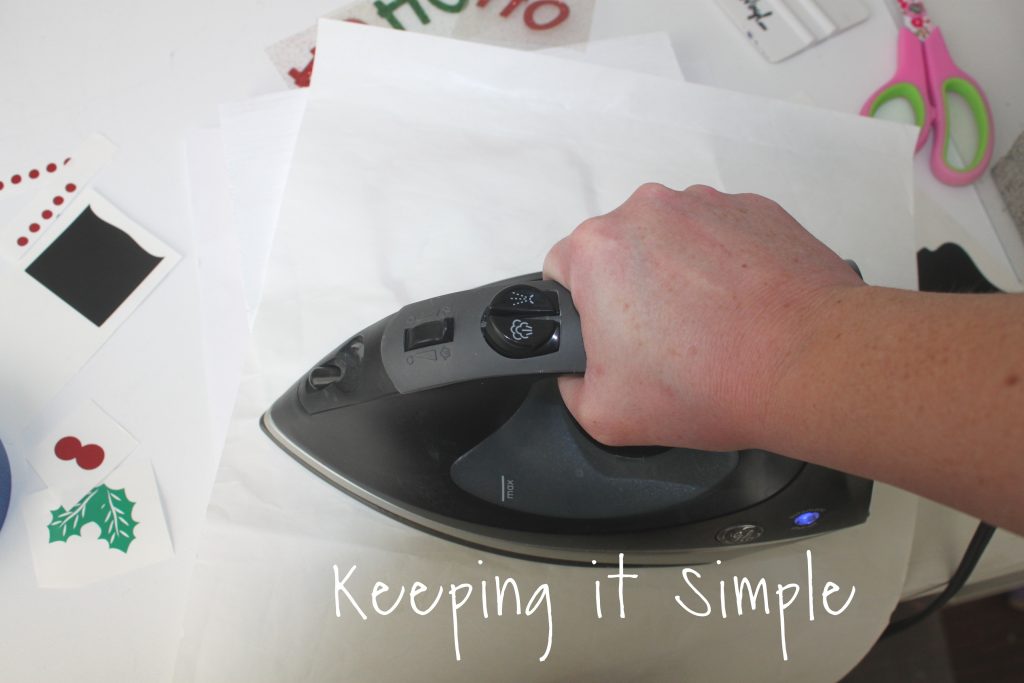
I continued to put the HTV onto the board. I love how the glitter looks on the wood, it’s so amazing!
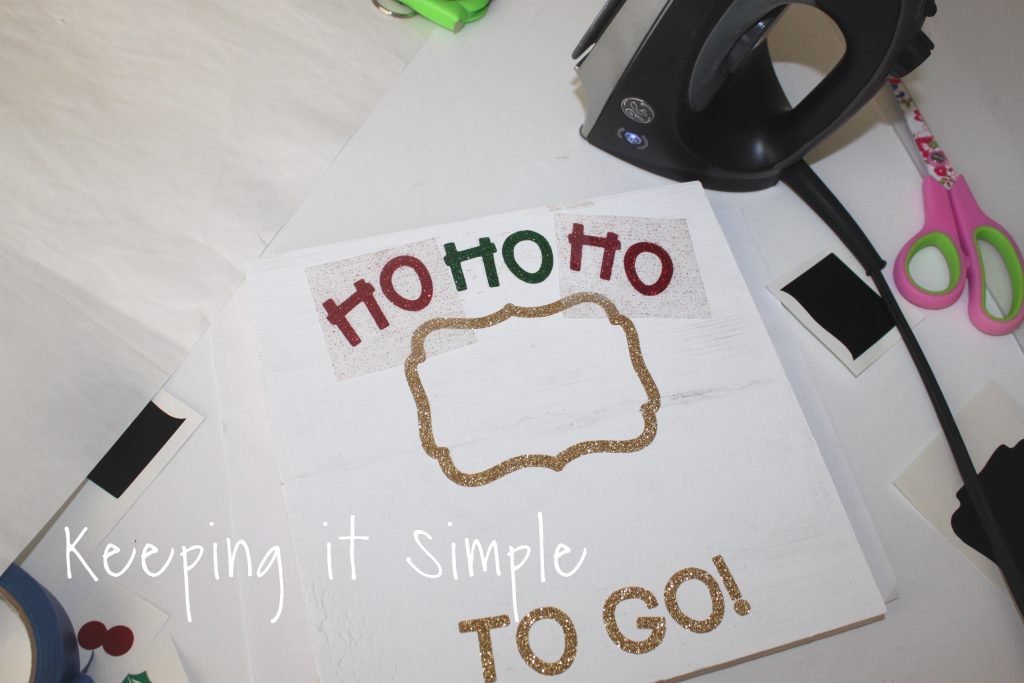
Once all the HTV was ironed onto the board, I then put on the vinyl. I used some grid transfer tape to put the vinyl onto the wood.
Here is all of the vinyl onto the wood now, I love it!
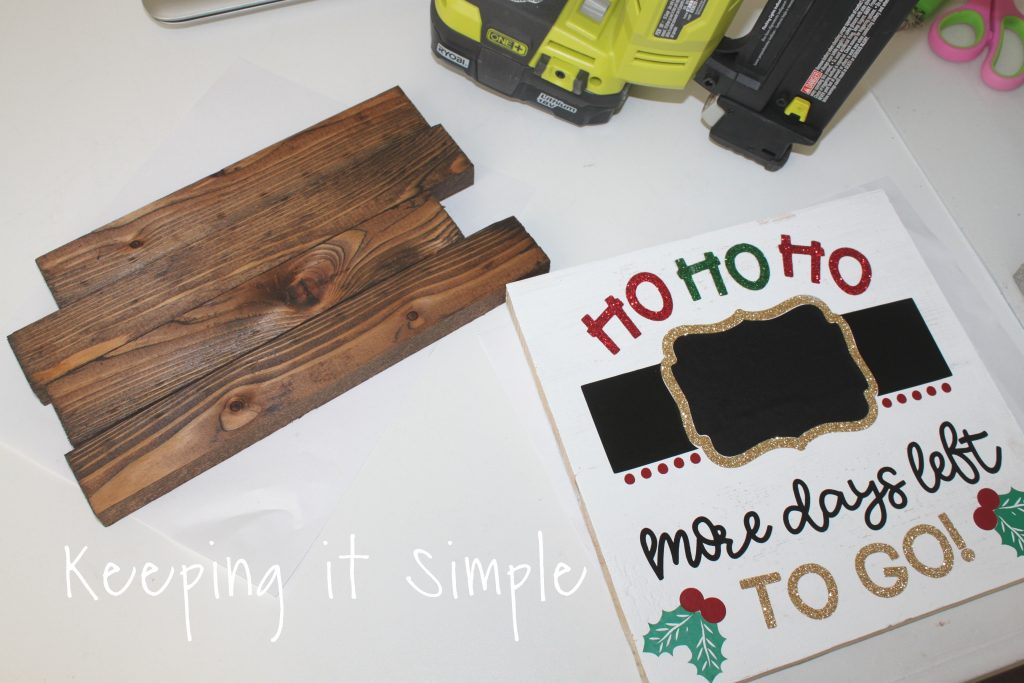
For the frame I cut some 1 x 2 pieces. I cut two pieces 9 1/4″ and two pieces 10 3/4″ and then stained them with a pretty wood stain. Then with a nail gun and 1 1/4″ nails, I nailed the frame onto the board.
And that’s it!! I love how it turned out! The chalkboard vinyl is awesome and it really does work. You can use a chalk pen or regular chalk to write on it and it comes right off (as you can see in the video).
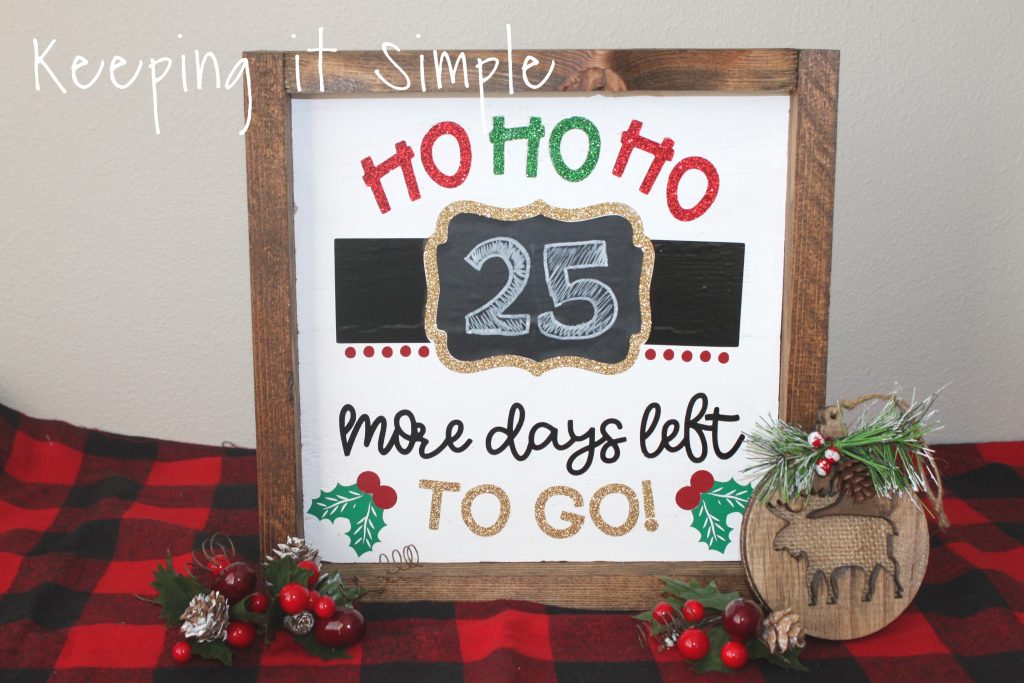
Here is a close up of the sign, I love it so much! The glitter heat transfer vinyl is amazing!
Make sure you check out my other Christmas ideas!


This post contains affiliate links.
Leave a Reply
You must be logged in to post a comment.