**** Post update: I would do this to a chair or inexpensive piece of furniture but I wouldn’t do it on a couch or in a car, I would let professionals do that. Make sure your piece is leather and not pleather.****
By now you all know that I love garage sales! Well I really do. Sometimes I just have to not go because I don’t want to over clutter my house or I’m not up for a huge project that seems to happen after a good find. Well about a month ago, I found this chair for $5

I had to look beyond the ugly color and the horrible dust and see the potential of it.
After many hours of work, I finally turned the chair into this.
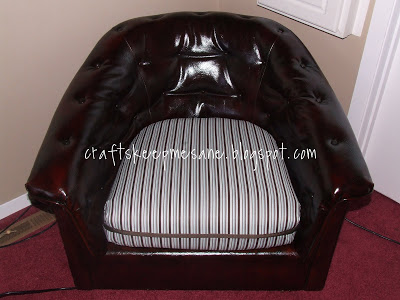
Now it’s sitting in the corner of my bedroom. I love having it there, it’s really comfy to sit in, but most of all, I just love looking at it!!
When I got it, I thought that maybe I would just paint it, but then I found out that I could dye the leather. So now I’m going to show you how to dye leather!
What you will need:
-Leather Dye
-Acetone
-Spray bottle
-Gloves
-Cloths (or an old sock :D)
-Leather finisher
You can actually combine dyes if you need to. The brown that I got wasn’t dark enough, so I combined it with a black dye to get the dark brown. I got my dye from Leather Unlimited but you can also get it from Ebay.

1) First you will need to clean the leather with acetone and a cloth. Using a sock, I went all over the chair. (I did clean it with soap and water to get all the dust off)

This is how it looked after the acetone

Notice the different in color, it really cleans it!

Now it’s time to dye the leather!!
2) With water, I sprayed the chair to make it damp. Because I had such a big area, I would spray a little area at a time and then dye it and then spray another area.

3) Put the dye onto the cloth and wipe it all over the chair. (Wear gloves!! I made this mistake and was cleaning dye off my hands for a week). Dye the whole area trying to make it as even as possible

4) After each coat, take a dry cloth and rub off the excess dye

Do as many coats that you need. This is what mine looked like after 6 coats of dye. I let it dry about 1 1/2 hours between coats

Now you have to use a finisher to protect the leather and dye.
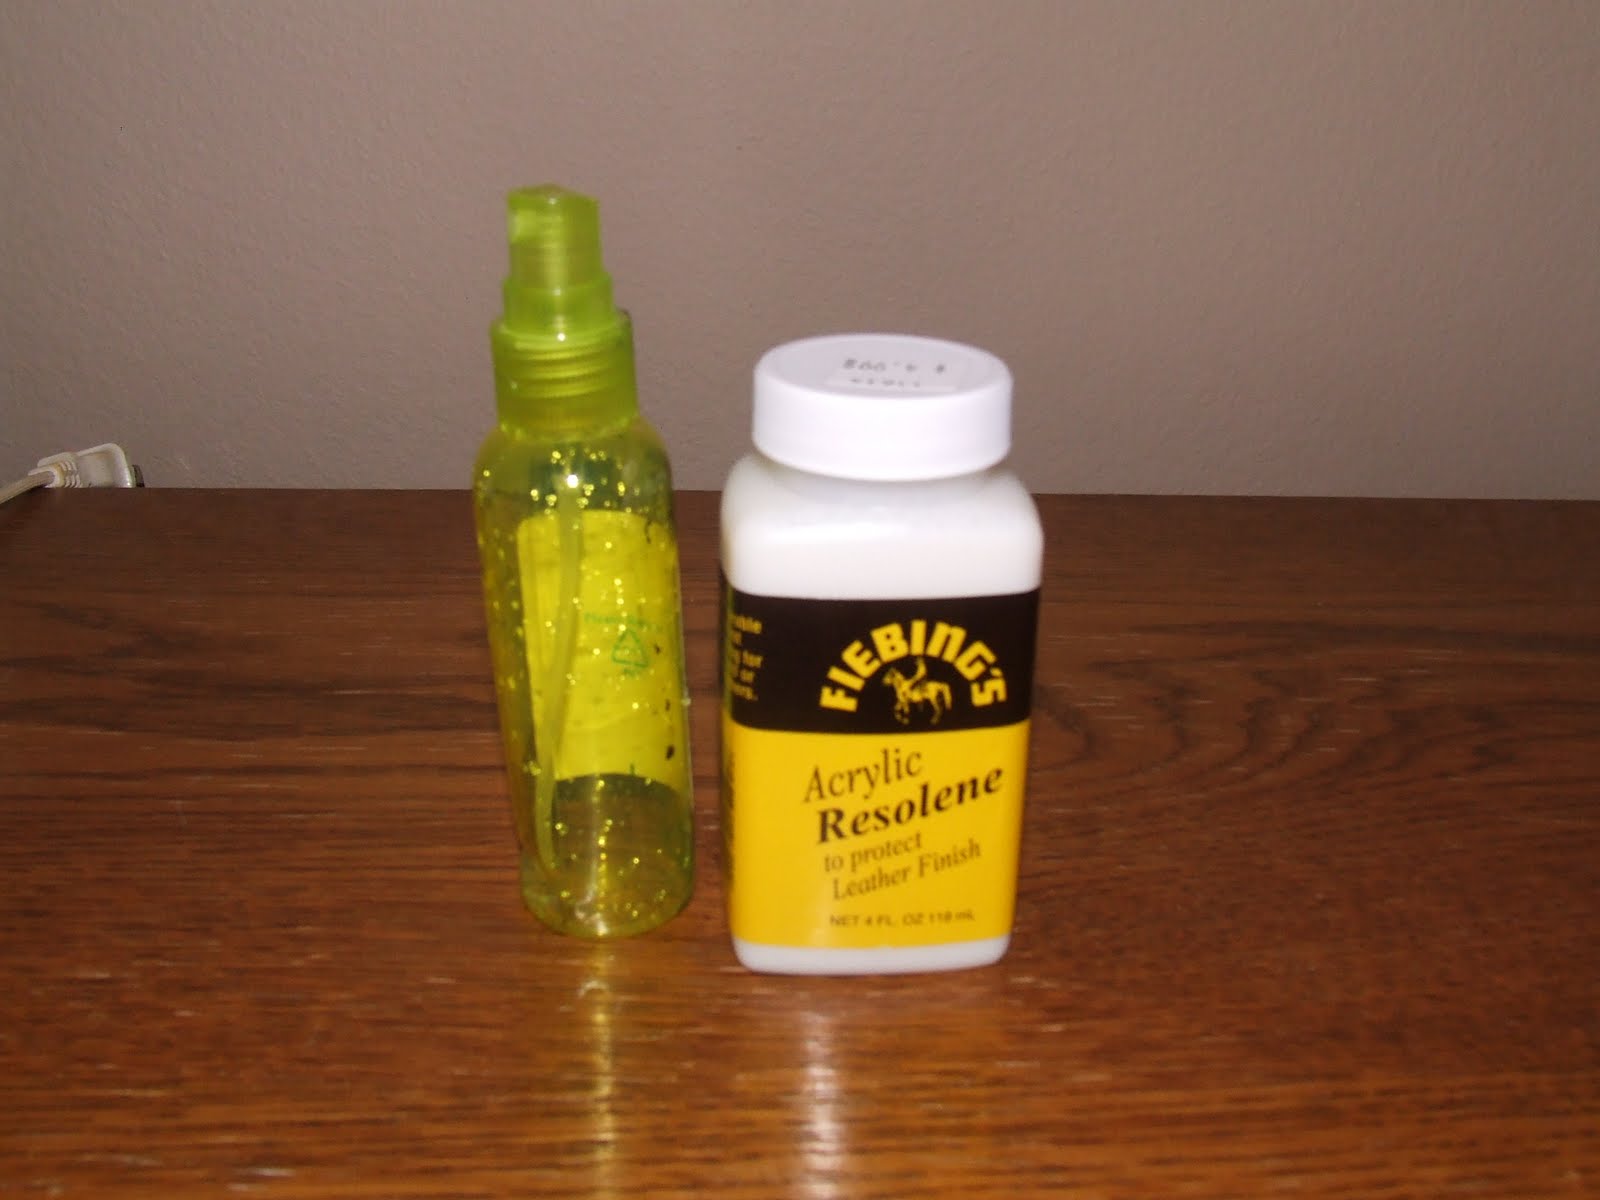
5) Using the spray bottle, I sprayed the finisher on the chair. Like the water, I did a little at a time.

6) Then with a damp cloth, I spread the finish evenly. I used long strokes to do this.

The finish leaves a nice gloss!

Because the cushion was ripped and not in good shape, I just put fabric over it.
I know that other people actually take off the original cover and make a completely different cover for it, but I don’t. I actually just sewed it straight onto the cushion. I don’t know why, maybe it’s because I’m too afraid to touch the foam that in the cushion…. 🙂
Once the fabric was on the cushion, I then took an 1″ grosgrain ribbon and put it over the lip of the cushion. Using a yarn needle, I then sewed it onto it.
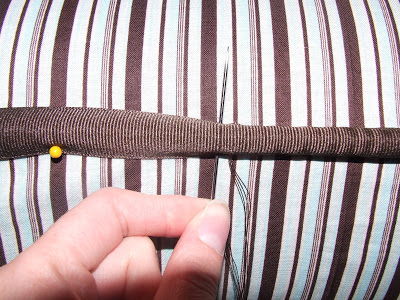
I love the way it looks altogether!

I wanted to use a flowery fabric but my husband didn’t care for it, so I made a pillow to add a little girly touch 🙂

This is actually a really easy process! You can dye shoes, belts, purses and furniture!

wow!!!! amazing. i never knew that leather could be dyed at home:-). thanks for sharing this. i wonder if these dyes are available in India????????????
I liked the way you changed the chair. Nice job 🙂
wonderfull..wonderfullllll :))
awesome, i just got a leather chair & ottoman that needs to be redone. thanks for the help. where did you get your dye &finish?
Danielle:
I got the dye from a site called leather unlimited but you can also buy it on ebay. Good luck!
Kaysi
so amazing…love the color!
Thank you so much for sharing this. I had no idea you could die leather. Where did you purchase your supplies? I am bookmarking this post for future reference.
I love how you did the piping…I might even be able to do that! 🙂
Now this makeover is really cool ! I didn't know you could re-do leather like this. I'll be on the lookout at the yard sales and flea markets!
Wow! who knew….thanks for the post! Now I will keep my eye out for leather!
Thanks for stopping by my blog! Thanks for sharing your tip on dying leather! It looks great!!
I had no idea you could dye leather. Kind of a duh moment – the leather was dyed at some point. Your chair looks beautiful!
Thank you so much for posting this! I have a leather chair we bought 3 years ago on discount because the color had rubbed off in spots. I've been hiding it under throw blankets, but now I know how to fix it!
Wow! I had no idea you could do this! It looks great.
Thanks for linking up with Sugar & Spice.
Wow! What else can you say but that, lol. Quite a differece. I'm going to feature this tomorrow 🙂
This was such a wonderful tutorial, I love the idea of putting grosgrain over the welting, too. You should be very proud. I wish we could go to garage sales together :).
I didn't know you could dye leather!! The chair looks fabulous now!! Thanks for linking @Creative Itch's "Sew Cute Tuesday"!
My eyebrows shot up in disbelief when I saw that after picture. It looks so good. And I had no idea that you could dye leather!
Thank you for participating in the Creative Therapy session at Life in the Pitts!
Very clever! What a transformation!
Thanks for sharing @ Anything Related!
{Rebekah}
How very pretty that turned out. Very ingenious.
I found you via Simply Designing. Glad I did. Come visit me anytime over at Pittypat Paperie. I'm having a giveaway for a personalized umbrella. Diane
I had no idea you could do this yourself. What an amazing transformation!
Thanks for linking up at my link party!
~Ashley @ http://www.simplydesigning.blogspot.com
WOW! This turned out AMAZING! Great job! 🙂
I can't believe the transformation! It looks fantastic! Thanks for linking it to Hoo's got talent!
Pretty cool! I didn't even know you could do that. Thanks for linking up to Mad Skills Monday!
Ginger
SSB
We've picked this as one of Our Favorite Thingz @ our Anything Related party! Come grab a "I've Been Tagged" button, if you'd like!
http://allthingzrelated.blogspot.com/2010/05/anything-related-tuesday_24.html
wow where do you get these ideas!? Awesome!
Amazing transformation! I would have never thought you could make over leather! So clever and creative! Fantastic job! Thanks so much for joining The Sunday Showcase. I greatly appreciate it! Hope you are enjoying your week! ~ Stephanie Lynn
Hi Kaysi! Just wanted to let you know I'll be featuring your chair today! Stop by and grab a featured button if you like! Thanks again for linking to The Sunday Showcase Party! ~ Stephanie Lynn
Kaysi your chair turned out beautiful. Such a transformation. I really like your girly touch as well.
Thanks for linking up to my challenge.
-Crystal
Amazing! You did a great job! I'd be scared to tackle a project like that!
Your ring caught my eye, it's the same as mine! Beautiful ring! 😉
wow, I had no idea that this could be done. I gotta know, does the color or the glossy finish transfer onto clothes when you sit in it?
Thank you for this! I have a leather couch that is discolored by the sun on one end. And here and there by wear.
I'm also interested that you don't remove the old upholstery. I was thinking of that for a chair, nice to see your technique.
Kathy
Could you email me and let me know if I can do this with upholstery? I have a very comfortable hand me down chair that is a super ugly pink. I would love to keep the chair, can't afford to reupholster it professionally, but want it to be a classic black. Any ideas? 🙂 Heather
Hi Kaysi, it looks great! I'm looking into doing this to my couches. About how much dye and finisher do you suggest I buy? I have a love seat and a standard 3 seater couch. Thanks for your help!
Would you recommend this process for a professional upholsterer to use for a customer? Is your chair a high use chair? has any of the dye worn off?? Thanks for your post!!!
Wow thanks that I found this wonderful site that might help me how to restore leather chair, actually this blog seems like same as the blog of boston leather chair repair. Thanks! Keep on worth it writings like this.