I have not been a big holiday decorator. I have decorated for Christmas and that’s about it. Well since I’ve started this blog and seen how people decorate and that you can do it without breaking the bank, I’ve decided to decorate a little more.
One big reason that I don’t like about decorating is that sometimes it feels like you have just gotten them out of storage and next thing you know, you’re putting them back into storage. Plus, I don’t know about you, but I really don’t have that much storage, so holiday decorations add to that problem.
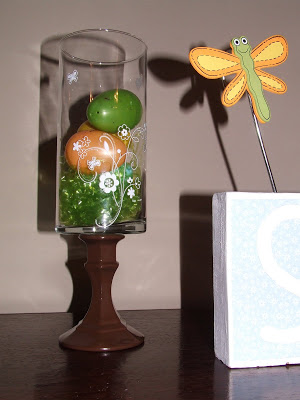
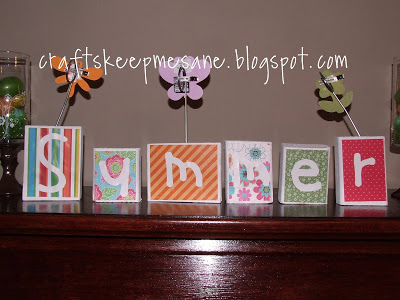
So I’m going to decorate for the four seasons (I’ll decorate more for the bigger holidays). I am just going to switch the blocks and then filled up the vases with something else for each season (I’m going to put fake flowers in it for summer, leaves for fall and a little snowman for winter). This set of blocks are for spring/summer and I’m going to make another set for autumn/winter. You could do cubes because all four seasons have 6 letters, I didn’t because you can’t hide the side letters as well. This only cost me about $10 and it will last all year long!

So this is how I made it:
For the vases:
1) Using two vases and two candlesticks, I used this tutorial.

2) Using plastic eggs and Easter grass I filled the vase. I splattered painted the eggs with a brown for a little more texture and color. I didn’t put rub-ons on the other side, so I can just turn it around and fill it with something else.
For the wood blocks:
1) I took wood of the same thickness and cut them into various sizes, sanded them and painted them white.
2) Using mod podge, I put the paper and letters on the wood

3) My husband drilled a hole in the in the top of three blocks
4) I glued an alligator clip onto the back of the wooden bugs
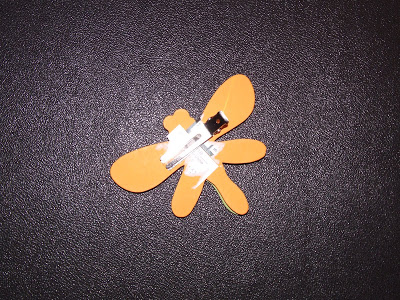
5) I put metal poles into the holes and clipped the bugs and flower to the pole. I didn’t glue them in because I need to be able to rotate them and use them for my other blocks

And just like that I have a decoration that I can keep for three months 🙂

And on the other side says summer, so I can just turn it around when June comes and add a little wooden watermelon, flip flops or other summery things.
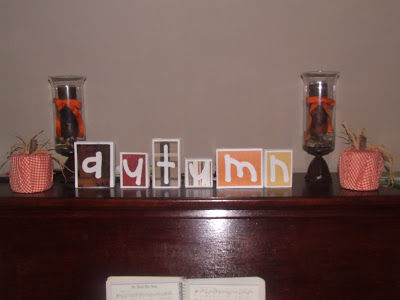
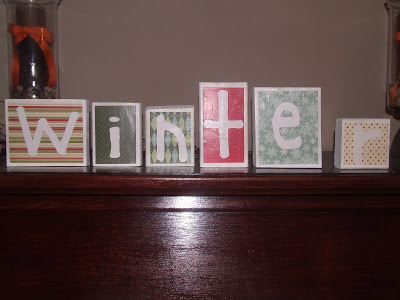
So for six months, I don’t have to do a thing except fill the vases and clip on a watermelon, that’s my kind of decor 🙂
I’m linking this post to these parties

That's such an awesome idea!! Love it 🙂
Great ideas Kaysi!
Please feel free to link your project up with my Talented Tuesday Link party on My Frugal Family, found at theherberfamily.blogspot.com!
Hope to see you there!
I love these blocks and how cool that you can turn them around. You always do such a great job. Thanks for inspiring me.
Cha Cha
So cute Kaysi! My FIL was framing his basement a few weekends ago and I'm now kicking myself for not taking wood scraps! Would've saved me a step 🙂 Keep up the great work!
Your Spring/Summer blocks turned out great!
Rebekah {all thingz related}
Looks very nice.
this is so cute, i never would have thought about the fact that spring and summer have the same number of letters…duh…thanks for sharing!
Hey, this one is a winner for sure! Looks really nice! Easy enough too!
Kaysi,
I love that idea with the blocks. I too like a decoration that will last a little longer than a month at a time.
I linked to your party yesturday and you asked that I link directly to the post. Can you tell me how to do that. I have tried typing only the name of the post and it still goes to the blog. Help, Please.
Brooke
How cute that turned out! And I love the painted bases on those apothecary jars you made.
Sooo cute!
cool. 😀
Very cute idea! Thanks for sharing.
What? That is so. darn. clever. I am not kidding. I love it!
visiting from Lucky Star's linky
What? That is so. darn. clever. I am not kidding. I love it!
visiting from Lucky Star's linky
Thanks for linking up! 🙂
I love the patterns you chose.
This turned out great! I still need to do something like you've done with your glass pieces. I love your projects 🙂
Very cool 😀
Those blocks are super cute! I love the versatility!
Way cute!! I must make some! Thanks for the idea!
This is such a creative idea! Talk about easy decorating. I need to make some of these!
Thank you for linking this up too!
I love this idea! And I really like the thought of using six cubes but agree it would be best to have blanks at the end of each word.
I have solved the problem of how to have a blank on the end of each word by being careful about the placement of letters on 3of the 6 blocks.
Its complicated to explain, but you would use 3 of the common letters in more than one season and in that way be able to leave a blank side on 3 blocks. First: use the same S for the beginning of summer and spring. That block would be (going around the 4 sides): Blank, S, a middle letter from winter, N from autumN. The blank will be on the correct side of N to be at the end side of the word Autumn, and at the correct side of S to be at the beginning side of Spring and Summer. Two of the words end in R. So the second block would be R (for SummeR and WinteR), Blank, A for Autumn, and an inside letter from Spring. Third block: G for SprinG, Blank, W for Winter, M for sumMer and AutuMn (interior.)
Finally once you have made these 3 blocks, fill in the other blocks by laying the six blocks out to spell each season, one season at a time, making sure to use the three blocks as explained above. You will see which letters are missing for each season and can finish up!
This came to me in a flash. Thank you for the idea, I'm going to do it! (Can you tell I loved math in school?)
Kathy
I just re-read my suggestion, above, and realized that when you make the first 3 blocks, make sure you indicate a blank, that is a side with no letter, by what ever paper or paint that you want to be on your ends. That way you will remember its not supposed to have a letter and avoid accidentally filling it in later in the process.
Wow! These look amazing!
Also, thanks for your sweet comments about my blocks!! They are so addictive to make, as you obviously already know something about, and I'm trying not to give them to everyone I know 🙂
Have a great week!
Super cute!! I particularly like the vases
How cute!!!
m ^..^
So cute! I don't decorate that often either, for the very same reasons. . . I love the blocks idea, I may have to do that meself. 🙂
very very cute! I love that your blocks are interchangable! : )
I LOVE your block letters!! Come stop by my Favorite Things Friday Party if you would like to join in!
Great idea… I might have to copy you! 😉 Thanks for sharing at the Power of Paint Party (POPP).
So very cute! A good use of your paper and I like that they're changeable.
Very pretty! Nicely done!
Thanks for joining Get Your Craft On Thursday at Life As Lori… Please join me next week for another great party!
Very cute! I love that you can flip the blocks over and be ready for summer!
Thanks for linking up to Make it Yours Day at Backyard Eden!
Very cute! 🙂
Those are very cute!
I featured this at Life As Lori!
If you would like to grab the I was featured button please stop by and take it!
Love it! Great job!
I LOVE LOVE this! And I never even thought of making the blocks reversible!! Sheer genius! Thanks so muhc for the idea!!
Okay you're a genius I would have never thought of the reversible blocks! It's such a great idea – thanks for the post!!
I've been resisting the urge to make a set of these… but I might be caving! They are just too cute. you did a great job!
I didn't know they all had the same amount of letters!?! lol. I totally didn't believe you and had to count. Spring just seems like it's so much shorter than the others. Your signs are extremely cute!
I love these blocks! Thanks for linking up this week!
Great ideas! I think the blocks turned out great and the vase is lovely too!
Thanks for linking up at my link party!
Be sure to join me Friday for another link party!
Love the blocks, I've been meaning to make some so thank you for the motivation. Great Job!
Kaysi,
Cute cute cute!! you did a great job on all of them. I'm so glad you joined the Easter Roundup! Happy Easter!
Linda
Thanks for join in on the link up a few weeks ago. I'm just getting around to looking at things. I love these blocks. I've had a similiar idea in the back of my head for awhile. Just need to get it out. 🙂 Very cute!
This is adorable-its been on my list ever since I saw it. Thanks for linking up to my craft challenge.
Oh wow, I did something similar, yours is way cuter though. Love the tall vase and the cute decals. Thanks for sharing!
You are just so awesome!! Every time I come here I find something else to love!! Thanks for linking up!!
Lovely idea, you really are keeping it simple with these blocks, but so charming and pretty too!