Hello Keeping it Simple readers! Today (as promised last time) I’m going to talk about one of my favorite sewing accessories – the twin needle!
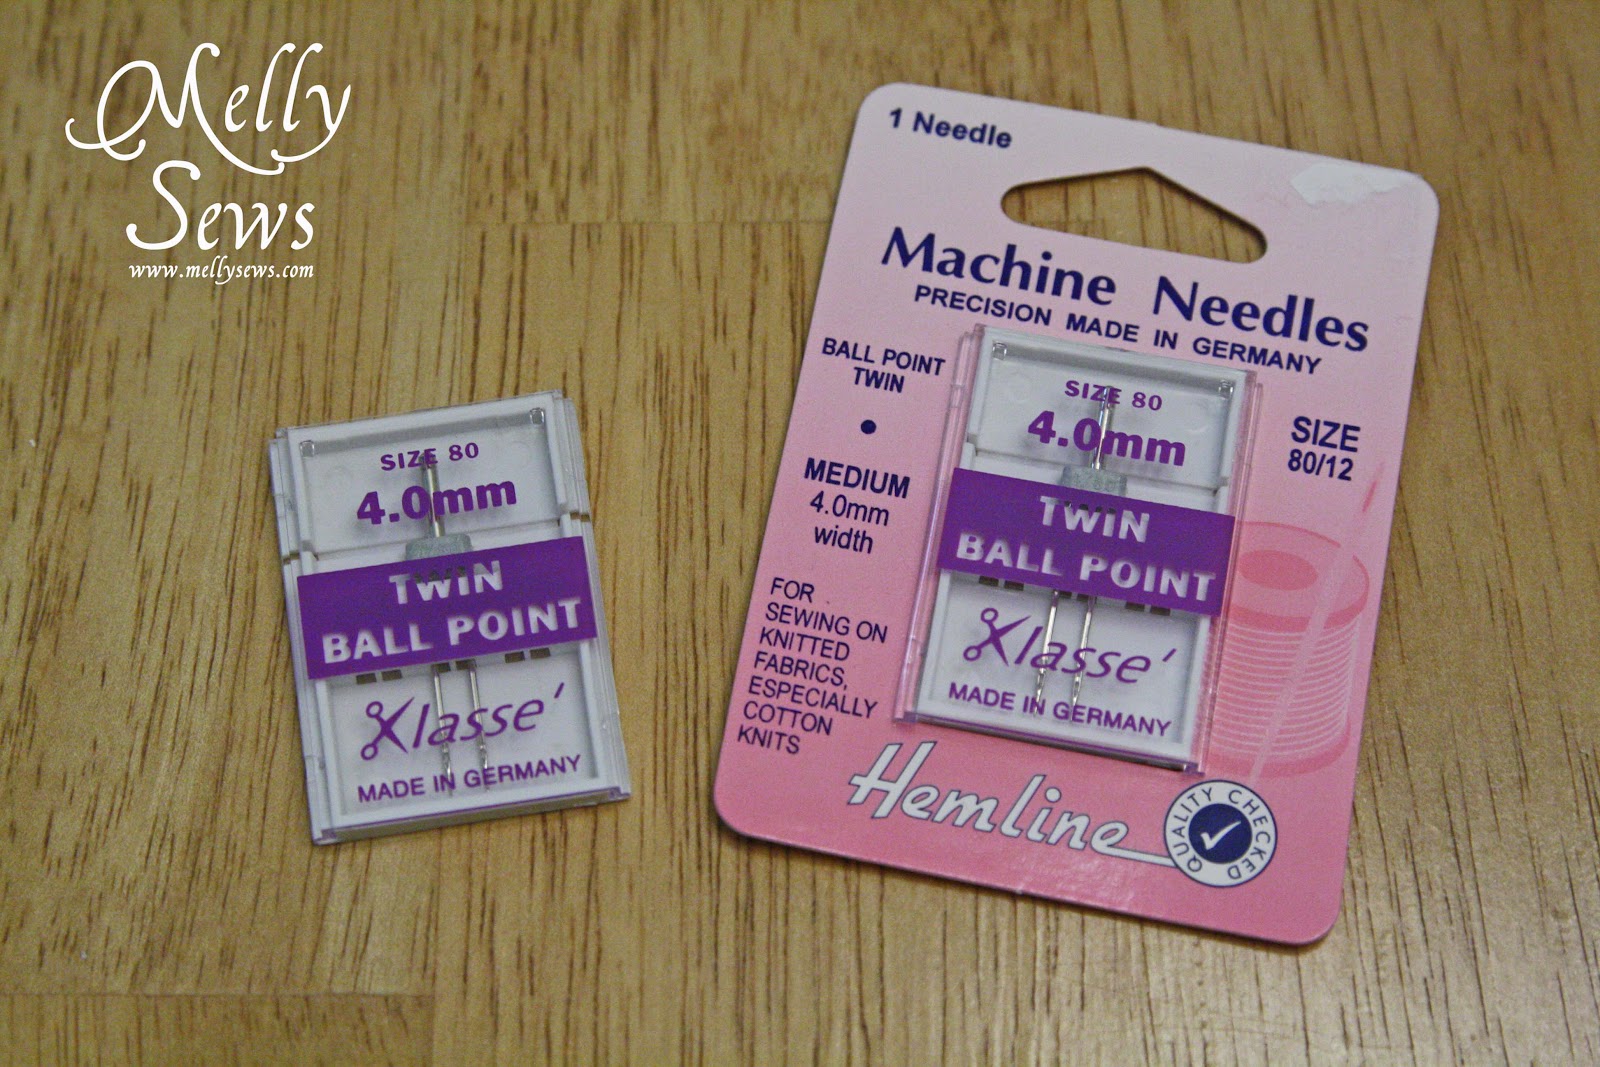
I use my twin needles on a regular sewing machine mostly for hemming stretch fabrics, and therefore I prefer Klasse’ Twin Ballpoint Needles Size 80 – 4.0mm . The universal twin needles they sell at Joann sometimes work and sometimes don’t – like when I was sewing my tankini.
I read several blog entries about using twin needles that were pretty helpful when I first started using these, but there were several things I had to discover on my own. So this is a summary of my best tips for sewing with twin needles.
- Buy ballpoint needles if you’re going anywhere near knits for this.
- Pay attention to the width (the mm number; 4mm in the picture above). Some extra wide-set needles won’t fit with the standard foot on vintage machines. I learned this the hard way.
- Leave loooooong tails when you start and stop sewing, and don’t backstitch (see below)
- Set your machine to a long (if not the longest) stitch, and use the straight-stitch, not zig-zag
- Give your stitching a tug every 6 inches or so if you’re doing a long hem to prevent puckering.
As I mentioned, I mostly use my twin needles to sew knit hems. Here is a step-by-step of how I do that
First, replace your needle with a twin needle. Then put the thread and a bobbin of the same thread on your machine. Make sure thread is unwinding the same direction off both. Here are two configurations of what that might look like (please excuse the mismatched thread in the first picture).

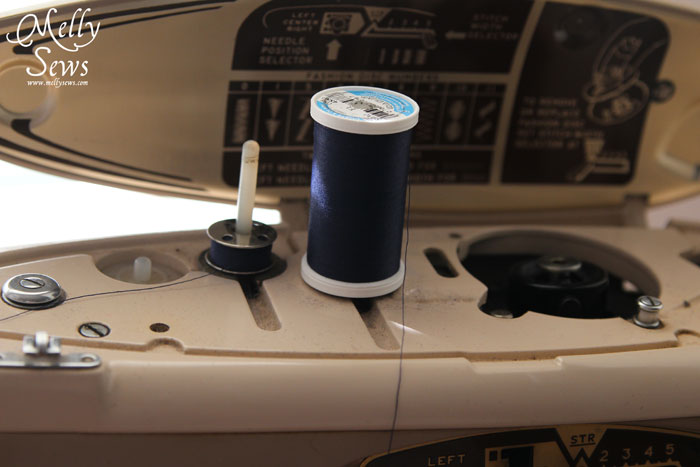
Holding the two threads together, thread the machine as if you were only using one thread until you get to the needles, then separate the threads. Tug one to see if the left or right thread unwinds, then thread the corresponding needle.
Iron your hem. If you HAVE to, pin it. But you don’t want to sew over the pins. Two needles = 2 x the chance you will hit a needle.

Sew with the top side of the hem up. I use my finger on the left hand to feel the seam as I feed the fabric. Remember to leave LOOOOONG tails before you start stitching.

Stitch around to where you started. Don’t backstitch or overlap your stitches. Leave long tails again before cutting.
Give your hem a good tug. You’ll notice that the bobbin thread tails in particular may get a lot shorter.
Thread your long tails through a needle, two at a time. Use the needle to pull the threads to the wrong side.
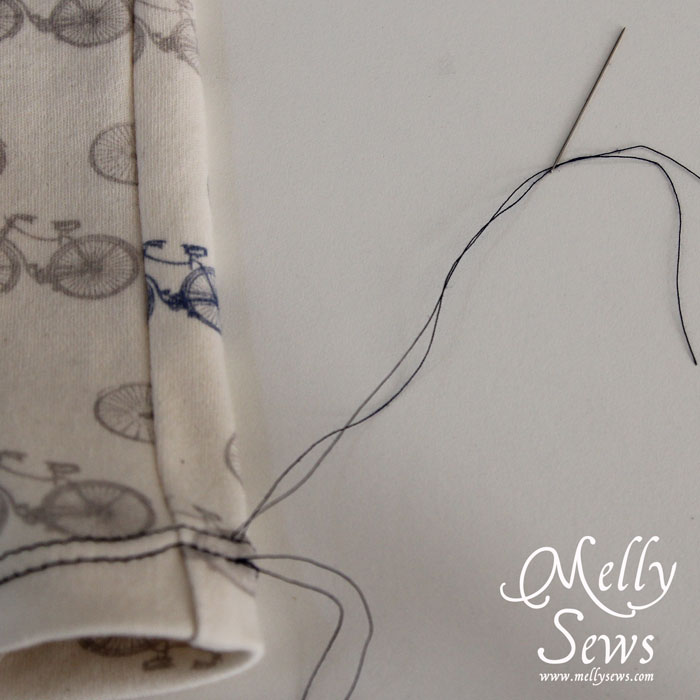
Knot all the threads on the wrong side before cutting.

Your stitches will look like this on the front
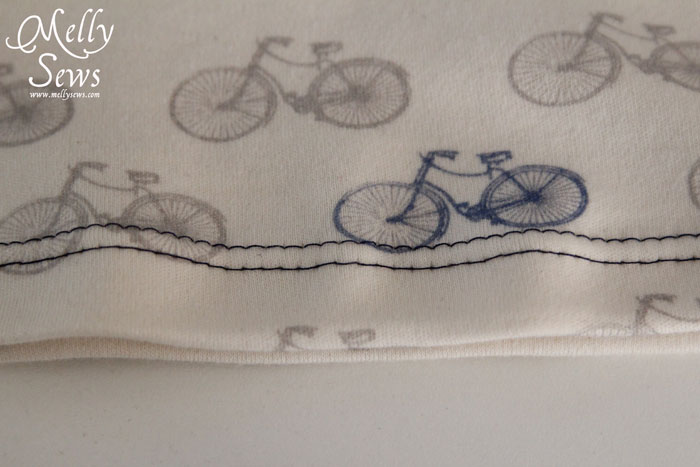
And like this on the back. That zig-zagging of the bobbin thread is what gives the hem its stretch.

thanks!
I made a knit skirt (out of the softest organic bamboo EVER) this summer and I really wished then I knew more about twin needles. Thanks for this tutorial! Just so I understand correctly, there is only one strand of bobbin thread, but two strands of top thread?
You've got it right!
I'm glad you showed the bottom of the stitch. For the longest time I thought that I was doing something wrong or that my tension was off because when I've seen tutorials I have never been able to see the bottom stitch and what it should look like. Thank you! Since I've started using twin needles I think my knit shirts look a lot better and I don't always have to resort to making bottom bands for my shirt rather than hemming them.
Thanks so much for this information. I've never used twin needles but now I'm ready to give it a try.
I'm been thinking twice of using a twin needle 'cause I don't know how to use it. Thank's to you I've learned how to and all the doubts went away. Thanks so much.
website hosting australia
Ecommerce Australia
The beauty of the topic kept me reading till it ended. It happens only for a few times in a month that i read everything in an article.