I have started to have a couple regular contributors on my blog. I’m so excited to have these talented ladies!!
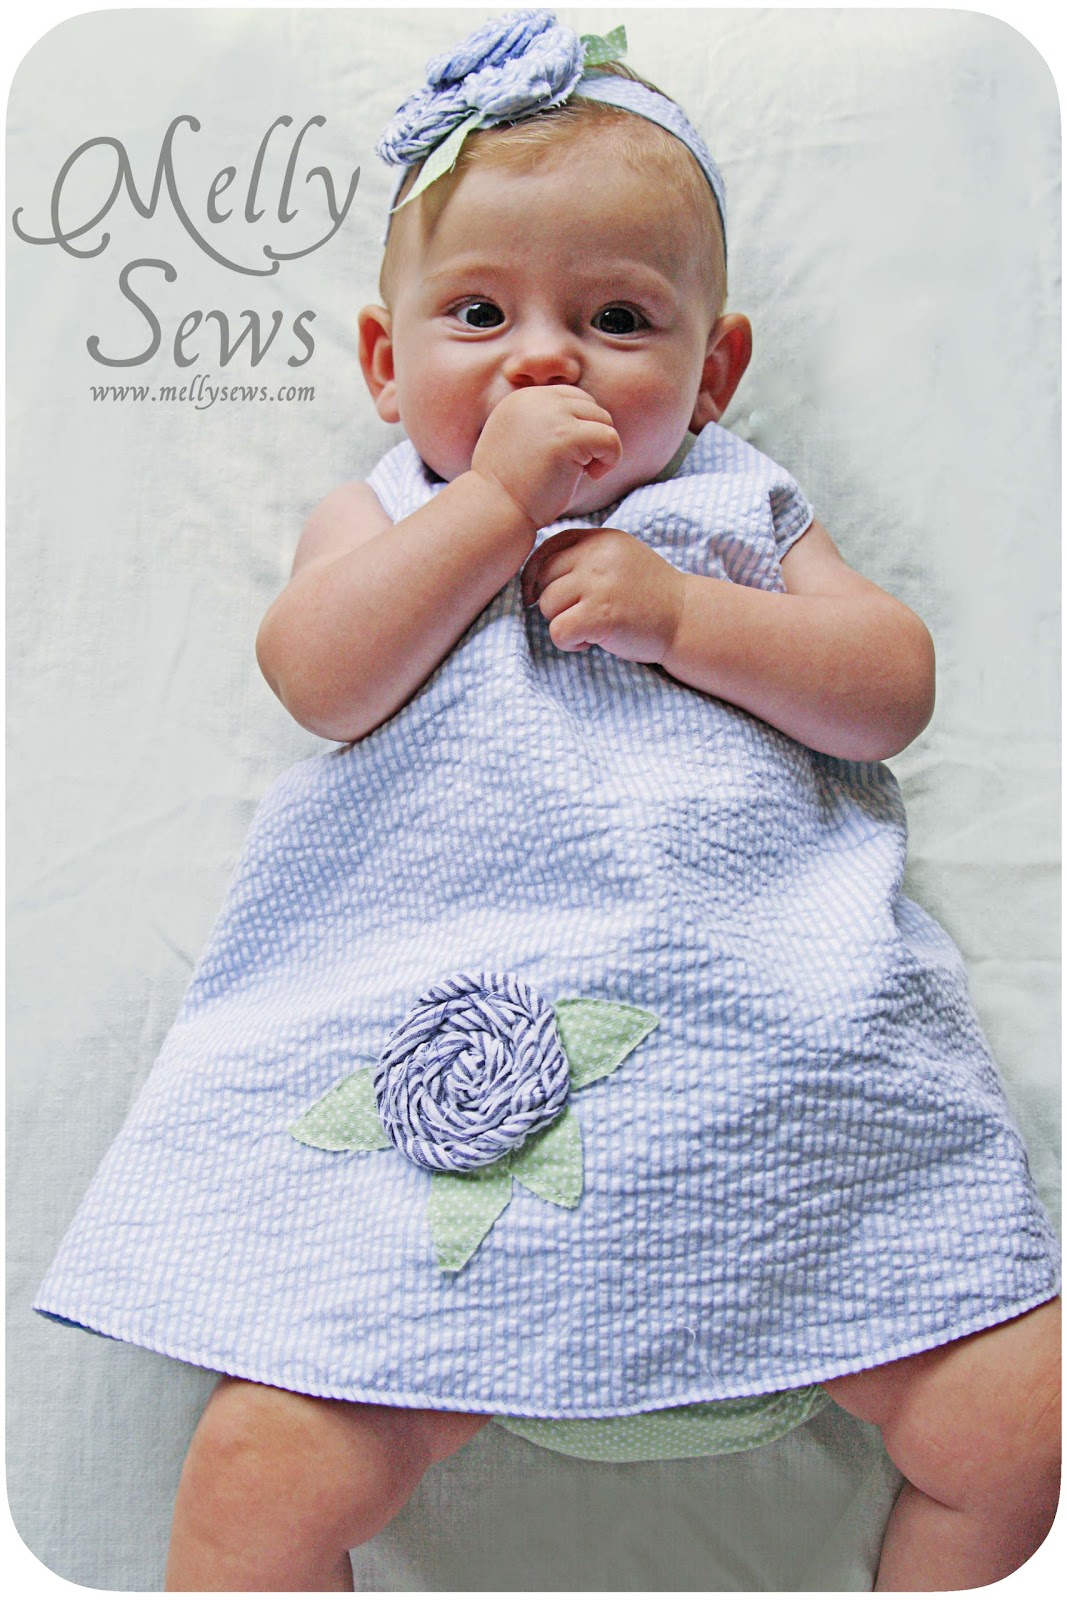
Hi, I’m Melissa from Melly Sews, and I am so excited to do my first post as a contributor to Keeping it Simple. In the spirit of Kaysi’s blog, I want to keep my contributor posts simple too, so today I am going to show you the easiest dress ever, and there’s a free pattern to download too!
So to make the criss-cross dress that my adorable niece is wearing, you’ll need:
So to make the criss-cross dress that my adorable niece is wearing, you’ll need:
- 2 pieces of fabric, 3/4 of a yard each
- The pattern
- Any embellishements you want to add
- 2 snaps – I used the kind you apply with a hammer, but you can also use the sew on kind.
Download the pattern HERE. This is about a 3-6 month size. This is a PDF file, you’ll print it across 4 pages of paper and then tape them together. When you print, set your printer to borderless, and don’t scale anything. There is a 2″x2″ test square on the first page, check the measurements to make sure you’re printing correctly. If your printer won’t print borderless, set it to the smallest margins you can and print anyway without scaling – you should be able to connect pattern lines across the page breaks. Butt the edges of the pages together – don’t overlap – and tape. The pages line up with 1 and 2 on top and 3 and 4 on bottom, left to right.
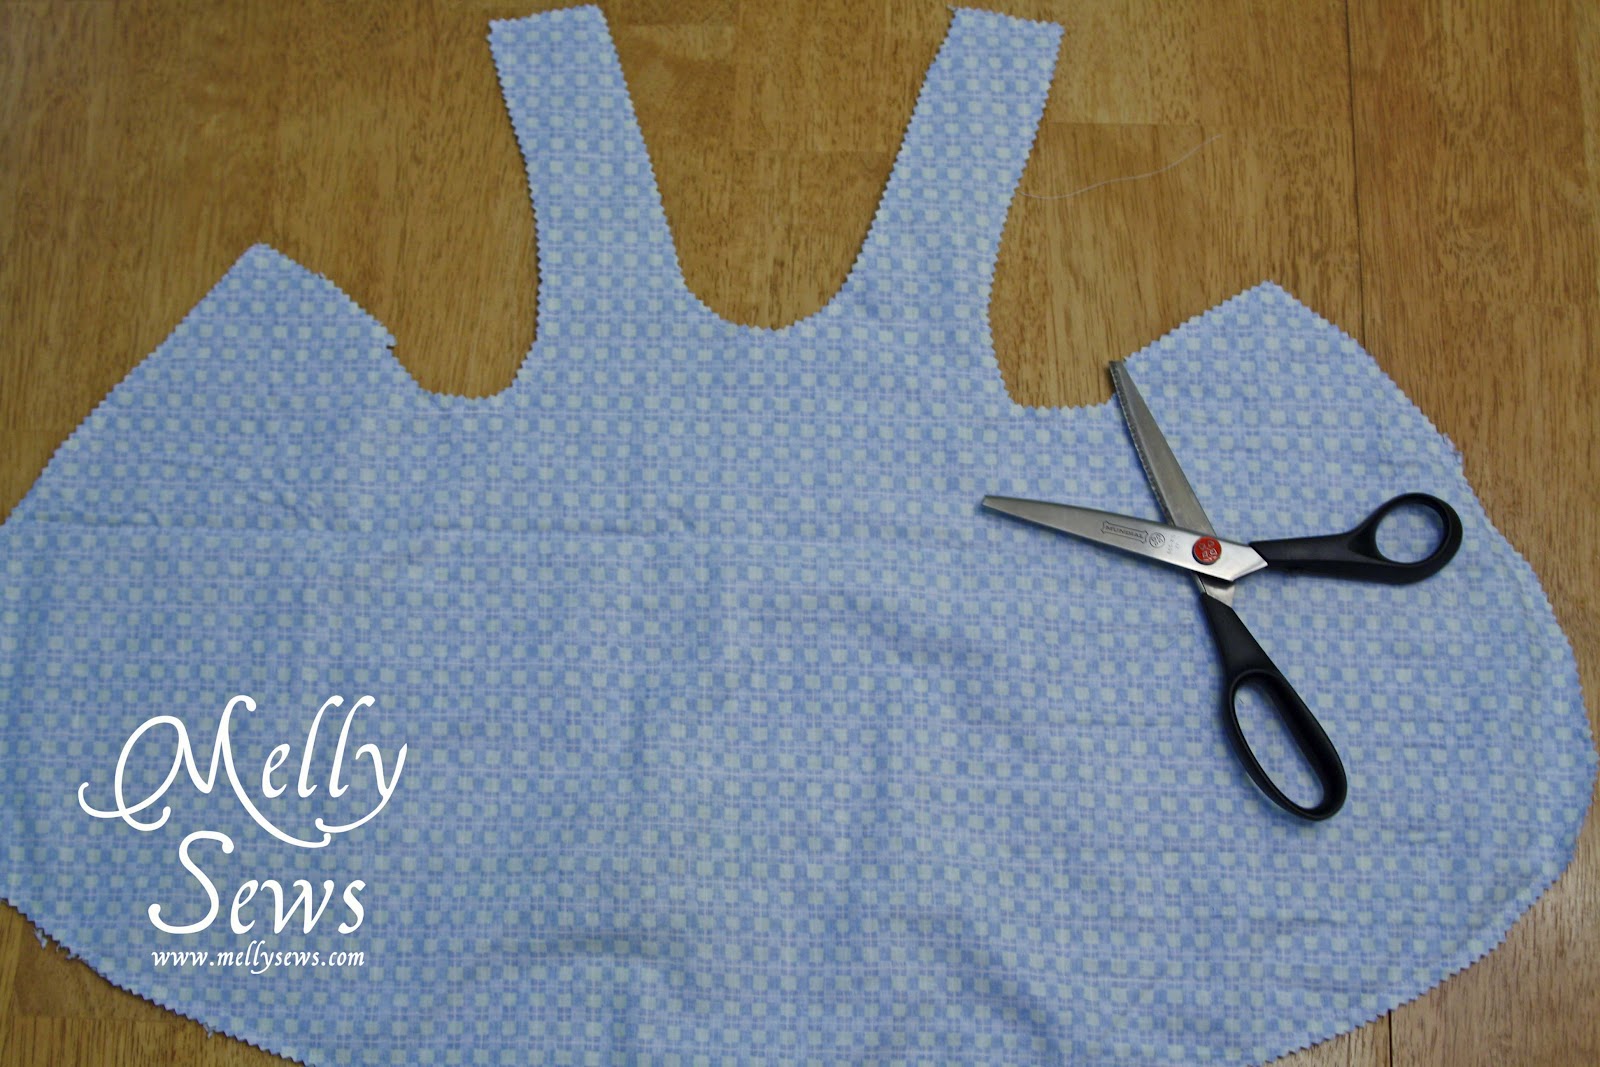
So if you have the pattern and are ready to begin, pin it to the fold of your fabric and cut. Do this twice, so you have an outside and a lining (you can make this dress reversible). They should look like this when openend out:
So if you have the pattern and are ready to begin, pin it to the fold of your fabric and cut. Do this twice, so you have an outside and a lining (you can make this dress reversible). They should look like this when openend out:

Next add any embellishment you want to the front of the dress. I sewed on a rolled fabric rosette and some leaves.

Now lay the dress front and the lining on top of each other, right sides together. Sew all the way around the dress edges BUT LEAVE AN OPENING FOR YOUR HAND so that you can turn it right side out later. This pattern has a 5/8″ seam. Go slowly around the curves.
Next, trim the seams down. I prefer to do this with pinking shears. If you don’t have pinking shears, you can sew another seam about 1/4″ towards the edge from the first seam and then trim. Be careful not to trim too much at the opening.
Next, trim the seams down. I prefer to do this with pinking shears. If you don’t have pinking shears, you can sew another seam about 1/4″ towards the edge from the first seam and then trim. Be careful not to trim too much at the opening.
Now turn the dress right side out. Press the edge so it’s nice and crisp. At the opening, press the edges under towards the inside.

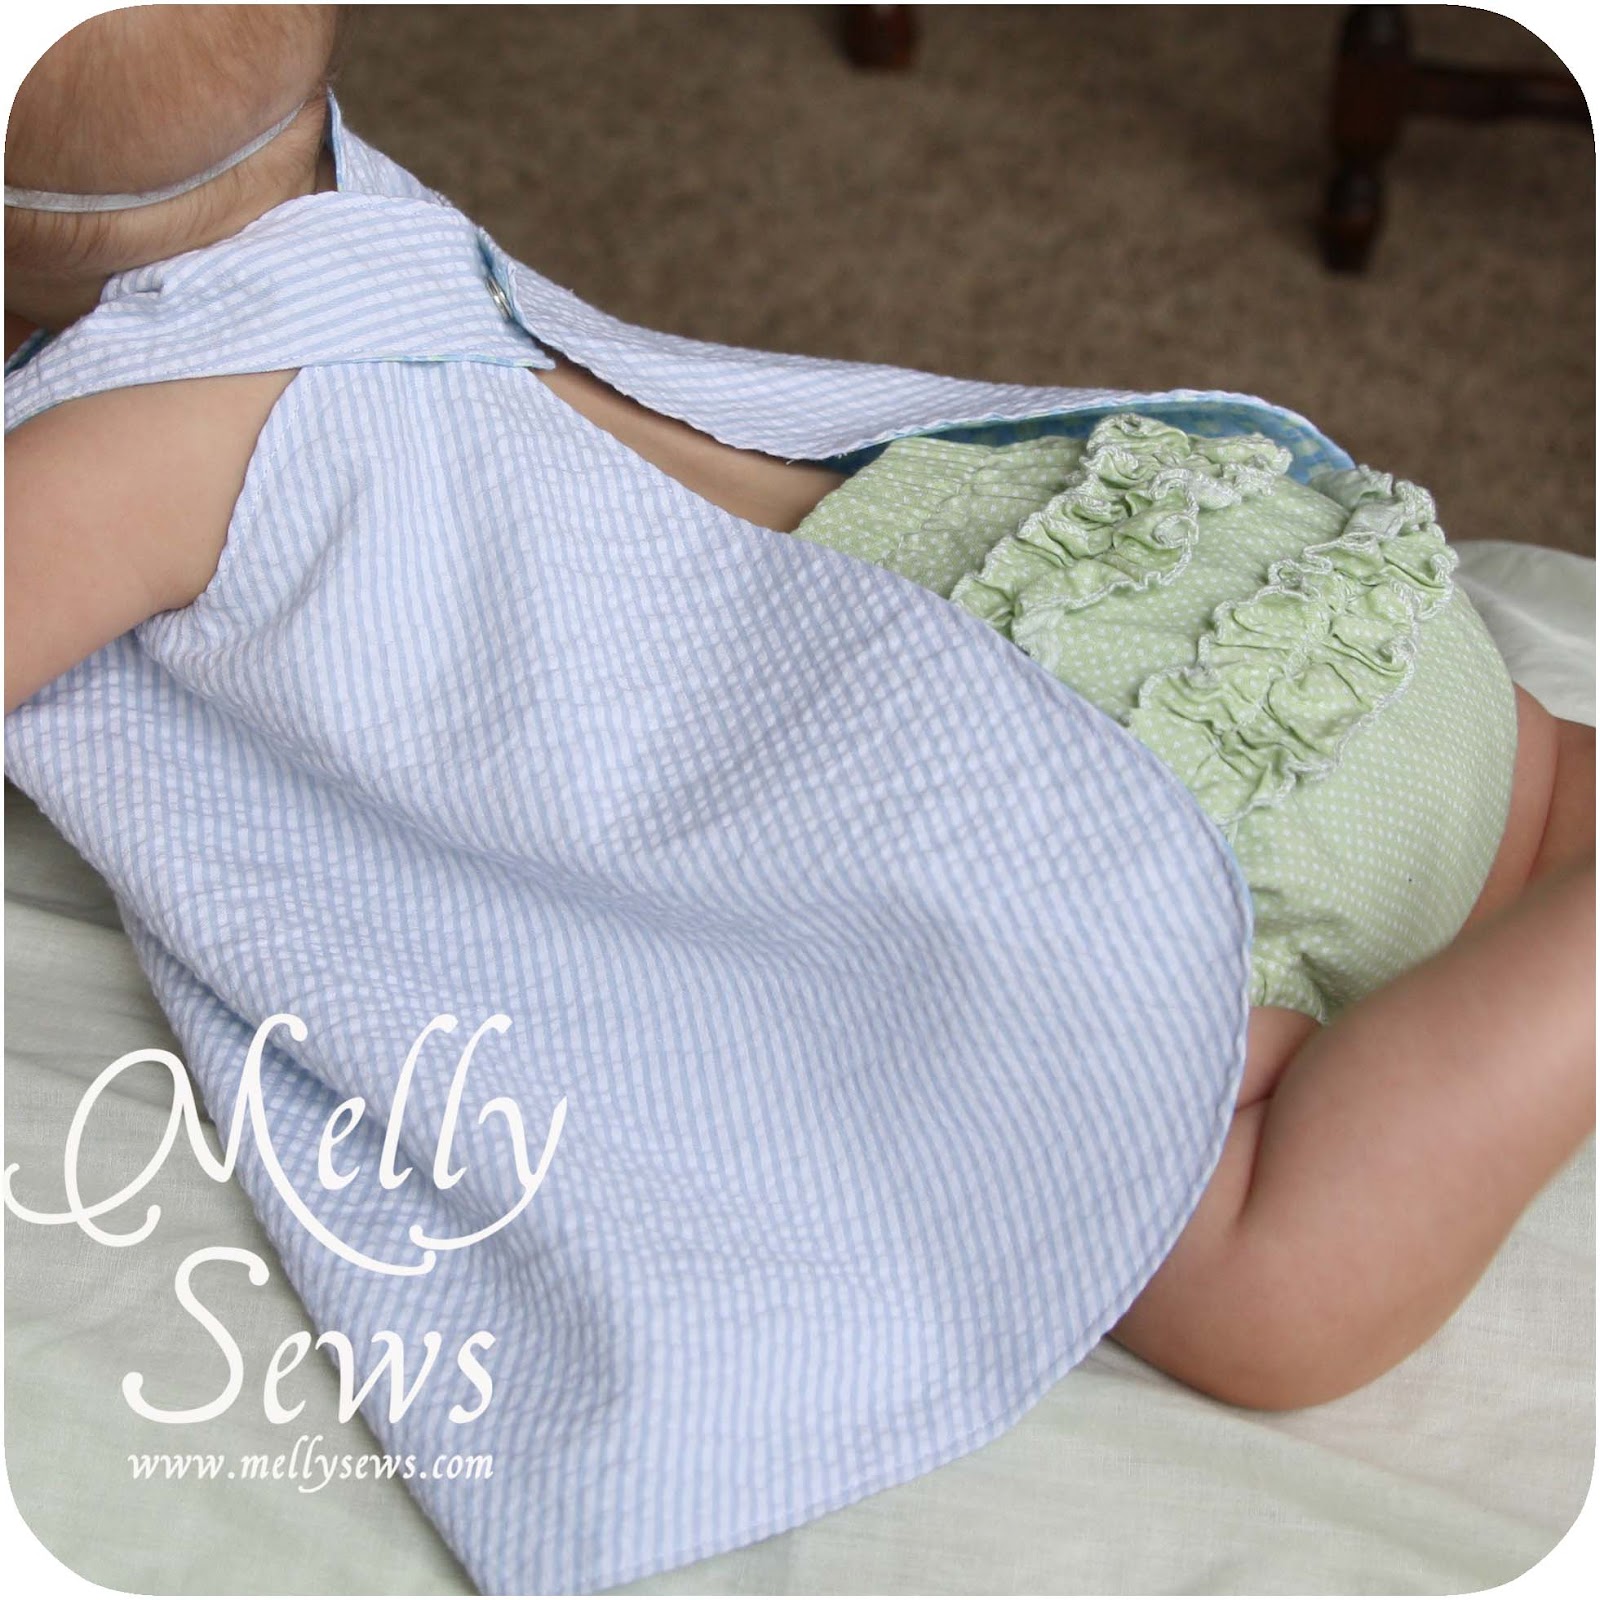
Topstitch all around the edge, closing up your opening in the process. Now you just sew or apply snaps at the end of the long straps and on the top of the back piece. You can see in the picture below how the dress goes on the baby.

These are so easy to whip out, and the combination of fabrics and embellishments are endless. They also make great gifts.


Come back on the 25th and I’ll share a pattern and instructions for making the cute ruffle-y bloomers my niece is wearing in these photos.
Thanks for having me Kaysi!
Thanks for having me Kaysi!

This is so stinkin' cute Melissa!!! And your niece is a doll!
That is really cute!! I love the rosette. Fun ideas ladies!!
That is the cutest little girl outfit I have seen. I love how it all matches but is not too "PINK". I also love the fabric.
could this be reversible?