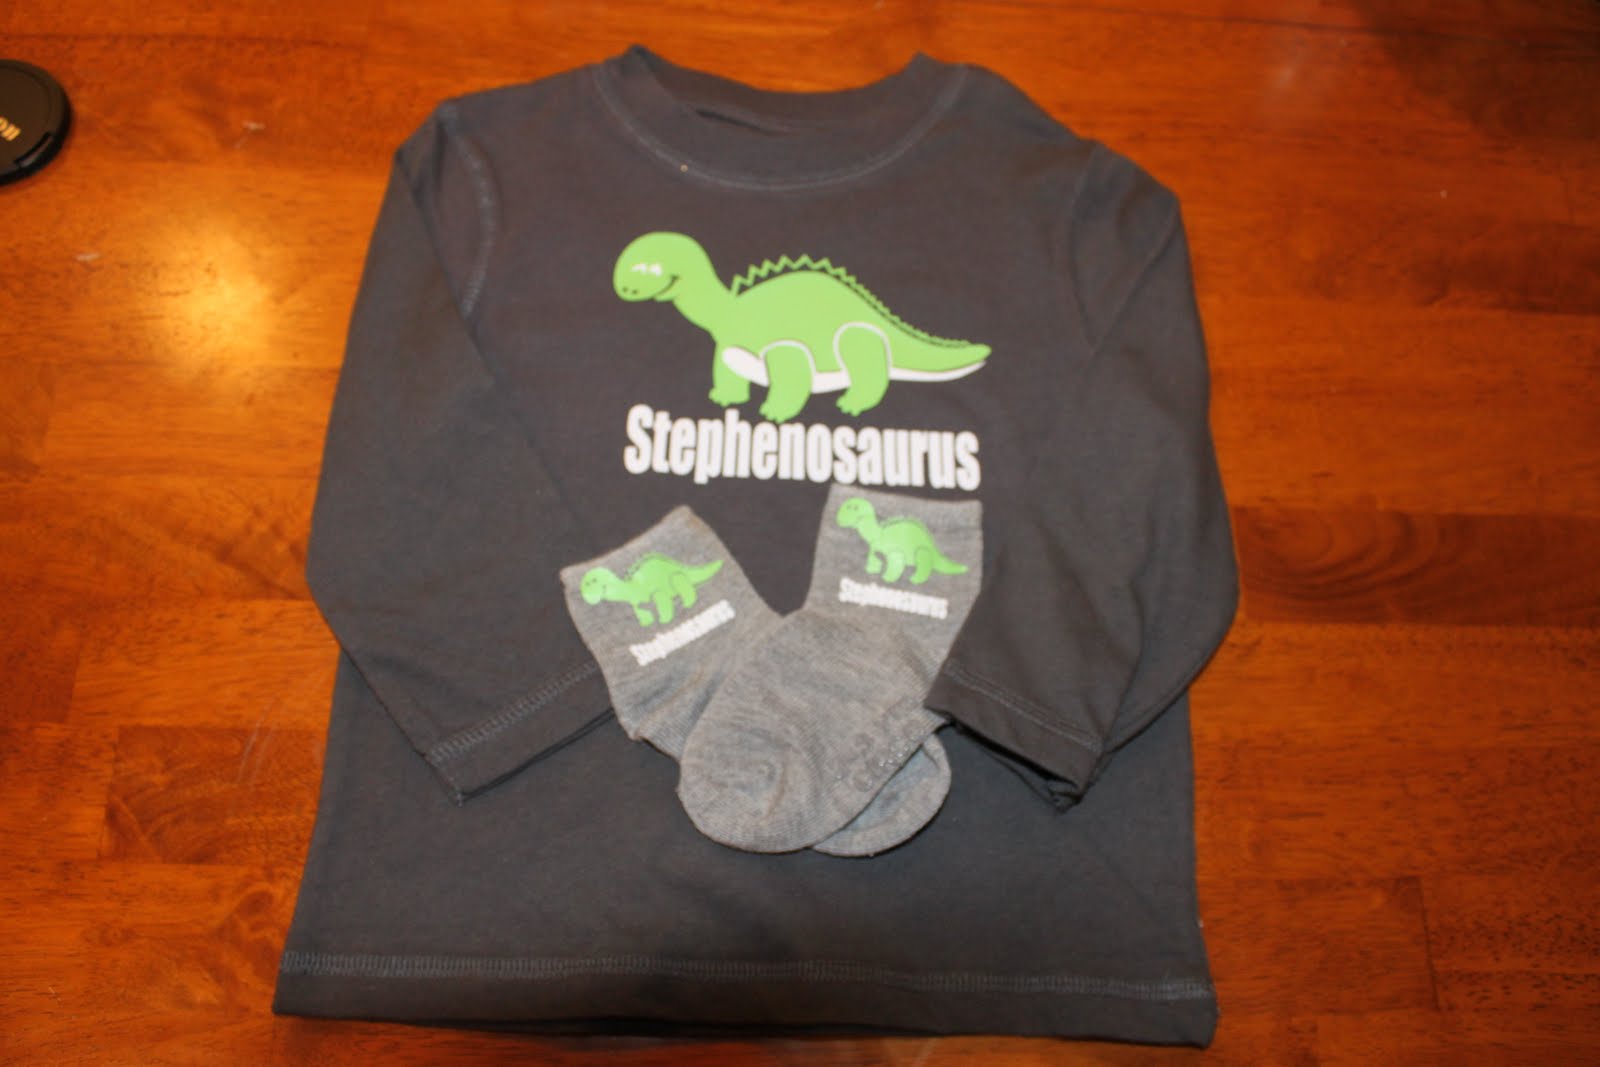
You all know that I LOVE heat transfer! I love taking a plain shirt and transforming it. I especially love making something personal. For Christmas, we are doing a cousin exchange. My baby has her cousin that is only 4 months older then her. I wanted to make him a cute shirt. So this is what I came up with.

This is how I made it:
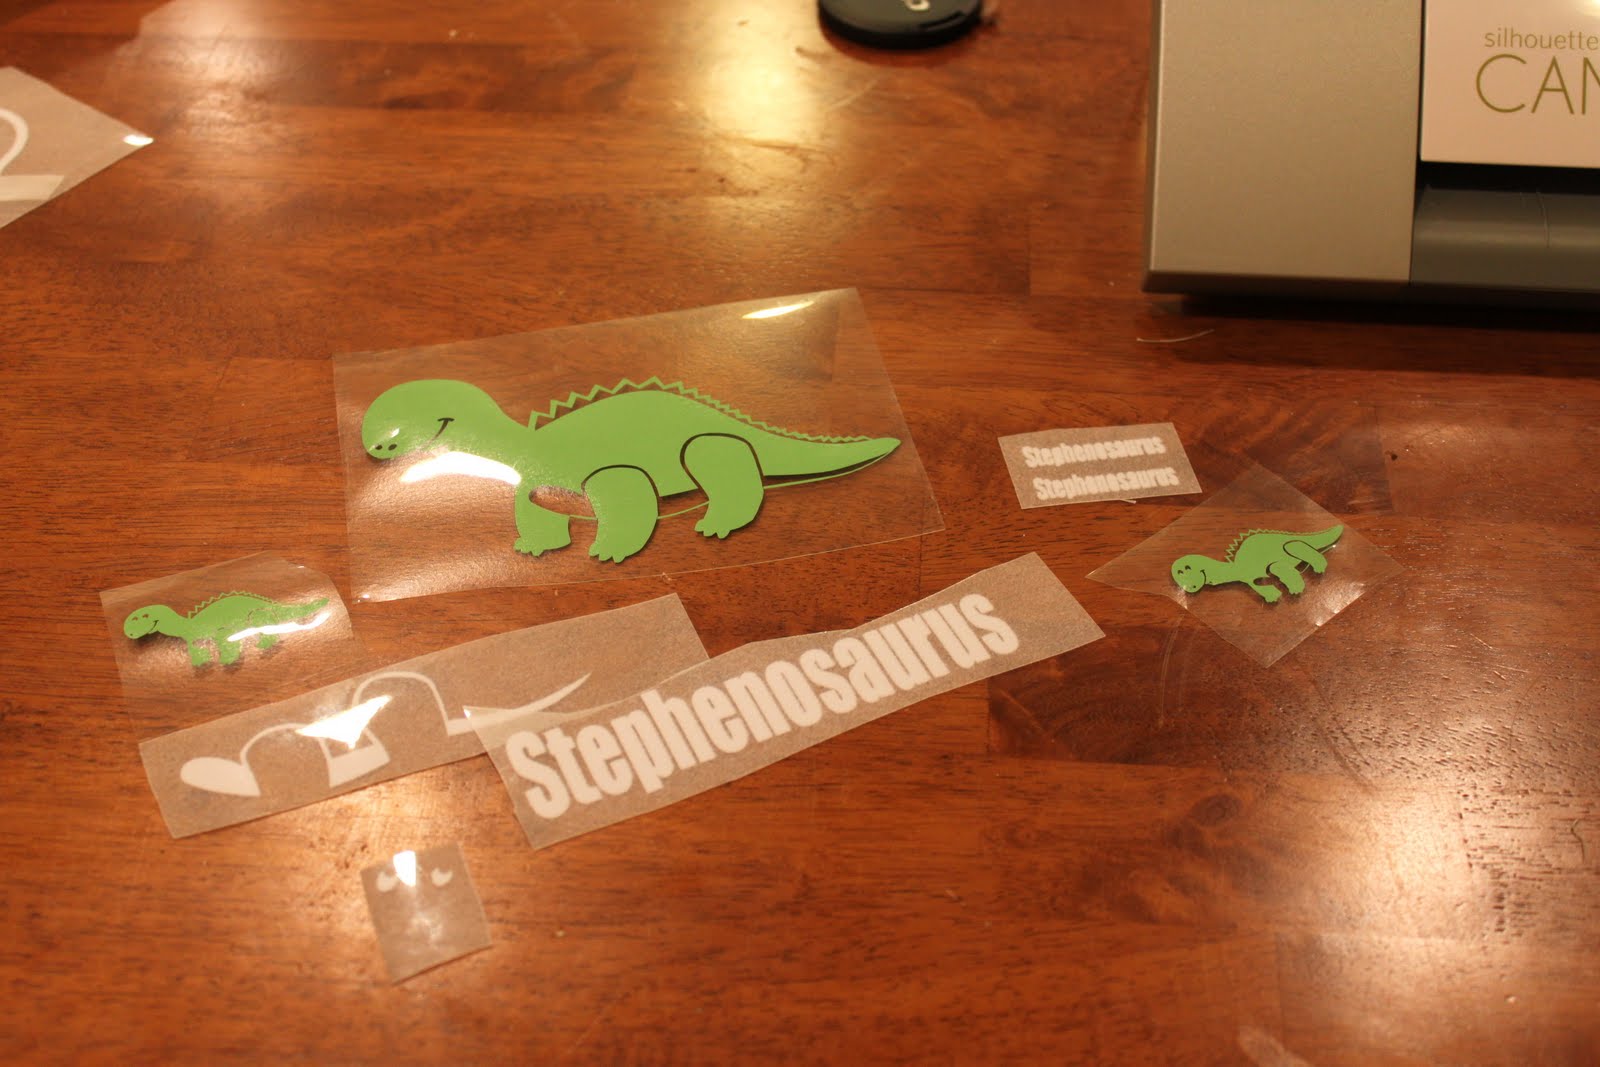
1) I got the design all ready in my Silhouette Studio. Then I cut it out of the heat transfer paper.
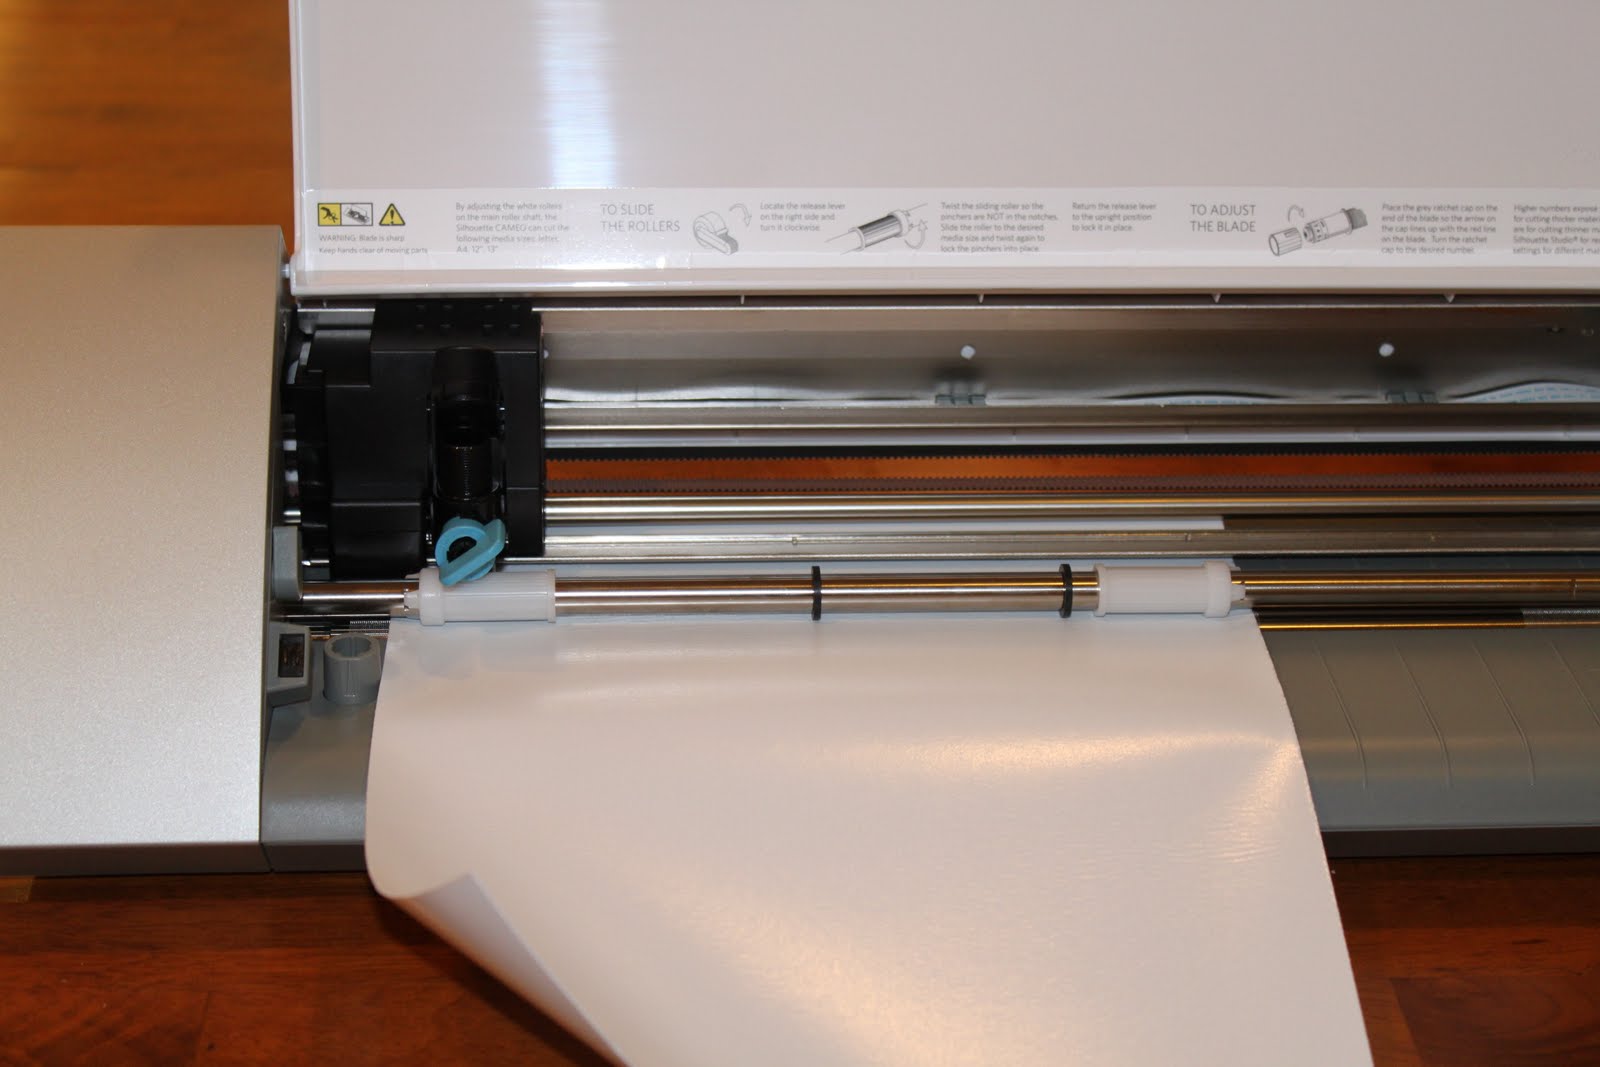
Did you know that the CAMEO cuts the 12″ media but it also cuts the 9″ SD media!!
2) I adjusted the rollers to fit my white flocked transfer paper. For the flocked I used the blade setting at 3, thickness 33 and speed 5. For the smooth heat transfer I used the blade setting at 1, thickness at 14 and speed at 8.
3) I removed all of the excess.
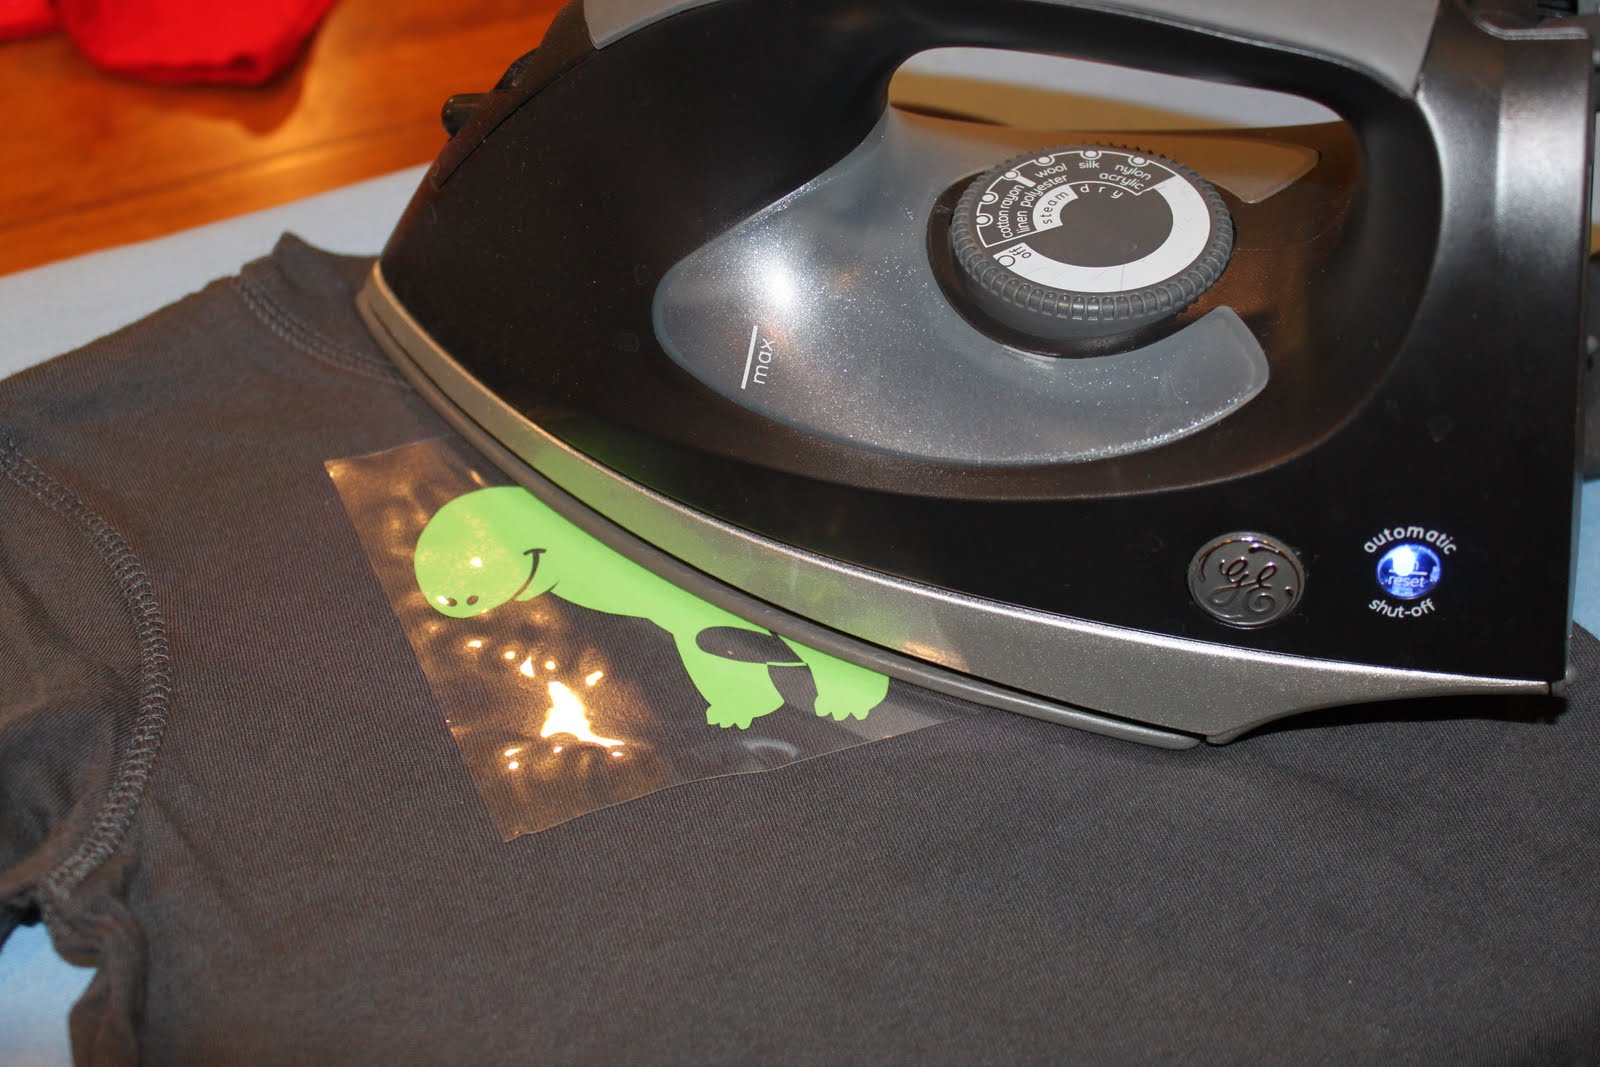
4) I then ironed the heat transfer onto the shirt.
I decided to make matching socks too! My nephew is going to look so cute in his new, personalized shirt! 🙂
Remember that there is an AWESOME deal coming on Black Friday on the new CAMEO! I’m sure that Santa would love to bring you one for Christmas! 🙂
You can get an additional 10% if you use the code SIMPLE, that’s 40% off!!

OK I would seriously buy two sets of these from you for the boys for Christmas! Let me know if you are interested! These are great!!!
when you make these, did you wash the garment first and then iron on the images? My images peel off. But I don't was the garments first.
Hi! A few questions for you if you don't mind:
1. What she said above ~ do you wash the clothes first and did you have any peeling issues?
2. Do you use the Cameo heat transfer paper only?
Thanks for the info! I really want to try this on my mom's cameo! 🙂
true said, heat transfer gives awesome look in T-shirt.