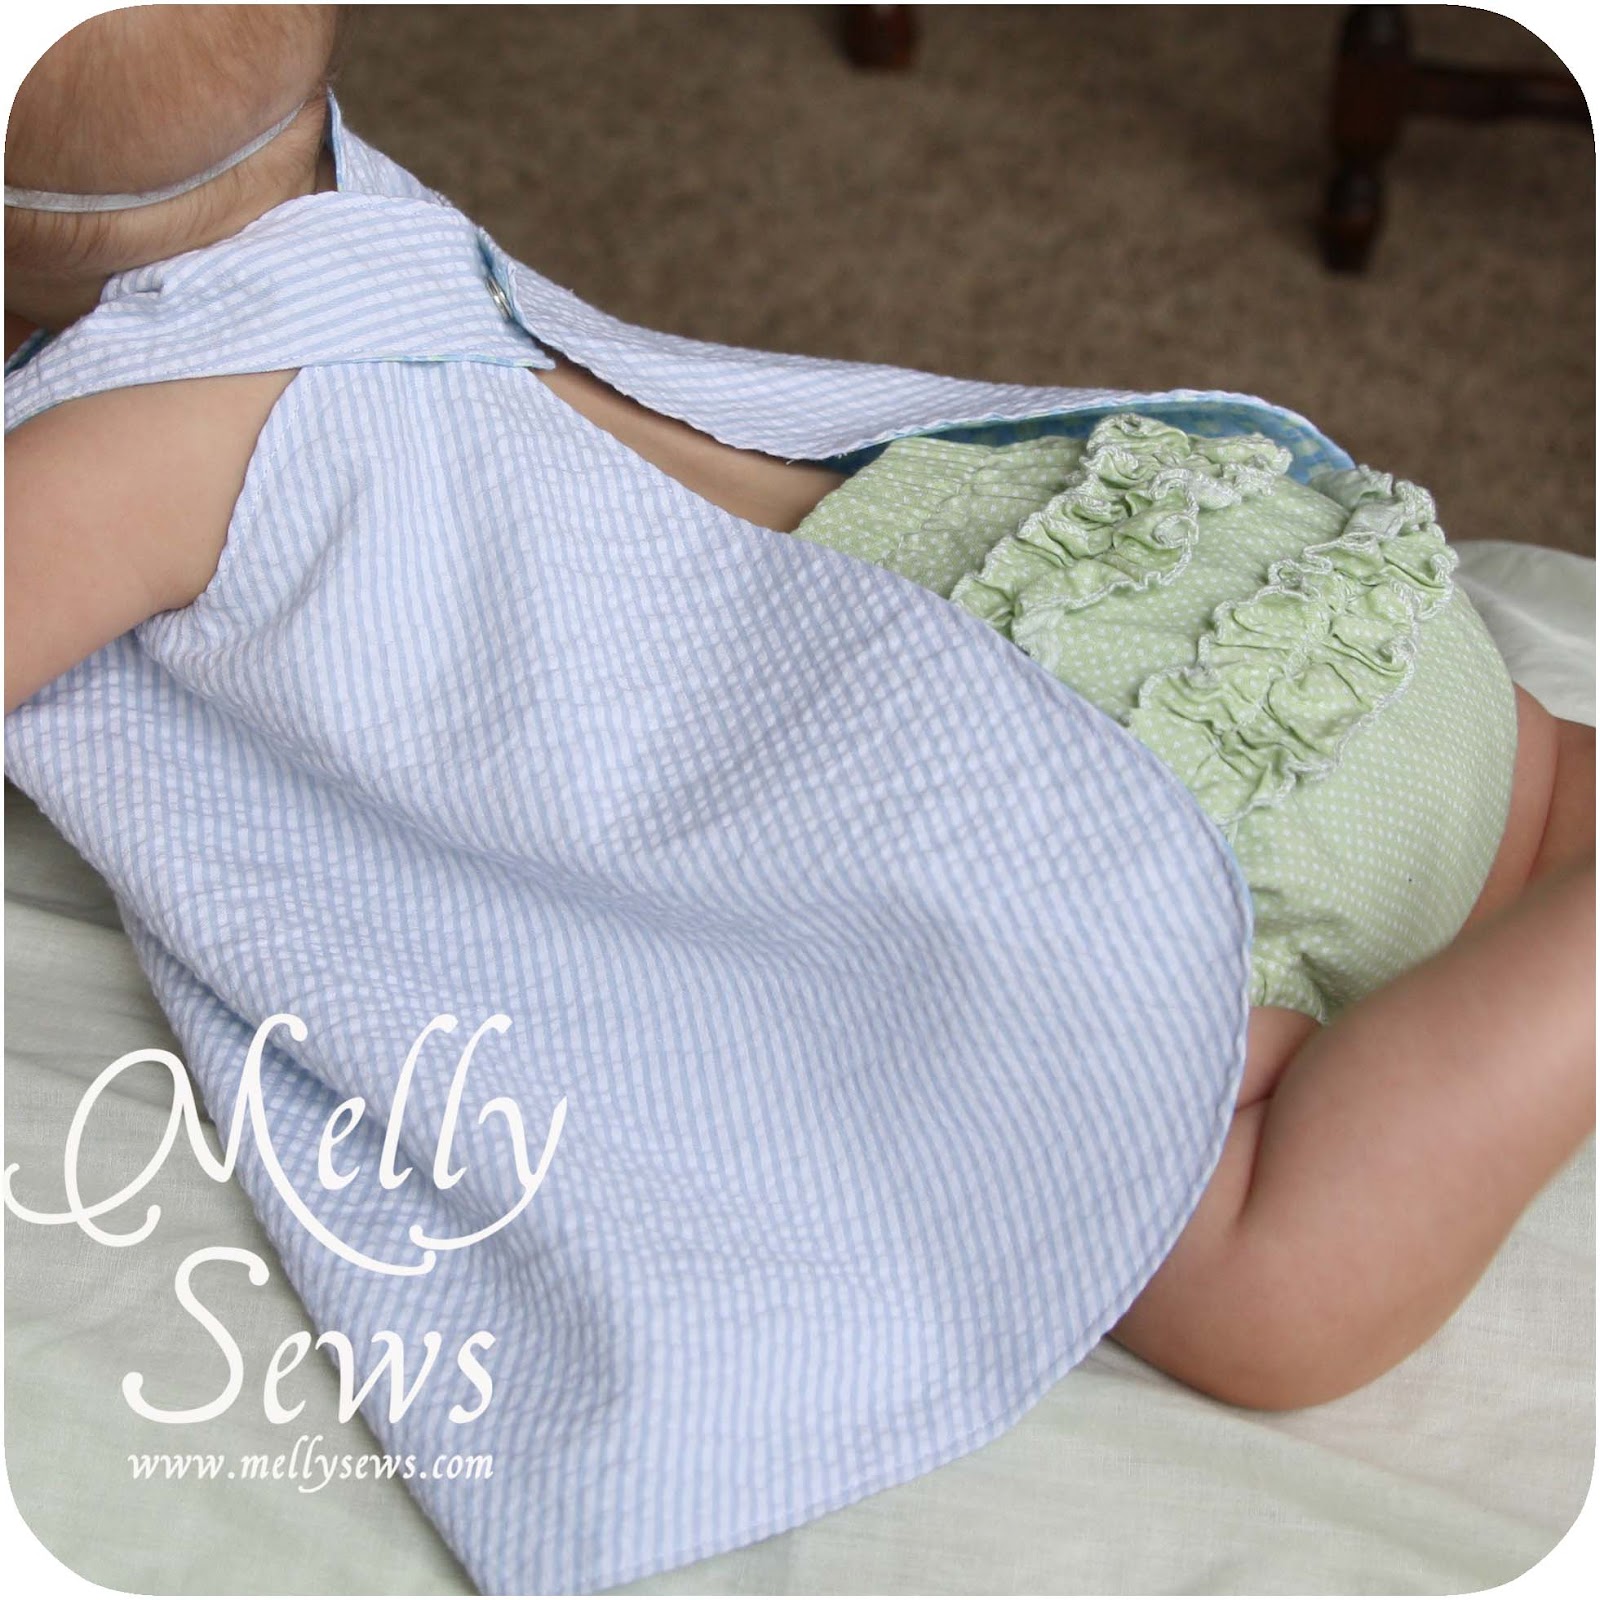
Today I’m going to show you how I made the bloomers that my niece wore with this dress.
I didn’t take pictures while making the original bloomers, so you’ll see a different pair in the tutorial. That also allowed me to use colors that will hopefully be easier for you to see. There’s a free pattern for you to download too.
So, you’ll need
- 1/2 yd of fabric for the bloomers
- 2 strips of fabric 28 inches long by 3 1/2 inches wide for the ruffles
- 1/2 inch wide elastic for waist, about 17 inches
- 1/4 inch wide elastic for the legs, about 20 inches
- The bloomer pattern
Download the pattern HERE. This is about a 3-6 month size. This is a PDF file, you’ll print it across 2 pages of paper and then tape them together. When you print, set your printer to borderless, and don’t scale anything. . If your printer won’t print borderless, set it to the smallest margins you can and print anyway without scaling – you should be able to connect pattern lines across the page breaks. Butt the edges of the pages together – don’t overlap – and tape. The pages line up one above the other. NOTE- the front of the pattern piece runs to the edges of the paper, and the back of it goes to about 1/4″ below the edge. So if you’re having trouble with the borderless printing, make sure you draw the curve to the edges of the paper.
Cut out one, on the fold. Transfer the ruffle placement markings so your piece looks like this

Next, take one of your ruffle strips and sew it into a tube, right sided together (full disclosure – on the original bloomers, I did a rolled hem on the edges of the ruffle with my serger. If you have a serger and want to do that, it works great. But I’m writing this with the assumption that many don’t have sergers)

Next, use a safety pin fed through your tube to turn it right side out.

Press your tube so that the seam runs down the center of one side

Push the raw edges into the tube about 1/4 inch and sew across ends.

Sew down the middle of your tube with the longest stitch your machine will do. By pulling one thread (either the top or the bottom, it doesn’t matter) you create the ruffle. Ruffle until it is the same length as your ruffle placement line, then pin the ruffle onto the line with the seam down (please ignore my mistake chalk mark on the bottom of this picture). Sew in place.


Now fold the bloomers with right sides together and sew down the side edges, using a 1/2 inch seam

Check your edges around the seams at the leghole. If they didn’t match perfectly, trim.

Finish your seams. I prefer to do this by trimming with pinking shears (when I’m not using my serger)

At the waistline, turn under about 1/8″ then turn under again 5/8″. At the leg holes, turn under about 1/8″ and then 3/8″. Give or take an 8th. I always just hold up the elastic and make sure I have room to sew the edge and room to pull the elastic through. Pin your casing.
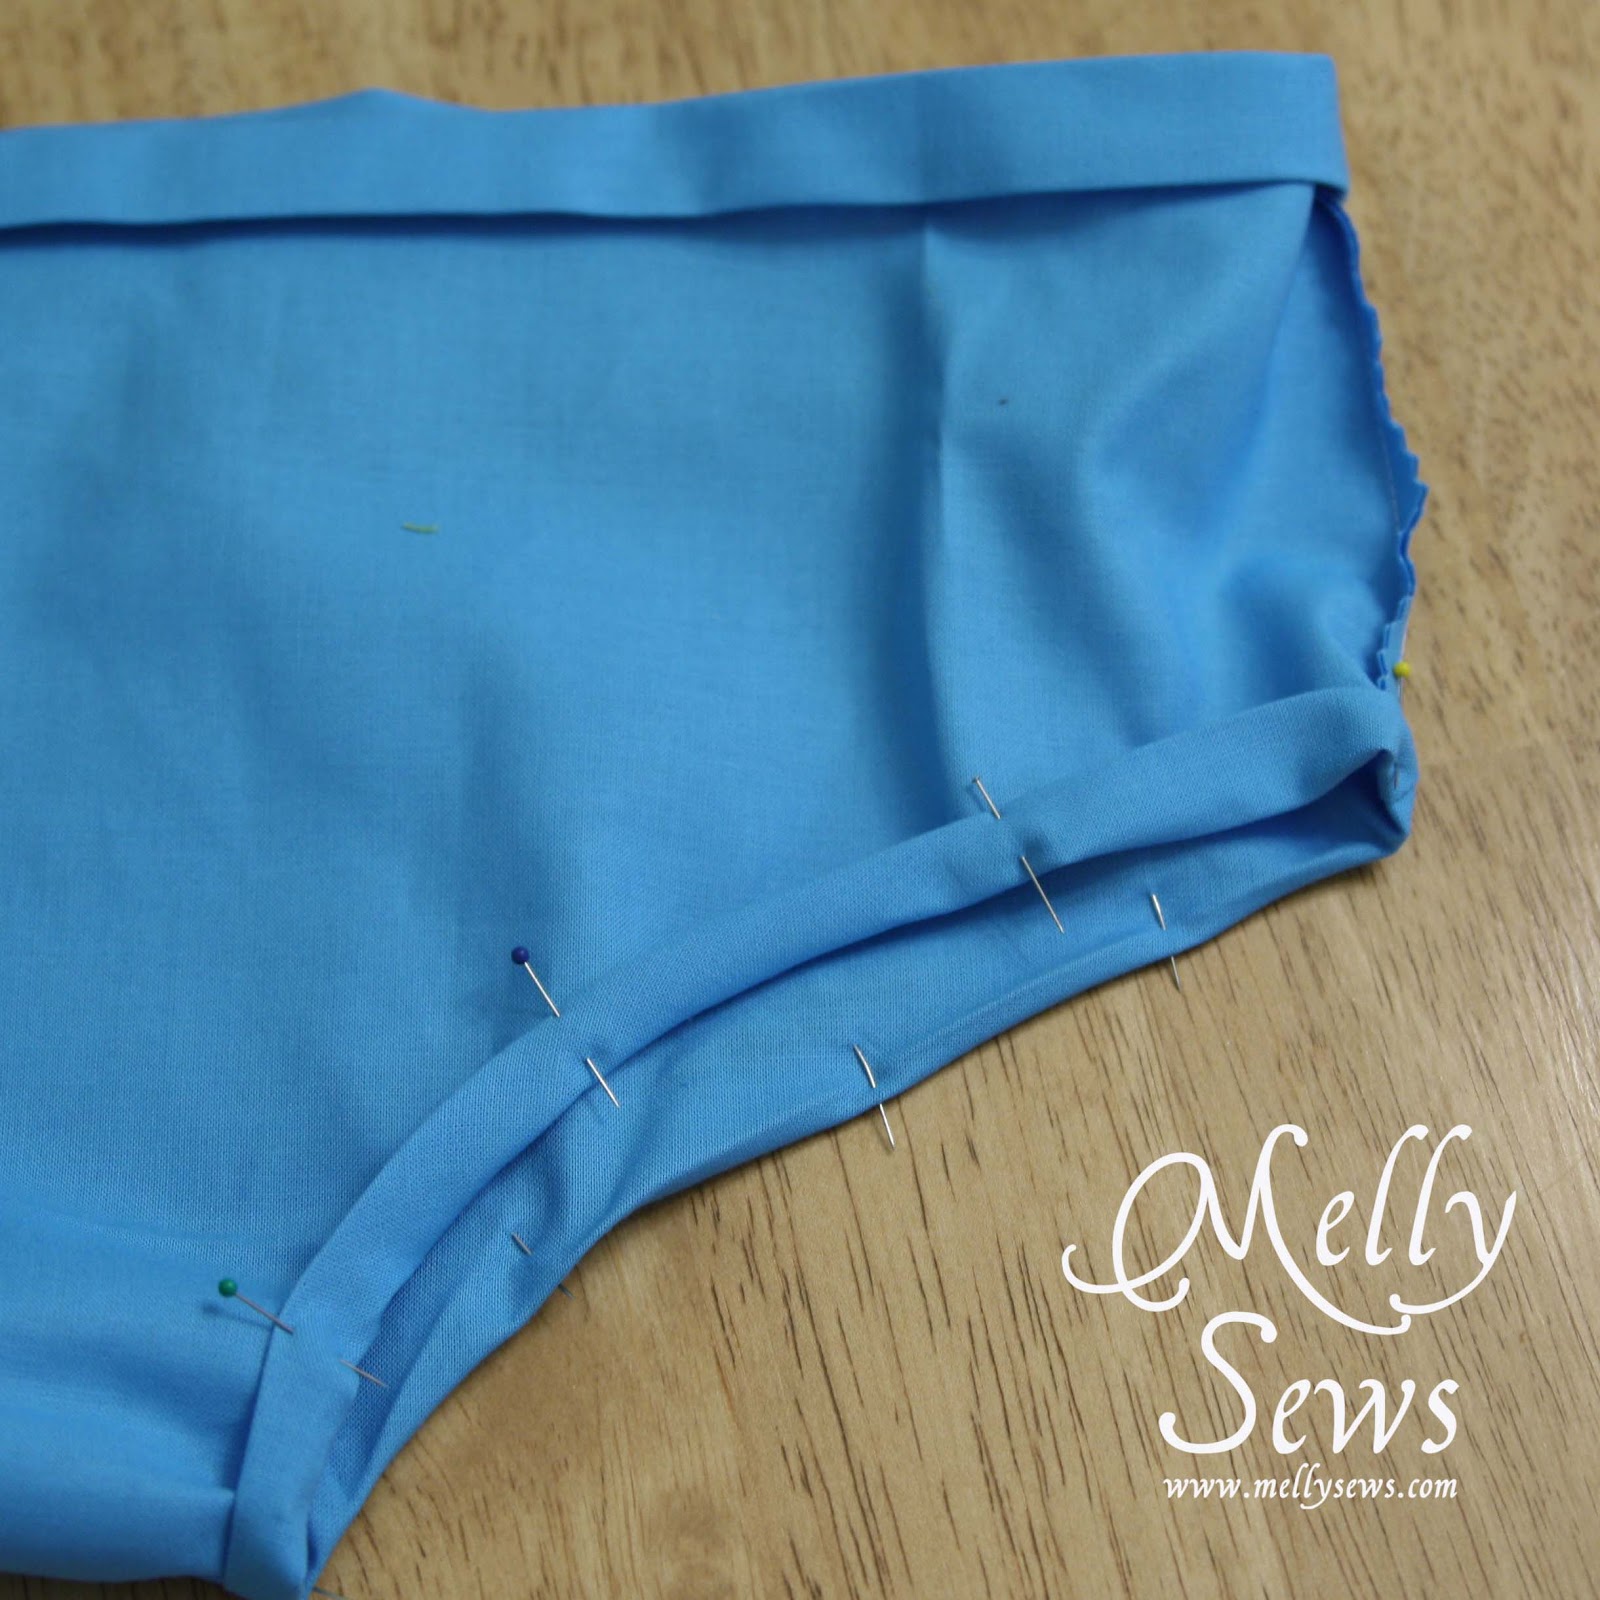
Around the crotch, things can get tricky. Don’t freak out if despite your best efforts, you have some wrinkles. They won’t matter because the leg holes get gathered so much. You can see in the pic below that my casing wasn’t entirely flat in the crotch.

Sew the casings, being sure to leave an opening to thread elastic through.

It’s best to measure your baby and then cut the elastic to their waist measurement, but if you’re making this for a gift, 17 inches is about right for a 3-6 month old waist and 10 inches is about right for a leg. Thread your elastic through the casing using a safety pin. Don’t worry that I’m using black elastic – I ran out of white and it’s the same stuff.
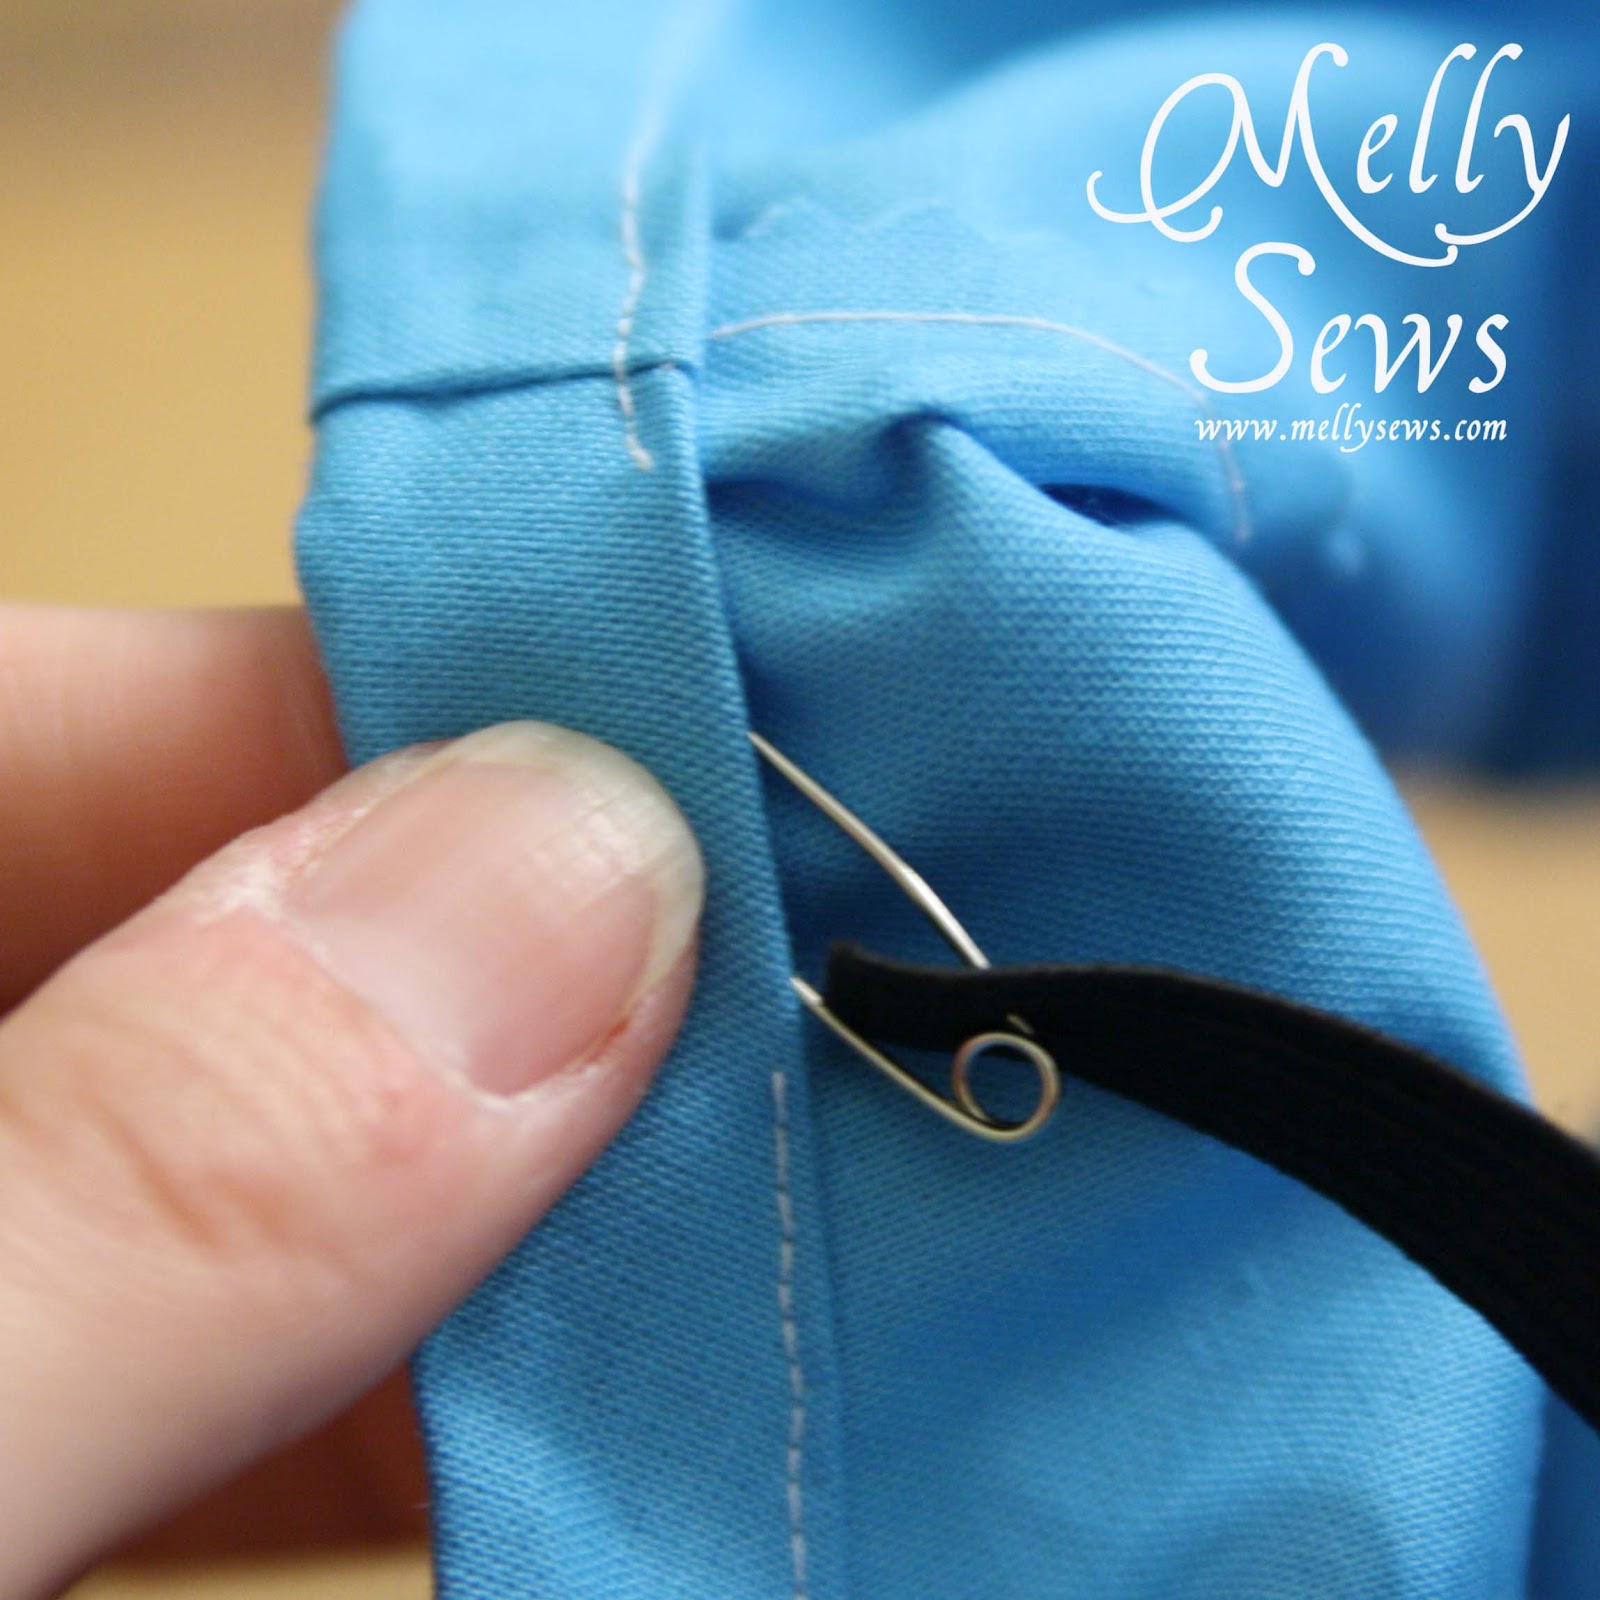
Overlap the ends of the elastic about 1/2″ without twisting, and sew them together, backstitching a couple times. Then pull into the casing and sew the casing shut. While sewing the casing shut, you’ll want to gently pull on the elastic to flatten the casing where you’re sewing.

Ta-da! Here’s the front of the bloomers (see, I told you the wrinkles wouldn’t matter).

And here’s the back.

Now find a cute baby booty to put them on!
These are so sweet and I have just the right little tushie to put them on. However, she is 18 month. Any tips on how to size up the pattern? TFS!
I would also love some information on resizing these. I have a 24-month size tooshie to put them on. you rock!!
To resize the best thing to do is add inches to the top of the pattern, at the waistband. Add about an inch for each size up; err on the side of adding too much because you can always cut them down before you add the waistband elastic. Adjust the elastic to your baby's measurements instead of the suggested measurements. You don't really need to worry about making them wider, because they're pretty roomy already and baby tushies mostly grow up instead of out.
Oh my gosh ~ These are just too adorable! Thank you SOOOOOOO much. My Granddaughter is almost 4 months old so this is perfect.