This shop has been compensated by Collective Bias, Inc. and its advertiser. All opinions are mine alone. #RoadTripOil #CollectiveBias
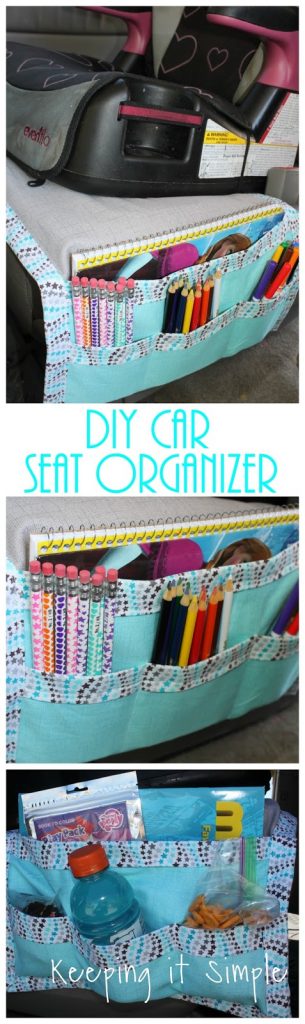
It’s road trip season!! One of my favorite things about summer is the fun and memorable road trips! This summer we planned a fun road trip that would take us to four states and get to see family and friends that we haven’t seen in years!! We have 5 stops planned and there is going to be a lot of time in the car. So to get ready for our big road trip, we got our car ready just like we got our clothes and kids ready. Since we knew that we would put a couple thousands miles on our van, we knew that we needed to get an oil change before we went, plus a few other things like rotating our tires and a tune up. And since we have 5 young kids, I knew that had to get the car ready for them to be in it for a long. No matter all the things that I plan for my kids for these long trips, it always seems like they lose their stuff during the drive because they don’t have anywhere to put it. So to help with that I made a car seat organizer that you can just put on to the car seat. It works as a caddy but also helps protect the car seat from spills and stains, it’s a win-win!
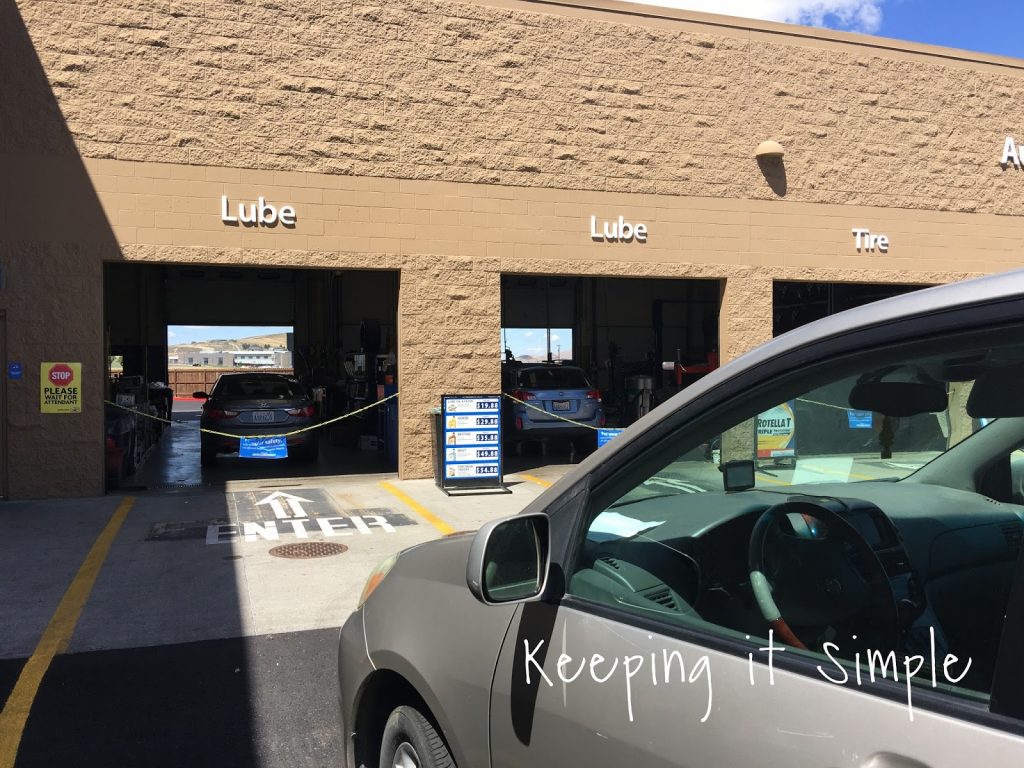
Whenever I get an oil change I always go to Walmart to their Auto Care Center. I have done it several times and every time it’s a good experience. It’s nice that I can just drive up to the back of the store, tell them what I want. I always get Pennzoil® High Mileage Vehicle® motor oil because my car is almost 11 years old and has taken us many places :). Plus it helps clean out the sludge from other oils in my engine and letting my older car run longer and stronger. I just leave my car for a little bit and go shopping. It’s so nice to be able to do two things at once! Right now is a great time to get an oil change because it’s on Rollback for $35.88 from $39.88 from June 15 to September 28.
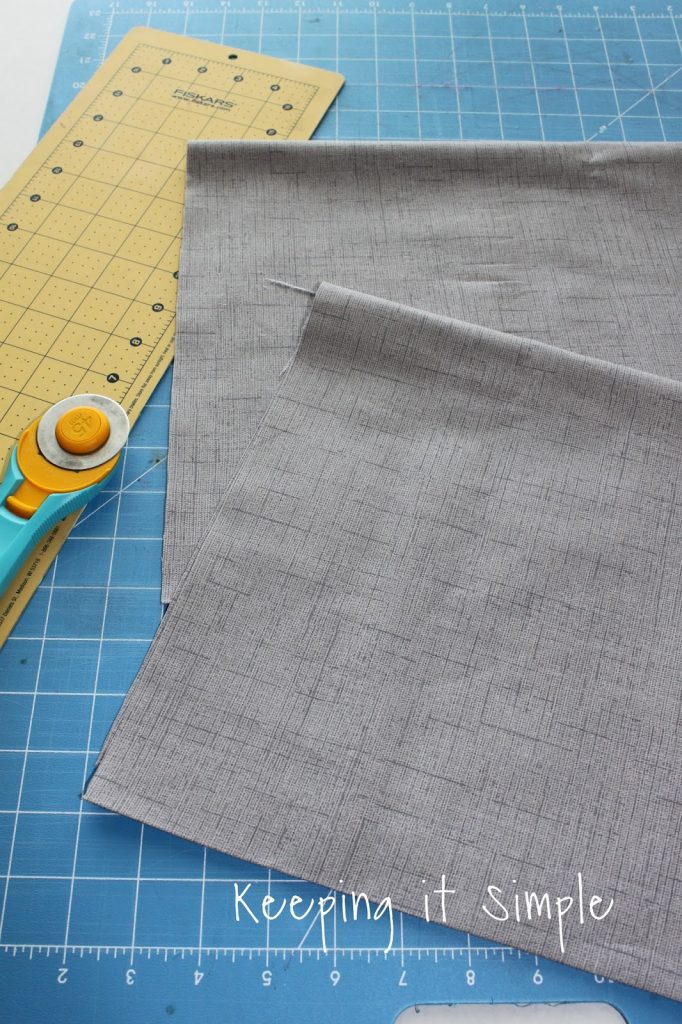
While my car was getting the oil change, I went shopping for food and then for things that I can make the car seat organizer with. I love Walmart’s fabric section, they have some really cute stuff for really cheap. I found a few fabrics that I loved. The gray and blue fabrics are a little thicker so they are perfect for the organizer and pockets and the stars were great to make some bias tape with. I got 1 1/2 yards of the gray, 1 yard of the blue and 1/2 yard of the stars.

This is how I made it:
I cut two pieces of the gray fabric, each of them were 42×14 inches.
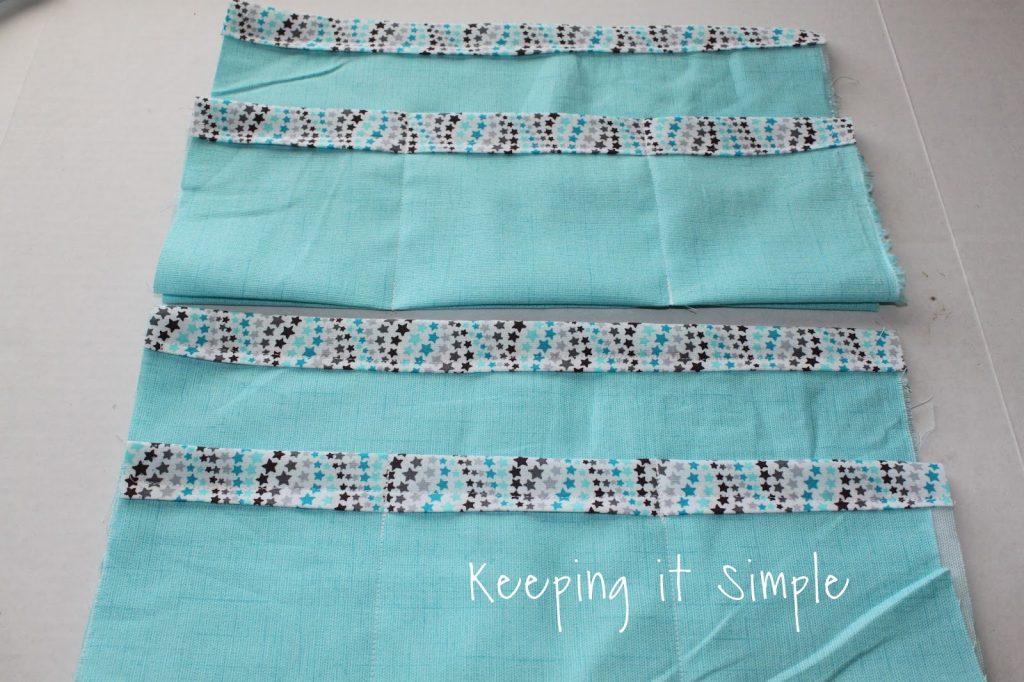
Then I cut the blue fabric for the pockets. I cut 4 pieces, 2 of them were 16×14 inches and 2 of them were 10×14 inches. Then I folded them in half so it was still 14 inches wide. 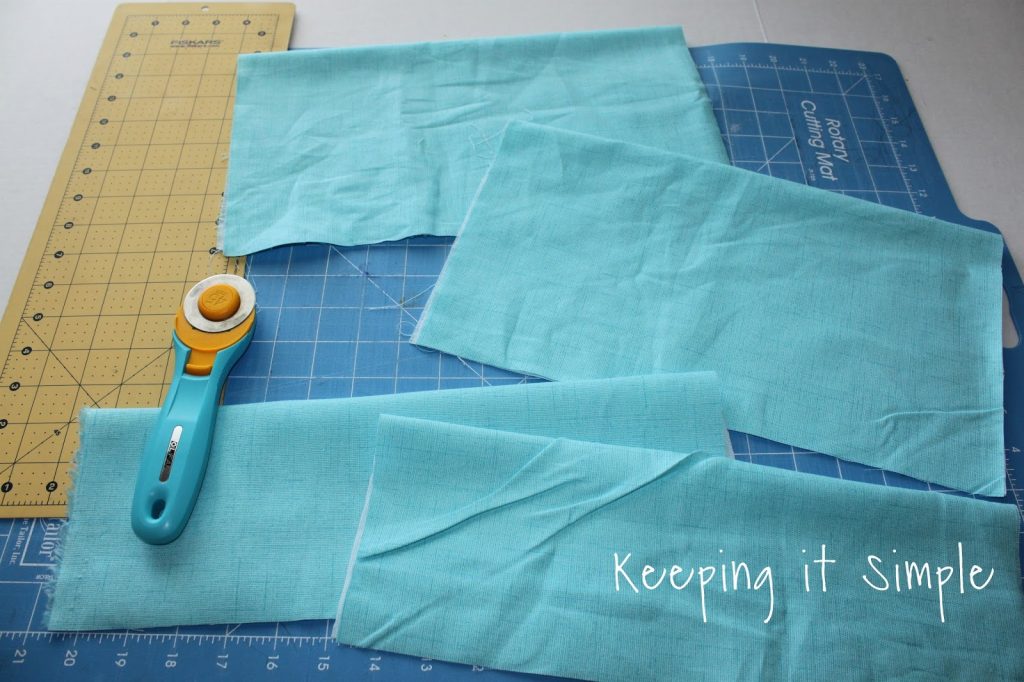
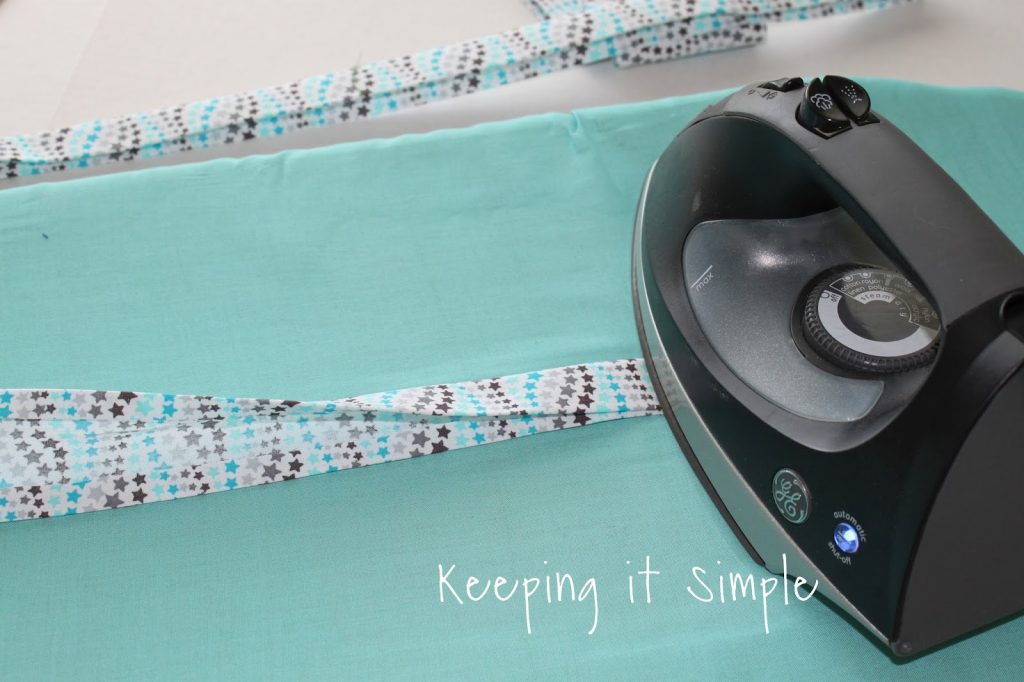
For the bias tape, I cut strips that were 3″ wide. 
To make the bias tape, I first folded down the sides of the strip about 1/4 inch (on both sides) and then ironed it. I then folded it in half and ironed it again.
Once I ironed all the bias tape, I sewed some on to the tops of the pockets.

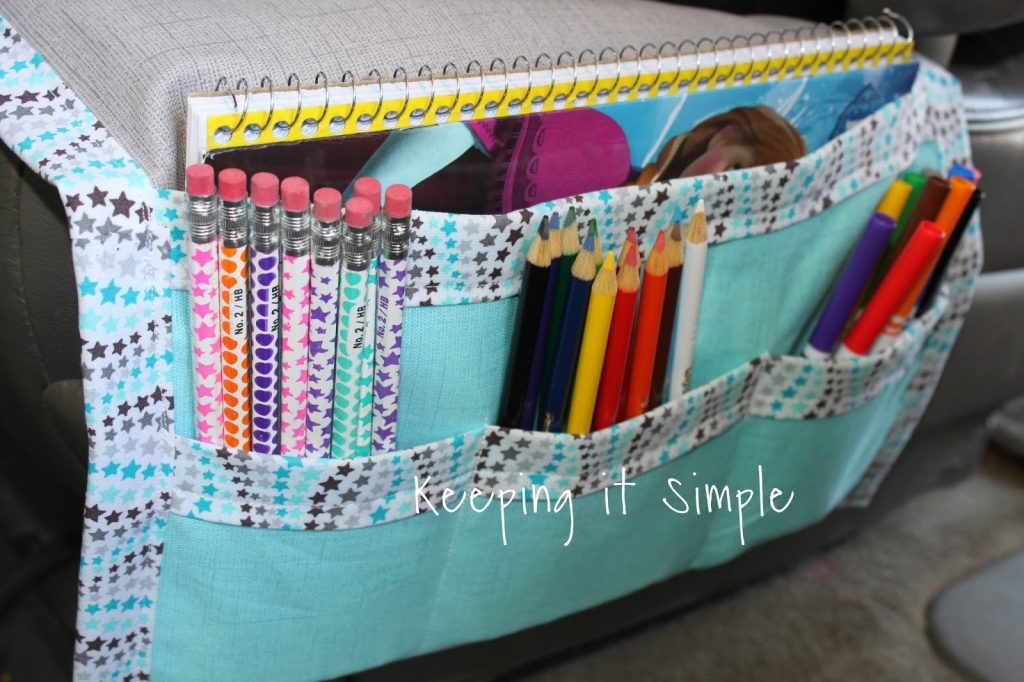
The bigger pocket is for notebooks and books and the smaller one is for crayons, pencils and pens. I wanted there to be three pockets in it, so I put it onto the bigger pocket and sewed two lines on the smaller pocket to make the three pockets. I did that twice.
I then took one piece of the gray fabric and sewed the pockets onto the ends of it. I just sewed the three sides, leaving the part with the bias tape open
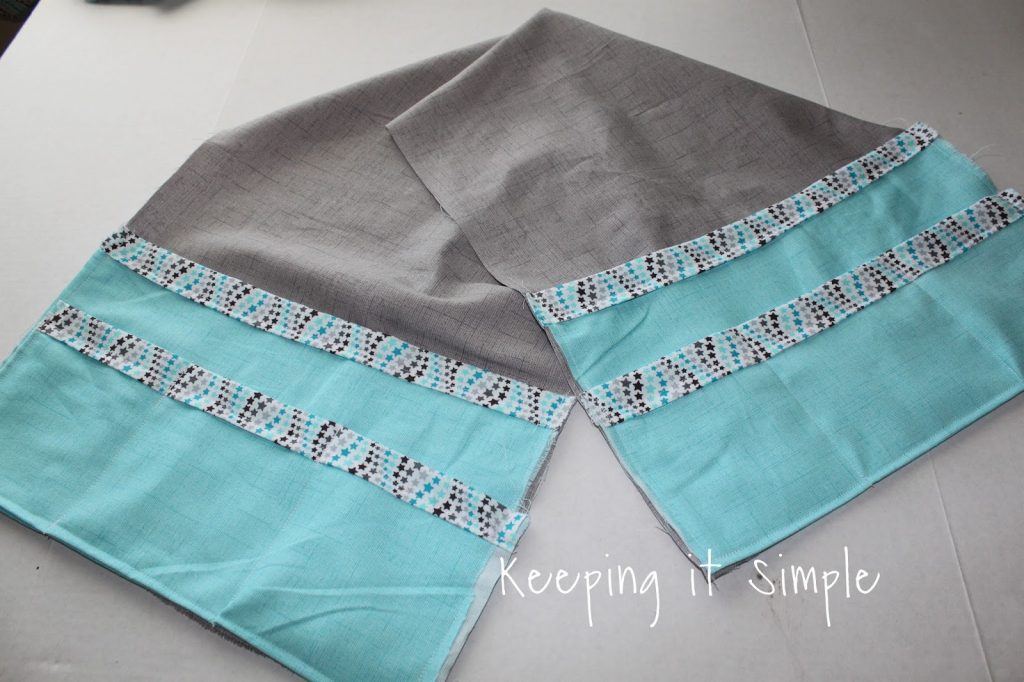
I then put the other piece of gray fabric onto the back and sewed it all together, along all four sides. This gives it a little more support.

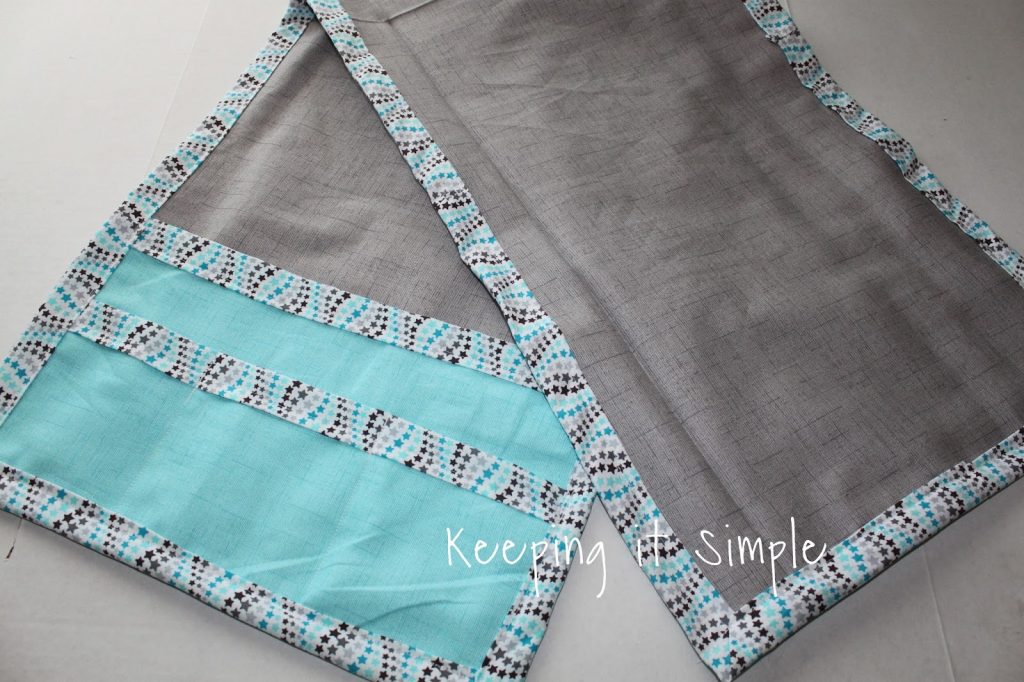
Lastly, I put the bias tape all around the organizer and sewed it on. This hides the sides and makes it look nicer and more finished.
And that’s it!! It was super simple to make. All you have to do is put it over the car seat and then fill it up with the kids’ stuff. If you want it to be wider, you could even measure the seat and make a hole to put the seat belt through, that way it wouldn’t fall off as easily.
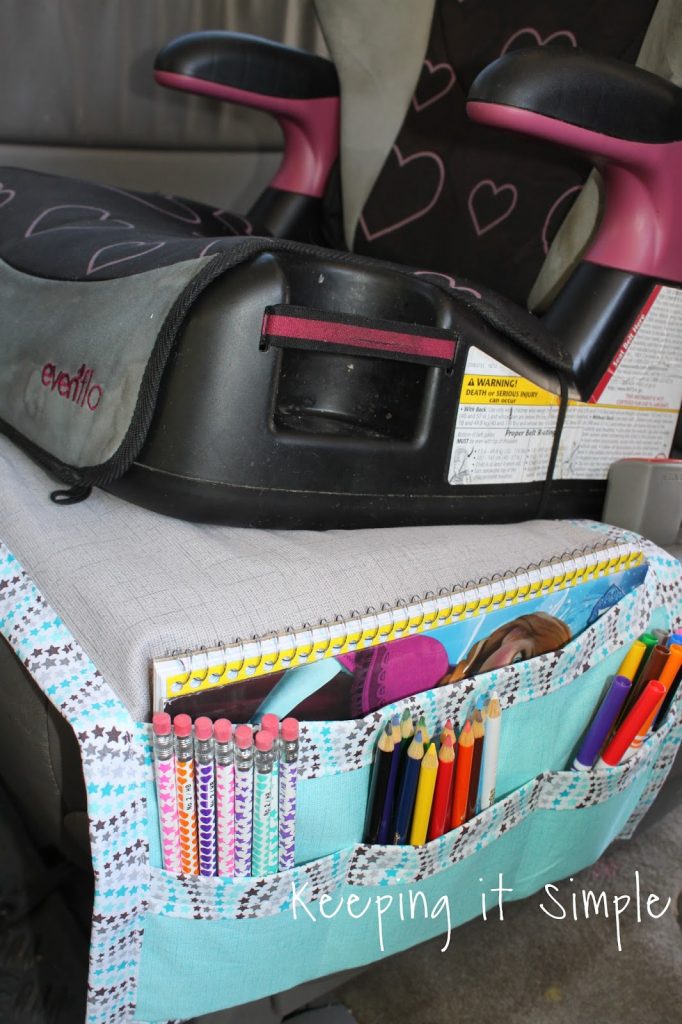
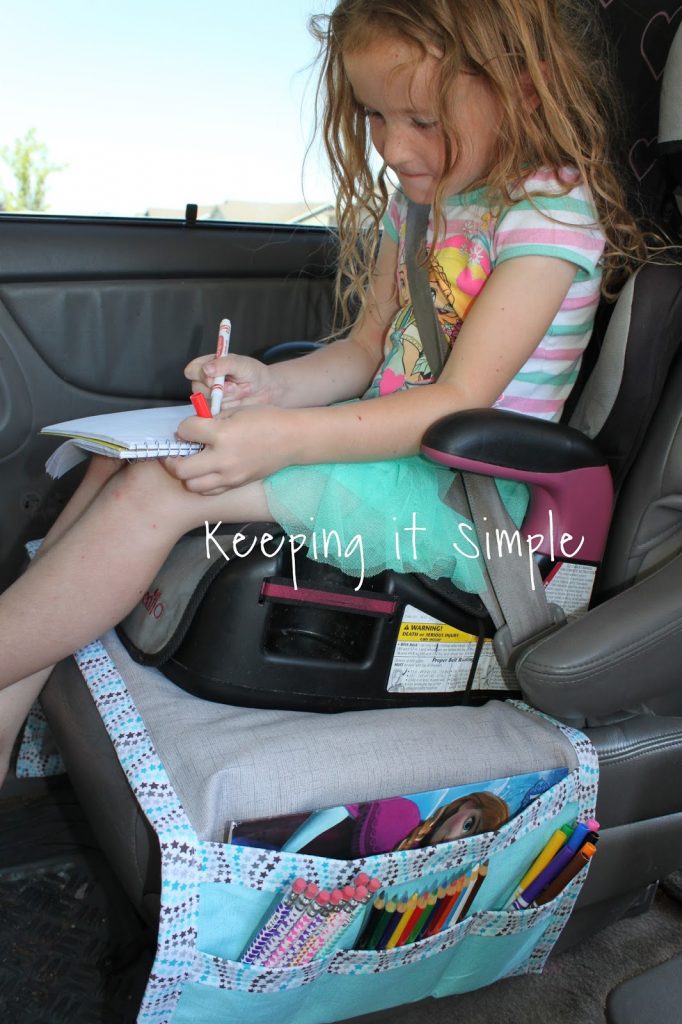
We filled one side with a notebook, coloring book and lots of coloring supplies.
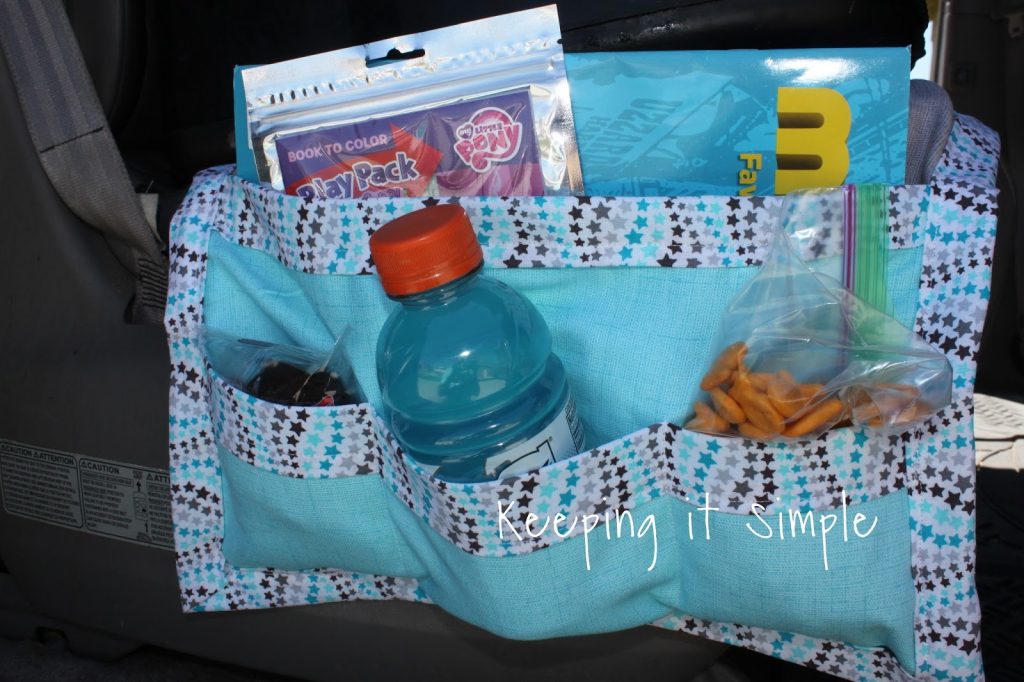
And the other side we filled with some snacks and few other coloring books.
My daughter was super excited to use it! It was so nice that she could just reach down to get the pencils and markers. And when she’s done with them, she can put them back (and not onto the ground!).
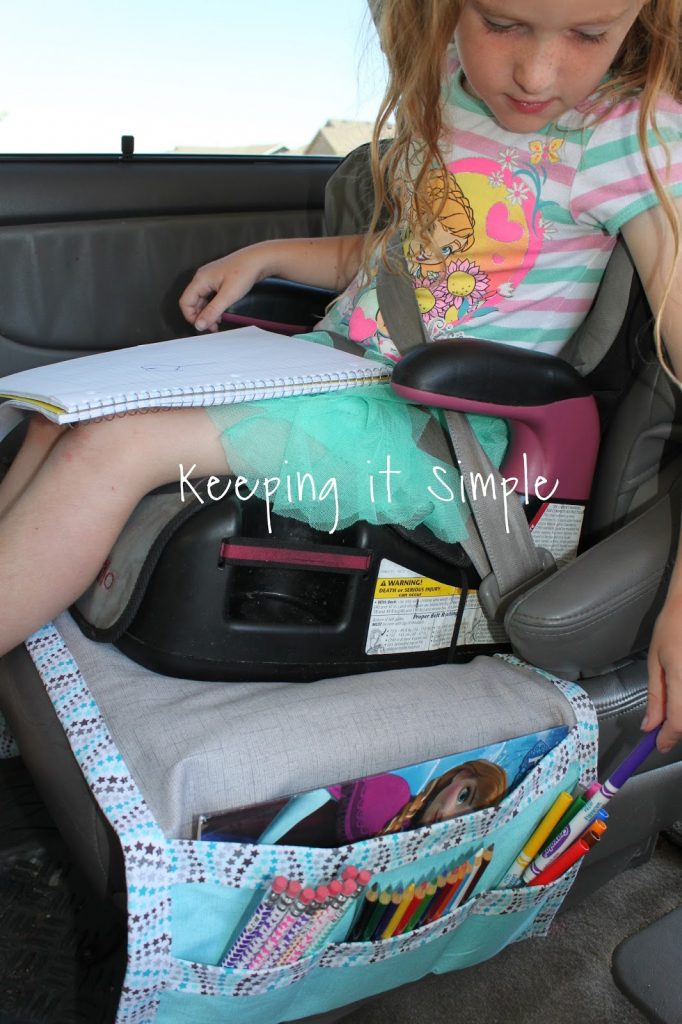
She is all ready for our next road trip! I am going to make another one for our other bucket seat. You could also do something similar for the back seat too, maybe just have the pockets hang in the front of the seat instead of the side.
I have also made a few other things to help make road trips more bearable, like these road trip binders (they were and still are a big hit with my kids) and this hanging garbage can that helps to clean some of the trash off the ground.
Do you have any fun road trips planned for the summer? We are hoping to make it to the coast soon and maybe even Canada :). Make sure before you go on your trip, to get your car ready and take it into Walmart for an oil change.
What a fun idea! Our son is still a little young for coloring books, but I am totally going to keep this in mind as he gets older. Thanks so much for sharing! #client