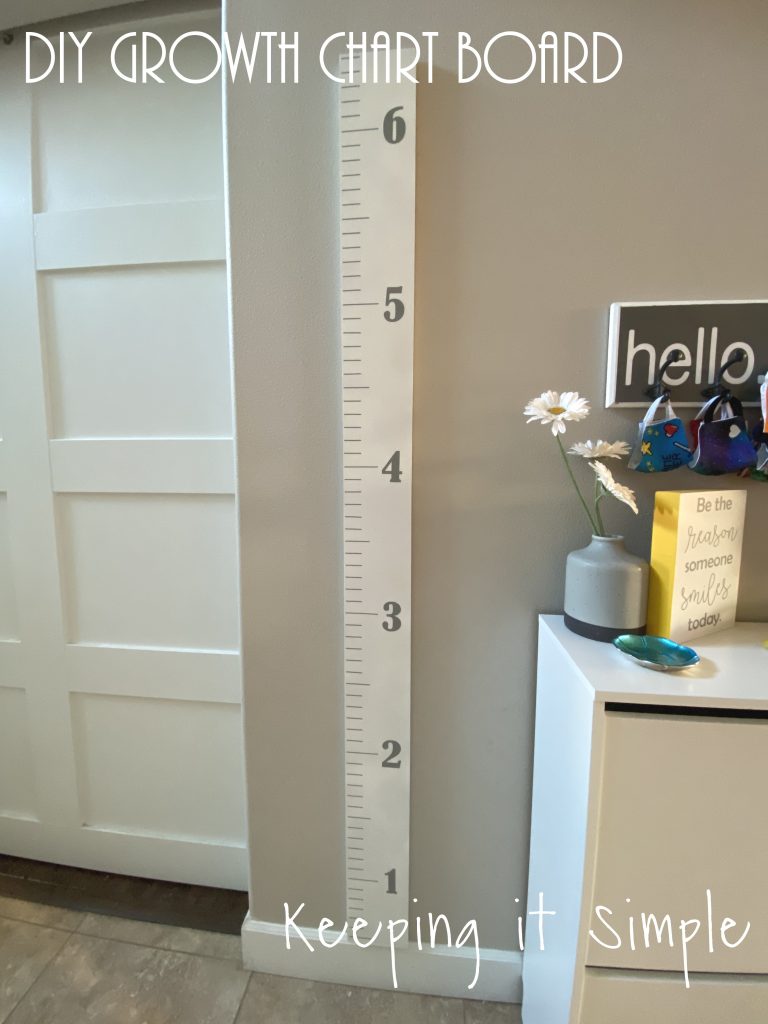
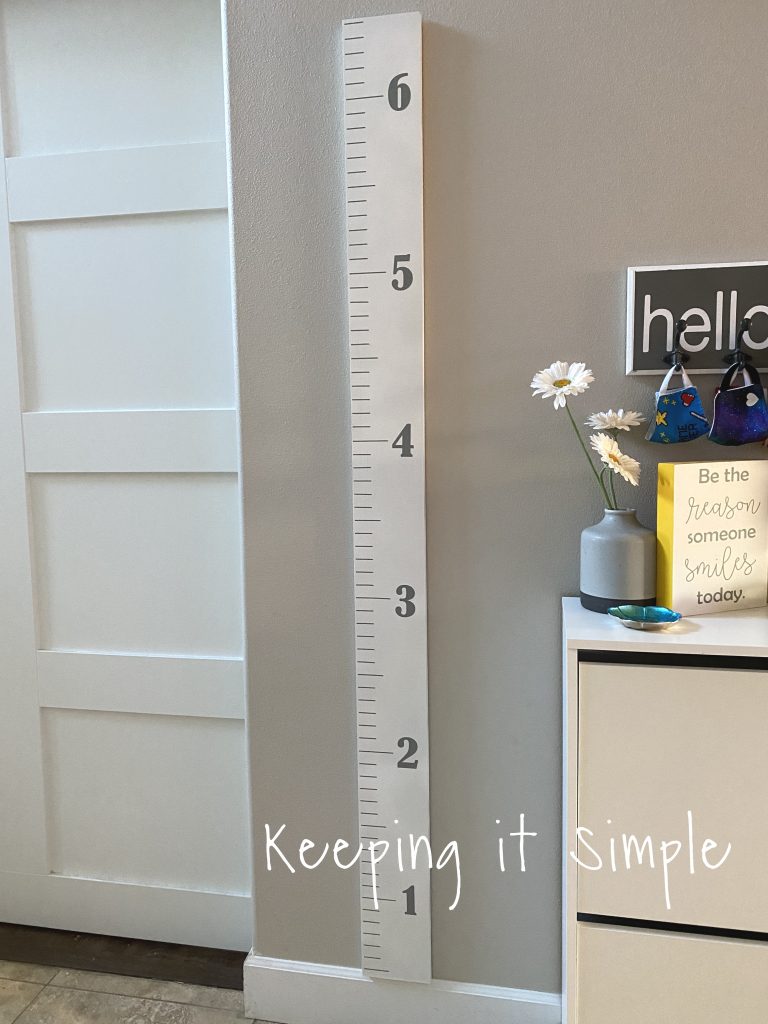
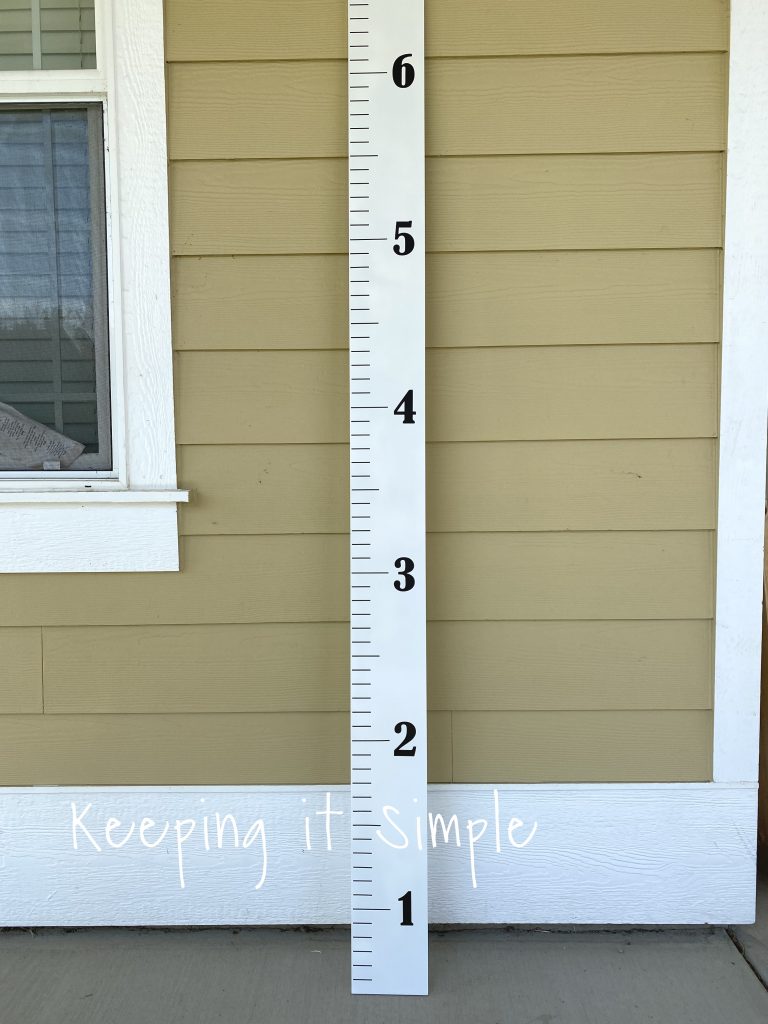
DIY Growth Chart Board
I have been wanting to make a growth chart board for my family for awhile now and finally got to it. We have been using just a plain piece of wood for the past several years and my oldest got too tall for it, so it was time to get another one. I noticed that all of the ones in the stores only seemed to go to 5 feet, which would give us the same problem as our plain board. So I decided that I needed to make one for our family, it was super easy to make and I love how it turned out. I love the simplicity of the white with the gray vinyl. I’m excited to track my kids’ growth on this board :).
This is how I made the growth chart board.
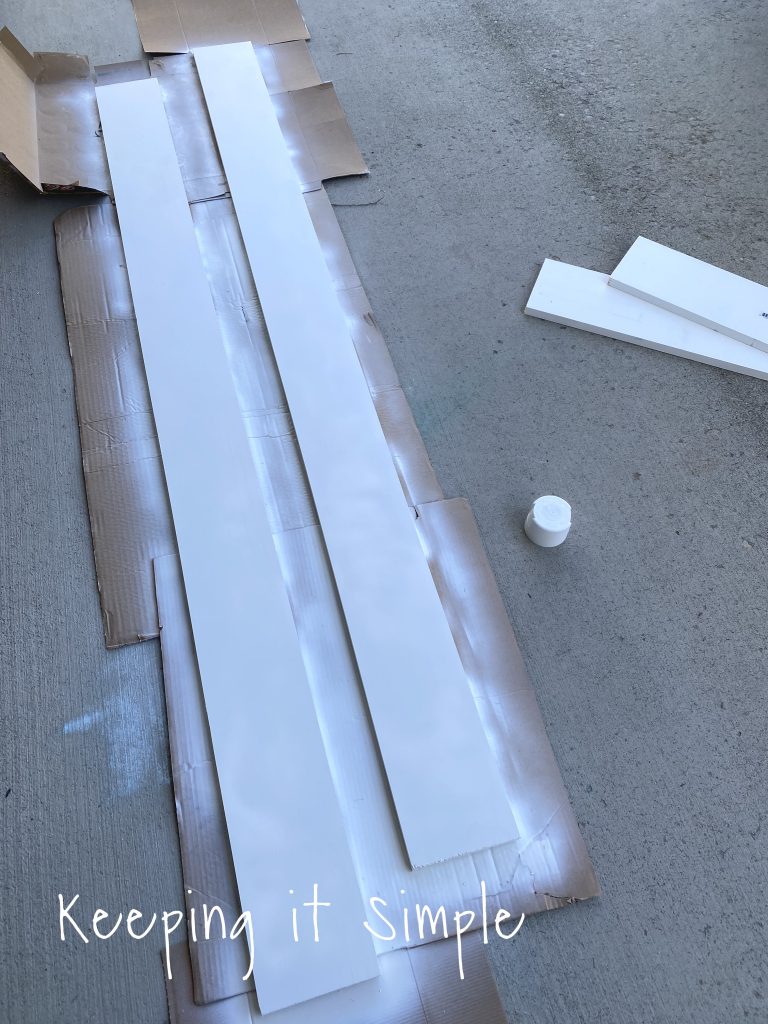
I wanted the board to be white, so I just bought one that was already primed white. I cut it to be 6 feet long and then painted it white (I made another one too, that is why there are two boards). I bought a 1 x 6 board.
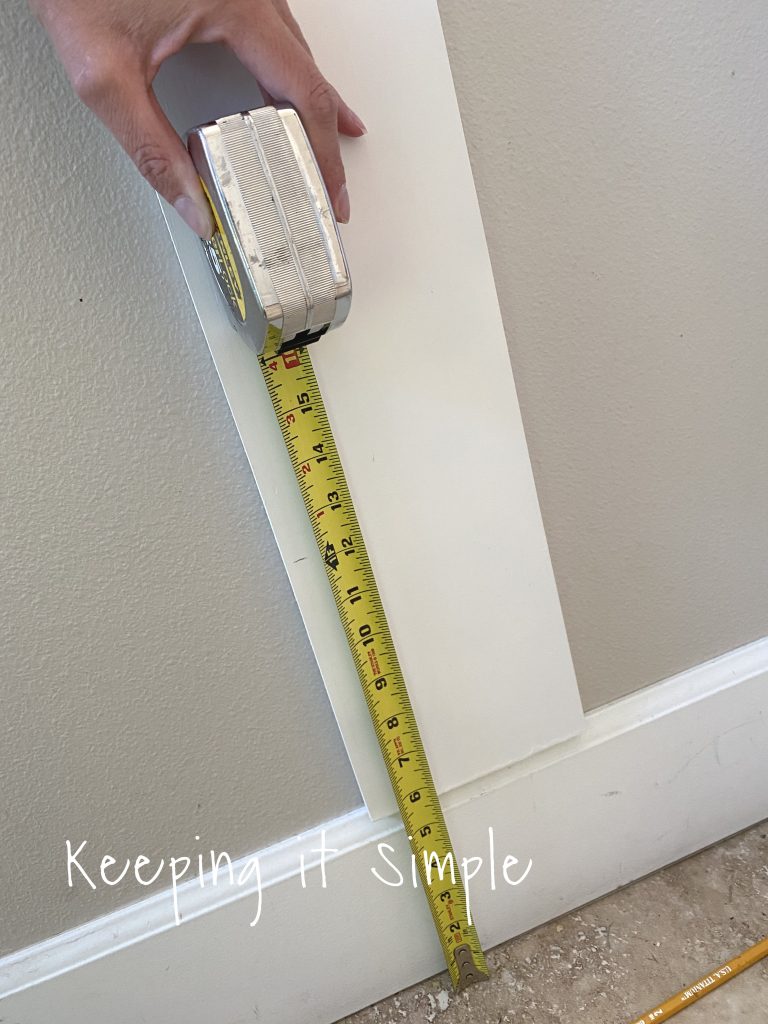
I wanted to put the board on our wall, so I put it right onto the baseboard and then measured where 1 foot hit the board, that was my starting point.
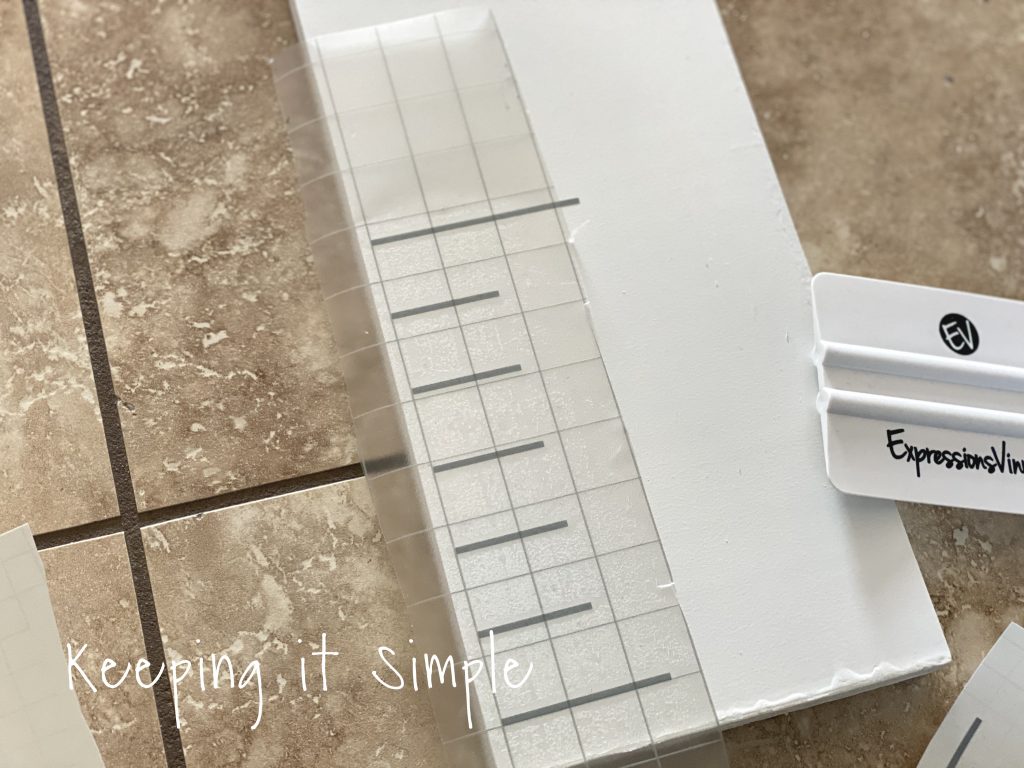
I then cut out all of the lines and numbers. I used a gray Oracal 631 vinyl. I then used the grid clear transfer tape, it was awesome because the lines helped me line up the notch marks so that it was straight on the board. I cut out the vinyl with my Silhouette CAMEO. I have the cut file available in both types- Silhouette and SVG. You can get them here (there are two separate links):
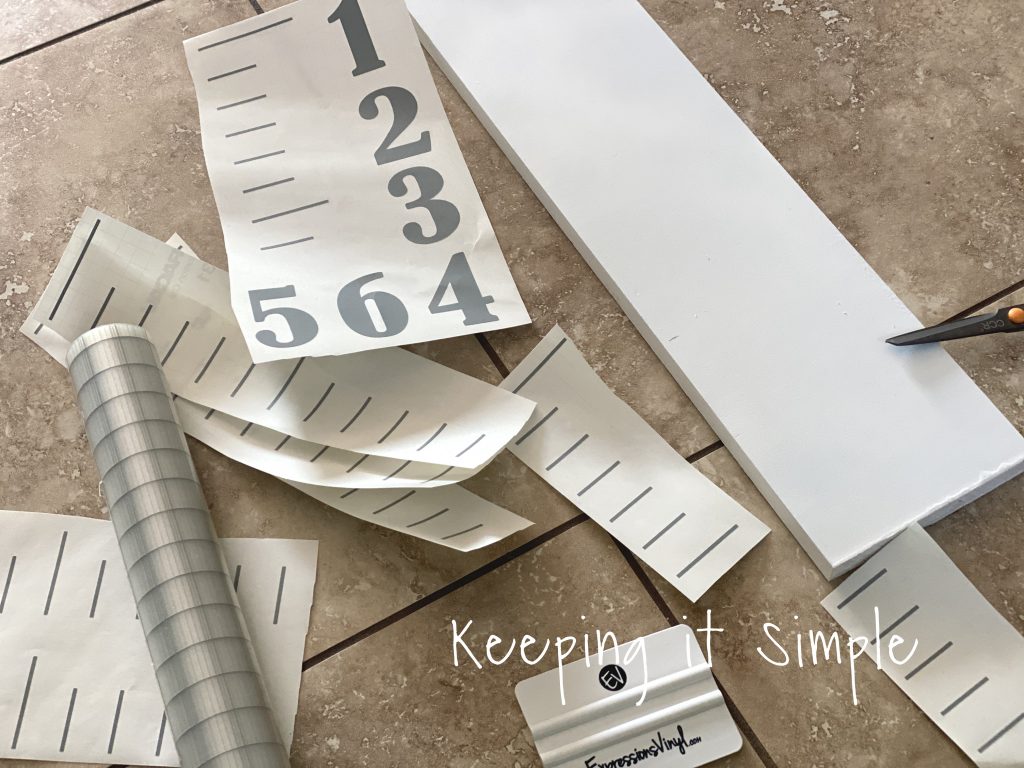
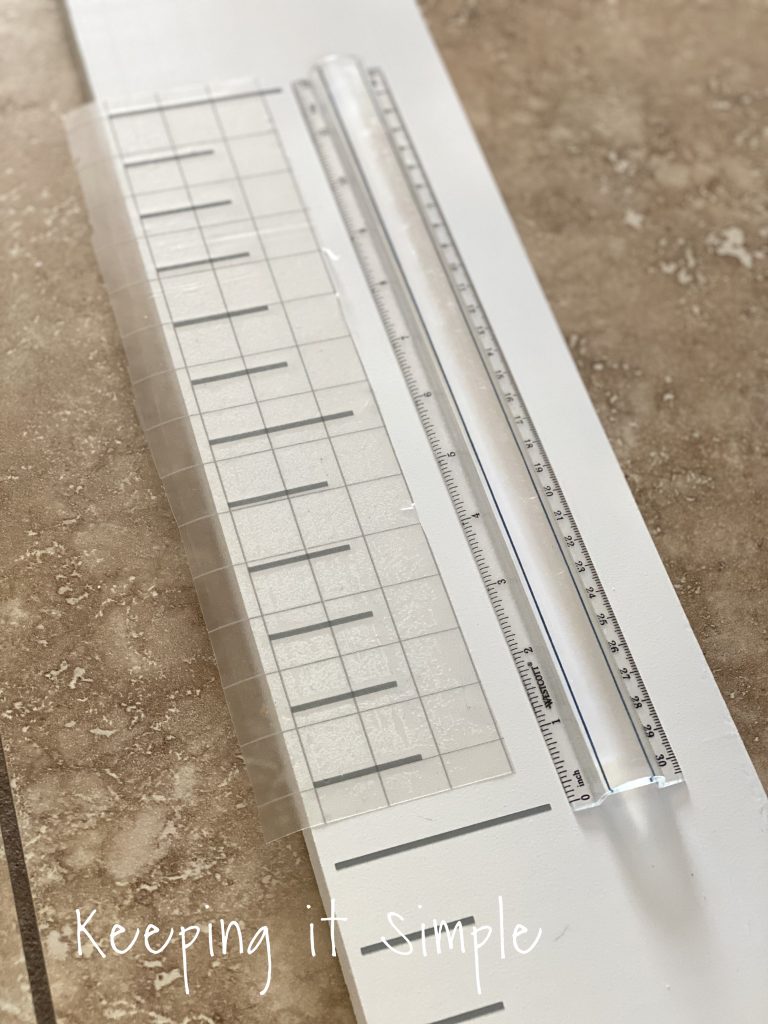
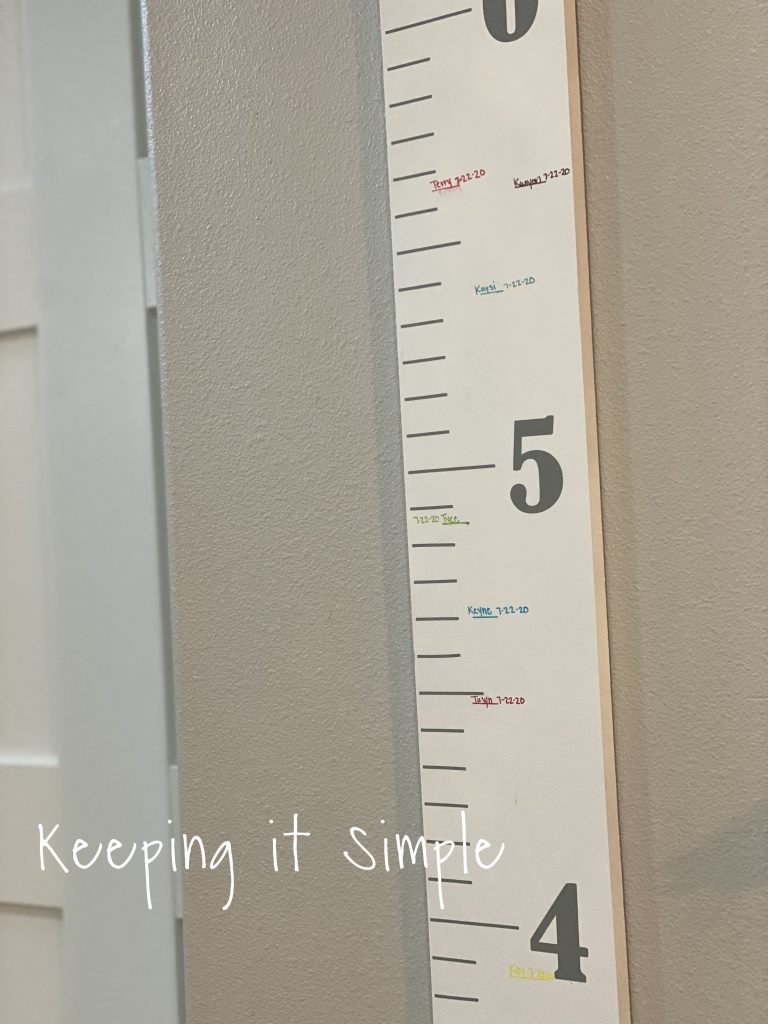
The trickiest part of the whole process is putting on the notch marks because they have to be lined up and be the right distance so when you measure the kids, they are at the right height. The first thing I did was line up the one foot notch mark up to the place where I marked the board with a pencil. Then I put the vinyl on the board and then used the application tool to get the vinyl to adhere really well onto the board. Then I peeled off the transfer paper.
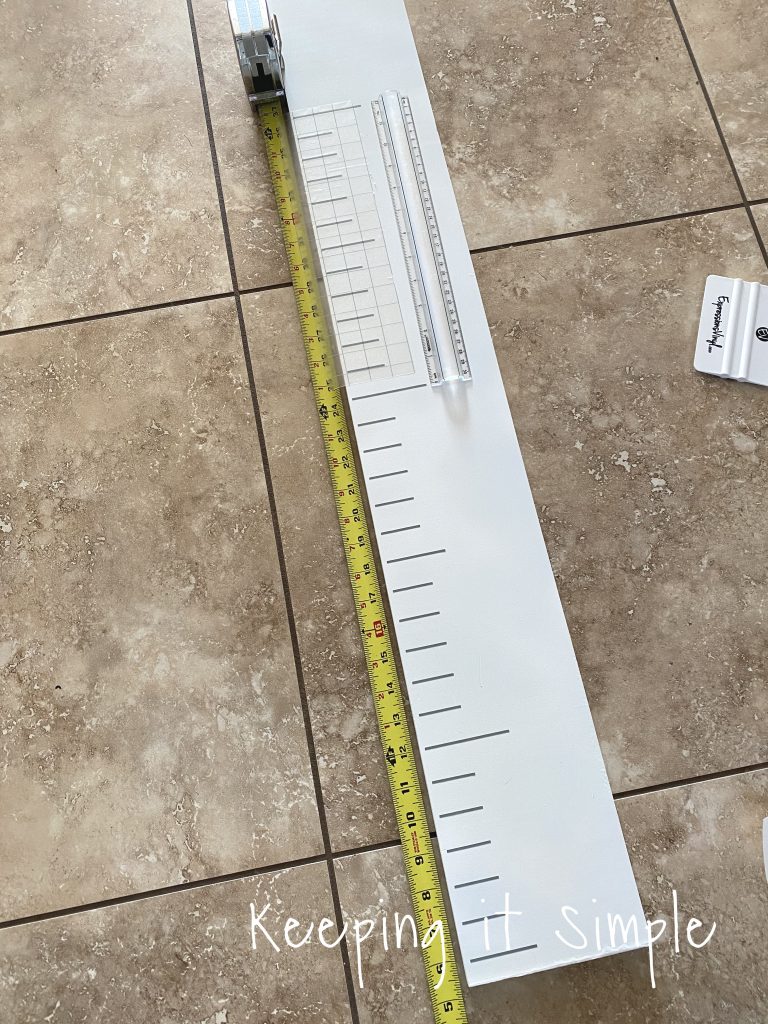
I then worked my way up the board putting the notch marks onto the board. I used a ruler to make sure that they were spaced correctly.
As I kept going up, I used other things, like a tape measurer to make sure the height was correct.
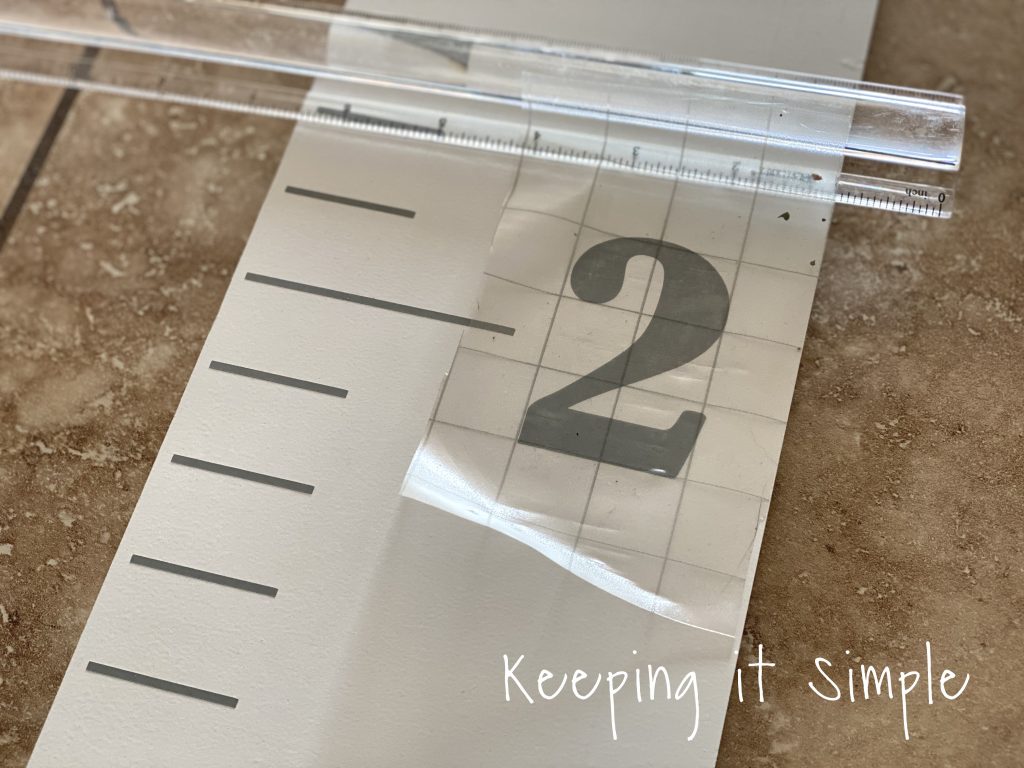
Once all of the notch marks were put on, I then put on the numbers.
And that’s it! Super easy to make! I put the growth chart board onto the wall using command strips.
Then we all measured ourselves on the board. Each kid will have their own color of Sharpie so we can keep track of them as they grow.
I made another one for a friend and instead of gray vinyl, I used a black matte permanent vinyl (Oracal 651).
Check out all of my other signs that I have made.

This post contains affiliate links.
Leave a Reply
You must be logged in to post a comment.