Family Reunions Shirts with Numbers and Different Colored Shirts
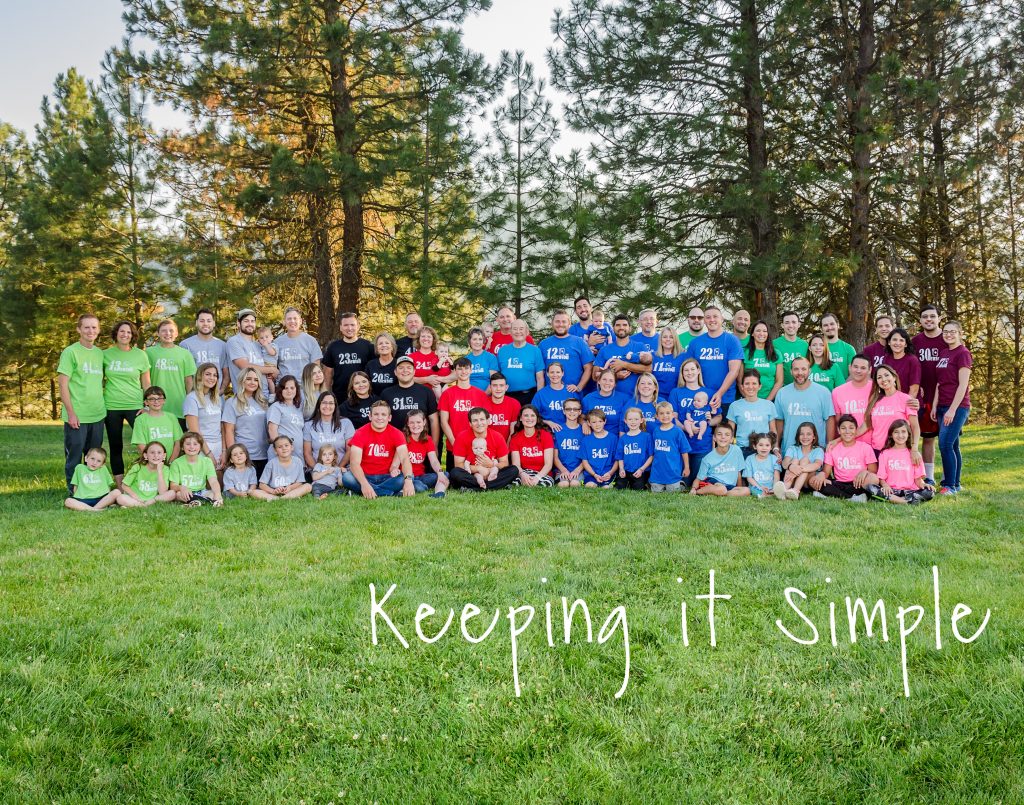
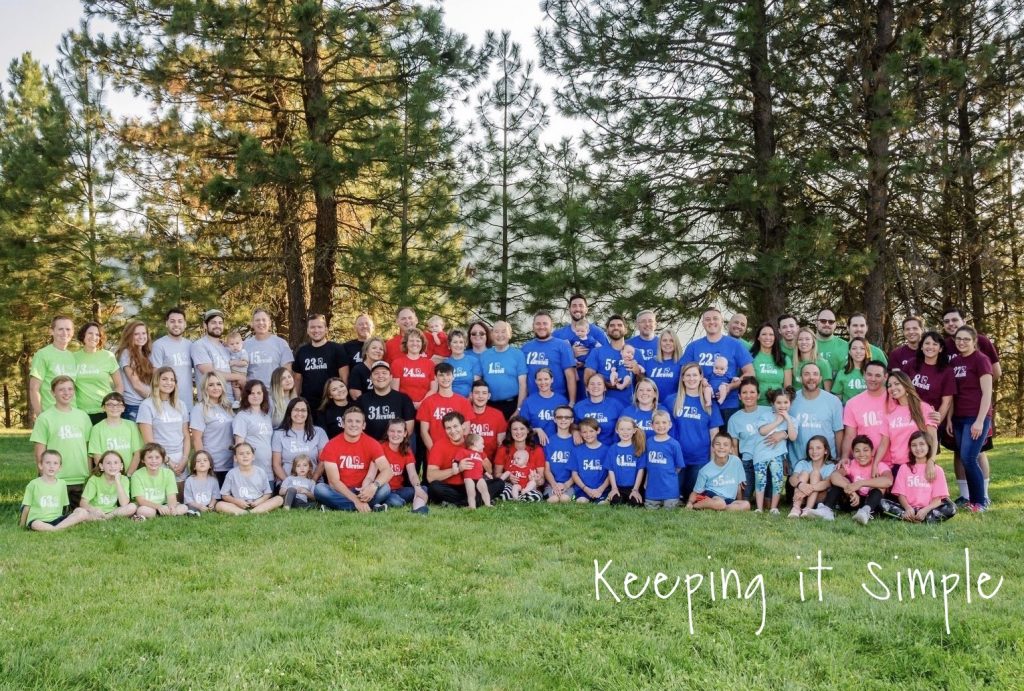
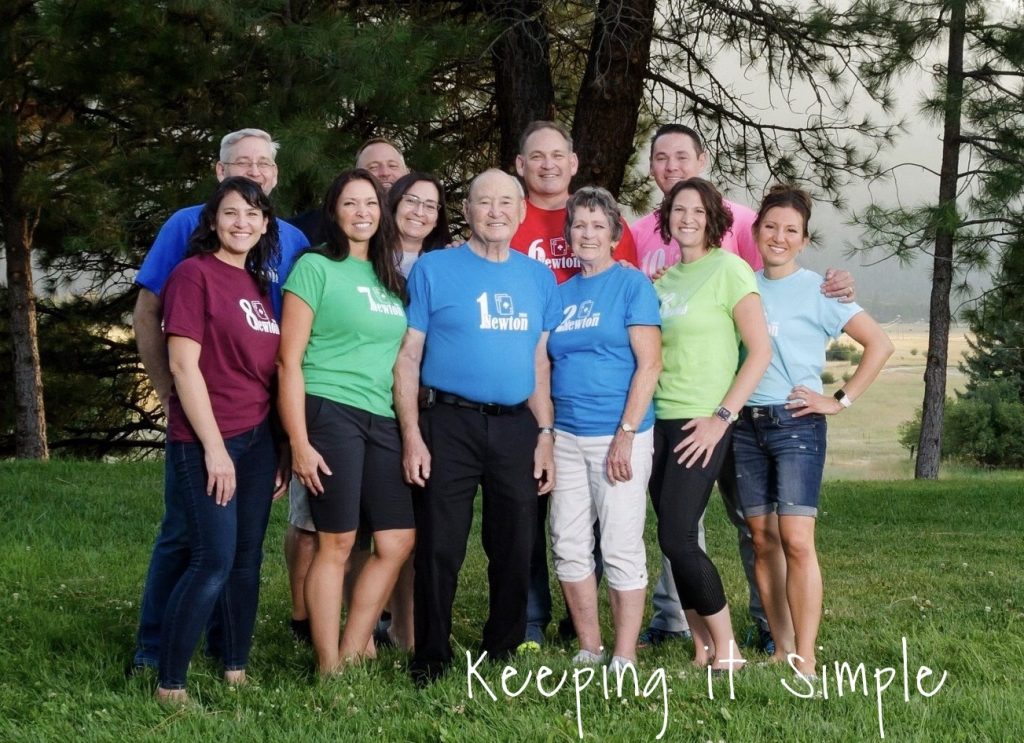
This past summer we had a big family reunion for my Dad’s 80th birthday party. We have a large family, I am the youngest of 9 kids, and so trying to get everyone together is a huge deal. I have always wanted to have a picture of my whole family with matching family reunion shirts, so I got to work and made my family all matching shirts for a big family picture. I ended up making 80 shirts and they turned out AWESOME!! I learned a lot of things along the way, so I thought I would show you how I made these shirts and give some tips that I learned along the way.
![]()
This is how I made these family reunion shirts.
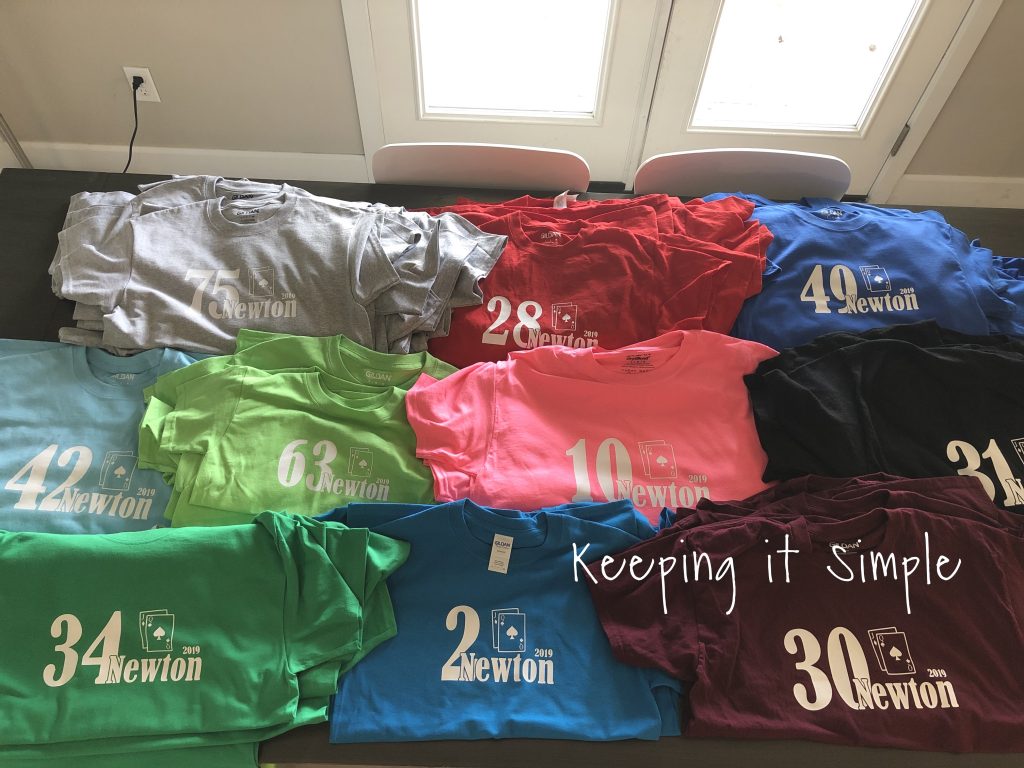
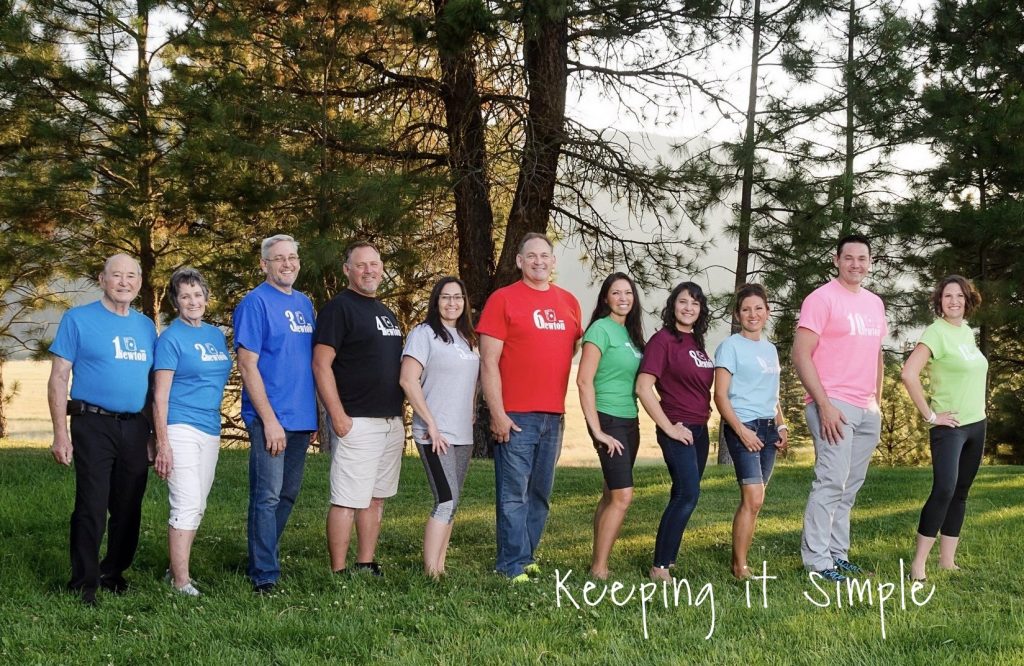
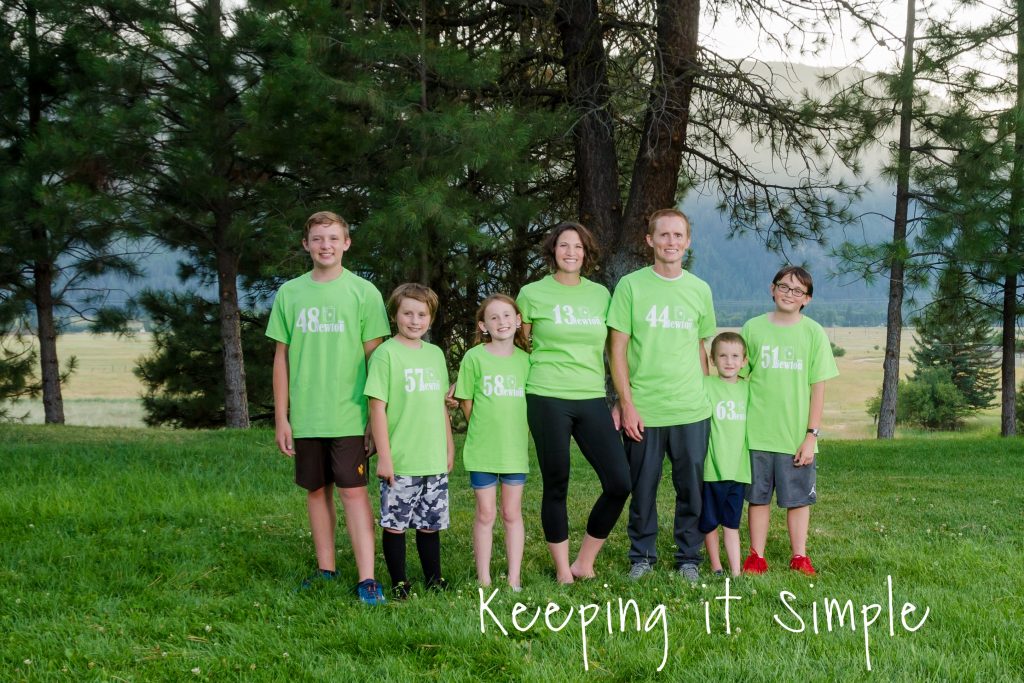
As you can see, we have a big family and we have all ages, from grown ups, to teenagers, to toddlers, to babies. The two things that I really wanted was for each of us to have number on our shirts, the number is based off of when you entered the family. And then I wanted each sibling to have their own color so when you look at the picture, you know who belongs to who. So having 9 kids, plus my parents, we had a total of 10 different colors.
Finding shirts is the first step in this process because you have to have shirts, right? I looked at Hobby Lobby, Michaels, Jo-Ann and then a few online stores. I ended up going with Hobby Lobby and here’s why- their shirts are ALWAYS on sale, so I didn’t have to shop the sales. Also, they have a LOT of different colors and lots of sizes. And the big deciding factor for me was that they had matching onesies, which was huge because we had 4 babies born that year. So I was able to find adult shirts, youth shirts, toddler shirts and onesies all at Hobby Lobby.
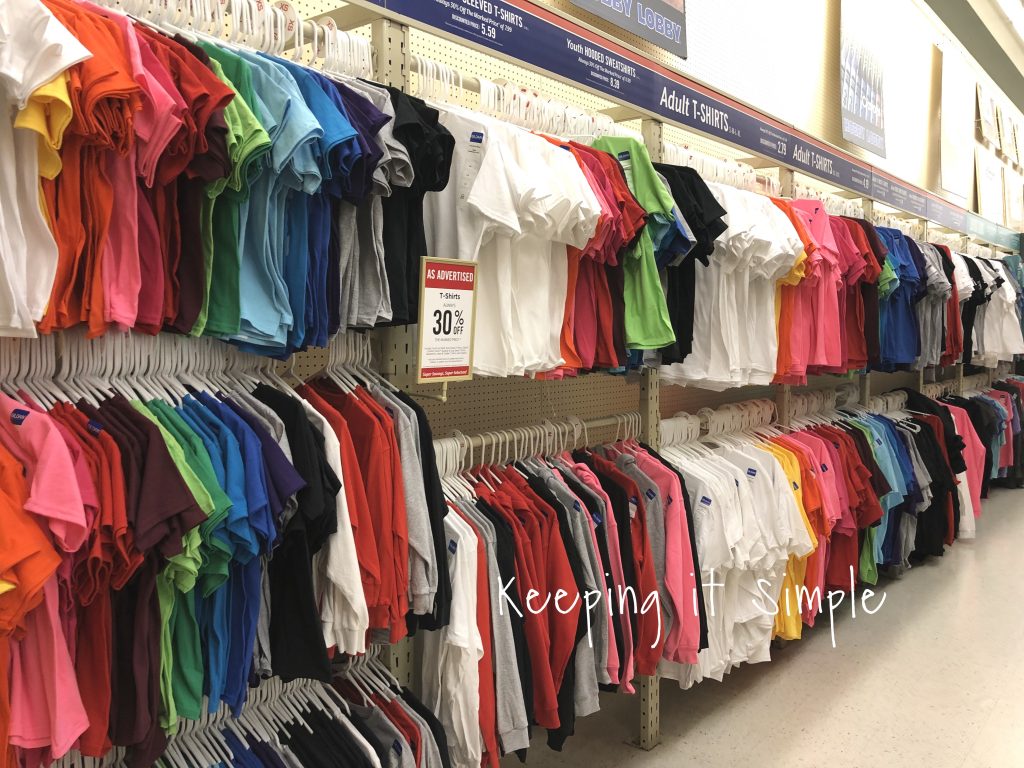

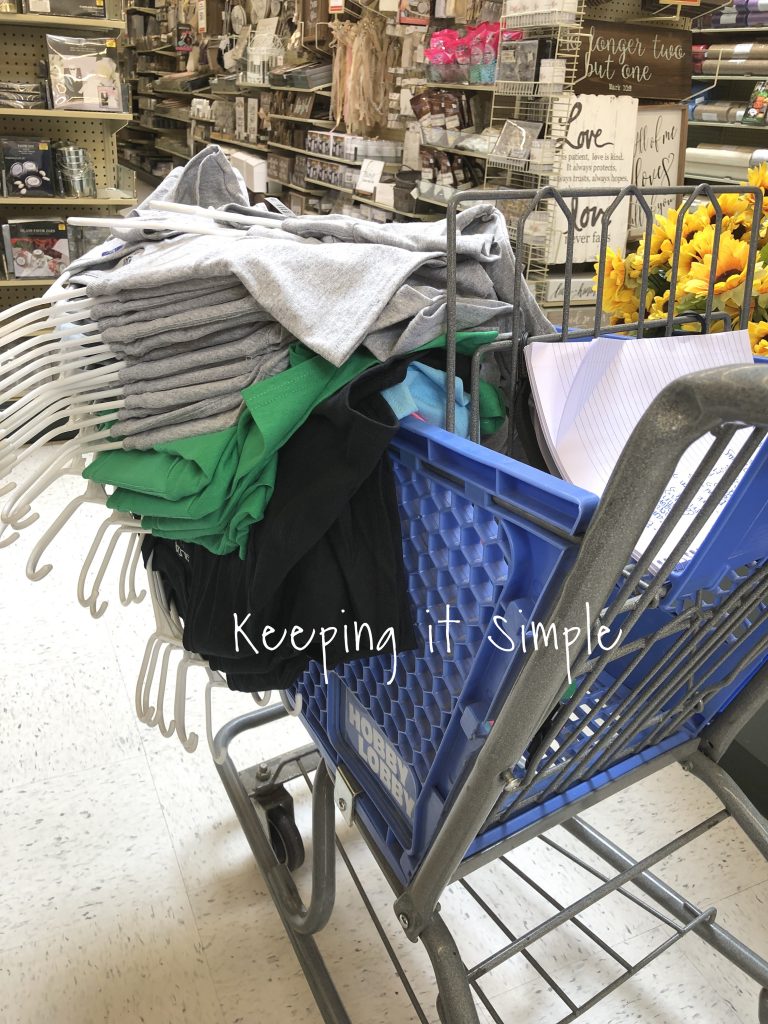
So the next step was having everyone pick out a color and then getting all the different sizes. The way that I did it was I asked my siblings and made them in charge of getting the sizes for everyone in their family. As far as choosing a color, there were limited colors of the onesies, so the people who had babies in their families, I let them choose first and then we kinda just went down the line to pick. I picked a bold and bright color for my family because I knew that no one else would want it. The key is to have a variety of colors that stand out from each other so you can actually tell who is from each family. Once we decided on colors and sizes, I went shopping. Luckily, our Hobby Lobby had all of the sizes and colors that I needed!
Now time to design the shirt. This was actually one of the most challenging parts of the whole thing. Here are a few things that I learned quickly when it comes to making shirts- simple designs are better. As I asked everyone in the family what kind of design we should do, lots of ideas were brought up. Someone suggested the theme be PASS! the love, so I tried to work that into the design. I also wanted to have the number in design and some kind of symbol that represented our family, so I went with cards. This was my first attempt at the design. Once I got it onto the shirt, I didn’t love it.
*** Also another tip, when you are playing with designs, cut out them with regular vinyl instead of heat transfer vinyl, it is cheaper and not permanent :).***
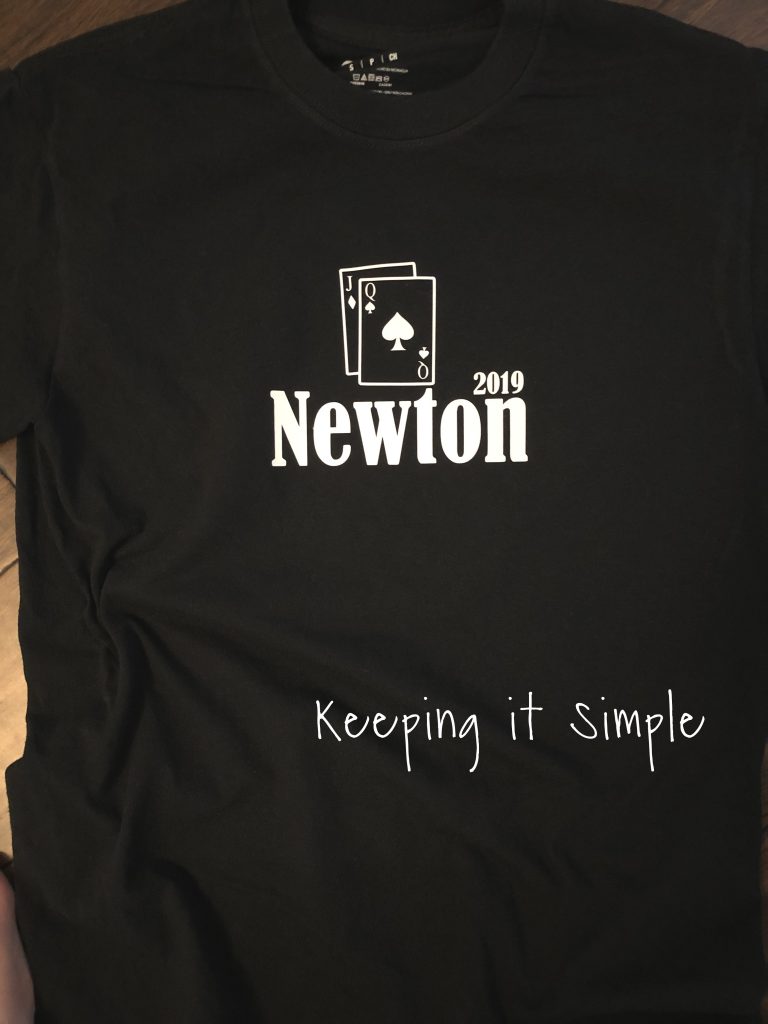
So then I tweaked the design again, this time putting the number in the cards and then added a date to it. I actually liked this one, so I cut it out of heat transfer vinyl and made up the shirt. Then I tried it on…. didn’t love it as much anymore. Here were the problems I had with it- the script font is a PAIN to weed, seriously. One or two of them, not big deal, but 80…. nope. The lines were not flattering at all, especially on girls. And lastly, the number was too small. No one would be able to see it in the photos. So I went back to the drawing board and completely redesigned it again.
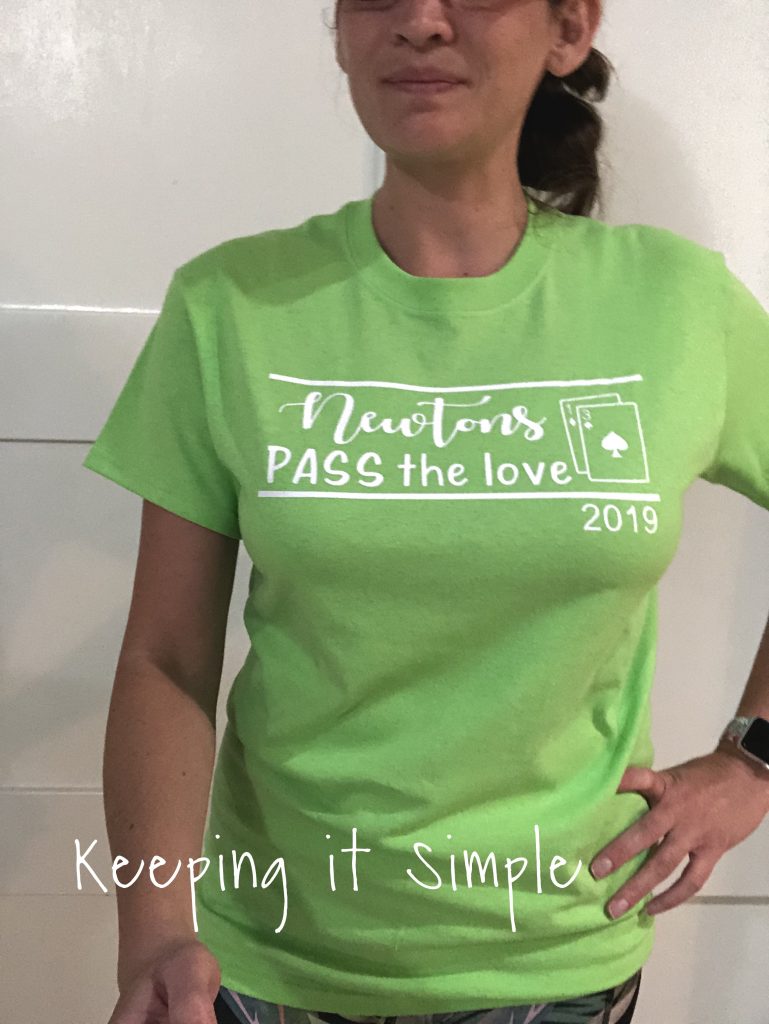
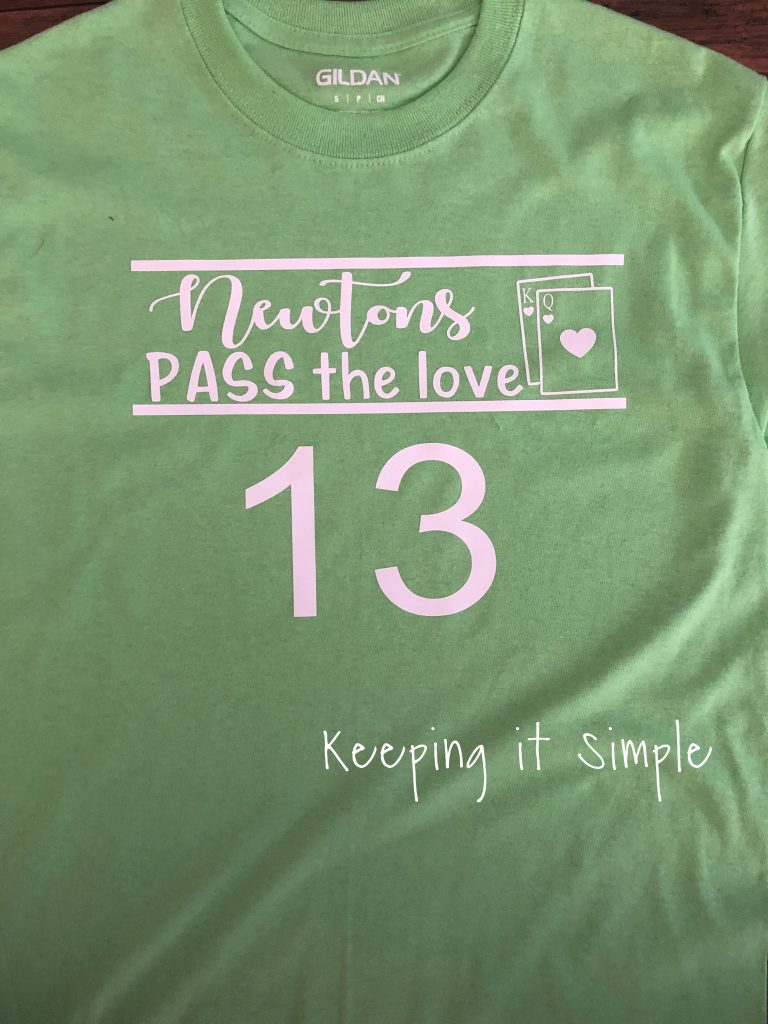
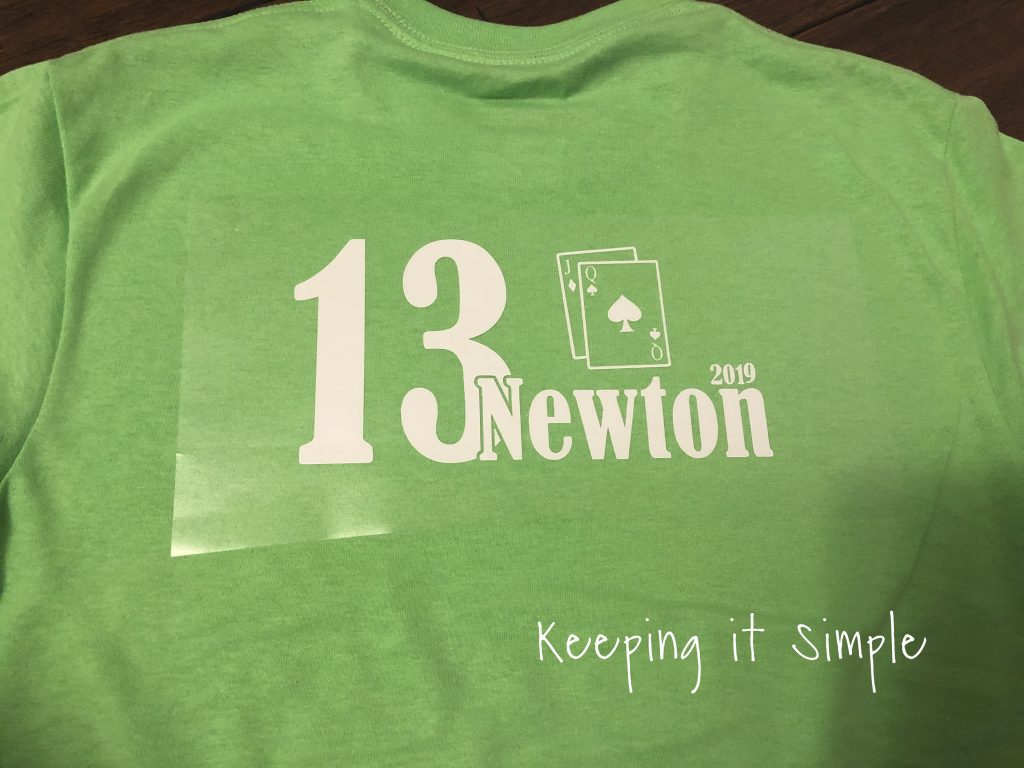
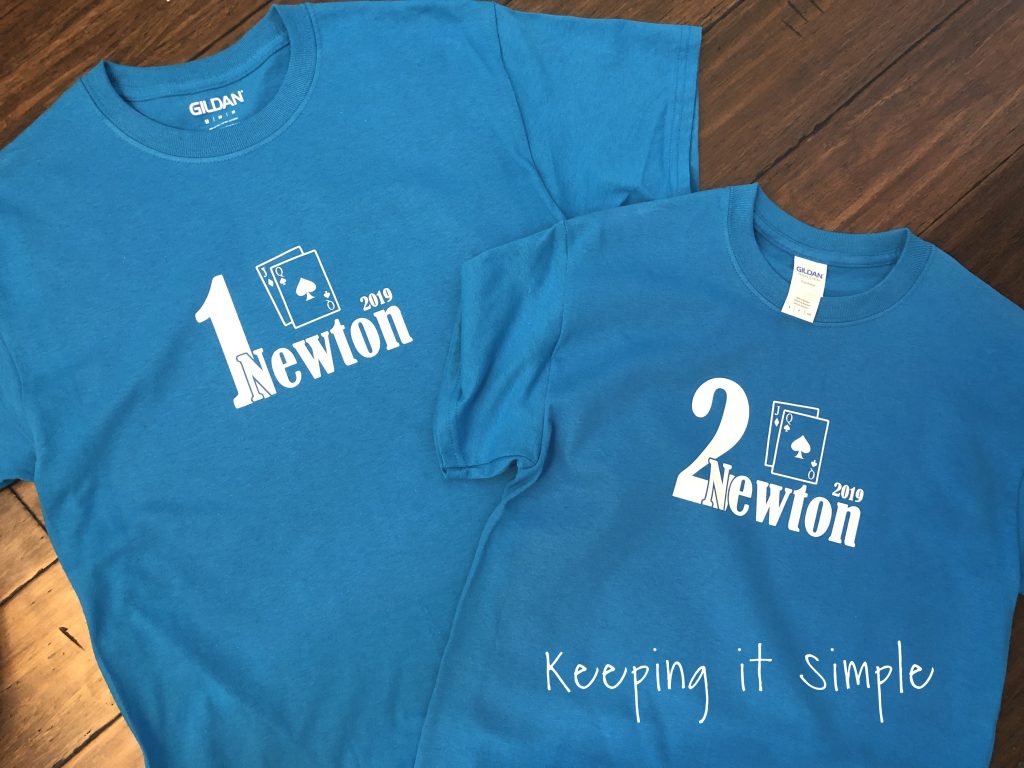
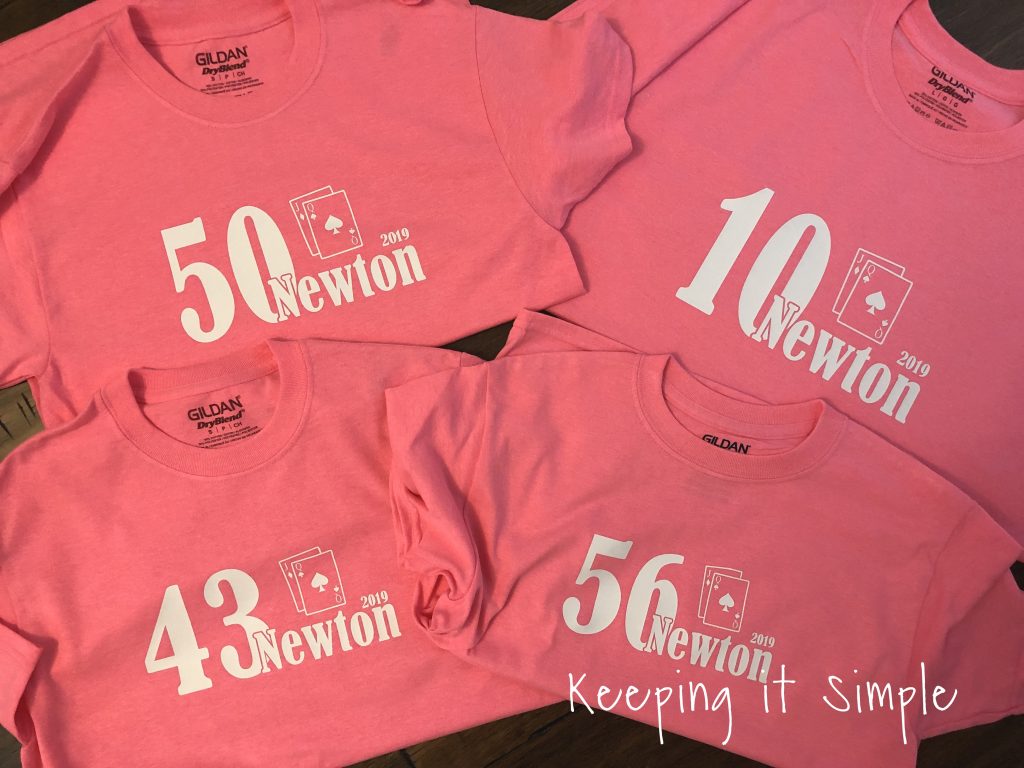
This design I decided to not put PASS! the love into it. I just had three things- our last name, the number and a symbol. It was simple and bold and I loved it! I ended up having our symbol be cards and I choose Pinochle because that is my Dad’s favorite game and during the reunion we had a Pinochle tournament. The Newton was in a bold font, so it was easier to weed and the number was big so that you can actually see them in the photos. The symbol really could be anything that represents your family. A tree would be a basic one (for family tree), but things like a sport or activity that your family loves would work.
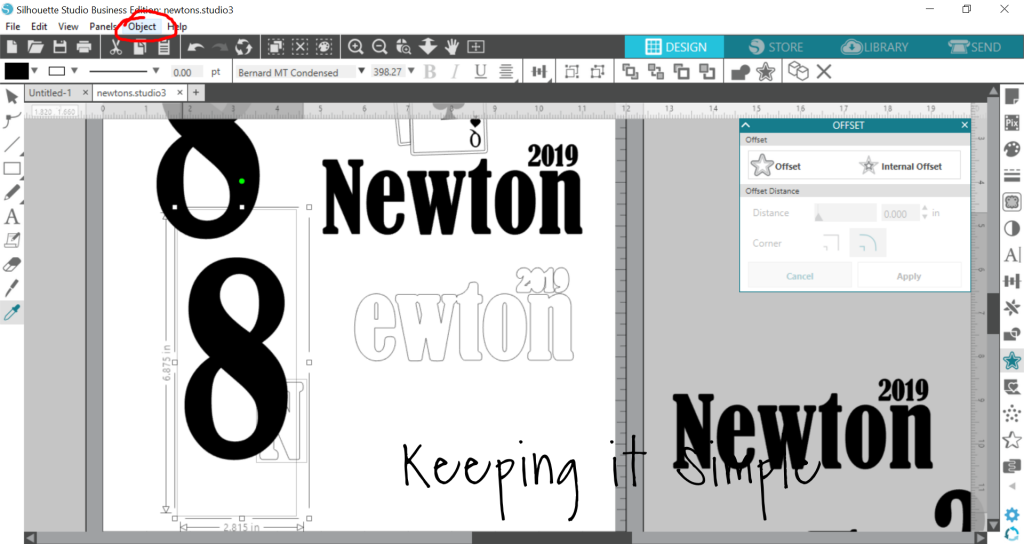
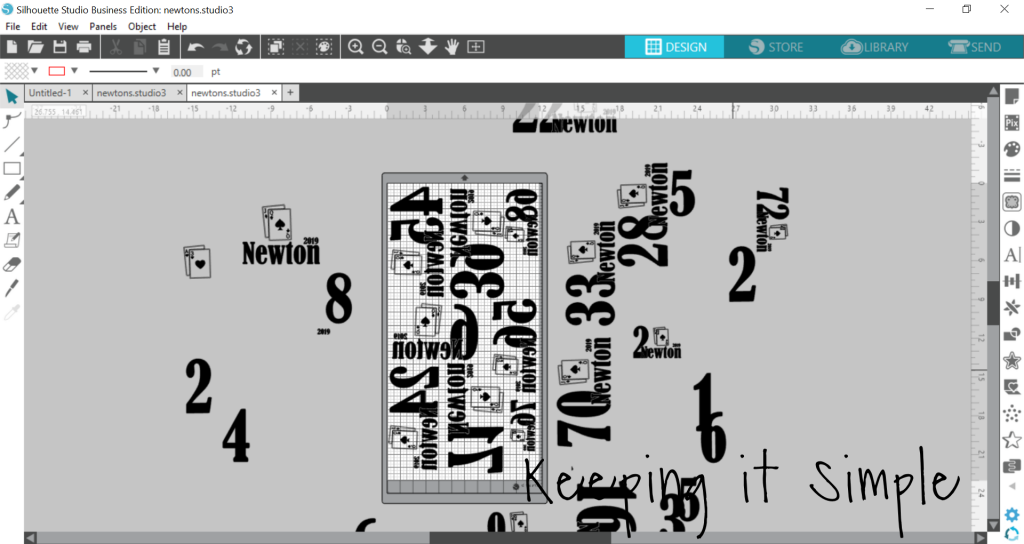
To create the layered effect (without having to actually layer), I used the offset function and subtract function with Silhouette Studio. Here is a quick video to who you how I did it in Silhouette Studio.
The first thing I did was design the shirt like I normally do, sized it and placed it how I wanted it. The font that chose is called Bernard MT Condensed. For the cards, I just made them with the rectangle tool and the offset function. I then used the subtract function to place them together. 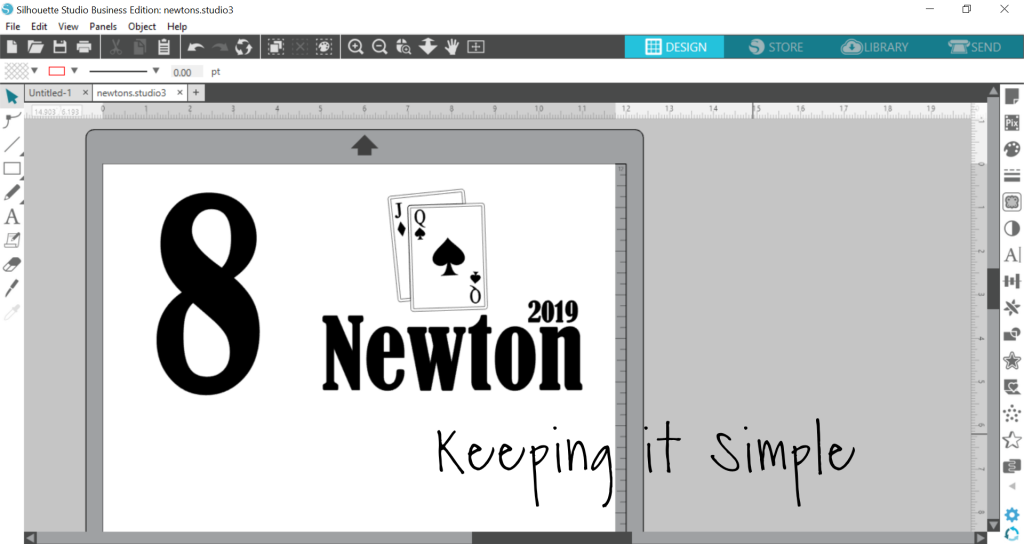
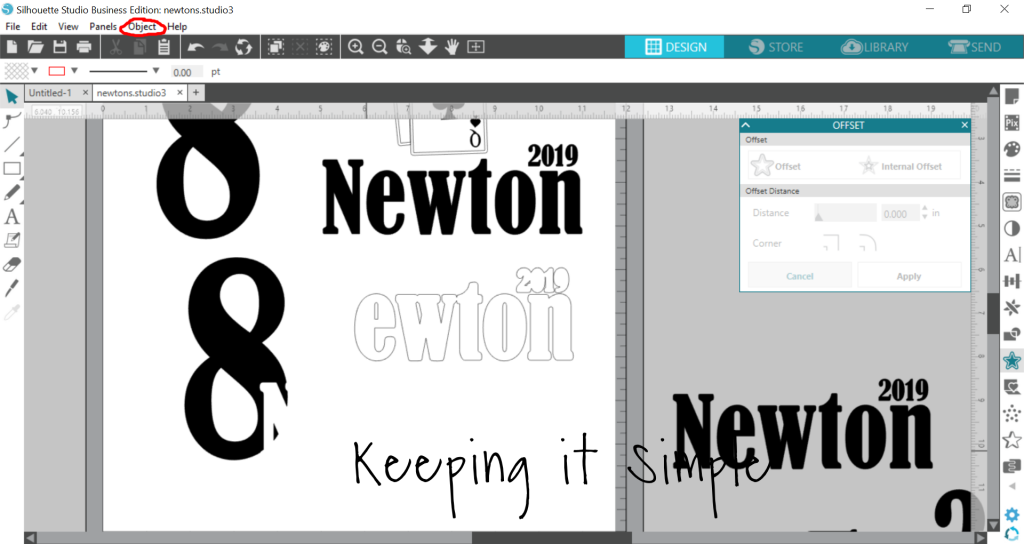
The first thing I always do when working with a design, is I duplicate it (right click- duplicate) so that I have the extra same size but I don’t have to mess up the original. Once I did that, I then did the offset function (right click- offset). This makes a border around the image (it’s great for when you want to layer something). The standard is .125, which is pretty big, so I changed it to .055. So now the Newton is a little bit bigger than the original.
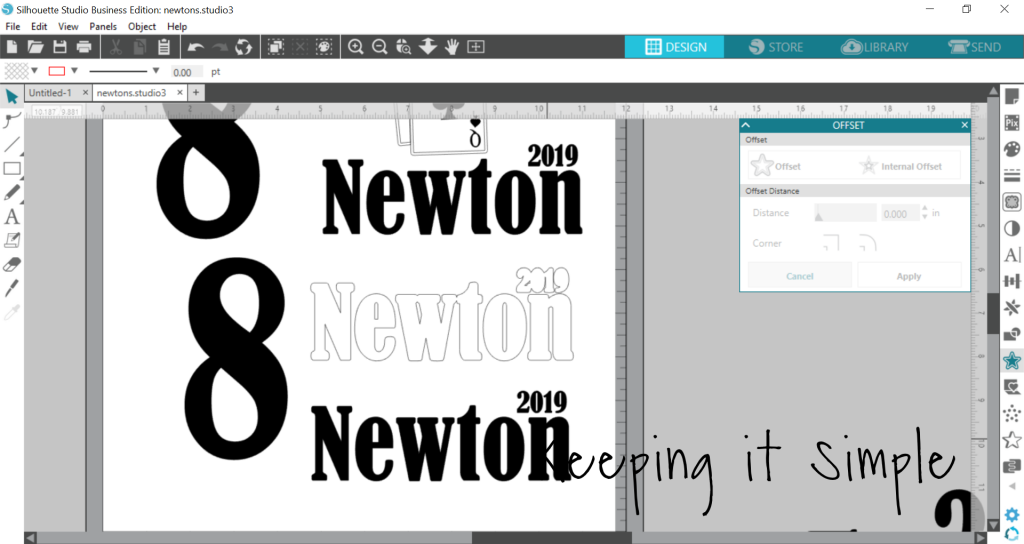
The next step is combining the N with the 8 (some of the numbers had the Ne combined, like the number 2). So I moved the N to where I wanted it to be within the 8 and highlighted both of them. Before you subtract, you have to make sure that the N is in front (right click- bring to front). Then you go to object- modify- subtract.
The subtract will remove the image but will leave the space open.
Then I moved the 8 back to the original Newton design, but now there is a little space in between so you can see both the N and the 8. Then I took the original 8 and put it next to the design, you can double click on it and then you can change number to what ever you need it to be.
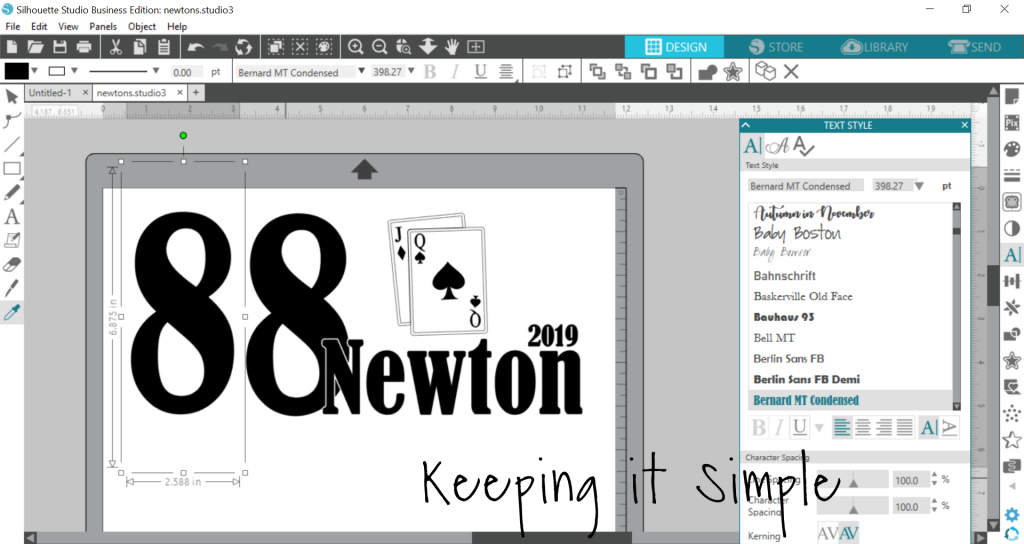
I did the exact same thing for all the numbers 0-9.
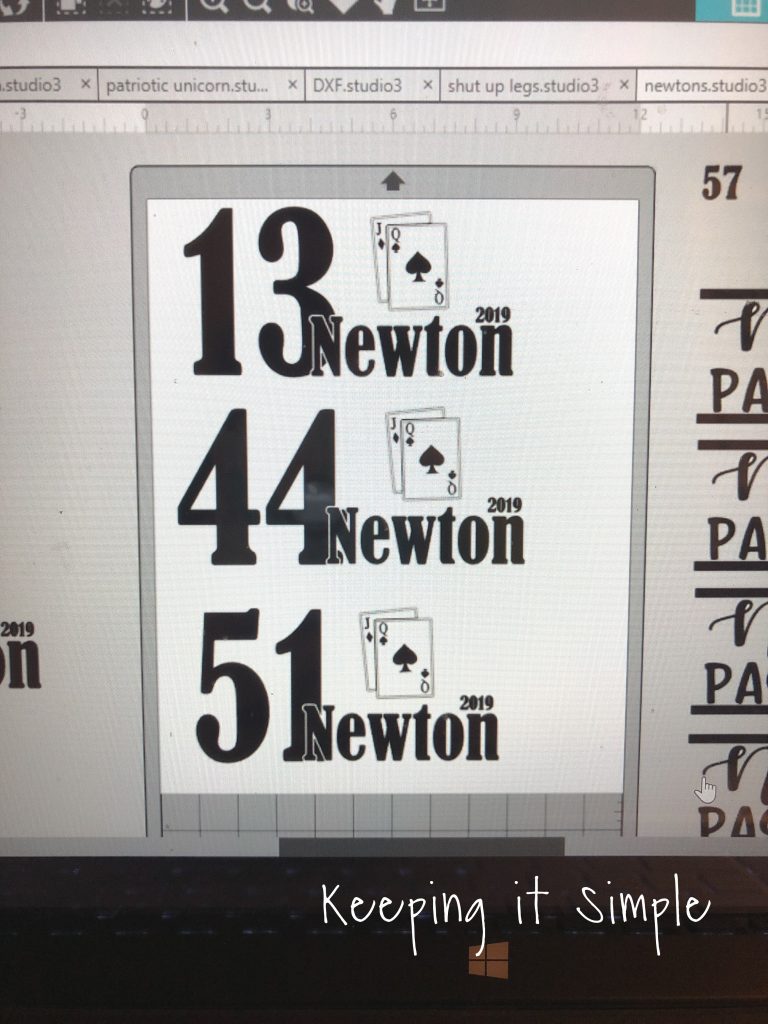
Once I had all of the numbers, it was time to cut them out. So I had a system- it may loo like a mess, but I had a very detailed notebook that had all the numbers and what sizes they were and then when I cut out a number, I put a check mark on it and then when the shirt was done, it got another check mark. I did each family separately. So since there are so many sizes, the numbers weren’t all the same size. This is the chart that used for the width of the design:
Men’s- 8.5 inches
Women’s- 8 inches
Large youth (14-16 years)- 7.75 inches
Medium youth (10-12 years)- 7.5 inches
Youth small (8 years)- 7.25 inches
Youth extra small (6-7)- 7 inches
Toddler sizes- 5-6 inches
Onesies- 4 inches
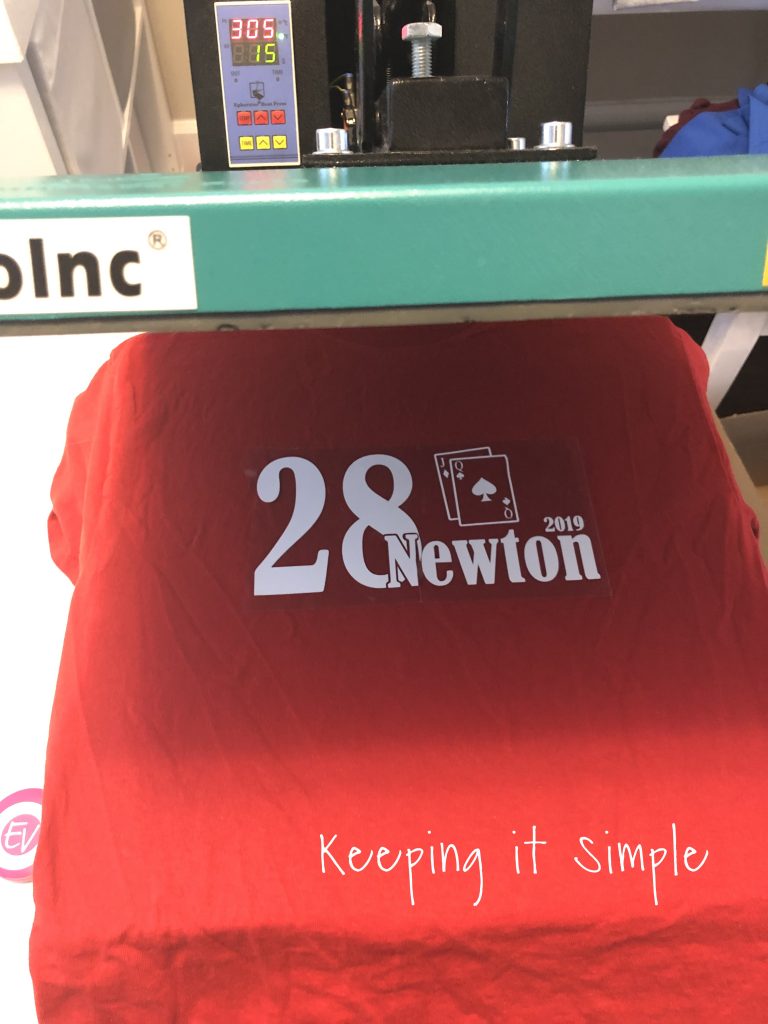
I placed as many numbers on a 12×24 mat as I could. I then mirrored the image (right click- flip horizontally). For these I used the stretch heat transfer vinyl and I bought it in a roll to save money. The roll is nice because you can cut it to exactly how long you need it, like this time I only needed 23 inches instead of 24 inches, so instead of the inch going to waste, it will go to next time I use it. It really starts to add up and save money/vinyl quickly. I cut the vinyl out with my Silhouette CAMEO.
Once I cut out the vinyl with my Silhouette CAMEO, I weeded it and then used my heat press to put the vinyl onto the shirt. I didn’t take many photos while doing this, so here is a video from another post that shows the process of how to do this.
When using the stretch heat transfer, they recommend doing it at 320 degrees for 20 seconds (it has changed since this picture was taken).
Since the ones that only had one digit were not as wide, instead of being 8.5-8 inches wide, I made them 4.3 inches tall. Also when putting them onto the shirts, since the placement matters depending on the gender, I placed the men’s shirts lower. The top of the design was 3.5 inches from the collar and the women’s was 3 inches. You can see the difference between my parents shirts. The kids’ shirts, they were any where between 2.5-3 inches, depending on the size.
Here is another family set.
We had a couple people come who don’t have a number but still wanted a shirt, you know the girlfriends, cousins, nephews or just friends, so I made up shirts or them and just added the Newton without the number.
Here are all of the shirts done!! I’m sure you are curious about cost- so for these, I just did a set price for each shirt. So I had each family pay for their shirts and they cost me about $5 to make each shirt. So I had each one pay my cost and basically didn’t charge for labor. the shirts cost $3 from Hobby Lobby and the vinyl cost anywhere from $1-2 per shirt.
It was a lot of work but it was worth every second because I loved how the shirts turned out and how these pictures look. They will be cherished forever because I know that it is getting harder and harder to get our family together.
Make sure to check out all the other shirts that I made.
Leave a Reply
You must be logged in to post a comment.