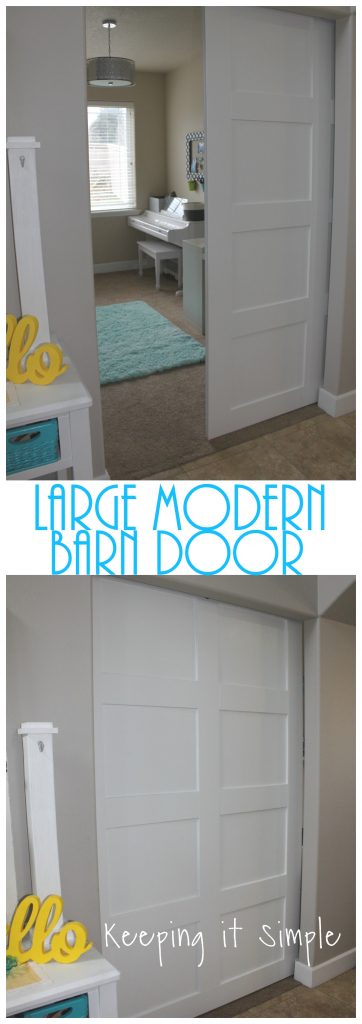
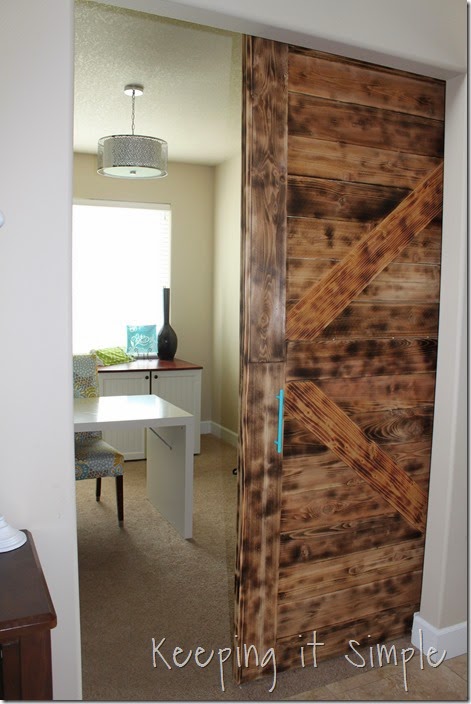
Do you know what your style is? I am gradually figuring out mine. Back when we bought this house there was a lot of browns and traditional features with it. Well as we have been living in it we have been updating it here and there and make things work. We made a rustic barn door for my craft room about 3 years ago because it worked and it matched the style of our house. That was BEFORE I really started to put my personal touch on (you can check out this post to see what I am talking about). As we were remodeling our house I realized that my style is not rustic but I like white and clean lines and more modern things. I loved my rustic barn door and I loved that it was an easy solution for a door in my craft room, but I wanted a more modern barn door in there to match the rest of our house. So my husband and I decided to build one and I absolutely love it!
Here is a picture of the rustic barn door we made a couple year ago. I honestly loved it and was planning on keeping it (just refinishing it with gray stain) but I mess it up and it was too dark for my liking and we decided it would be best just to build a new one.
This is how we made it:
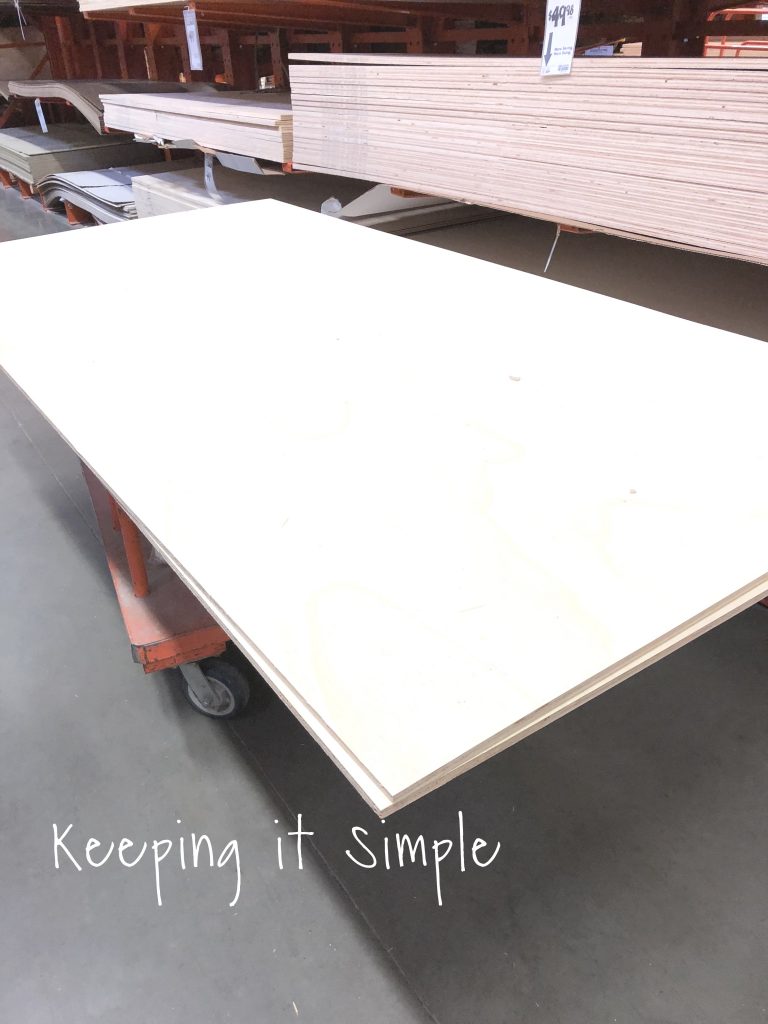
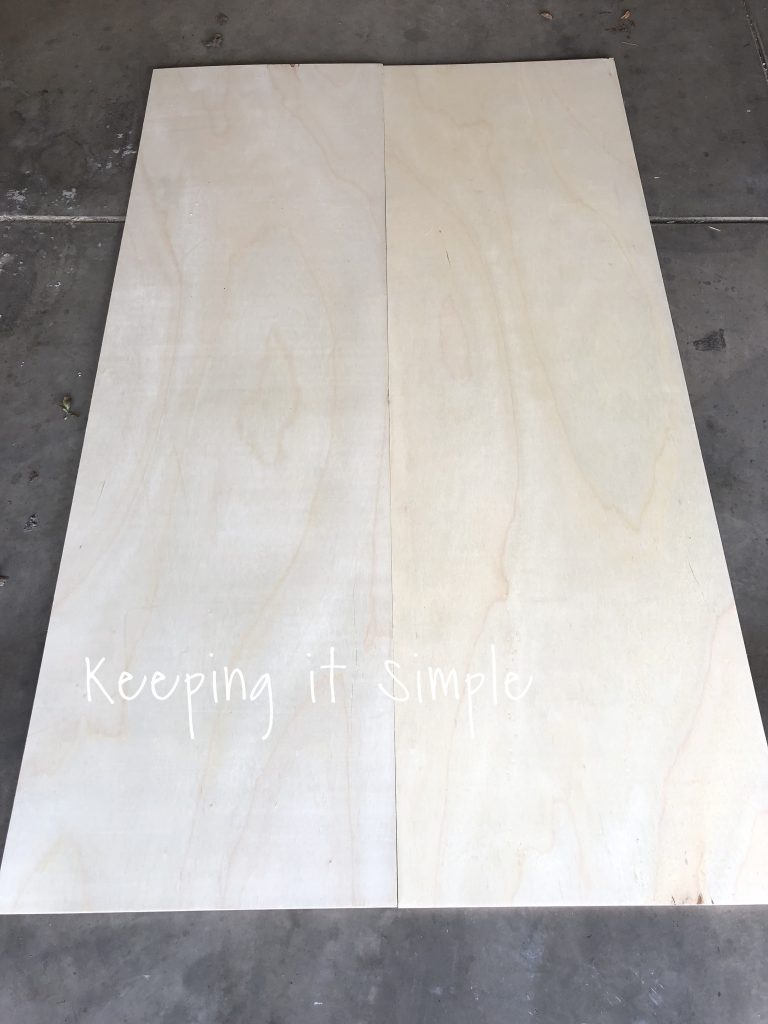
I head to Home Depot to get some wood. Since the opening of my craft room is large, I needed quite a bit of wood (two pieces of plywood). I tried to find the smoothest wood that I could get because I wanted the door to be smooth, but the plywood I didn’t want to be thick, so I found a 4×8 piece of birch plywood that was about 3/8″ thick (I don’t know the exact because the sign was down) but it cost about $36 a piece. I picked the birch because it was smooth on BOTH SIDES. Some plywood is nice on one side but not as pretty on the other side, so make sure you check out both sides.
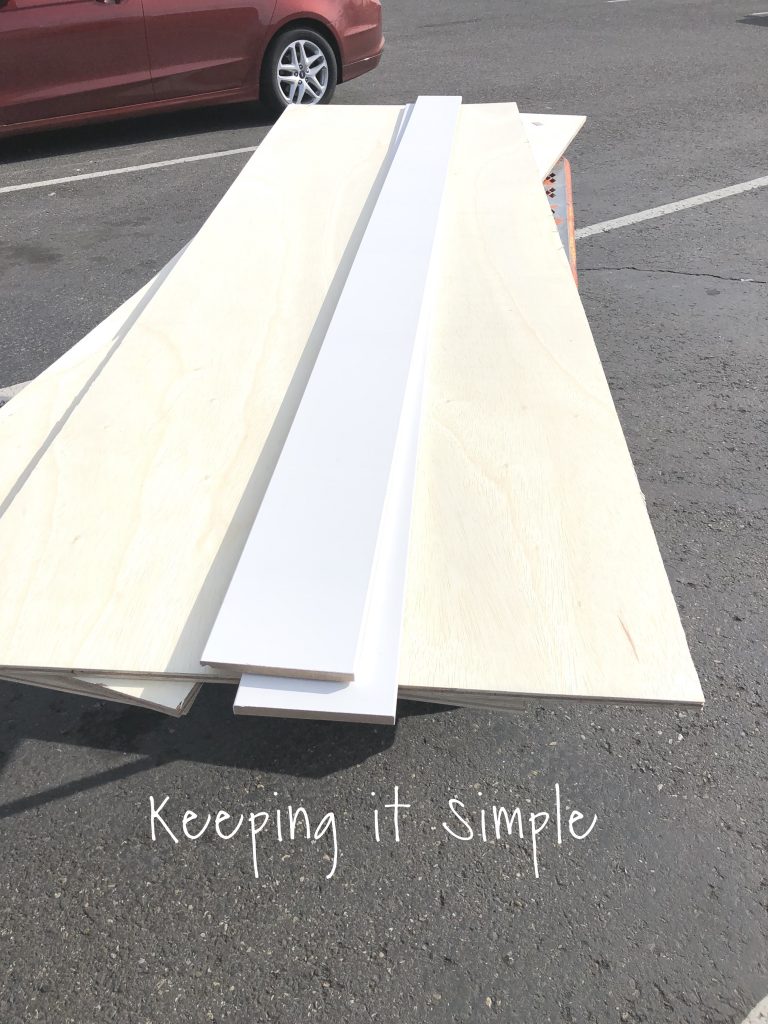
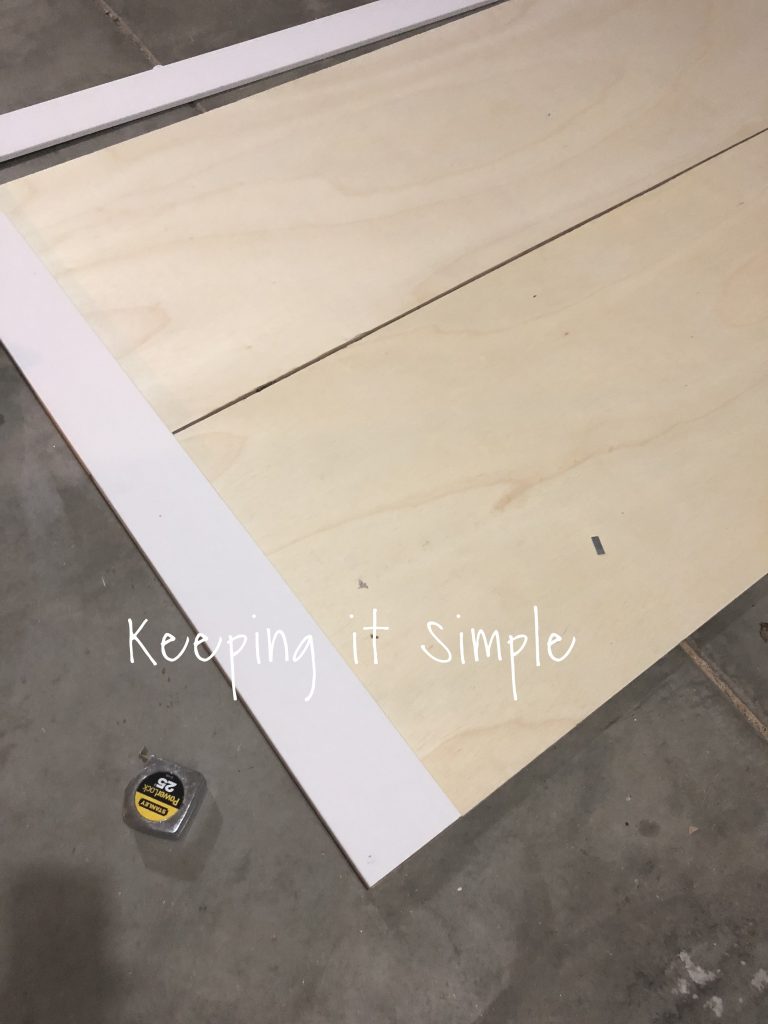
And for the frame of the door we went with 1/2″ thick by 5.5 inches wide. We picked these because it is smooth and then it had rounded edges and it was thinner than the 1×6 pine boards. We ended up getting 14 of those and they cost about $8 each.
Our opening is about 55″ by 89″ so we made the door 58 1/2″ by 94 1/2″ (we did the door to the 1/2″ because we did it to the same size as our other one, but 58×94 would have been just fine), so when you go to do this, you will want it to be 3-4 inches wider and 4-5 inches taller than the opening. We cut the plywood to be 29 inches wide and then 94 1/2″ tall.
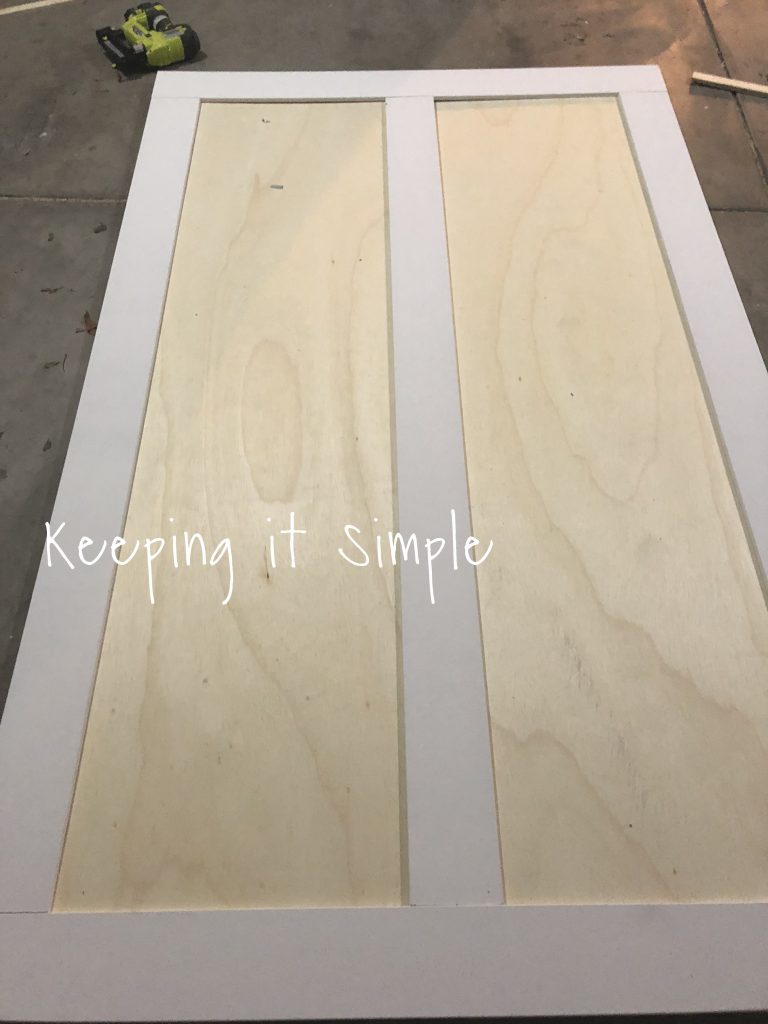
Then we started with the border pieces. We have the top and bottom piece go all the way across, so we cut the MDF to 58 1/2″ (there is a gap in the middle because the plywood wasn’t completely straight so to make it square, we had to put a little gap in the middle).
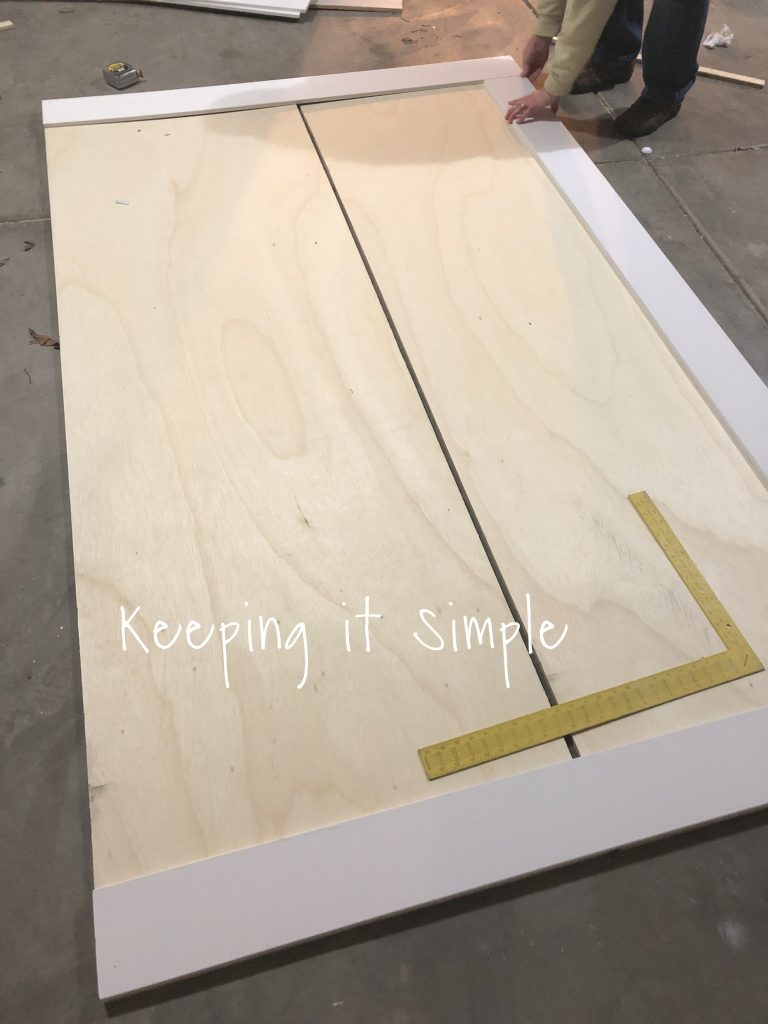
Once the top and bottom pieces were on, then we added the side pieces.
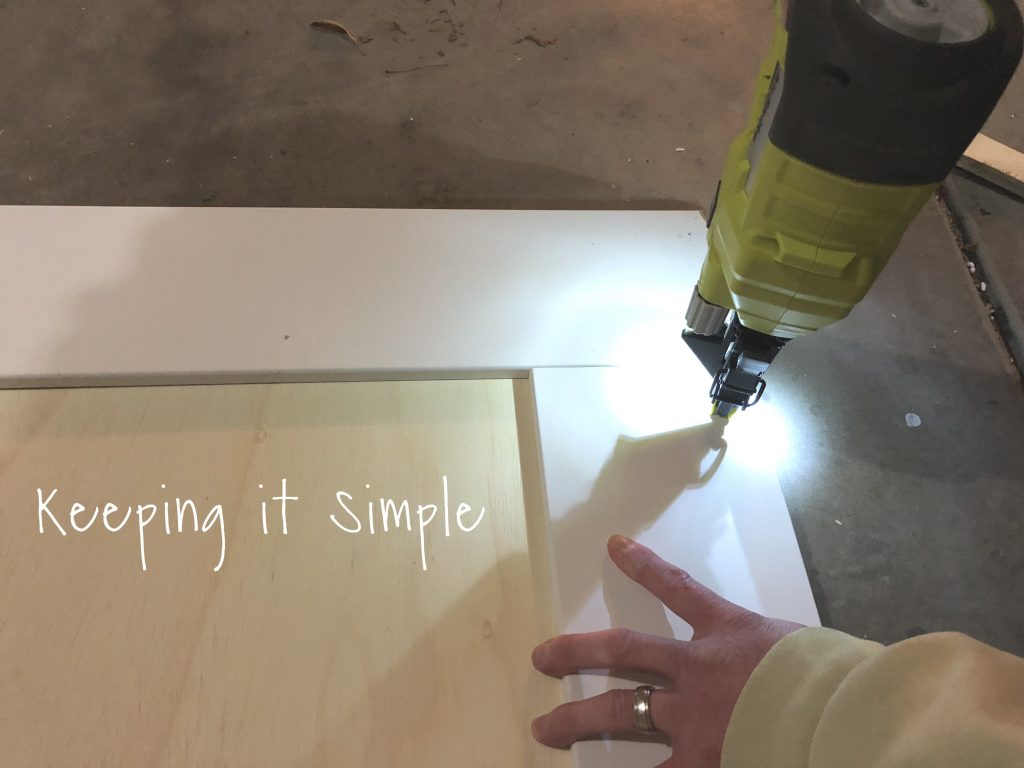
When we put these on, we just tacked them on with a brad nailer and only put in a few nails on each board (later on we put in more). We used 3/4″ brad nails (so it wouldn’t go through the other side). This was just to keep it on the plywood.
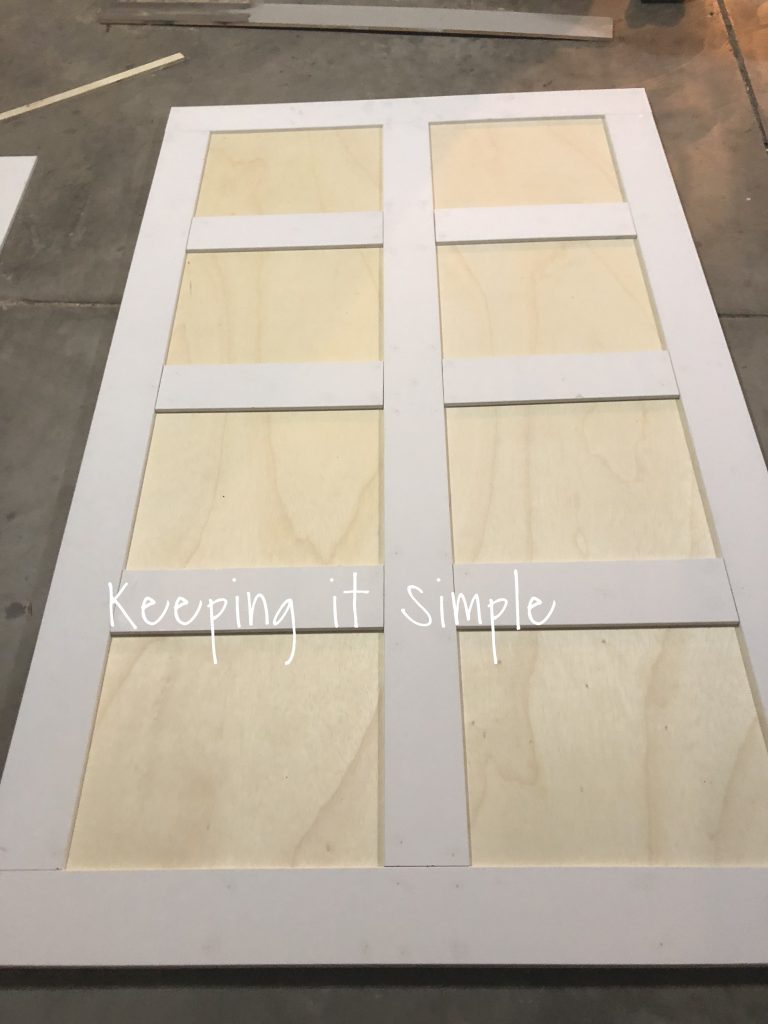
Next came the middle piece, it’s starting to take shape!
Next we did the panels. We made sure to make them all even and then cut the pieces to fit. Isn’t it looking great?! I love the design!
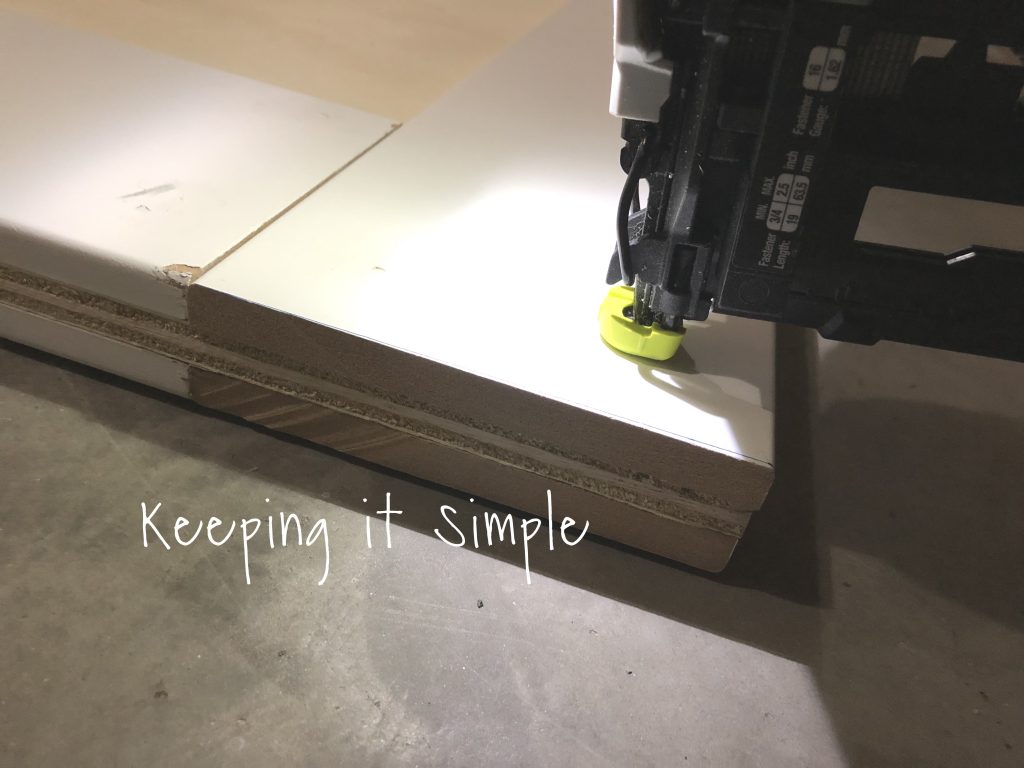
We flipped over the door and then the exact same thing on the other side. We used the brad nails at first to put on the border and then used the Airstrike straight nailer and 1 1/4″ finishing nails to keep it altogether. We put these longer nails all around and on both side to really secure it and keep it together.
Then using a paintable caulk, we caulked all the nail holes and edges. Now the door is built and ready to start painting! It only took about 3 hours to make.
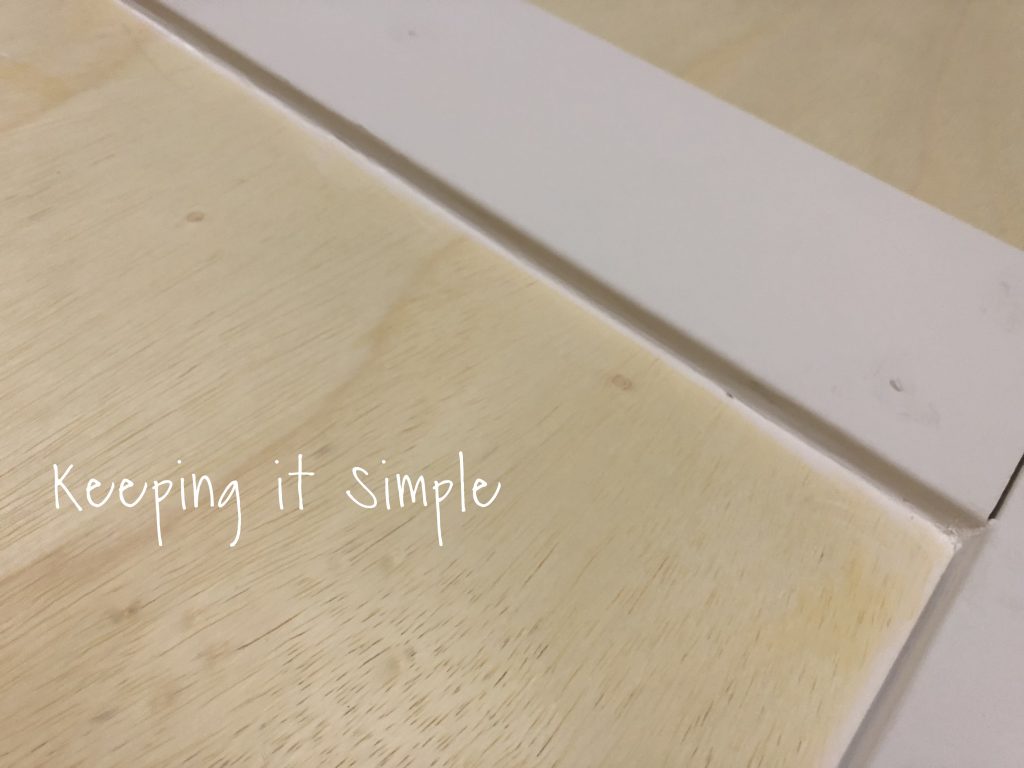
Once the caulk was dry (I let it dry over night) I sanded down all the holes and edges.
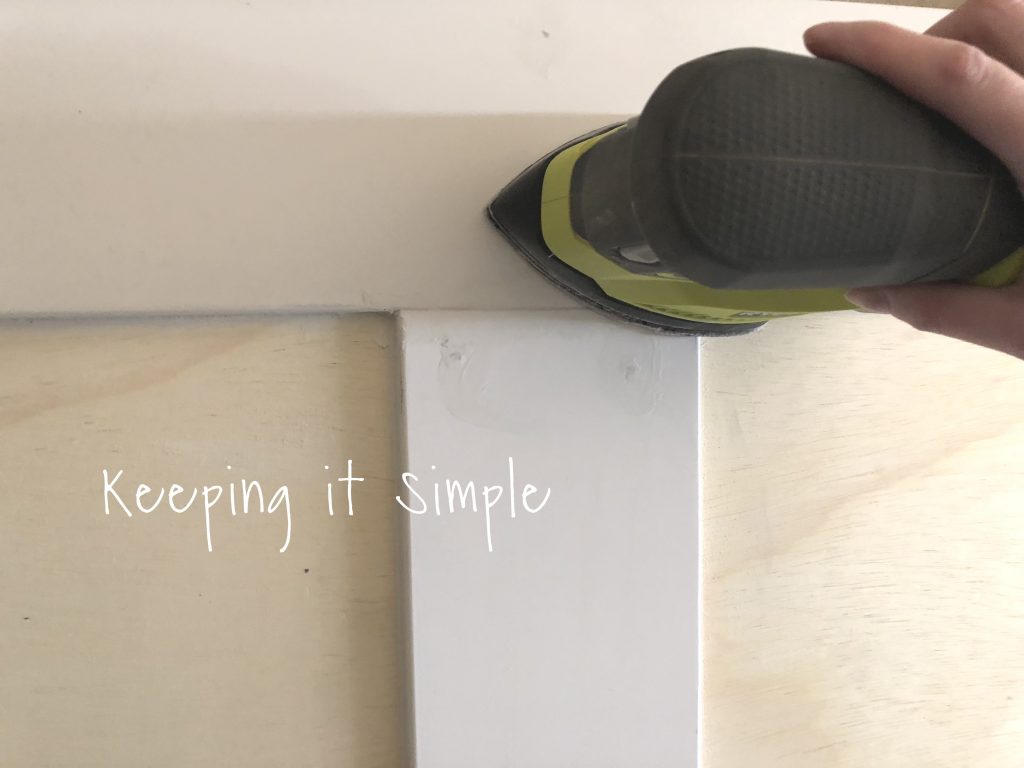
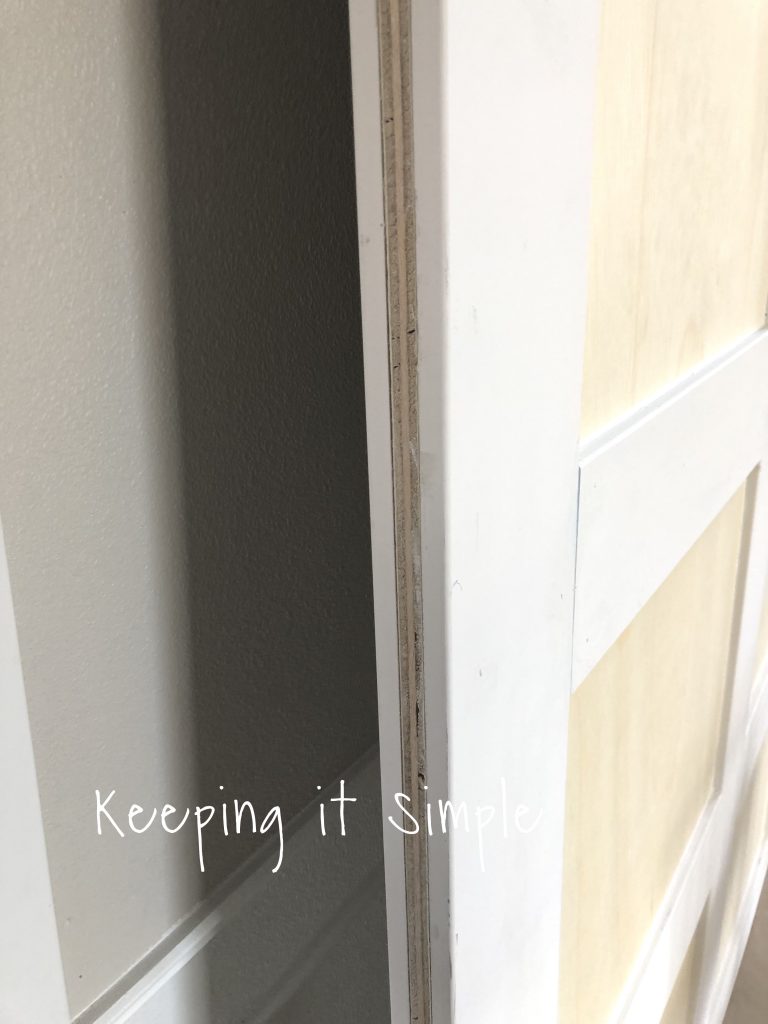
I also sanded the edges. Here is a view of side and the sandwich of the MDF and plywood. You can put a piece on here to make it look more smooth but we just painted it and it looks fine.
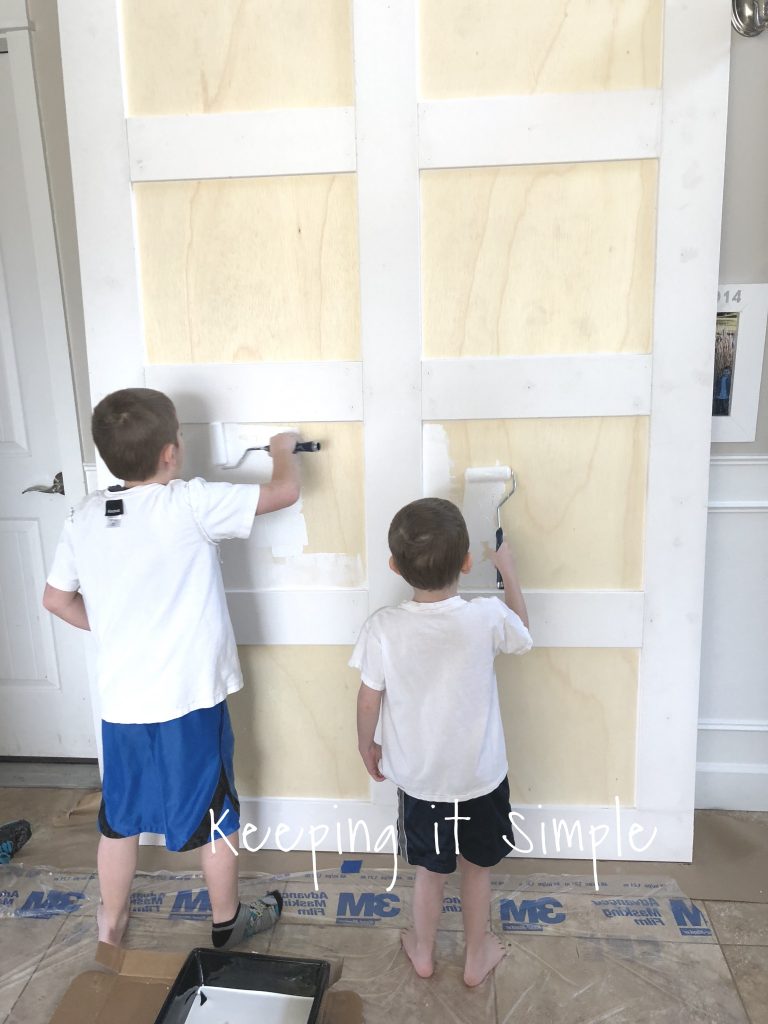
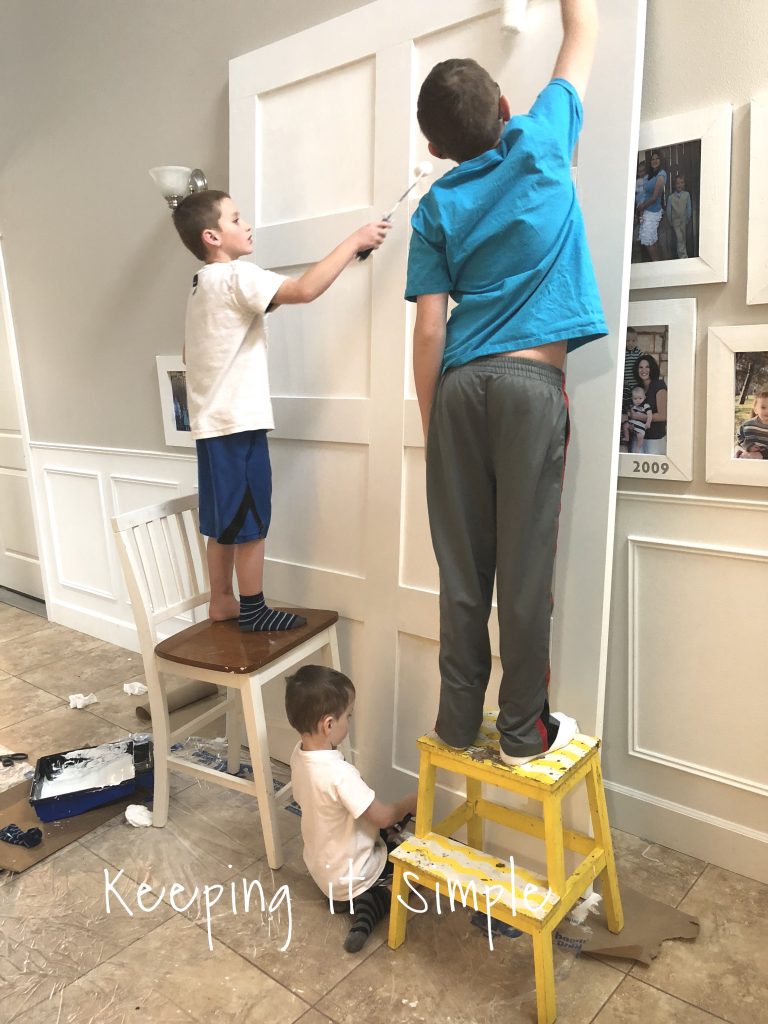
Now for the paint. I had some helpers when I was painting :). We primed and painted it all white. I used a pro classic in a factory white and semi gloss finish (the same paint that I used to paint my bathroom vanity). We used some little foam rollers but also a larger one.
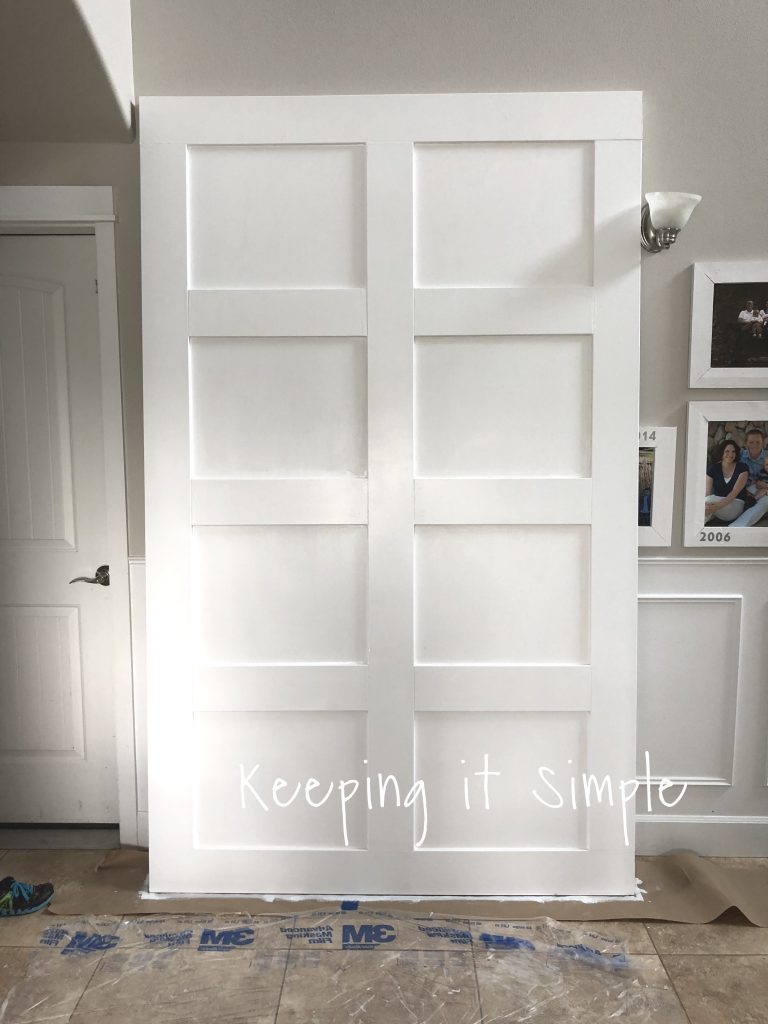
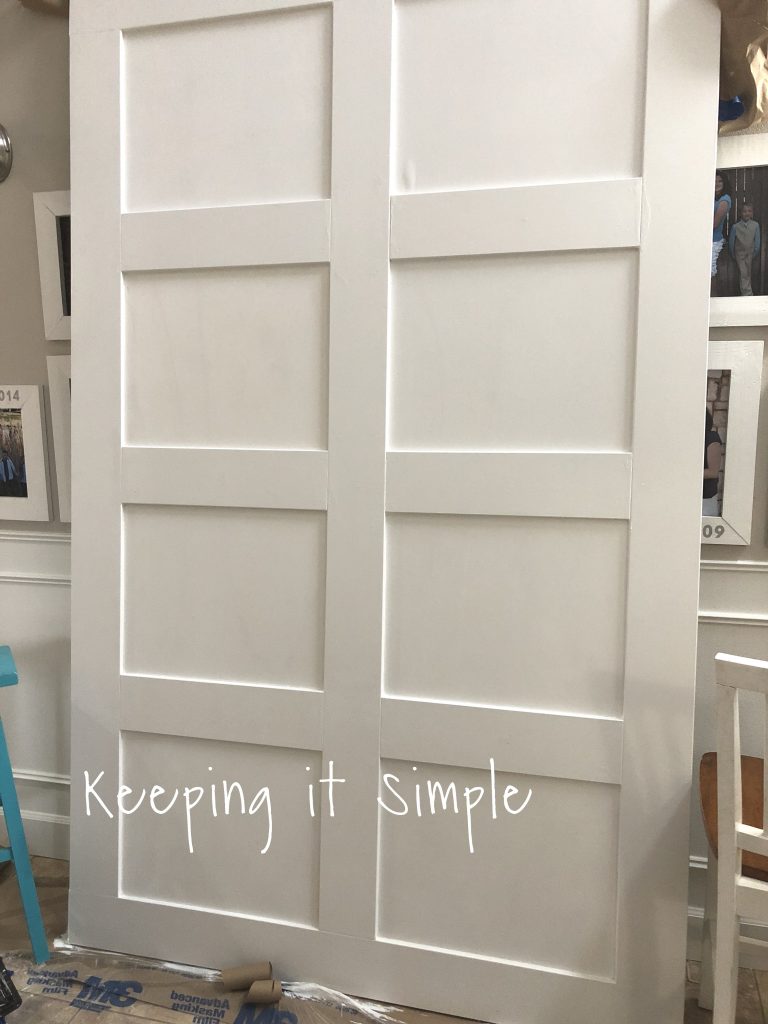
Here it is all painted, I love it!!
I did two coats on each side. I worked on one side, did both coats on that side and then I flipped it and did the other side. Here is the other side. I had even more helpers with this side :).
Here is the other side all painted, love the bright white!!
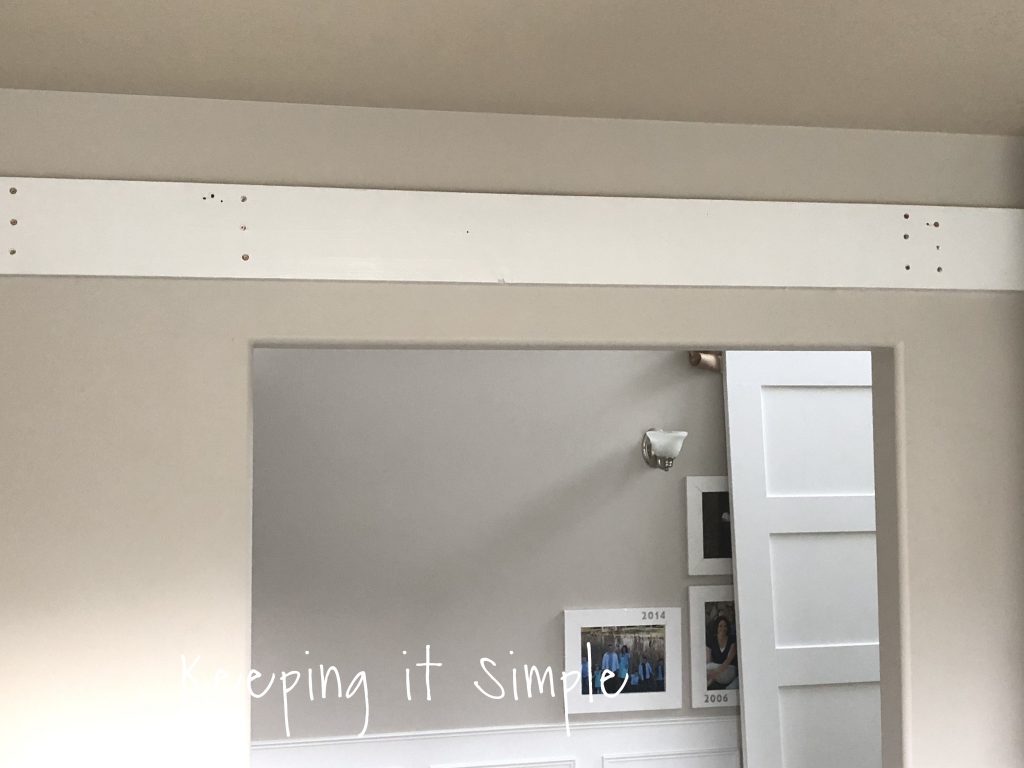
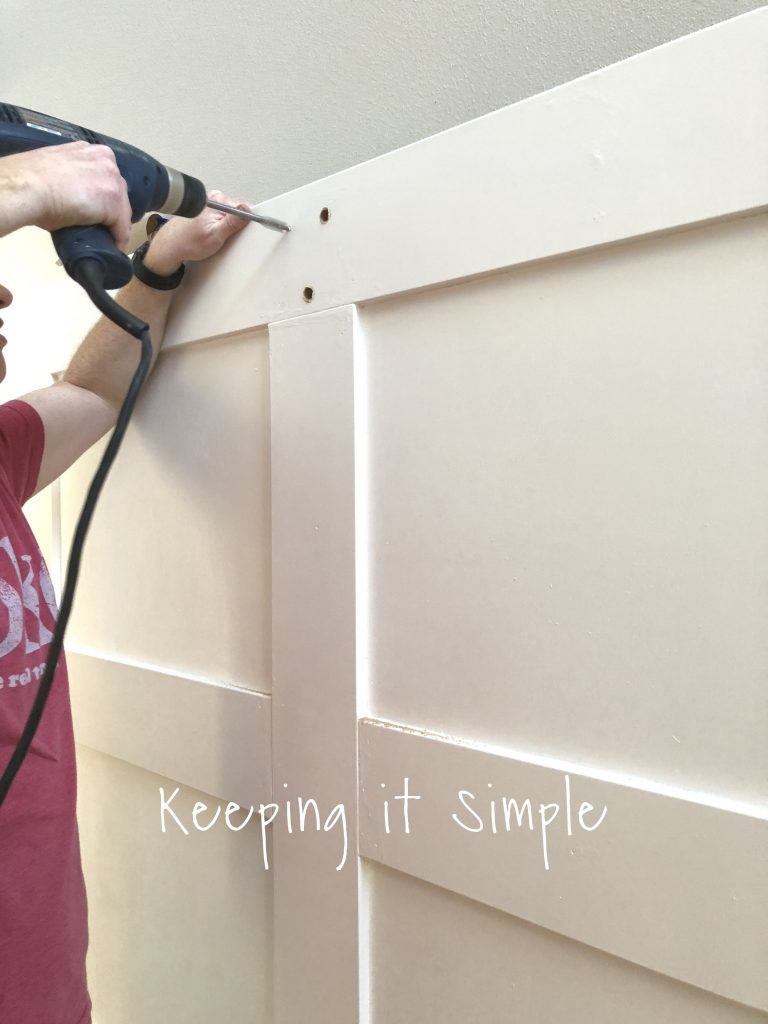
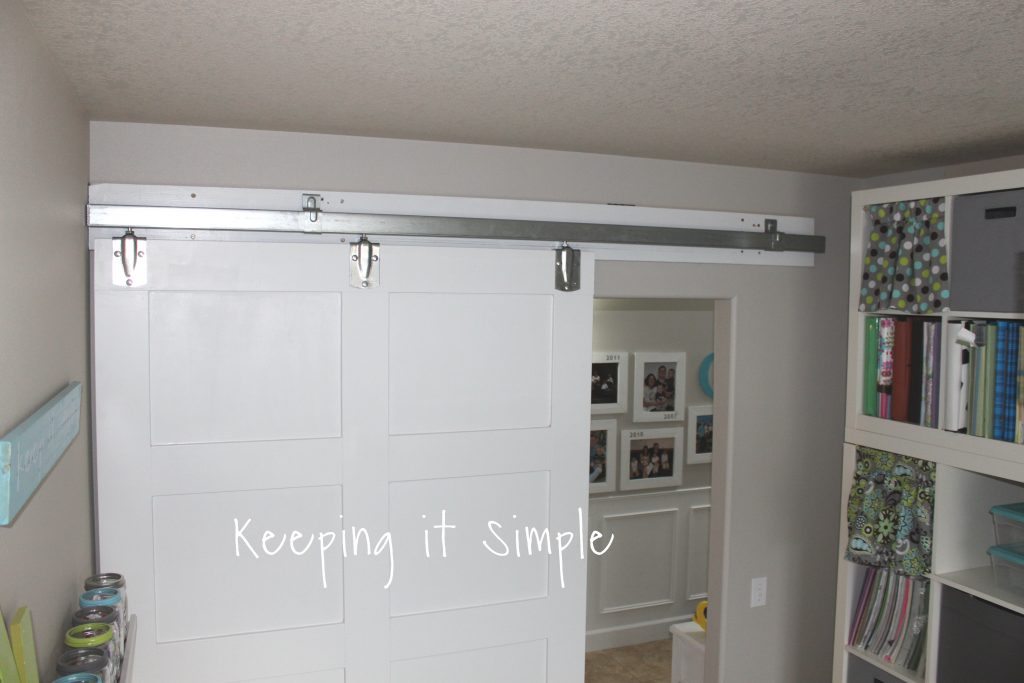
Now to work on the beam for the door to hang onto. We used a 2x8x8 piece of wood that I painted the same color white and then put it into the wall. As you can see by all the screw holes, we put in several screws into the studs on the wall.
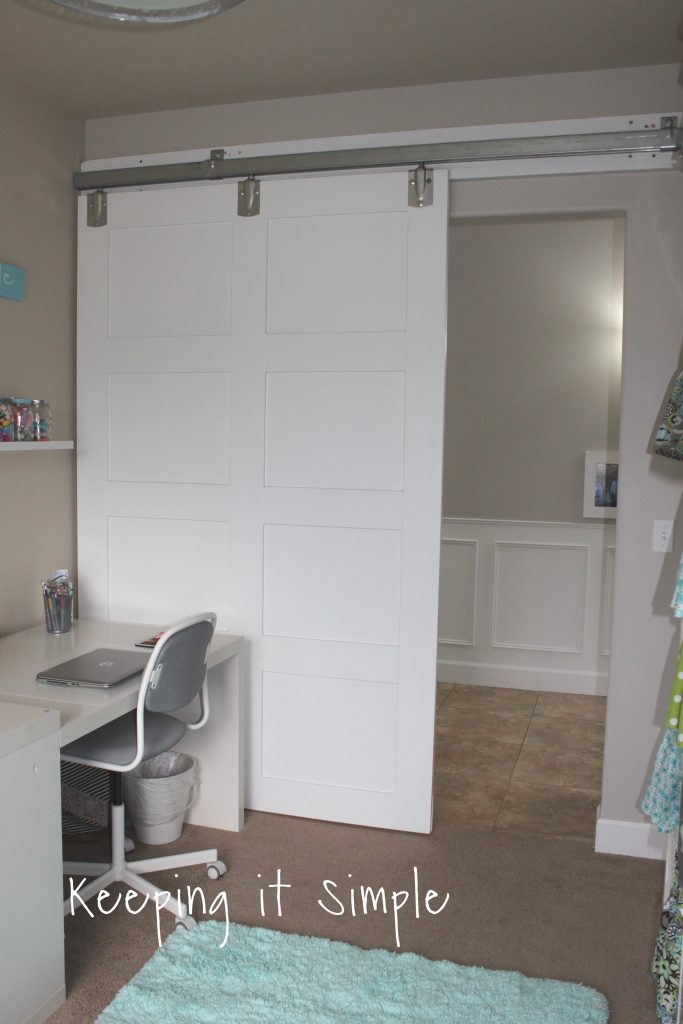
We let the paint dry and cure over night before we started drilling the holes for the hardware. I used the same hardware from my other barn door. For the hardware we used an 8 foot track and then 3 (they come in sets of 2) wheels and hardware. If you are going to have the door be all the way open, you have to have a longer track, so like 12 feet long (meaning your beam will have to be longer too). I got two sets of the wheels (click the link to see where I got them) and an 8 ft track and two brackets to attache it to the wall. It has worked wonderfully! It’s only about $100 for the hardware compared to $300-400 for the traditional barn door hardware. When we did the first barn door, we put all the hardware and track on in the garage and then had to try to get the door into my craft room. This time we learned our lesson and put the hardware and track on while it was inside and in the craft room. We also had the door vertical instead of laying down and that helped when it came to moving it.
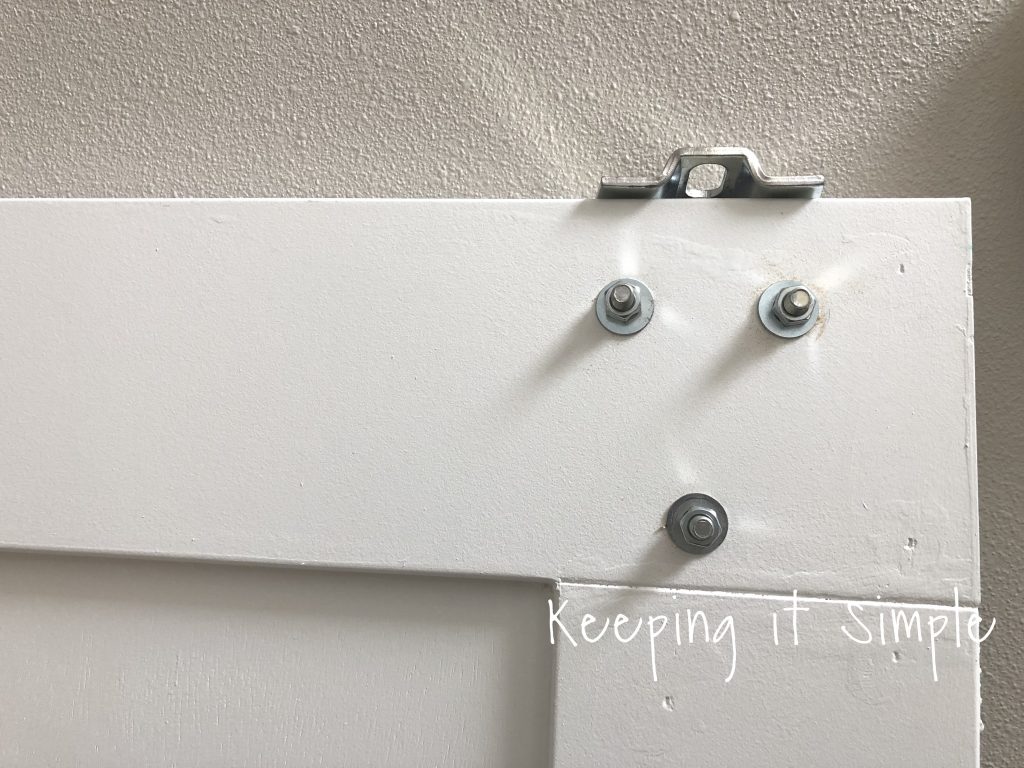
To put the hardware one, we used a 1/2″ hole bit and drilled holes into the top of the door.
Here is what the hardware looks like, it’s actually really pretty on the white!

Here is what the other side looks like, this is the front of the door (the side that is facing the entry way) and is hidden by the wall (so you will want to take this into account when you are determining the height of your door).
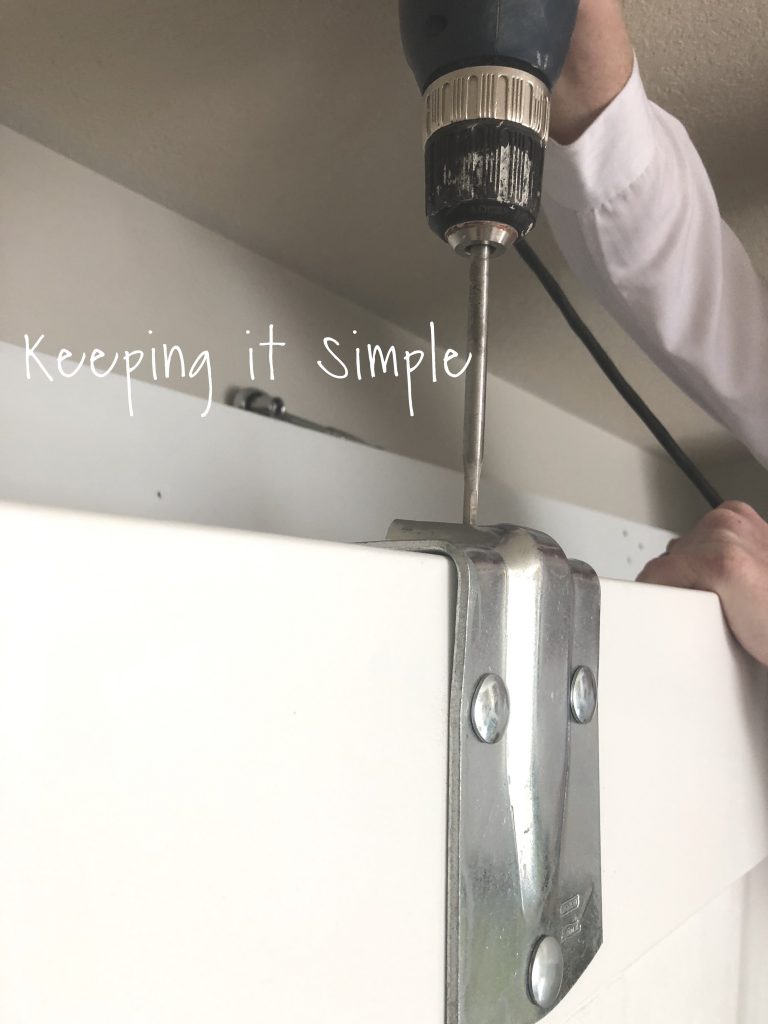
Once we had the hardware on, we then brought it into my craft room and positioned it the way it was supposed to go and then that’s when we put the wheels on and the track on.
Now time to put the wheels onto the hardware (all of parts are included in the wheels). In order for the wheels to fit, we had to drill a little hole on the top of the door with the 1/2″ hole drill bit so there was a place for the bolt to go (it’s about a 1/2″ hole).
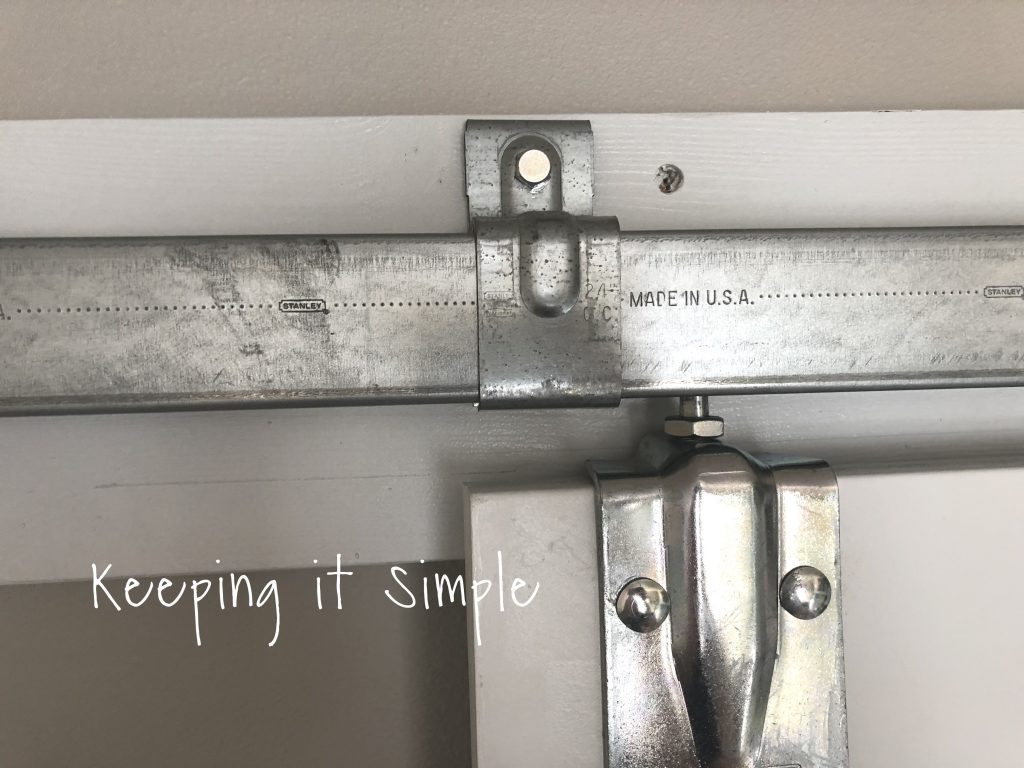
We then put the wheels onto the track and moved them to where the hardware was. Then we put the wheels into the hardware, tightened the nuts to bolt and then screwed the track onto the beam. When doing this, make sure that it’s level and it’s at good height where you can open and close the door easily. We did this by putting a couple boards under the door so there was a little gap under the door to make it easier to open and close.
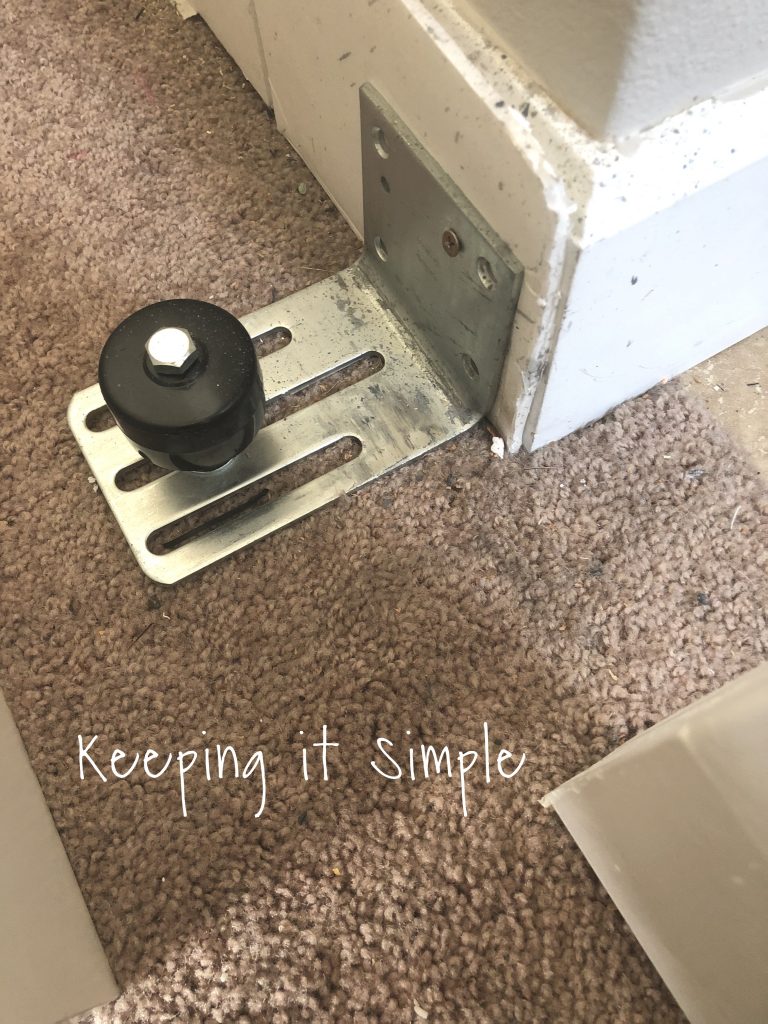
To make sure it doesn’t swing when you are opening it, we got a stay roller for the door to go through but will keep it from swinging. We just screwed it into the baseboard (and that’s foam board on the baseboard to protect them from the getting too scratched.
Here it is all hung! It only took about 3 days to make it and I love how it turned out. The wood cost about $250 and the hardware is about $100, so making this door about $350 to make, not too bad for a large door!
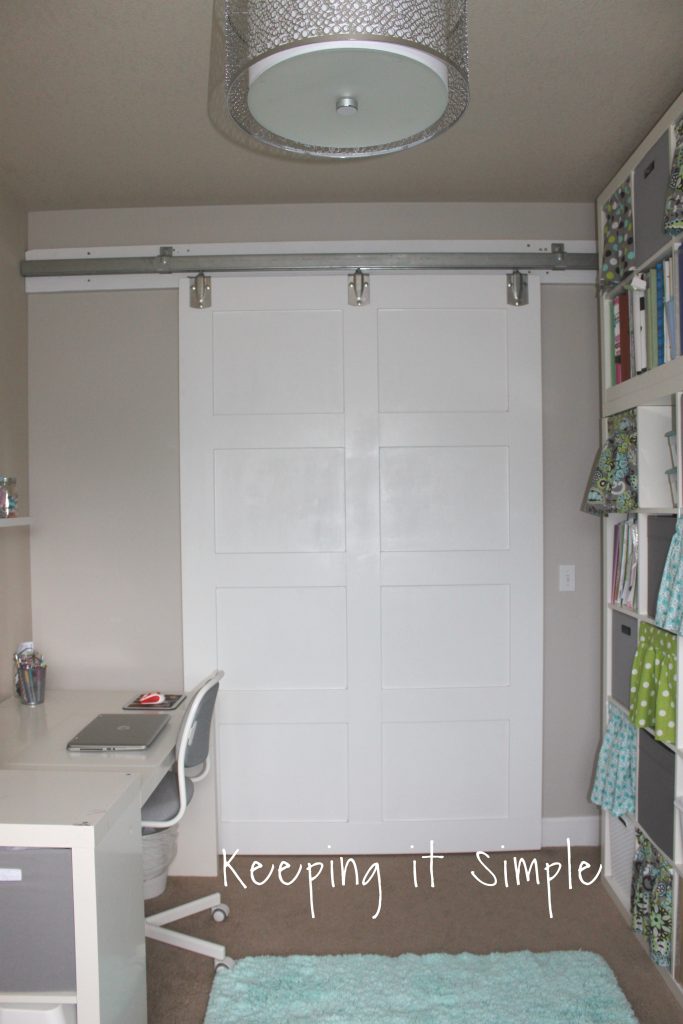
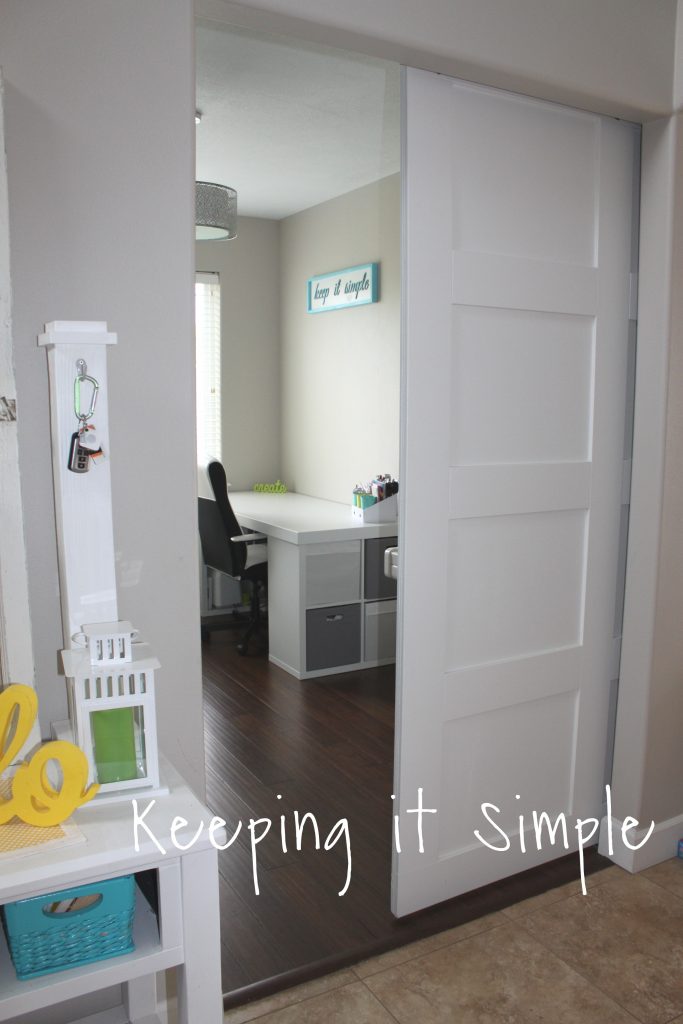
And that’s it!!! This door is much more my style and I love the bright white and clean lines of it! We haven’t decided whether or not we are going to up a pull handle on it. I think we will but just haven’t yet.
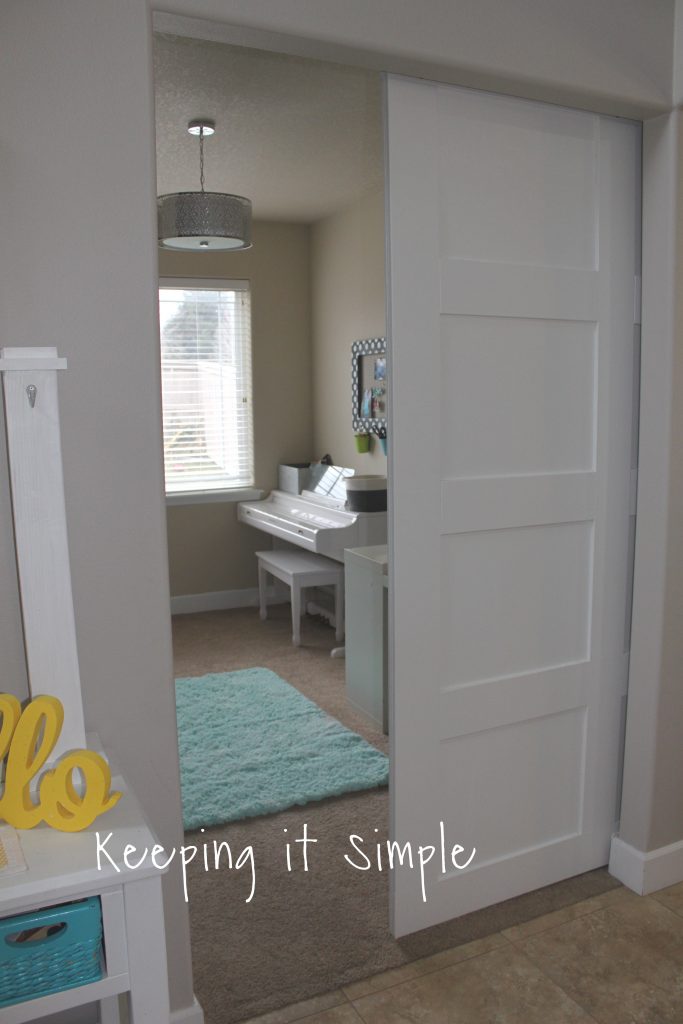
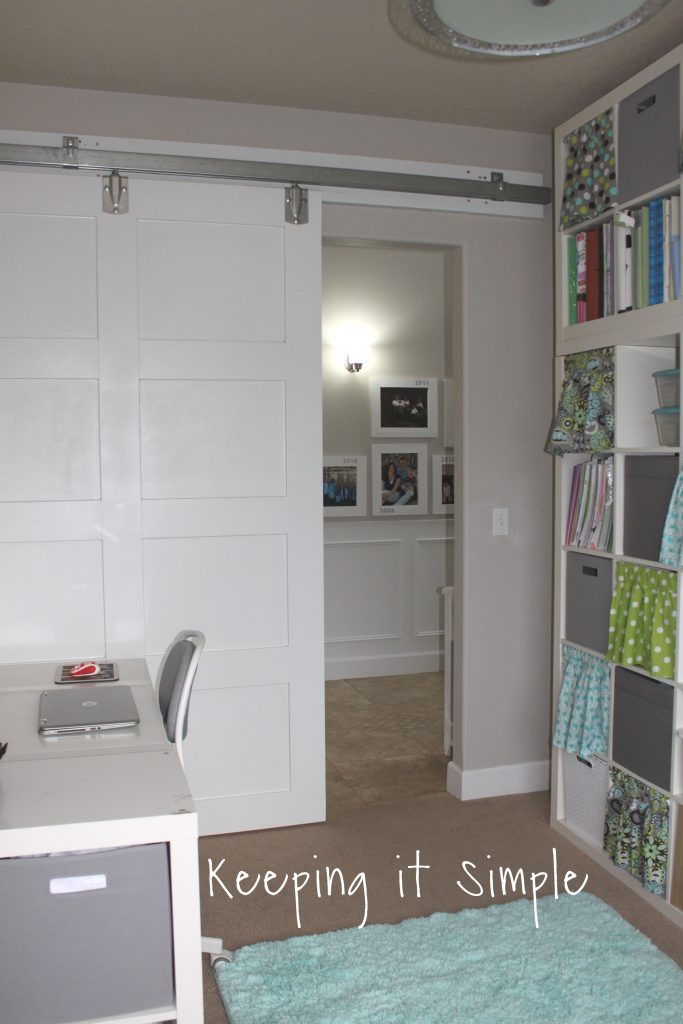
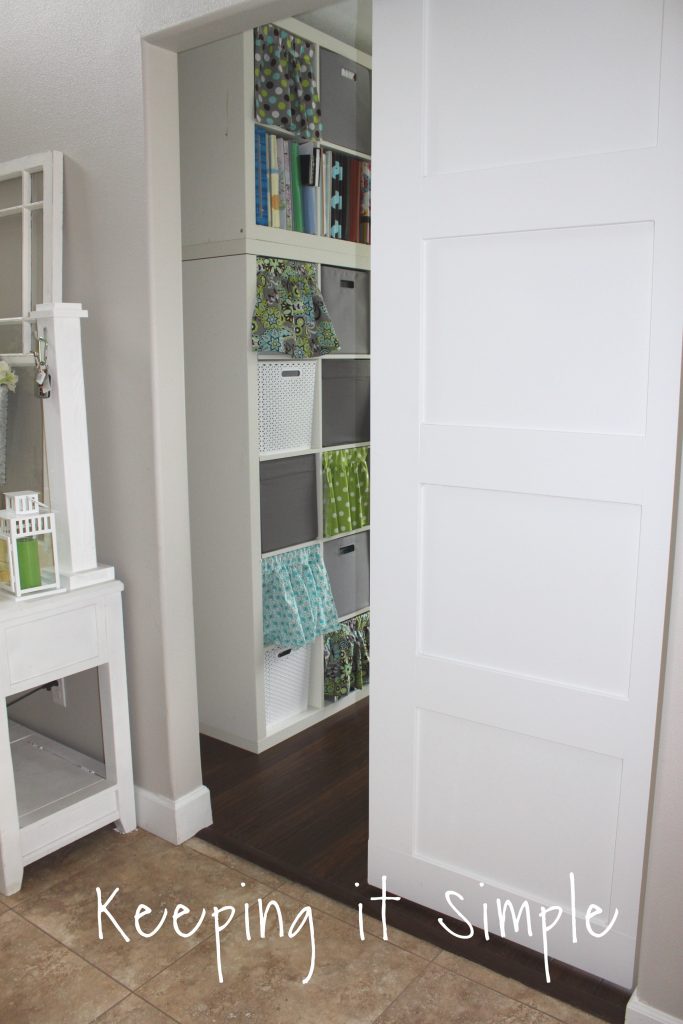
Here is the view from the other side.
And here it is closed, perfect for when I don’t want to clean my craft room :).
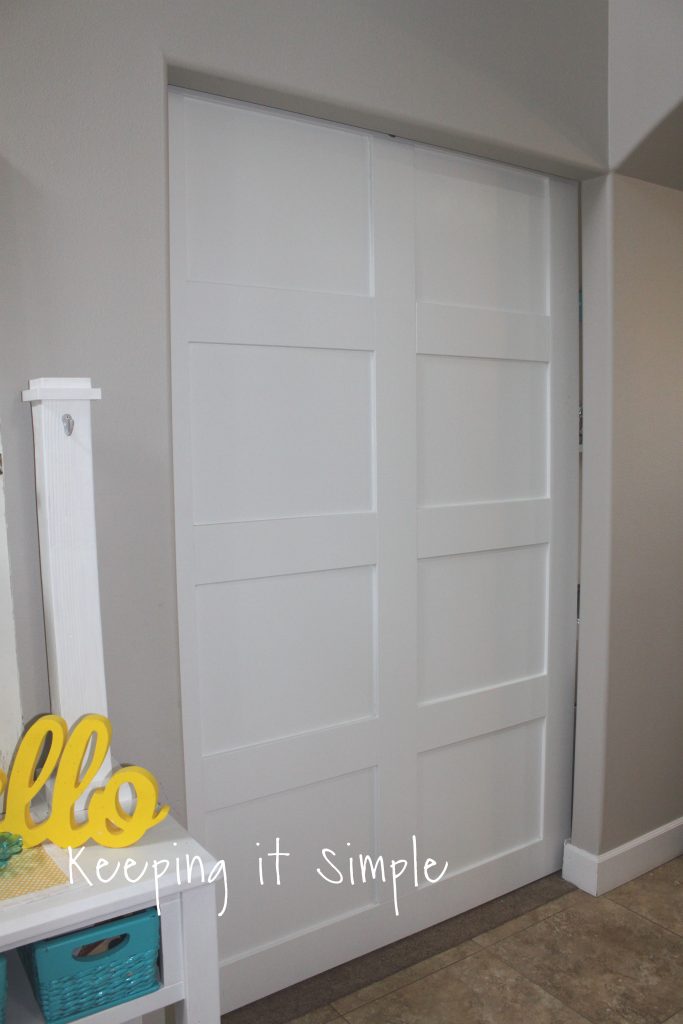
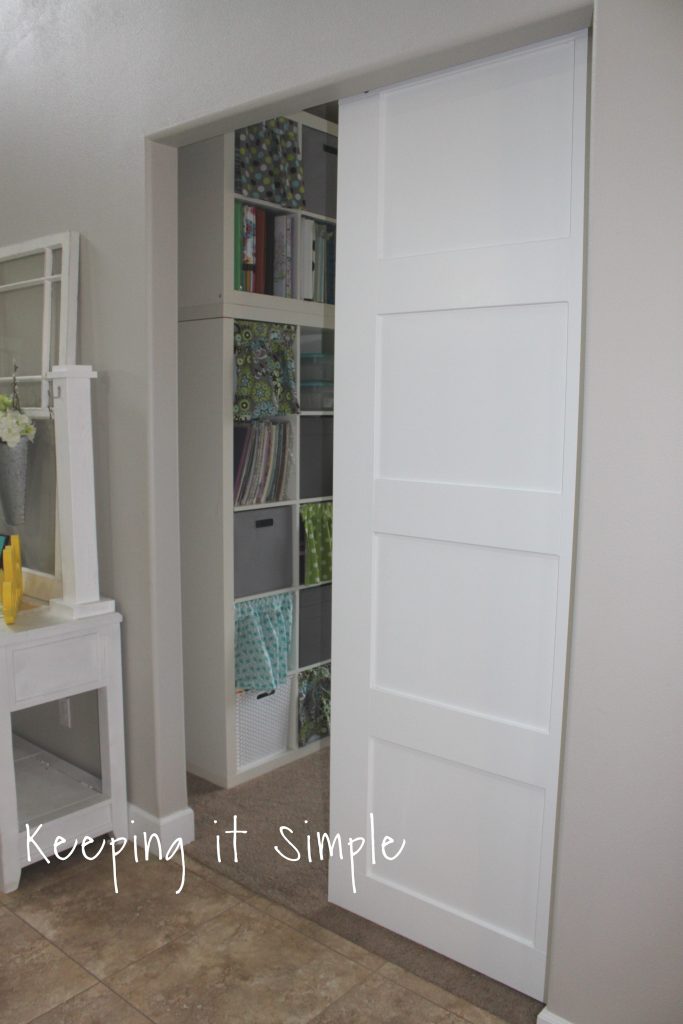
Here is what it looks like from inside of my craft room. The opening is about 24″ which is the same size as our french doors on my son’s room so it’s a decent size.
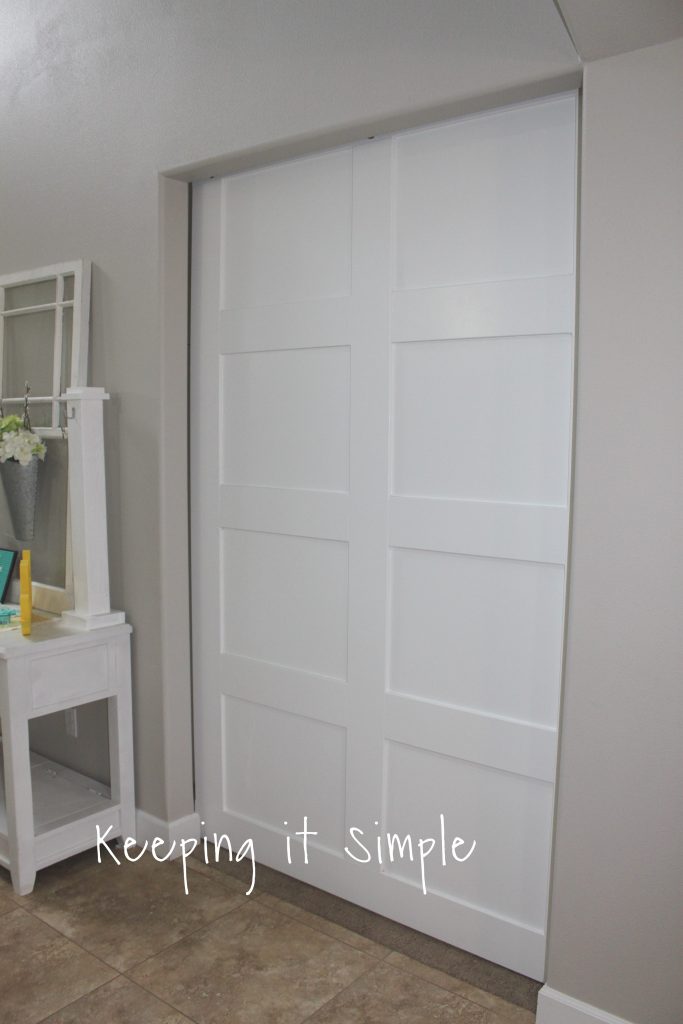
And here it is shut from the inside. I just love my new modern barn door!
UPDATE!! I have no updated my craft room, changed out the floors and rearranged the furniture. Here is what the barn door looks like now.
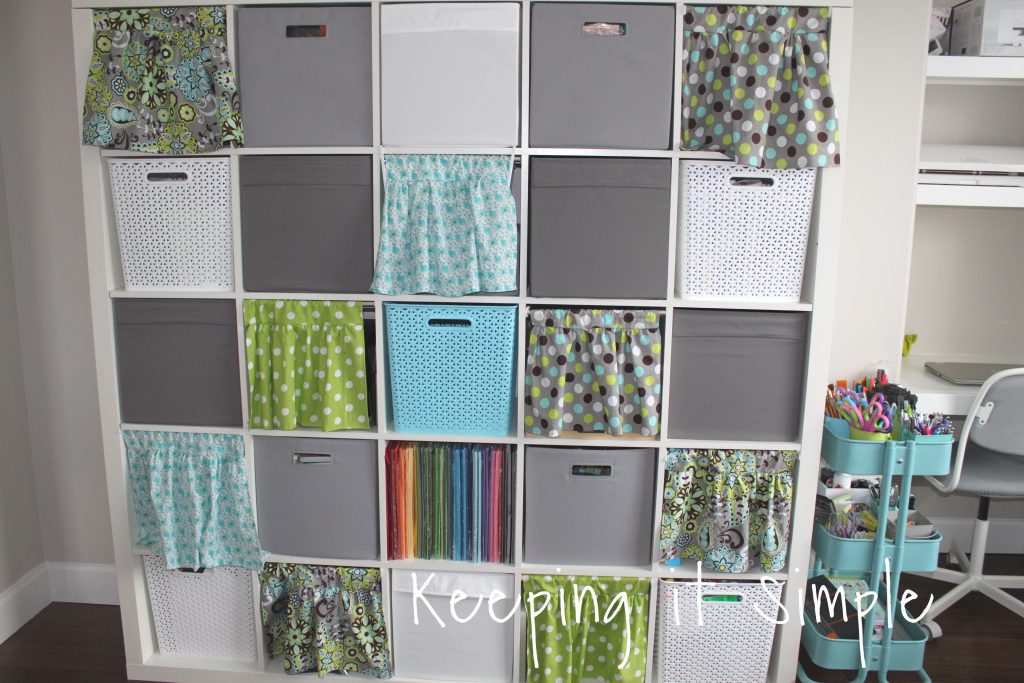
Check out the rest of my craft room!
Check out these DIY ideas:
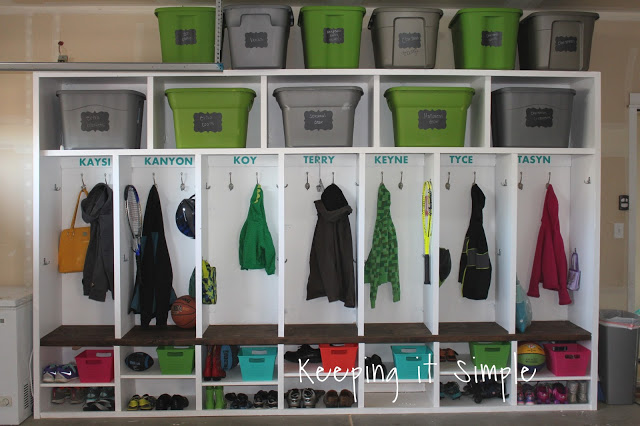
Garage Mud Room Lockers
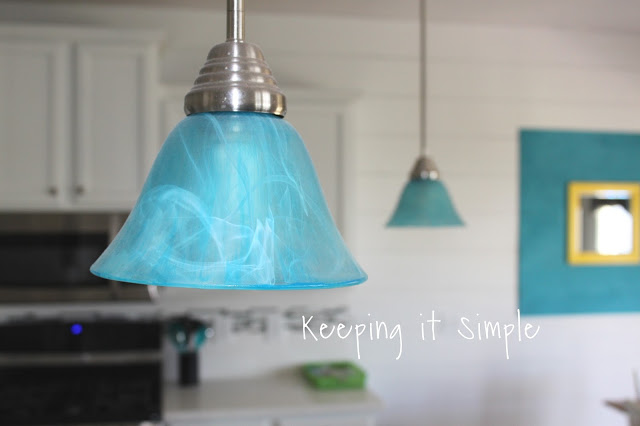
DIY Turquoise Pendant Lights
This post contains affiliate links.
Leave a Reply
You must be logged in to post a comment.