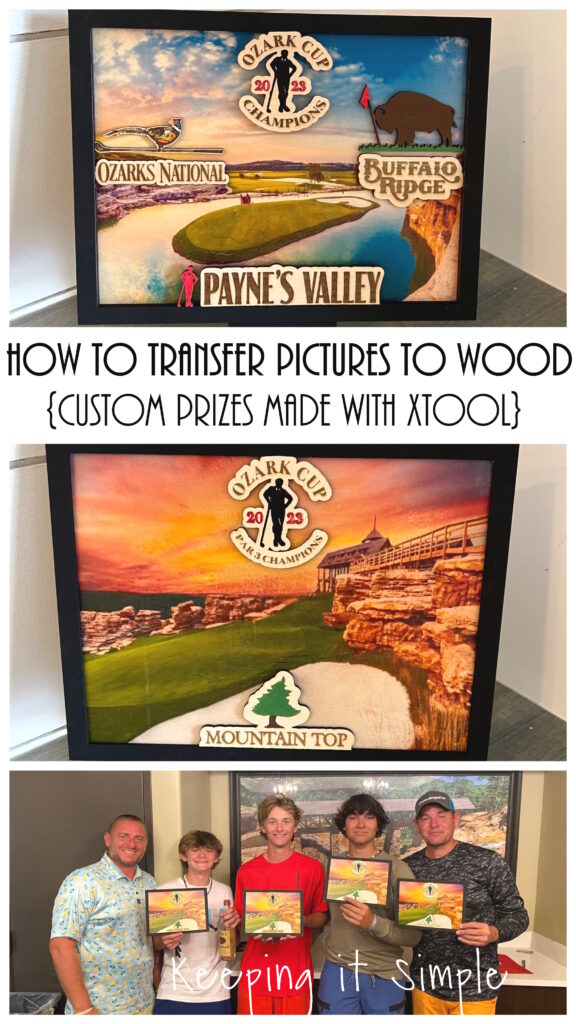
How to Transfer Pictures to Wood- Custom Prizes Made with xTool S1
One of the best things about having a laser cutter is that I get to make all kinds of things with it. I love creating truly unique things that you can’t just go to the store and buy. Every year my brothers, my nephews and their friends get together and have a golf tournament called the Ozark Cup. They go to some incredible golf courses around Missouri and compete against each other, it really is spectacular. The golf courses they go to are gorgeous! This year they wanted me to come up with a custom prize for the winning team. Since the golf courses are so beautiful, they wanted me to incorporate pictures into the design. After some trial and error, I was able to create a fun custom prize for the golfers.
This is how I made the custom prizes using my xTool S1 enclosed diode laser cutter.
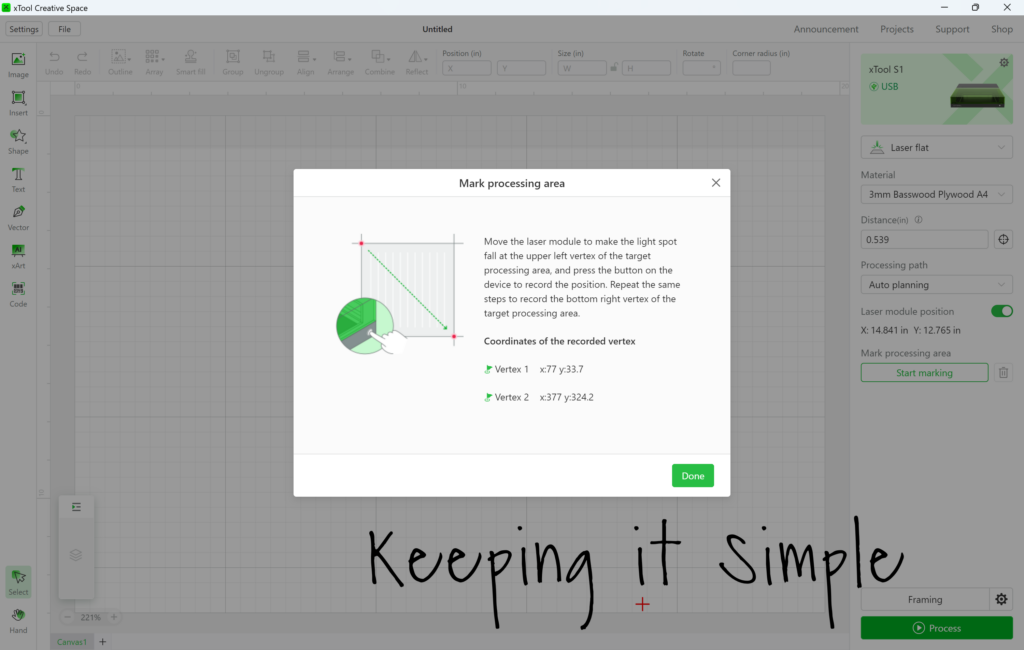
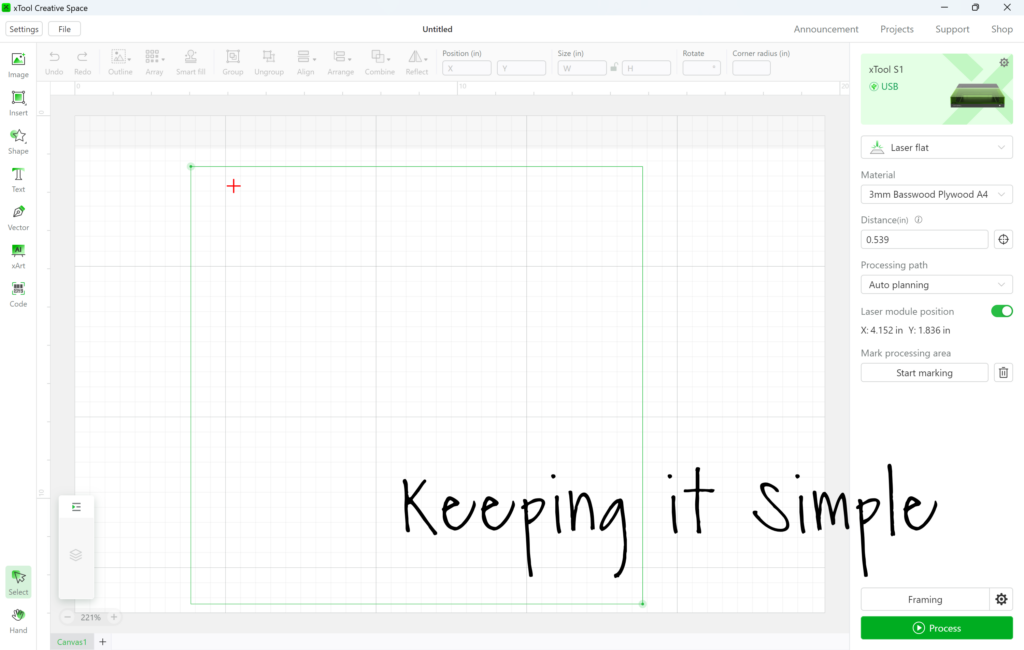
The first thing I did was open up xTool Creative Space. The xTool S1 using point positioning instead of a camera to position the laser. At first I was a little skeptical of this new technology, but after using it for a little bit, I am loving it. The camera positioning system was really nice because it was easy and quicker but it wasn’t exact. There were multiple projects that I made with my M1 that I didn’t get the engraving or cutting lined up perfectly. The point positioning is excellent and the cuts are exactly where I want them to be.
As I said before, it isn’t as quick of a process as the camera. With the M1, all you had to do was close the lid and the image came up in XCS. For the S1, you have to mark the area. To do this, I clicked on the start marking button.
Once I pushed the button, I positioned the laser module to the top left corner of the 3mm basswood plywood. I then pushed the button on the machine (not on the computer).
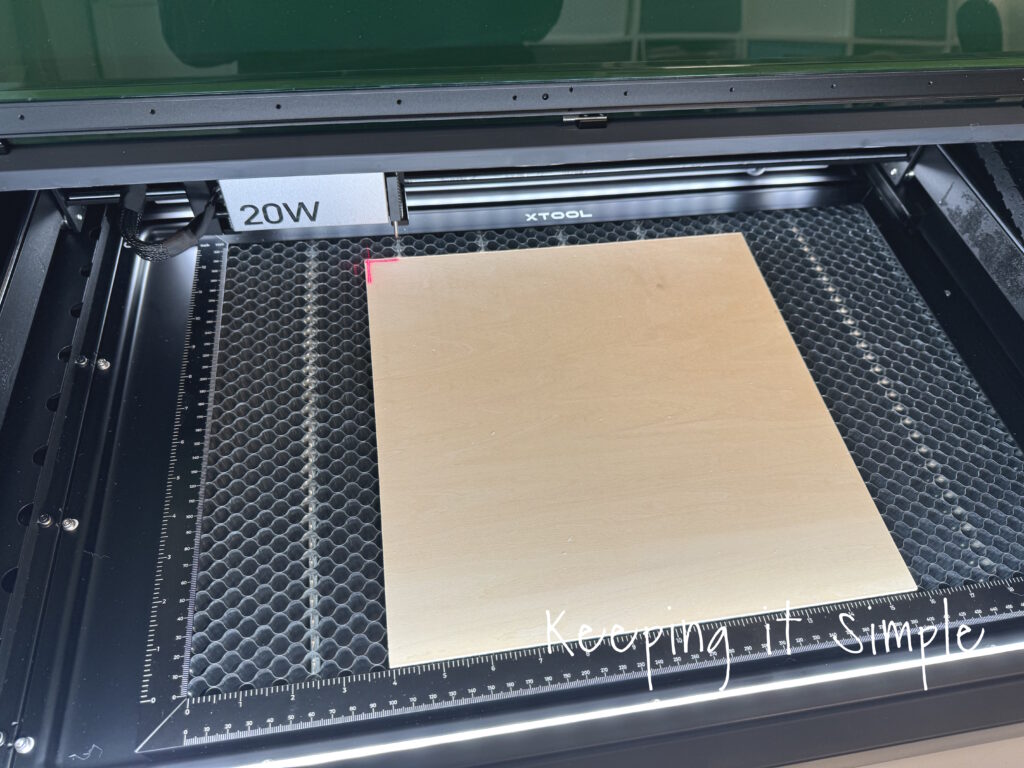
I then moved the laser module to the bottom right corner and pushed the button on the machine again.
Once that was done, I clicked done on the computer and the rectangle came up onto XCS. The little red cross is where the laser module is positioned, it moves when you move the laser module.
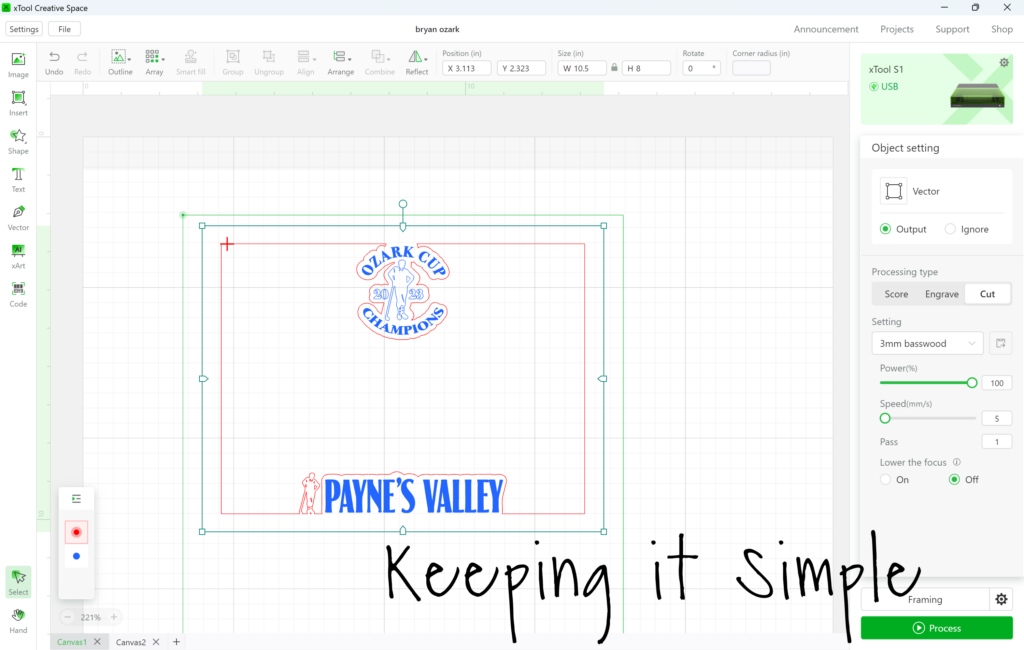
Once I had the plywood measured and on the screen, I opened a SVG image into XCS. These custom prizes are about 8 by 10 inches, so for each layer, it took up one piece of plywood. Don’t worry, you can reuse the left over wood so it won’t go to waste. One of the best things about xTool is that you can cut, engrave and score at the same time. For this layer of the custom prize, I did all three functions. The red lines are cut, the solid blue is engrave and the blue lines are score.
There are a couple ways that you do the power settings for the machine. You can choose the material as 3mm basswood plywood from the drop down menu or you can put in the setting manually. It’s really a personal preference. If you want to do put in the power settings manually, here is a great chart that has suggested power settings for the different xTool machines.
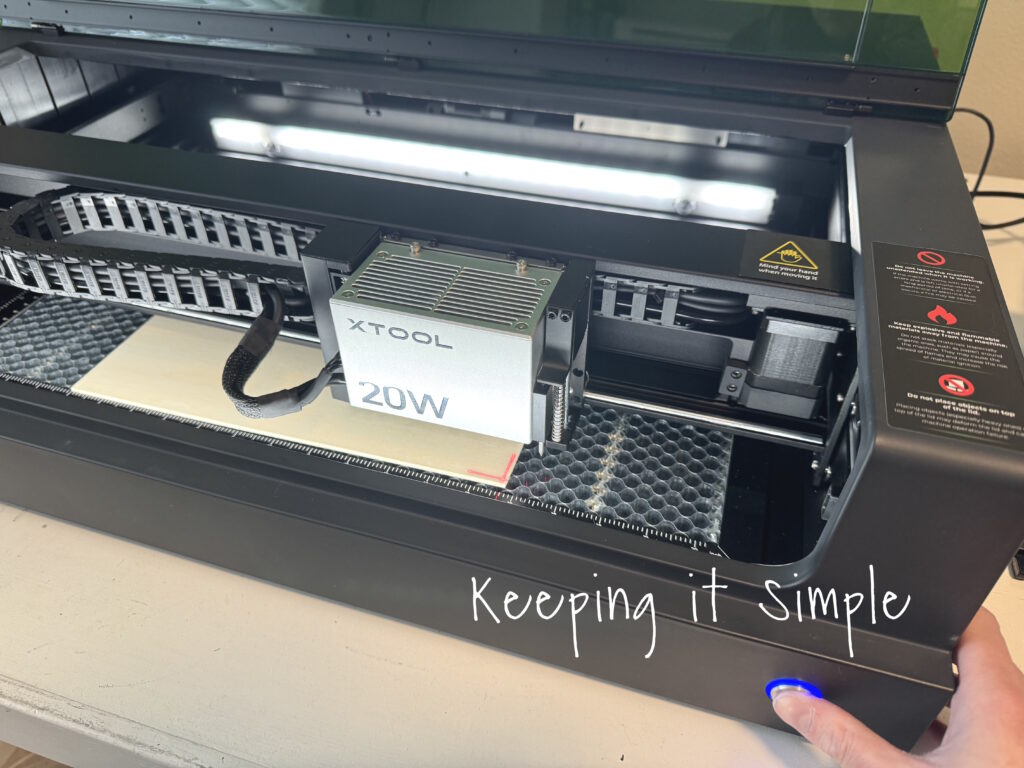
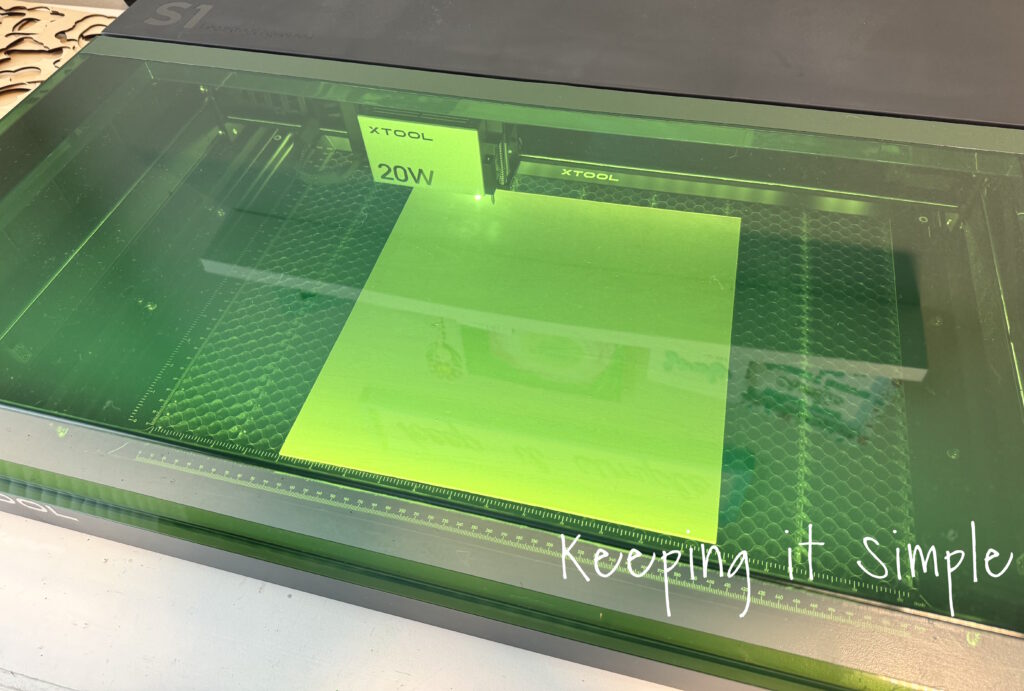
Once I had all the settings ready, I was able to send the project to the machine and let the xTool do it’s thing and work wonders. I turned on the air assist, to help prevent scorch marks, it worked like a charm.
Here are the 3 layers of the custom prizes. We wanted to have all the cool logos in the frame. Each logo looked similar but a little different.
![]()
Here is what the top layers look together. It’s looking so good and the xTool worked amazingly.
![]()
Now for the fun part, adding some color to the wooden frames! Using lots of different acrylic paints, I painted the frame and the logos. I used small paint brushes and even toothpicks for the little details. I really had to channel my inner artist, which is a little tricky because I don’t have much hand/eye coordination :).
![]()
Once I was finished painting all of the frames, it was time to work on the background picture. We wanted to use an actual picture of the golf course, so I printed out the pictures and put them onto the back piece of wood.
This is how to transfer pictures to wood with tattoo paper. **Make sure you get the tattoo paper for inkjet printers.**
![]()
The first thing I did was mirrored the image on my computer and then printed it onto the tattoo paper. I then let it dry and then I put the plastic transfer/glue paper on top of the picture. You will want to peel off a little piece of the green paper, place it onto the picture and then smooth it out. You can get a vinyl application tool or a credit card to smooth out the bubbles. **There are detailed instructions in the tattoo paper package.**
![]()
Once the transfer/glue sheet was on the picture, I removed the plastic and place it face down onto the wood.
![]()
Using a damp rag (not a soppy wet rag), I wet down the whole picture. You will want to make it wet enough that you can see the image through the paper.
![]()
Before removing the paper, I lifted the corner and checked to see if the picture transferred to the wood. If the picture stuck to the paper, I pressed the paper down again and made sure it was wet all over.
![]()
Since the picture was transferred to the wood and I could tell it wasn’t sticking to the paper, I was able to slowly remove the paper.
![]()
Here is the picture transferred to the wood, doesn’t it look beautiful?!? I love how it turned out on the wood. Once the picture was completely dried, I then glued the frame onto the back piece using E6000 glue. I used painters tape around the edges to hold the frame together while it dried and set.
![]()
And that’s it! I love how these custom prizes turned out! I found these perfect mini black easels for the prize to go onto.
![]()
Here is another custom prize I made for the Ozark Cup, I made it the exact same way but with different logos and picture.
![]()
Here are all the custom prizes I made.
![]()
And here are the other ones.
![]()
![]()
![]()
Check out all the other amazing projects I have made with the awesome xTool laser cutters!
This post contains affiliate links.
Leave a Reply
You must be logged in to post a comment.