Laser Cut Wooden Rose- Easy Mother’s Day Gift Idea
If you are new to laser cutting and xTool, check out my beginner’s guide here.
***UPDATE xTool is having a big sale right, going on June 8-28, 2026! They have multiple machines on sale, including the awesome xTool P3 machine, which has a CO2 laser and it is top of the line. Right now you can get $1,200 off! ***

Spring is here!! When I think about spring, I think about all of the beautiful flowers in bloom. Spring time makes me so happy and seeing all of the pretty flowers makes me even happier! Now that Easter is done, the next big holiday is Mother’s Day. I am all about easy Mother’s Day gift ideas and this laser cut wooden rose is super easy and would make a perfect Mother’s Day gift. It doesn’t have to be for Mother’s Day though, you could make it for Valentine’s Day or you can make it just for fun. Since it is a personalized wooden rose, the possibilities are endless.

Here is a quick video to show how easy it is to make these laser cut wooden roses.
This is how I made the laser cut wooden rose.
The first thing I did was upload the rose SVG image in xTool Creative Space. I did that by clicking the image button. Then I highlight the whole thing and clicked cut. I sized the wooden roses and then sent it to my xTool M1 machine. I cut the wooden roses out of 3mm basswood plywood. I put the plywood onto the triangular prisms to help with air flow. I also used my air assist to help with scorch marks. Here are some SVG cut files for the generic roses.
Wooden Roses * Wooden Daisies * Rose without Words (XCS file)
For the roses, you will have to resize them to be 3.25 inches wide (the height varies but the width is consistent). The bases will be 2.6 inches wide and 2.55 inches high.
For the daisies, you will have to resize them to be 2.91 inches wide. The bases will be 2.44 x 2.44 inches.

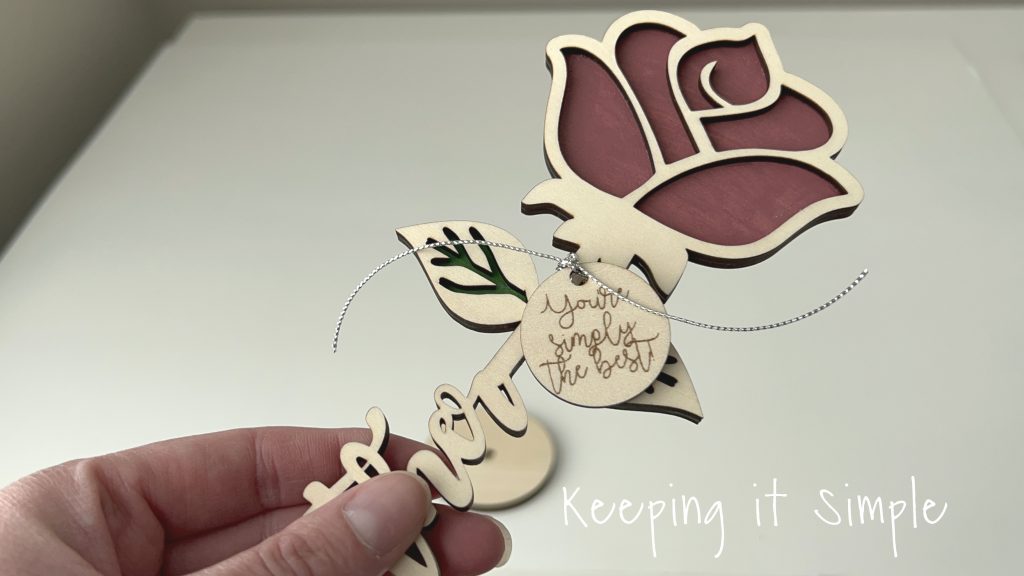
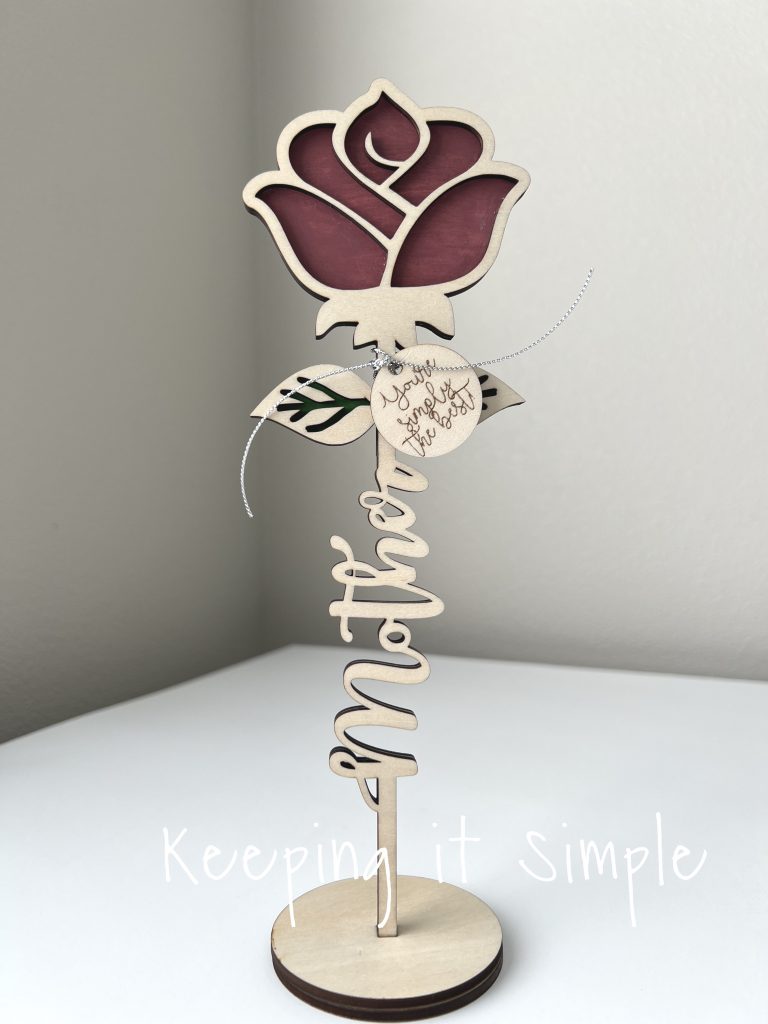
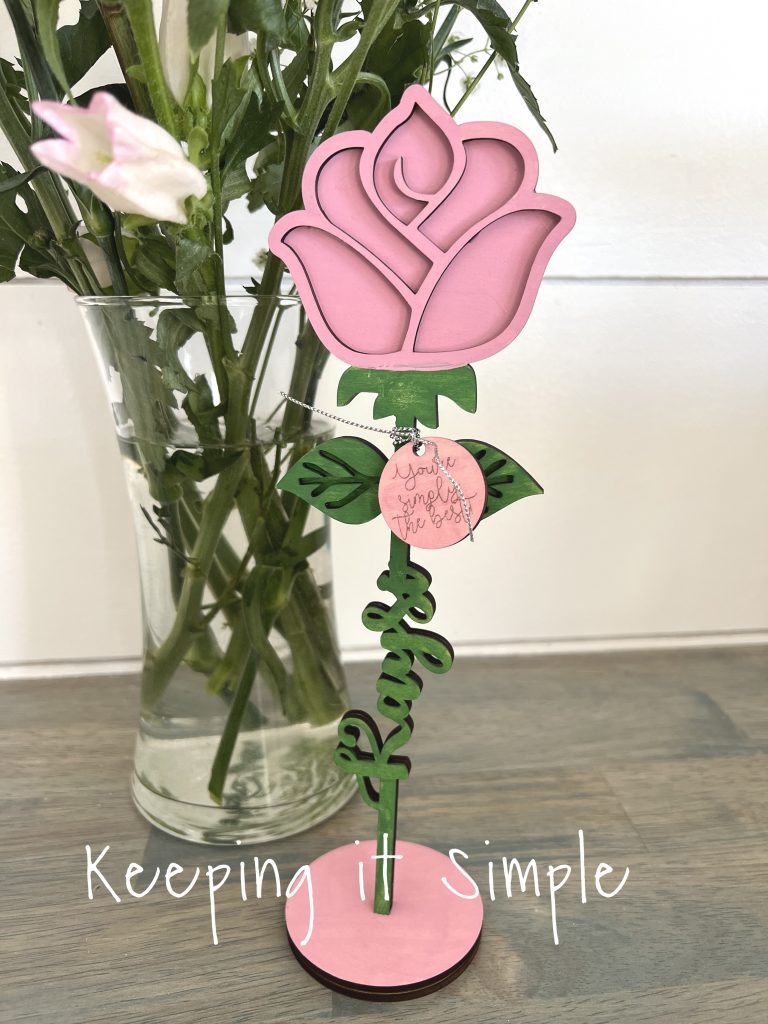
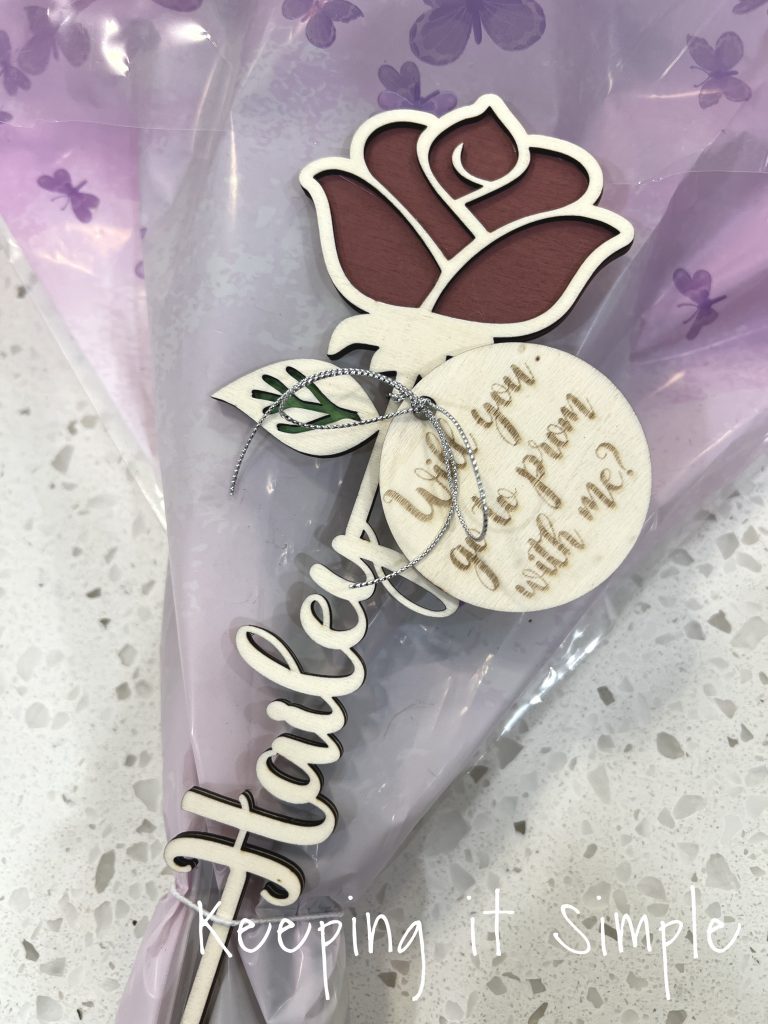
I wanted the wooden roses to be able to stand on their own, so I made a base for it. It’s just a circle with a rectangle cut out of it. The rectangle is the size of the stem of the rose, which ended up being about .1875 inches wide and .236 inch high. The base itself is 2.5 inches in diameter. Each base is a little different because the wooden roses weren’t the exact same size. I also made up some tags to go with the wooden rose. Some are for Mother’s Day and others are just basic ones, like the one that says “You’re simply the best!”. For those, I have the program cut the circles out and engrave the words. You can set that up by highlighting the part of the design you want engraved and then click the engrave button. You do the exact same thing for the part you want cut, just click the cut button instead of engrave.
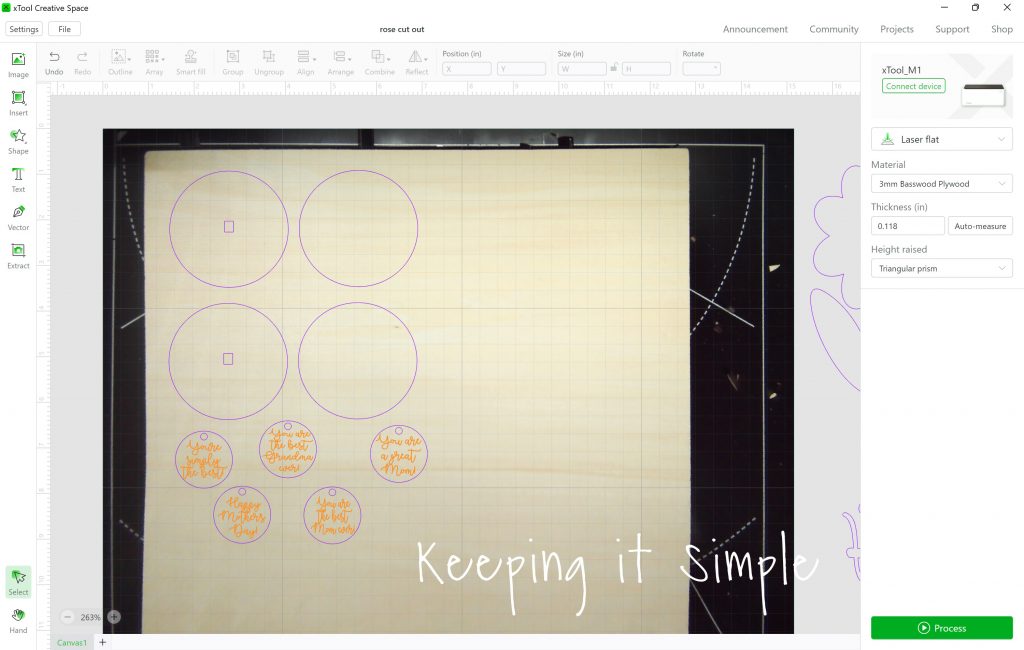
Here are all of the pieces cut out by the xTool M1 machine. It does such a nice job, I am always so amazed by how well it cuts through the wood.
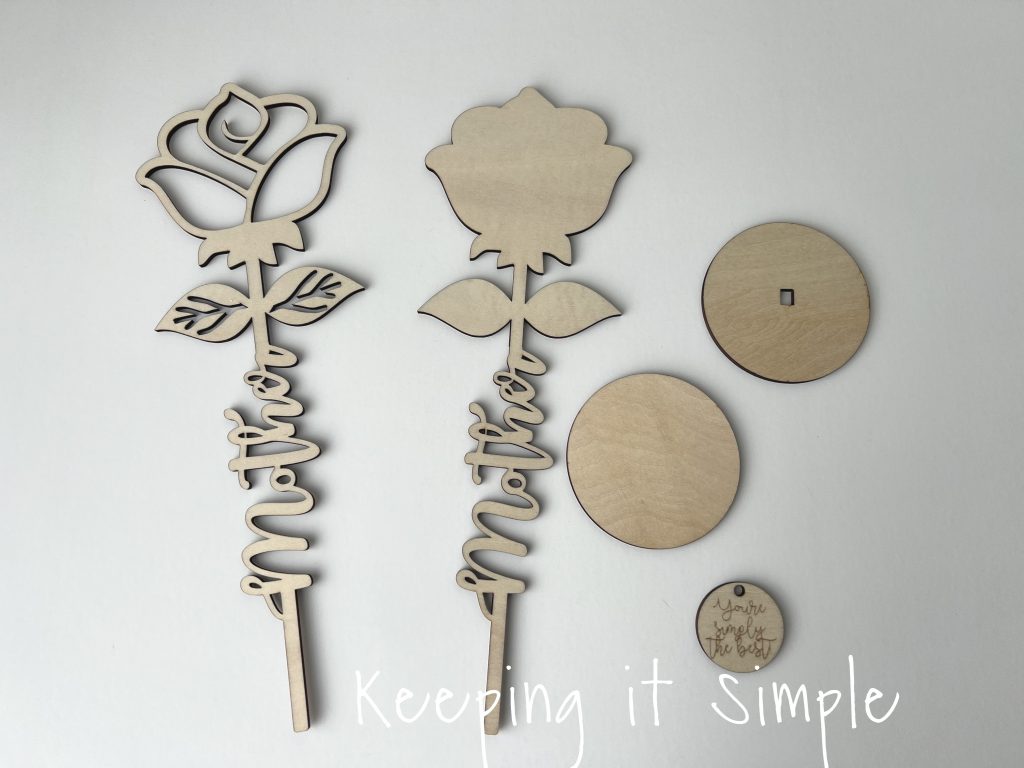
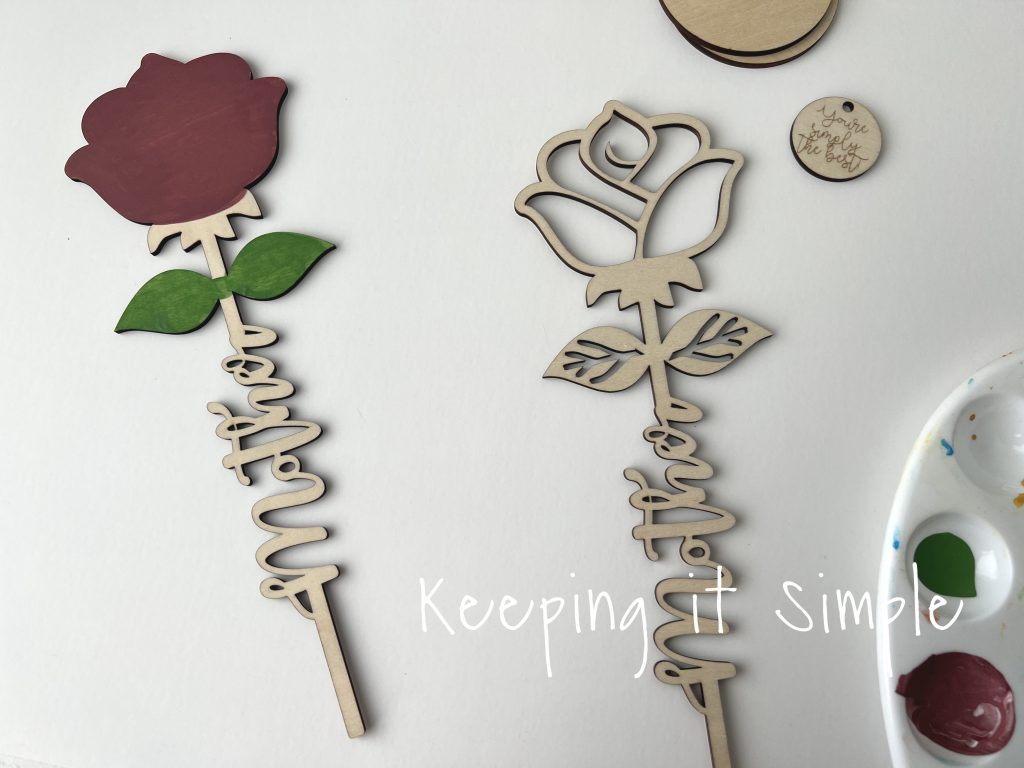
Using acrylic paint, I painted the rose and leaves on the back piece. You can paint the front piece if you want, it all just depends on what kind of look you are going for.
Using E6000 glue, I glued the two layers together. I also glued the base piece together.
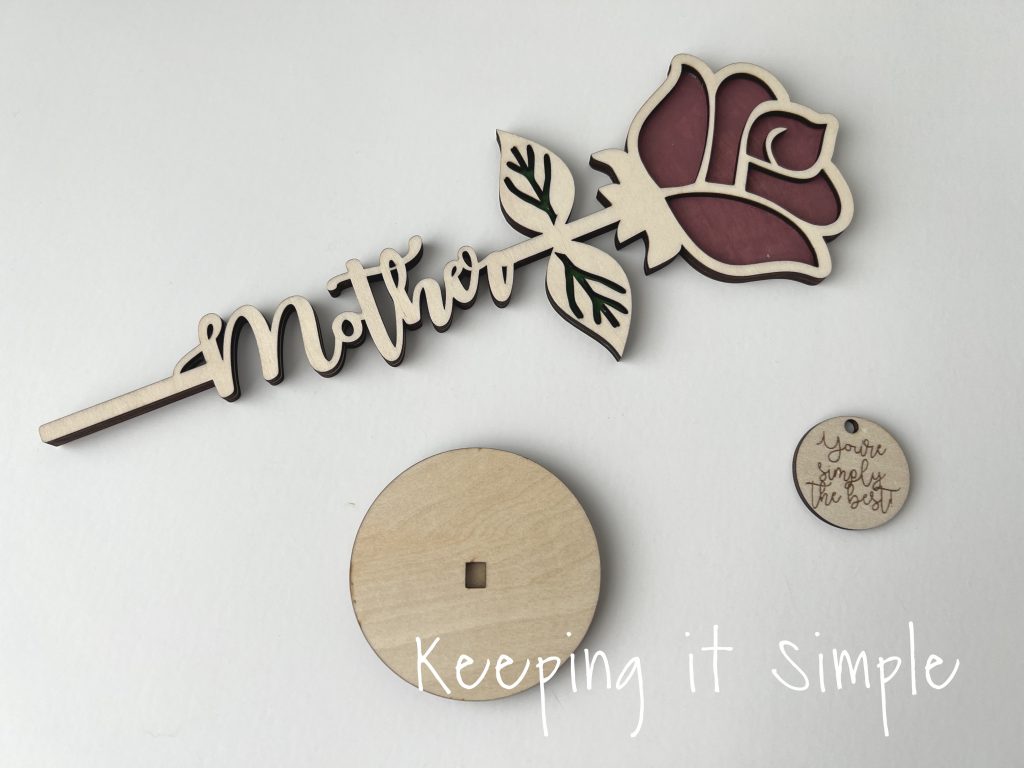
I then tied the little wooden tag onto the stem of the rose.
Using a dab of glue, I glued the stem of the wooden rose into the base. The rectangle is the same size of the stem so it’s a tight fit. You don’t need a ton of glue and sometimes you don’t even have to glue it, it will stand up just by putting the stem into the base.
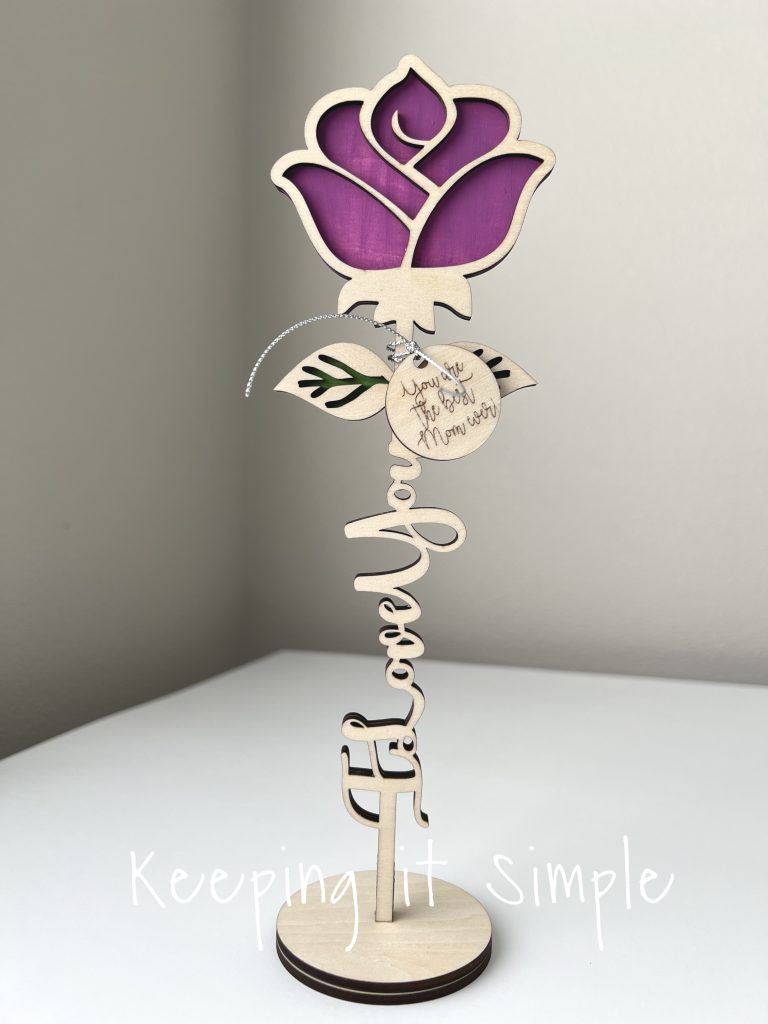
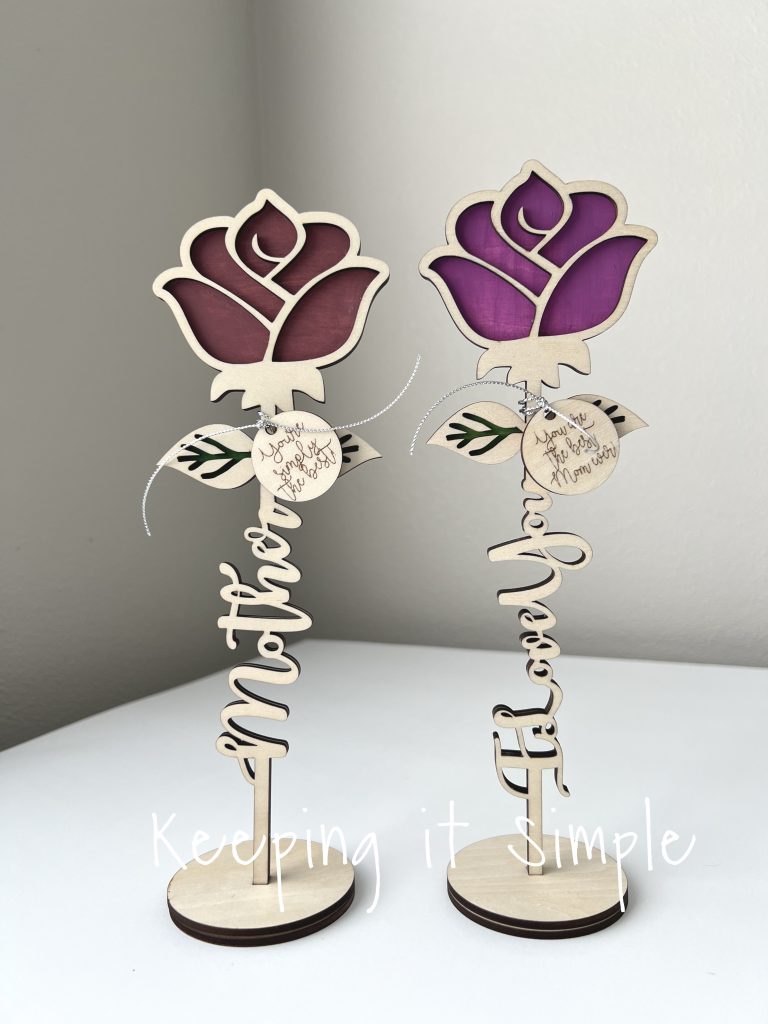
Here is the I love you wooden rose, I made it the exact same way, just with a different saying in the stem of the wooden rose.
And that’s it! Aren’t these laser cut wooden roses so pretty? I love how they turned out!
You can give the laser cut wooden rose as a gift by itself or you can add some pretty fresh flowers to go with it.
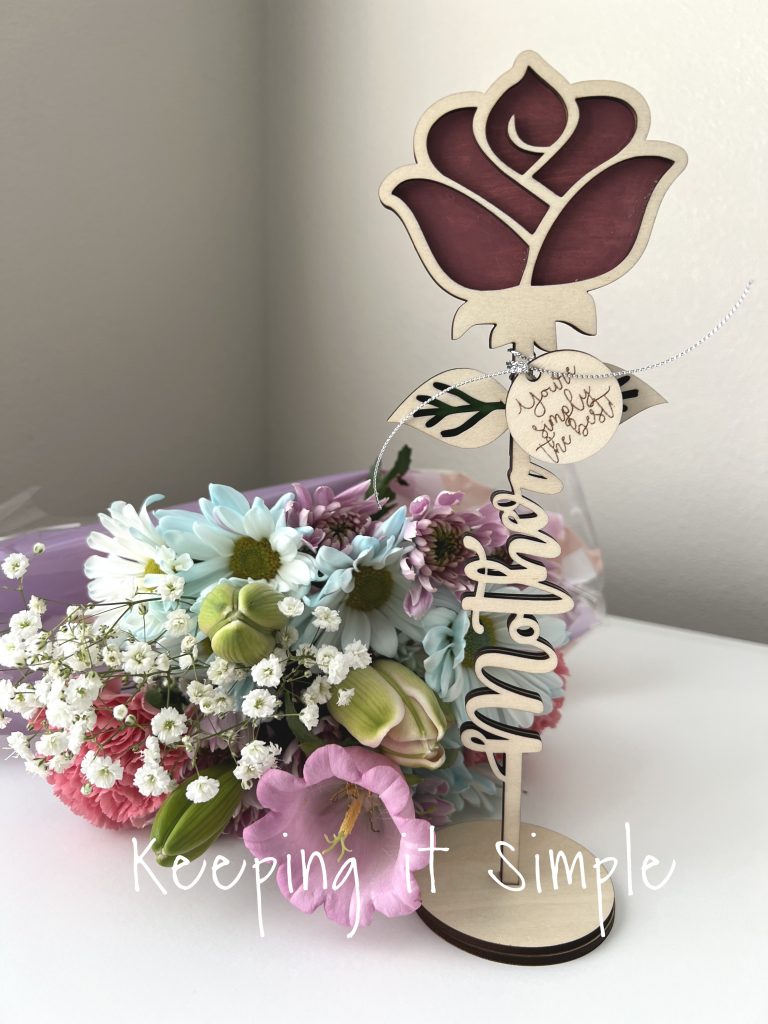
With the fresh flowers or with out them, the personalized wooden rose will for sure make someone’s day!
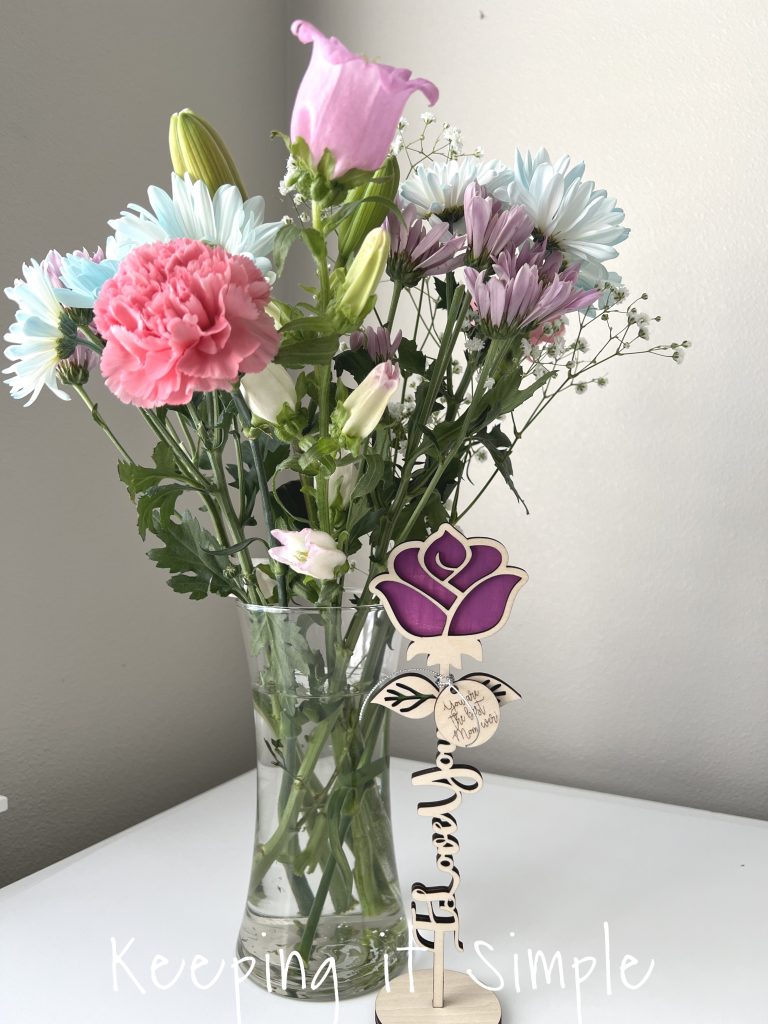
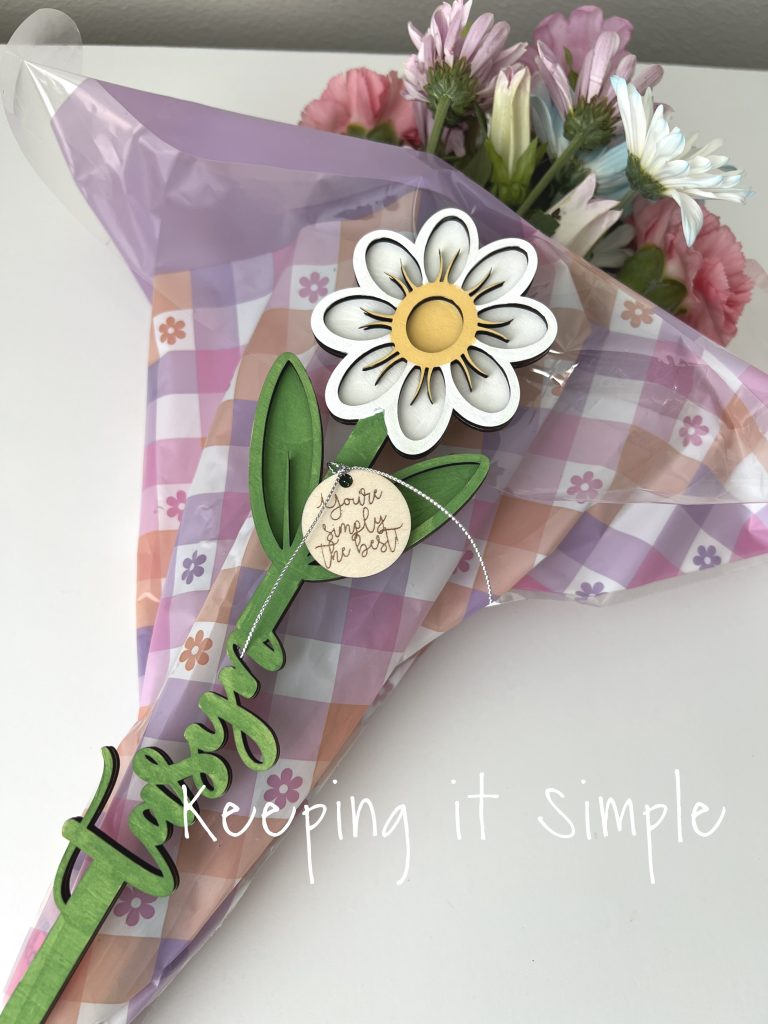
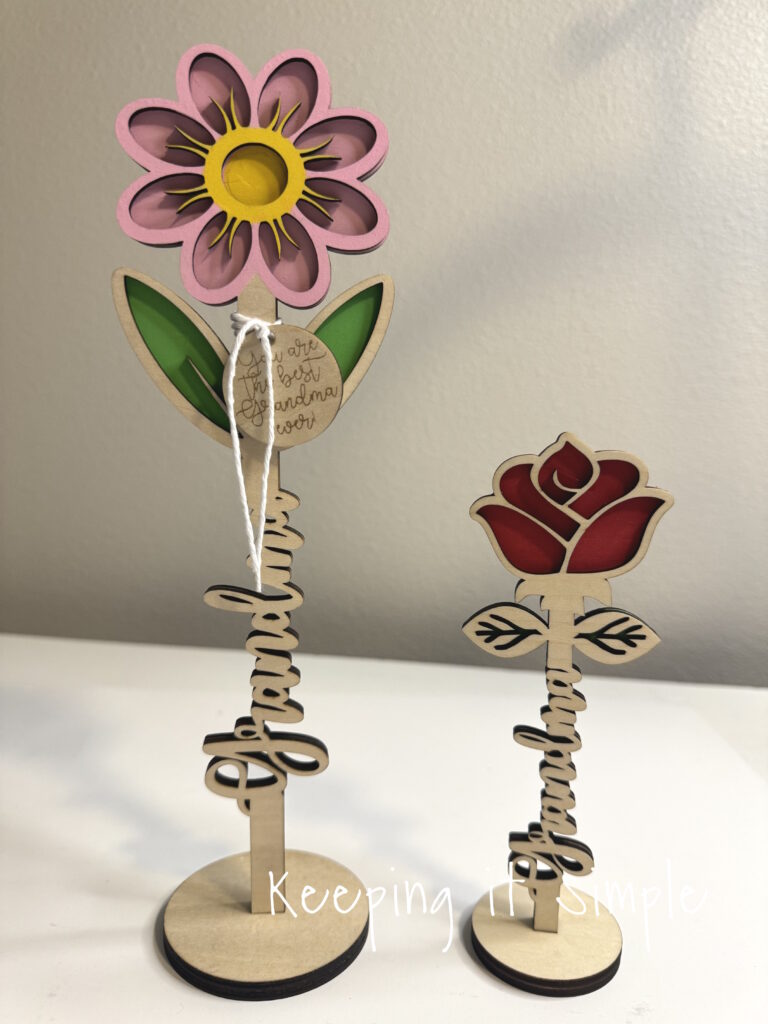
There are a lot of options to these personalized wooden roses. You don’t have to have a base with them, you can just tie it to some fresh flowers like I did with this one that says Grandma.


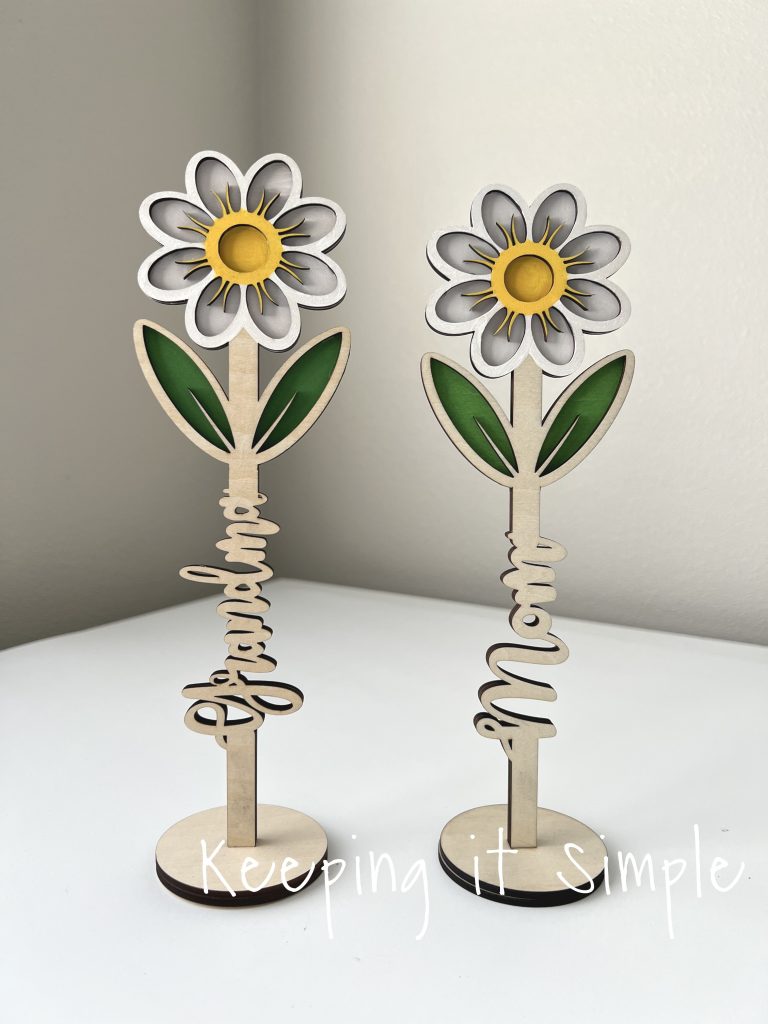
You can have a different design, like this wooden daisy I made my daughter. You can also paint the both layers of wooden flower. giving it a different look.
I made one for myself and decided to paint the whole wooden rose, including the base and wooden tag. I love how the green and pink look together and match the fresh flowers.
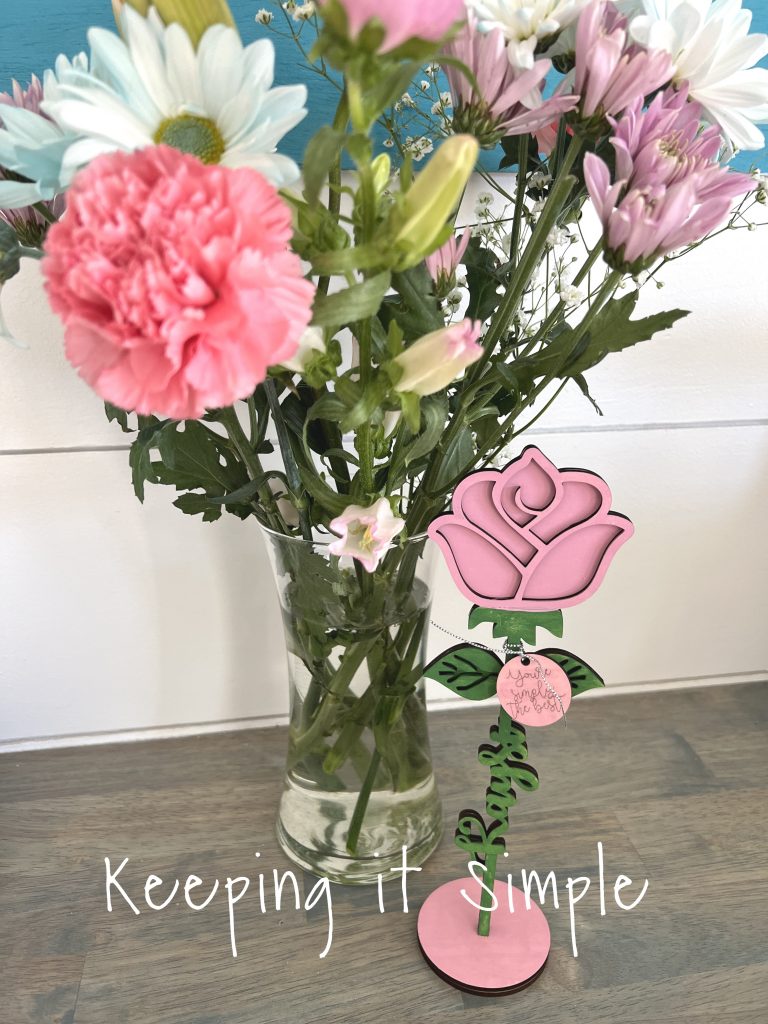
Here is a closer look of the pained wooden rose. Like I said before, the possibilities are endless.
There are lots of ways to paint these wooden roses. You can paint both layers of the rose and leave the rest of it unfinished.

I painted these wooden daisies the same way, I love how they look with the yellow center!
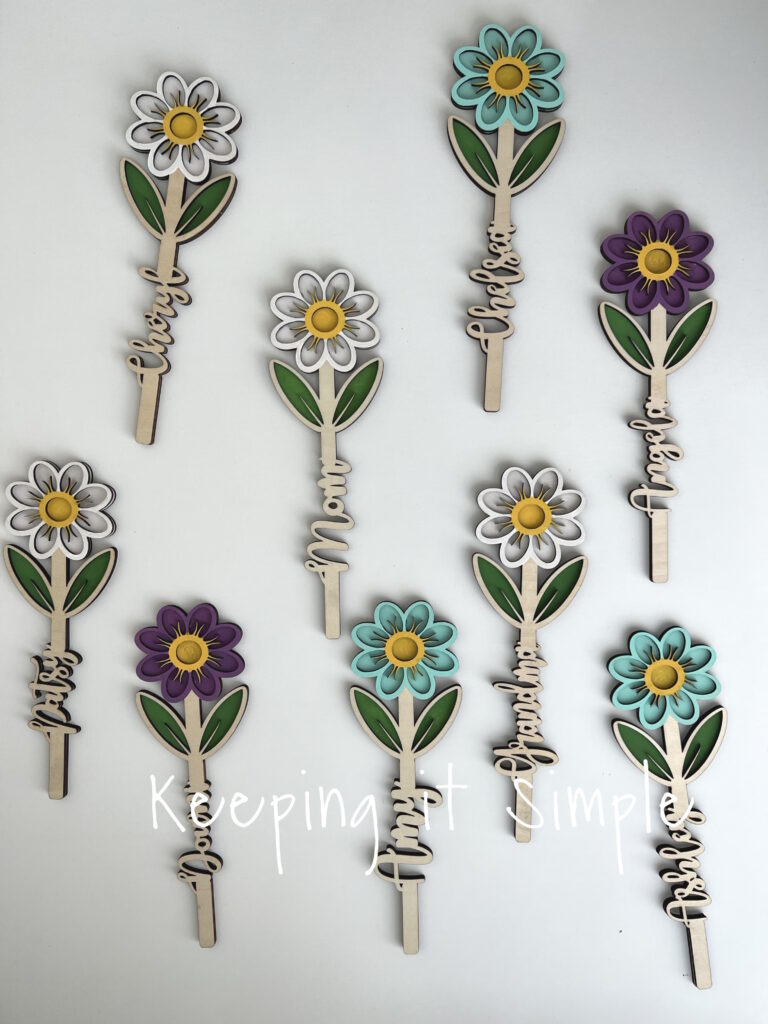
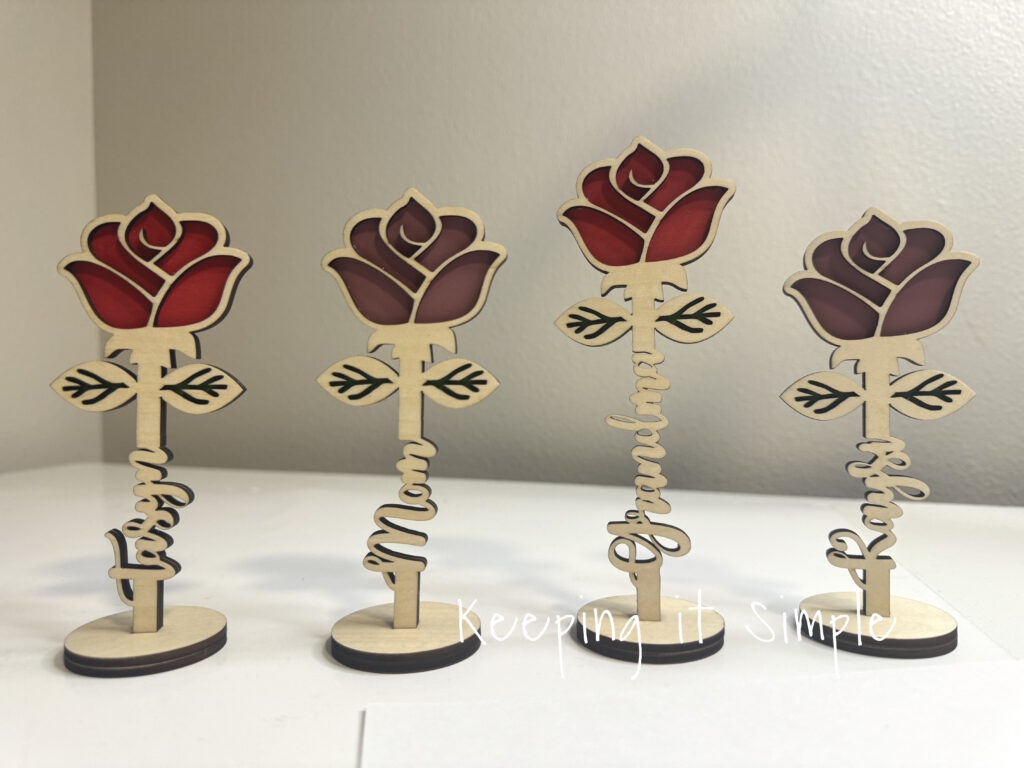
I love how these turned out so much that I made one for each one of my sisters for Mother’s Day because I wanted to do something special for them. I just love them! For the wooden daisy flowers, I went with brighter colors. I also painted the top layer of the daisy, I thought it looked best like that.
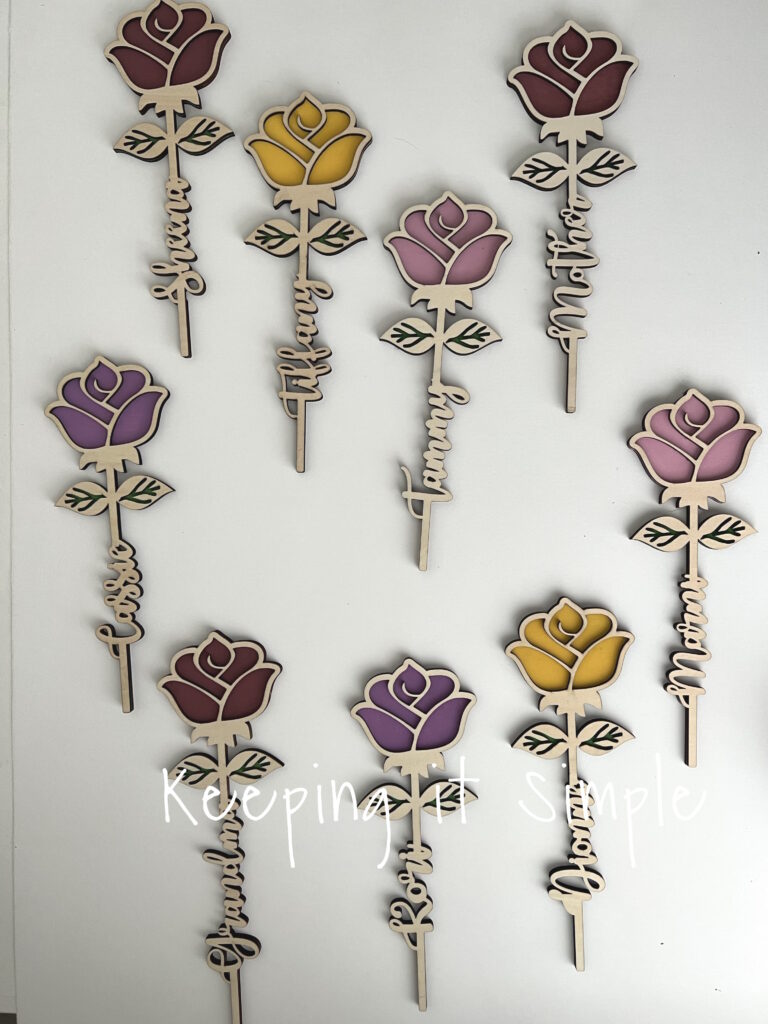
For the wooden roses, I went with more muted colors and only painted the bottom layer, leaving the top layer the natural wood color. I love how many options there are with these.
You can have the wooden tag say anything, even have it ask a question like, “Will you go to Prom with me?”. These laser cut wooden roses are so fun and beautiful! Any one would love to get a personalized wooden rose!
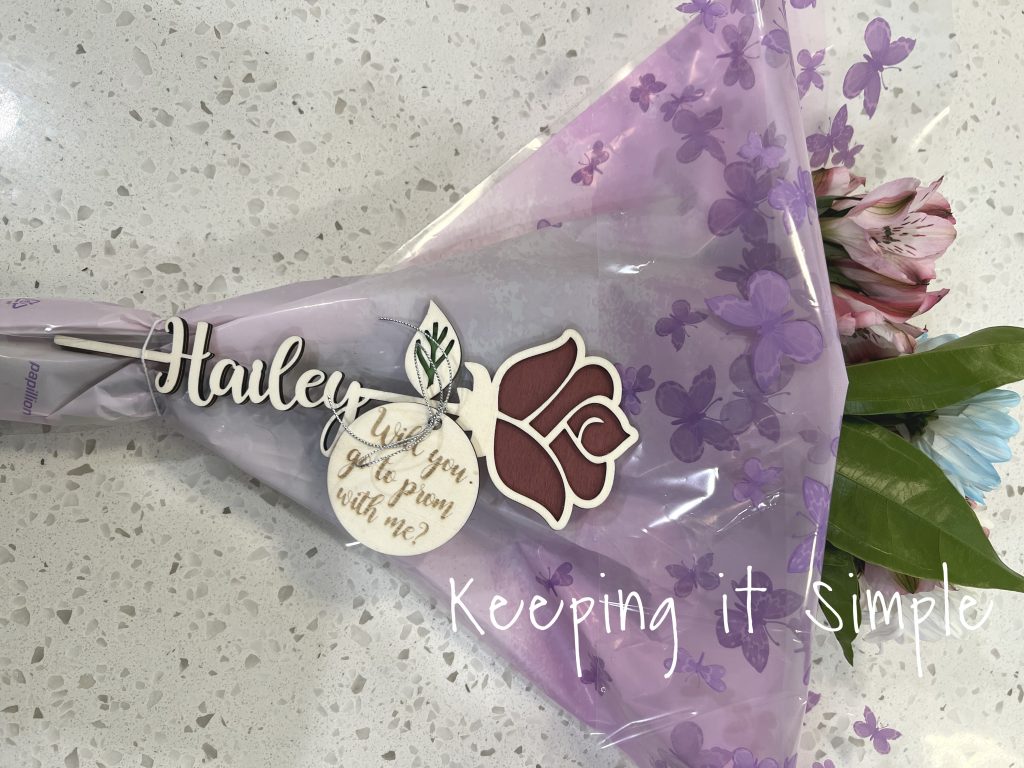
You really can make these wooden flowers for any occasion and they can say basically anything. I made up a generic Happy Birthday one to give to a friend. I love how the wooden rose looks on top of a bouquet of flowers. It gives it such a special touch.

***UPDATE***
I have loved these wooden roses so much, that I made a little mini rose. I made the stem a little thicker and the words a little more condense, so the mini roses are a little more sturdy. Here is the cut file for the mini roses.
For the roses, I made each one of them 2.2 inches wide. The heights vary, it all depends on how many letters are in the word. The bases are 1.75 x 1.75 inches.
Here is a comparison between the two flowers. The mini roses are about half the size. I love how both of them turned out!
If you love these laser cut wooden roses, then you should check out all the other laser cut projects I have made with my xTool M1. You can see all of them here.
This post contains affiliate links.
Leave a Reply
You must be logged in to post a comment.