Beginners Guide to the xTool M1- How to Use xTool Creative Space
This post is a sponsored post. I was given the xTool M1 machine to review. All opinions, ideas and content are 100% my own.
**** DEAL ALERT****
xTool just released a new, gorgeous white machine for Valentine’s Day! They are on sale until Feb. 16, 2024.
The S1 10W is $899.99, $300 off
The S1 20W is $1699.99, $400 off, plus you get $338 in accessories FREE: Air assist & Honeycomb!
The S1 40W is $$2,199.99, $300 off, plus you get $338 in accessories FREE: Air assist & Honeycomb!
Laser cutters are all the rage right now, they can do so many things. They can cut wood, engrave and so many more things. For the past couple years I have been dying to get my hands on a laser cutter, but whenever I looked into them I could not get past the price tag. I wanted one so I could make all the pretty things with wood and metal. Seriously I looked into almost every month for a year. Then over the summer I heard about the laser cutter that wouldn’t break the bank, it cost just the fraction of the price and could do all the things I wanted to do with a laser cutter. Someone in my family had one and he as making some awesome things with it. He then told me it was called xTool. I had never heard of the company before that so I went to their website and looked at their awesome machines. I was shocked by the prices, so much lower than the other laser cutters that I was looking at. After looking for a couple months, I decided that I was going to get a xTool laser cutter for my birthday (which is in February). I just needed to get through Christmas and then I was going to get one, I felt like for the price it was totally worth buying one. Well two weeks before Christmas I got contacted and asked to try out the xTool M1 5W Basic machine. To say that I was excited would be a major understatement! I jumped for joy and immediately started dreaming up projects to do. The possibilities are endless with this machine. Trust me, you are going to be seeing lots and lots of xTool projects on here!
Before we get to all the details, I wanted to let you know there are a lot of video tutorials on this post because sometimes seeing the process is a lot easier than looking at pictures and reading about it. I will have both though, I will still have a lot of pictures and I will explain everything that I do with it. Another thing that I want to say is that is a beginners guide to the xTool M1, I am a beginner just like you :). I’ll walk you along the way the best that I can. And lastly, I wanted to say, just like any new machine, it does have a learning curve. It will take time to adjust to it. Use scrap wood, scrap paper, scrap vinyl, etc. These machines can be VERY intimidating, especially if you are new to the laser cutting world like I am. I’m not going to lie, I was nervous to try it out. I’m here to help you and hold your hand along the way and tell you it’s going to be okay :).
Alright lets just jump right in and learn about this amazing machine, the xTool M1. Here is a unboxing video to show you the machine and how to set it up!
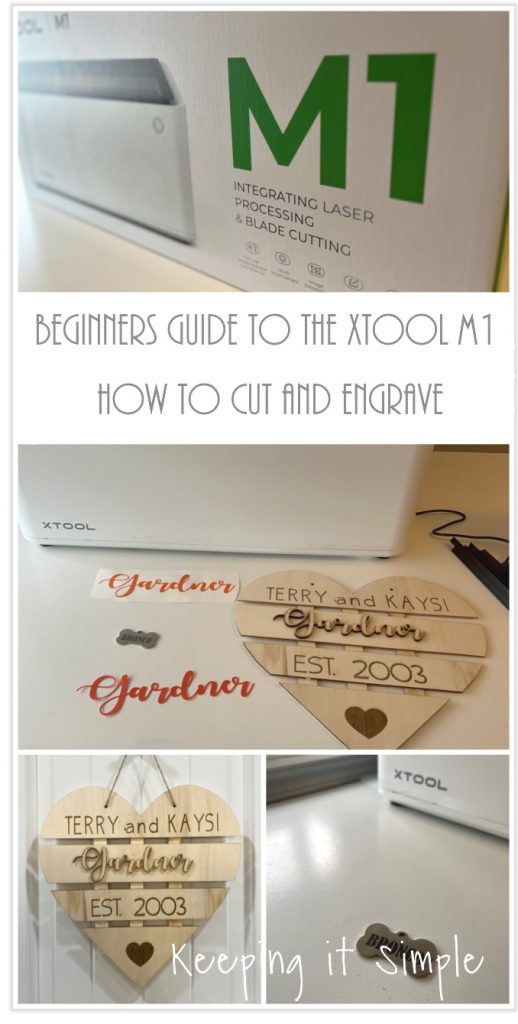
The xTool M1 is the first of it’s kind, it is a laser cutter and also has a blade to cut. It can cut wood and vinyl! It’s the perfect machine for people who want to do it all.
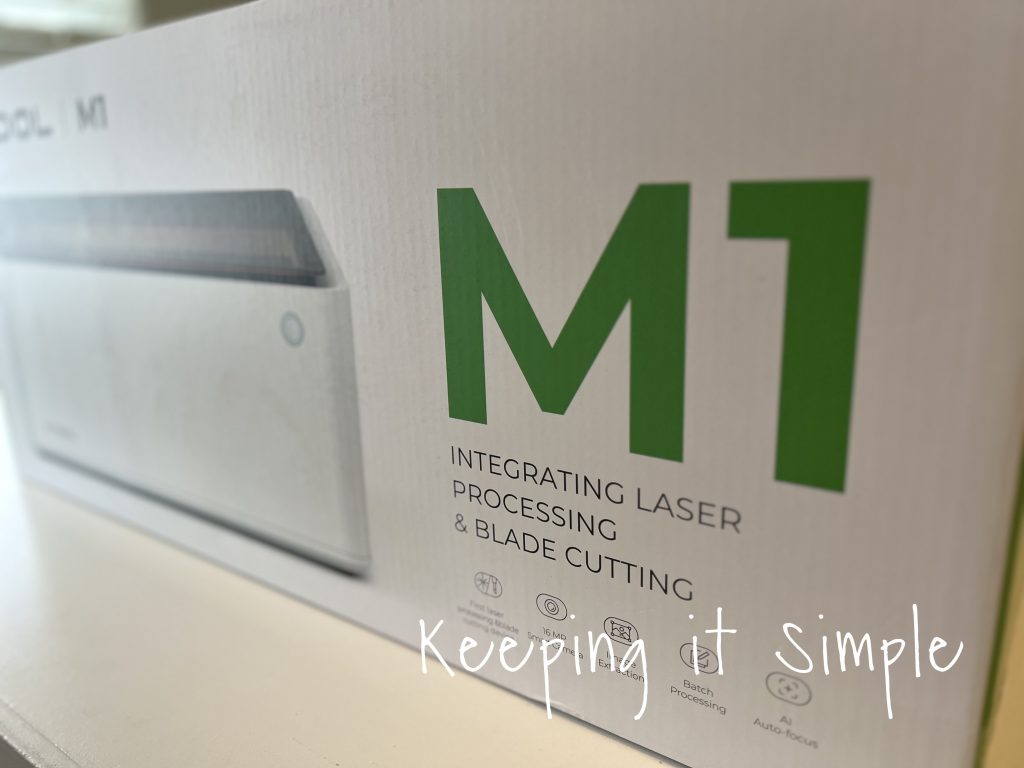
Here is the back of the box, showing what all it does. It has a smoke exhaustion fan and an exhaust pipe to help with the smoke. It has a camera that senses the materials and it projects onto the computer screen in xTool Creative Space. It is super handy when you are engraving things, you don’t have to do any kind of guess work, you can line it up exactly. This machine has ultra-fine compressed spot technology and with the laser processing and blade cutting, it can do lots of intricate details.
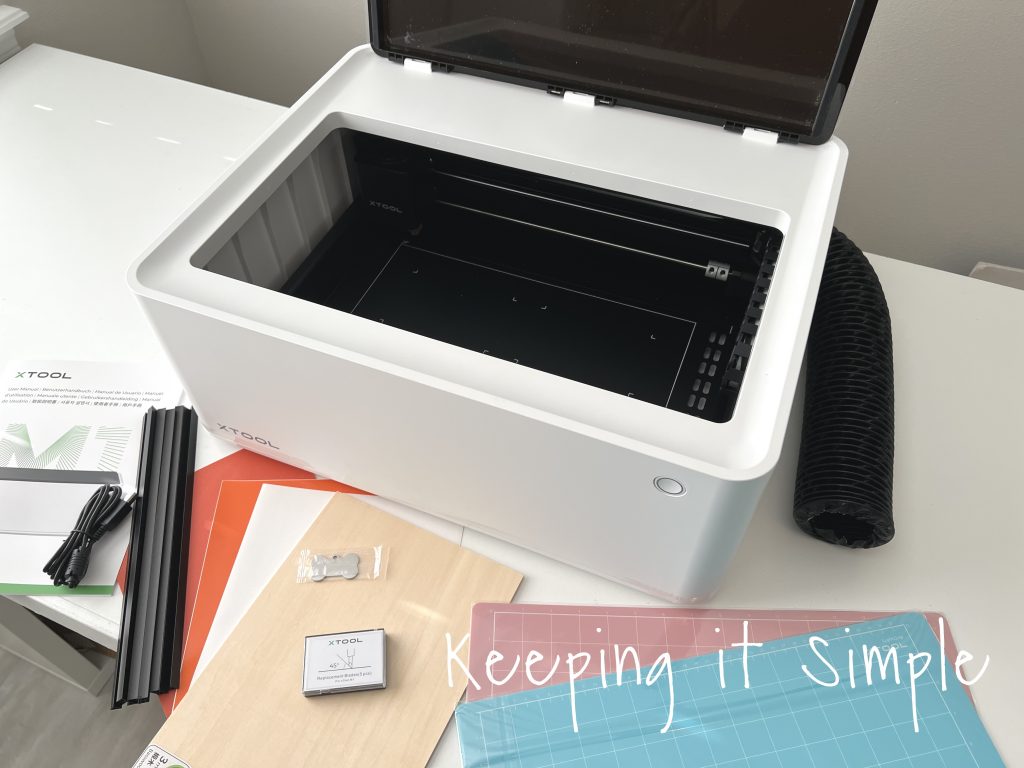
Here is what is in the box of the xTool M1 5W Basic machine:
M1 machine
Exhaust pipe with hardware to attach it
Power cord
USB cord
User manual
Triangular prisms
5 replacement blades
Two mats- light grip (blue) and heavy grip (pink)
Materials packet, which includes:
Adhesive vinyl
Leather sheet
3mm basswood
Metal dog tag
White masking sheet
Now that I have talked about awesome laser cutter, let’s talk about how to use it! I started with the materials that come with the machine and showed how to cut and/or engrave them. First up I used the blade cutter. I cut out the exact same design in both the adhesive vinyl and leather. Here is the detailed video tutorial here:
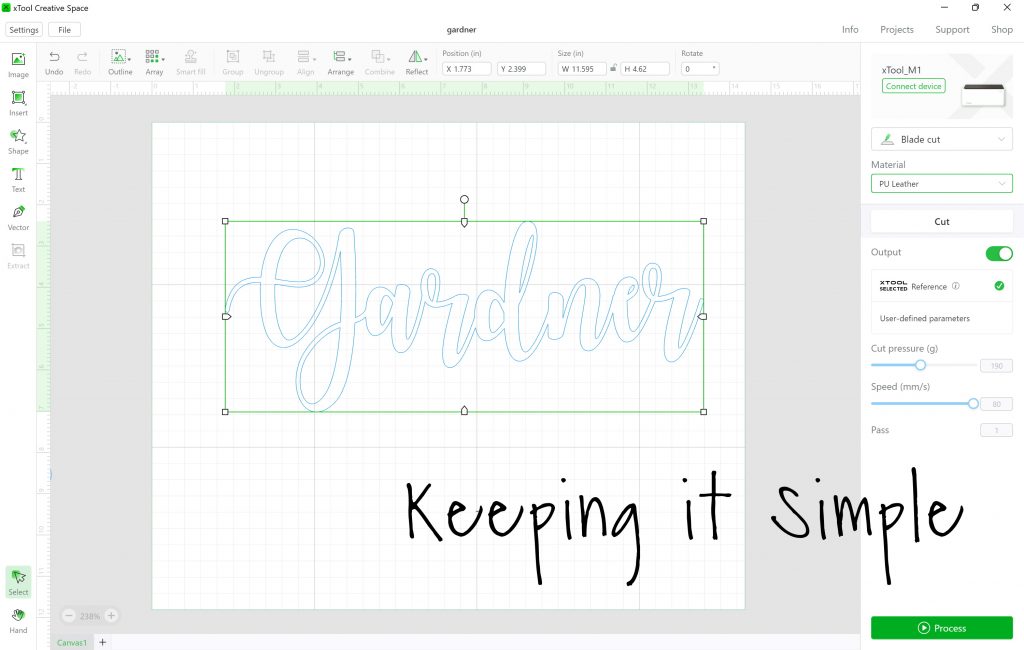
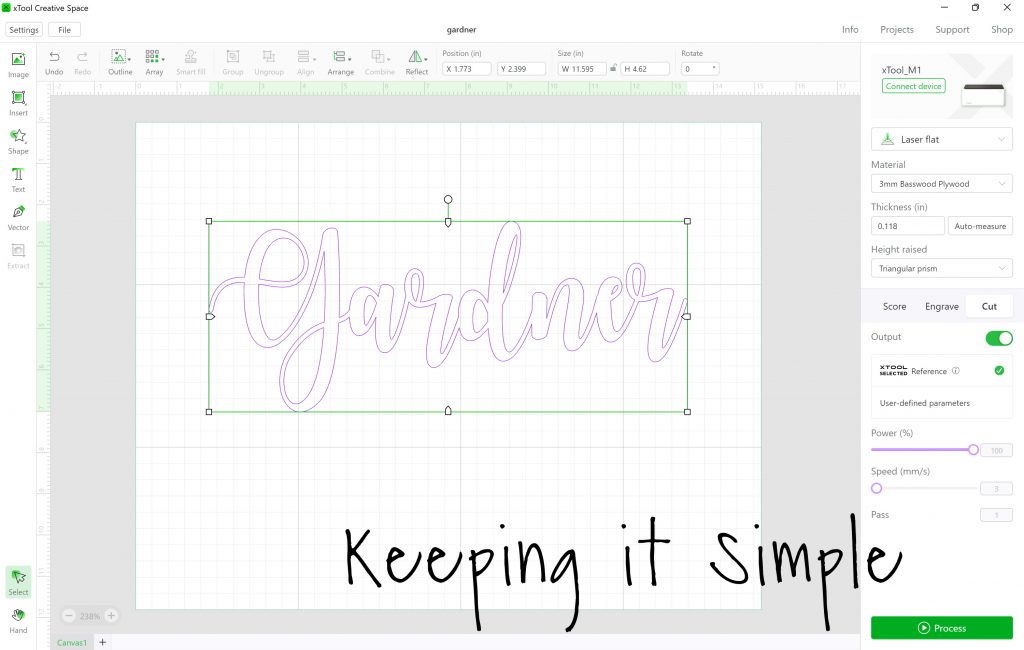
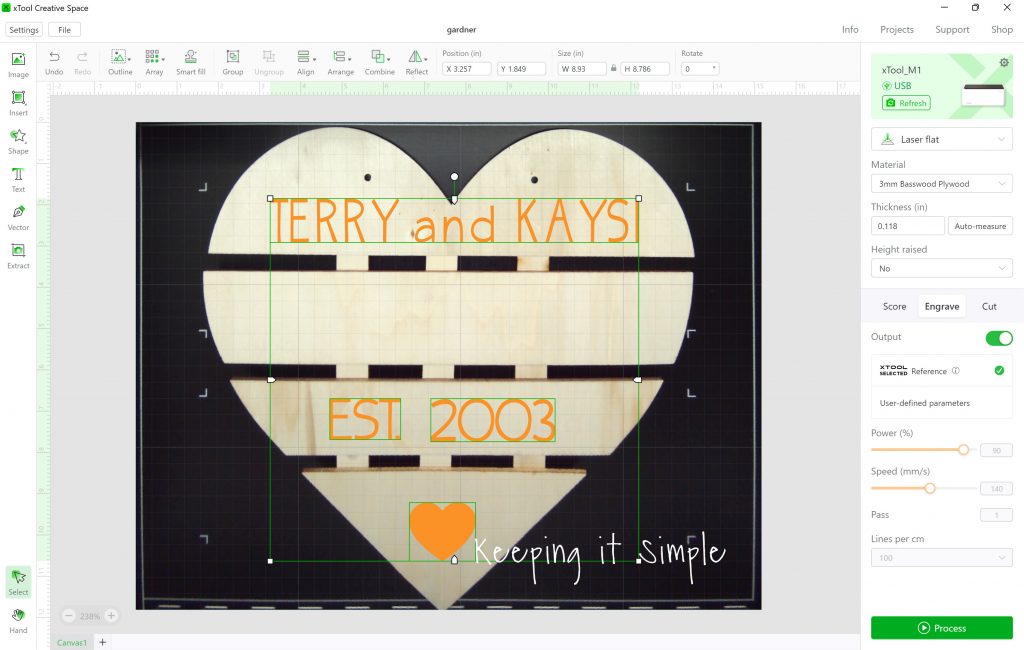
This is how I cut out the vinyl. First I started in xTool Creative Space. I wanted to cut out my last name, so I did that. In order to do a text, you click on the text button, click on the white work area and on the side there will be a panel that pops up and you can add your text into it. You can change the font, size, spacing and all sorts of things there.
I love cursive fonts, especially in cut outs, so that is what I did. The problem with cursive fonts is that they overlap and you have to combine them, if you don’t then they cut in the middle of the letters. In order to connect letters in xTool Creative Space, you have to type out each letter individually and then overlap them yourself and then click on the combine button and press unite. As you can see here, I started with the G and a and then overlapped them, highlighted both letters, clicked the combine button and then unite.
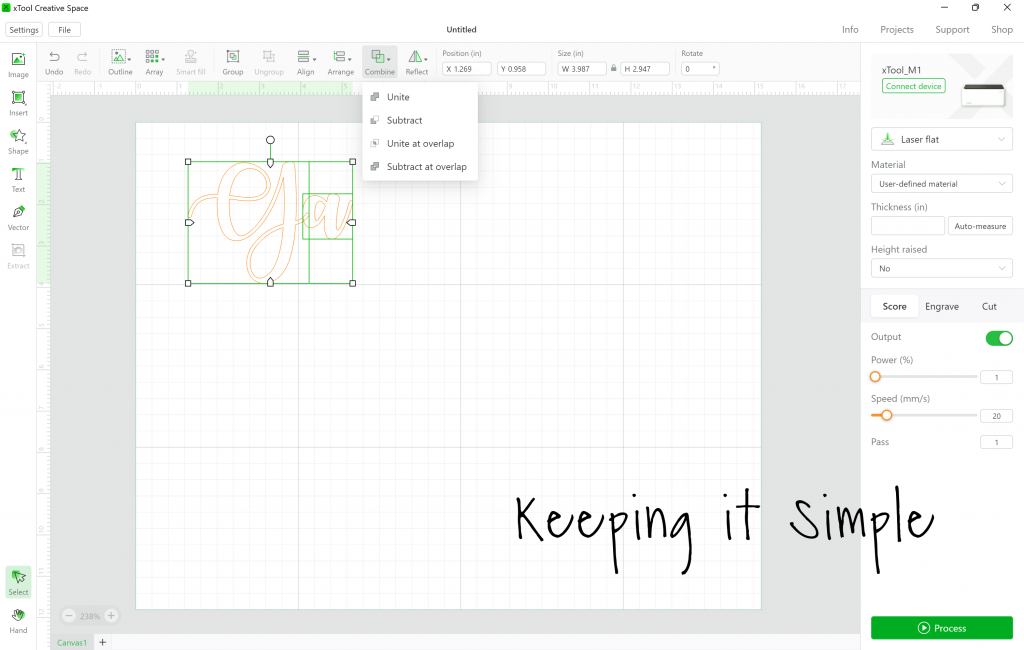
This is what the two letter like look connected.
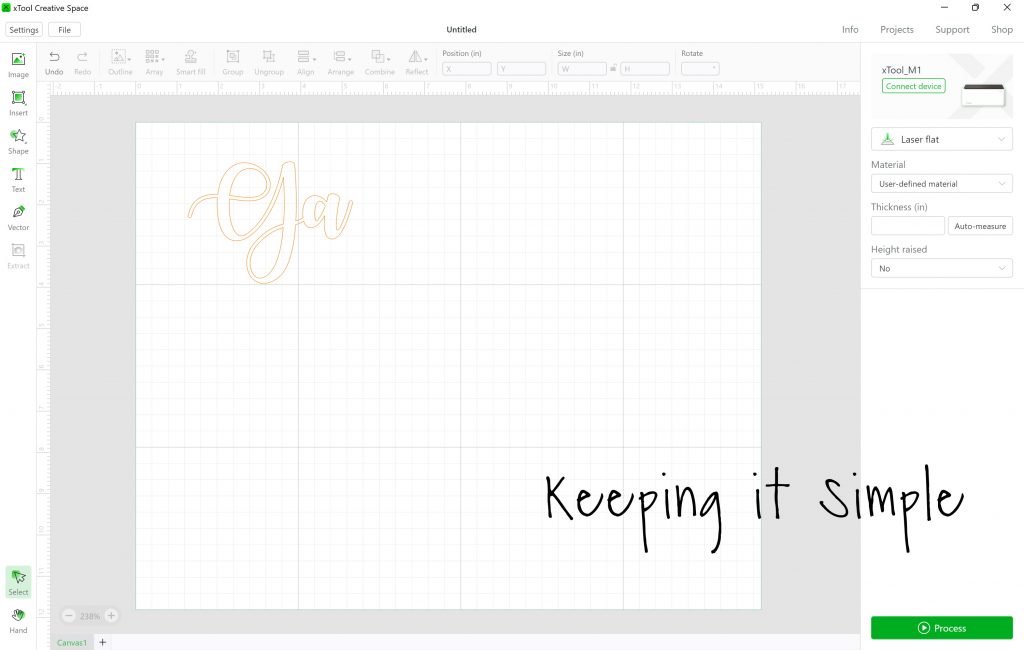
I did the same thing for my last name, doing each letter individually until I had the full last name. Once I had the design sized how I wanted, it was time to set up the cut settings in Creative Space. This is done after you put the material into the xTool M1. When you do that, there is a be a picture of the vinyl on the screen. I didn’t get a screen shot of it while I was making it, but you can see it on the video.
On the right side you can see the machine settings. I selected blade cut and for the material I found the PVC sheet. Since the material is from xTool you can use the material that is listed on the drop down menu. This automatically sets the machine to the right settings.

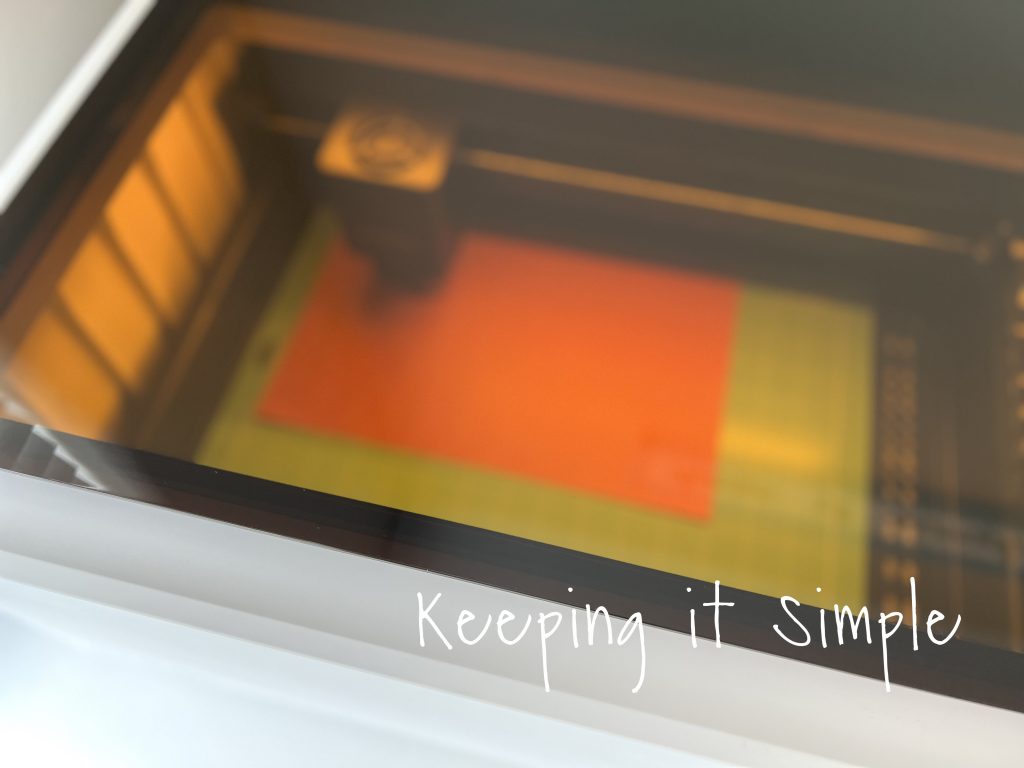
When using the blade cutter, you do need to use one of the mats. I used the blue one and then placed the vinyl onto the mat. Both sides are sticky, so you need to remove the plastic protective sheet before using it. I then clicked the process and let the machine do it’s magic.
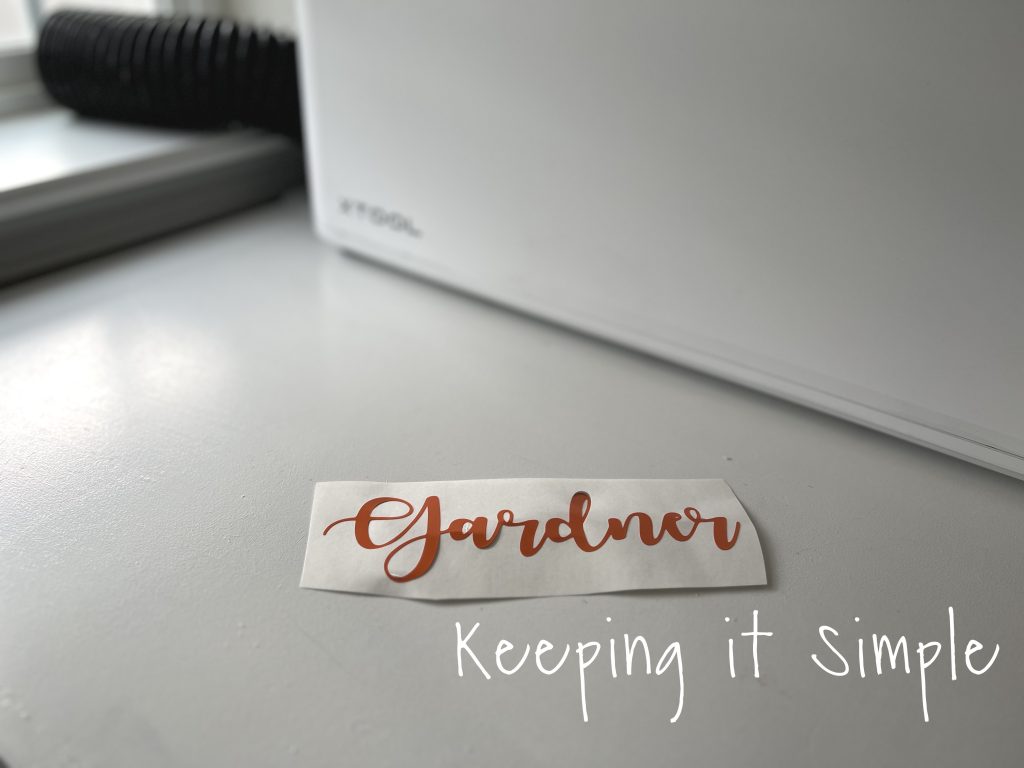
Once it was cut it, I then took it out, cut the vinyl and weeded it. To put it onto wood or another surface, all you have to do it use the transfer paper that is included to put it onto the wood or surface.
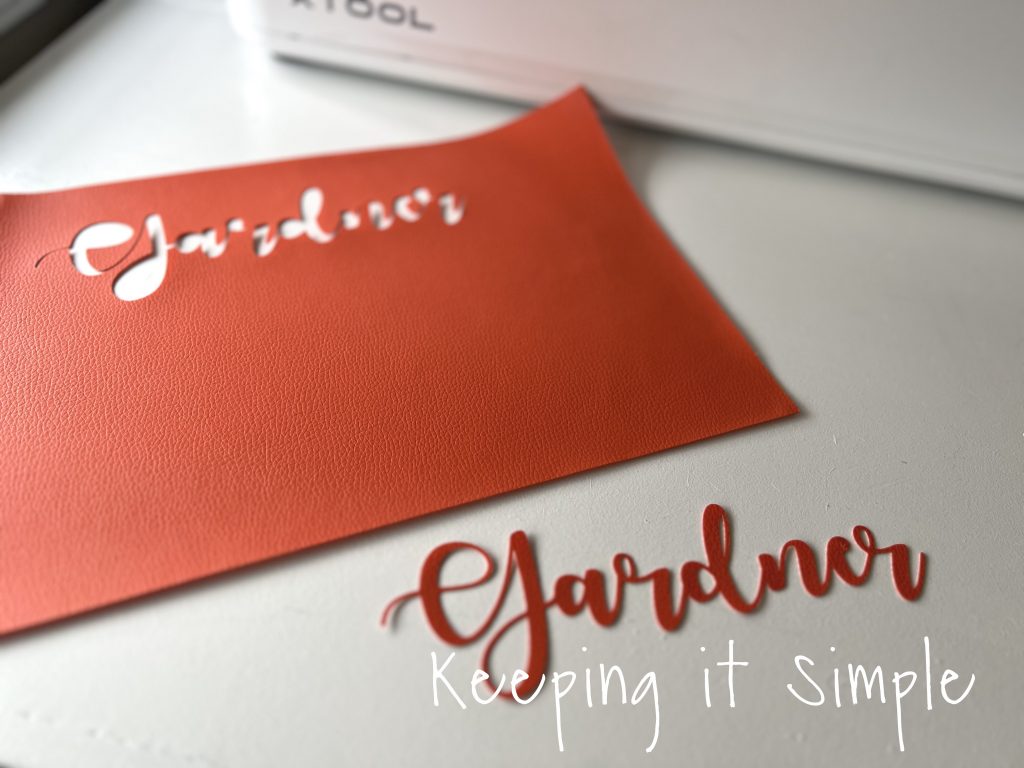
Next up, I cut the exact same thing out of the leather sheet. I did the same thing as before, the only thing that changed was the material settings. I picked the PU leather for this project.
Just like the adhesive vinyl, the leather needed to be put onto the mat before cutting with the blade.
Here is the word cut out of the leather. Look at those nice, clean lines! It did a great job cutting through the material.
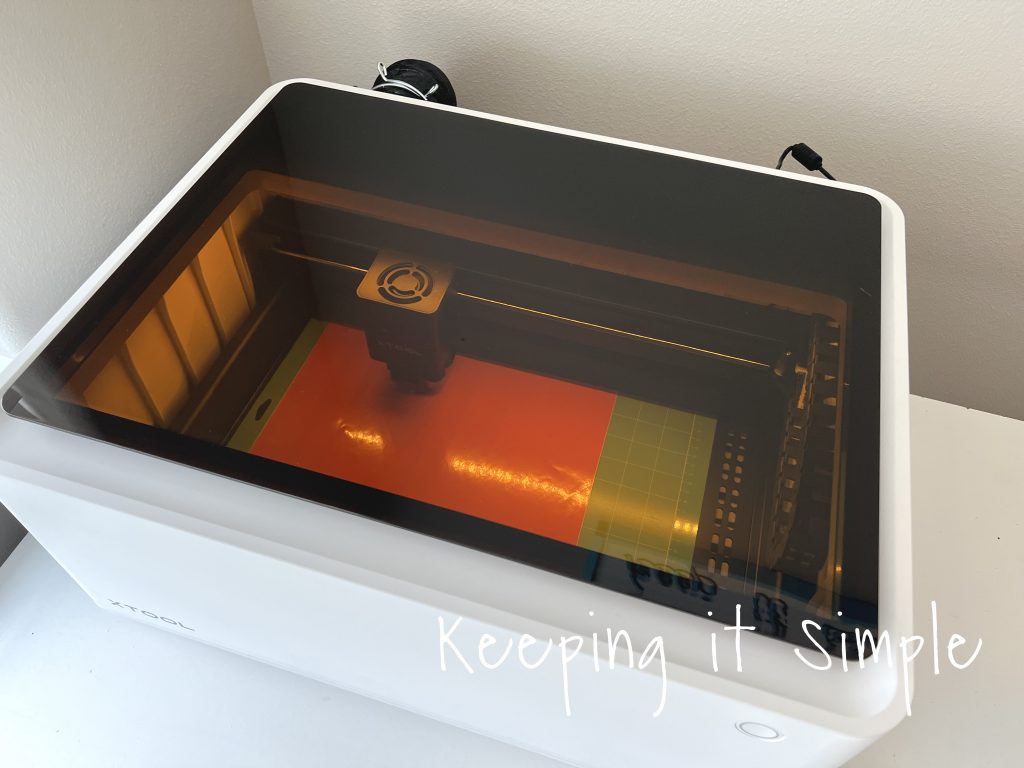
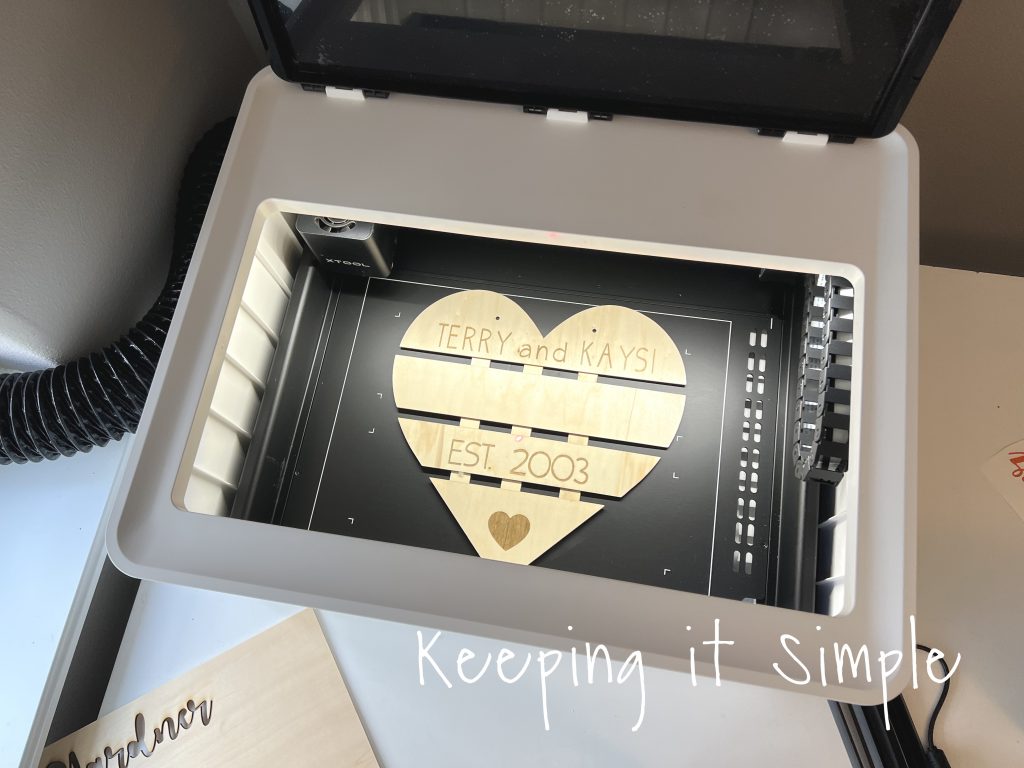
Next up we get to start playing with the laser! First thing I did was cut my last name out of the 3mm basswood. I then engraved a wooden heart that I found from the dollar store. Here is a detailed video tutorial on how I did those two things:
When using the laser, you have to first put the exhaust pipe out a window. I didn’t realize that the first time I cut wood. Don’t make the same mistake that I did, my craft room smelt not so lovely.
When cutting wood, you can use the triangular prisms to elevate the wood. It helps to protect the bottom of the machine (made that mistake too, I have some fun designs engraved into my machine now), it helps with the air flow and it also helps with protect the wood from charring. You don’t have to use them when cutting, but it is recommended. I placed them evenly in the machine. You want them to be close enough that the wood is stable.
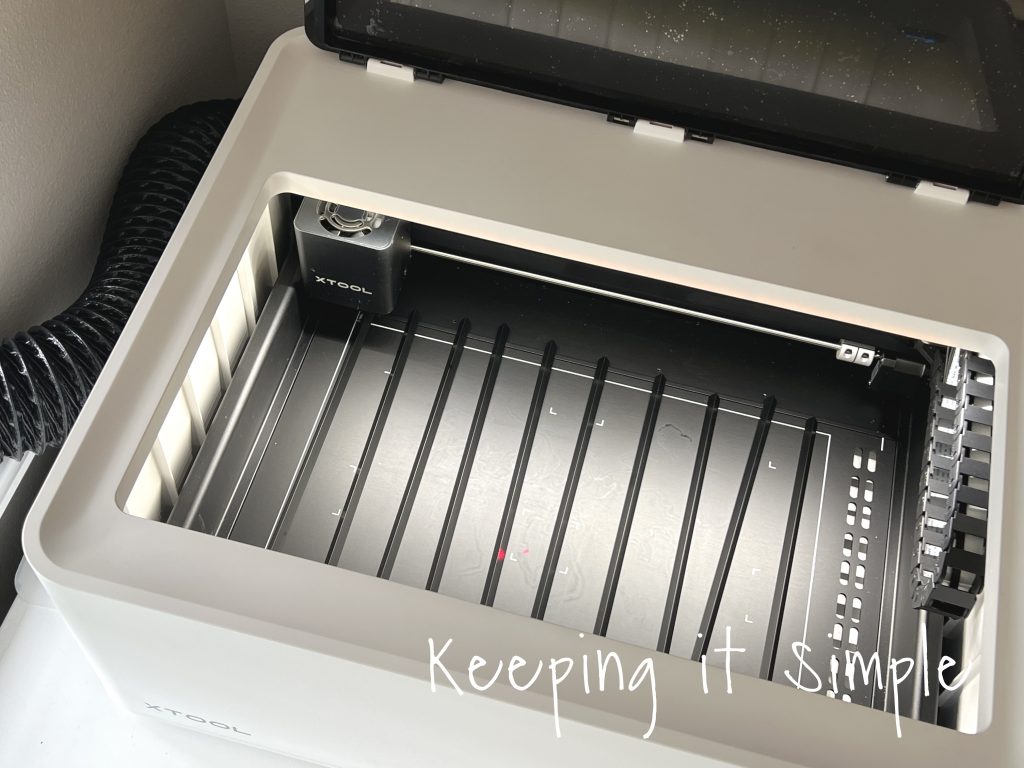
I then placed the 3mm basswood onto the triangular prisms. There is a red laser guide, so I tried to line the wood up with that.
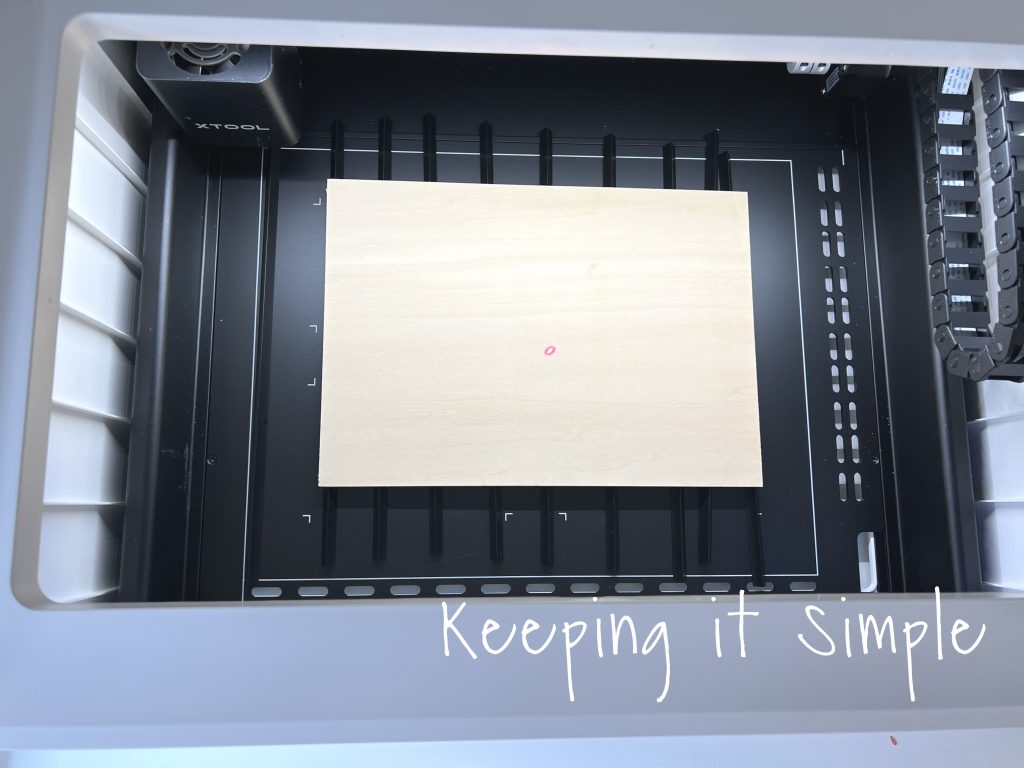
Now time to go back to Creative Space and get the machine ready to cut. I did the same design, size and everything. I then changed the settings for the cut. I picked laser flat and for material I picked the 3mm basswood plywood. Then for the height raised I clicked triangular prism. The other option is no, that’s when it’s directly on the machine. For the thickness, I auto-measured it (you don’t have to this when using xTool materials but you can). I then clicked the cut option. The machine automatically changed the settings, so all I had to do was press process.
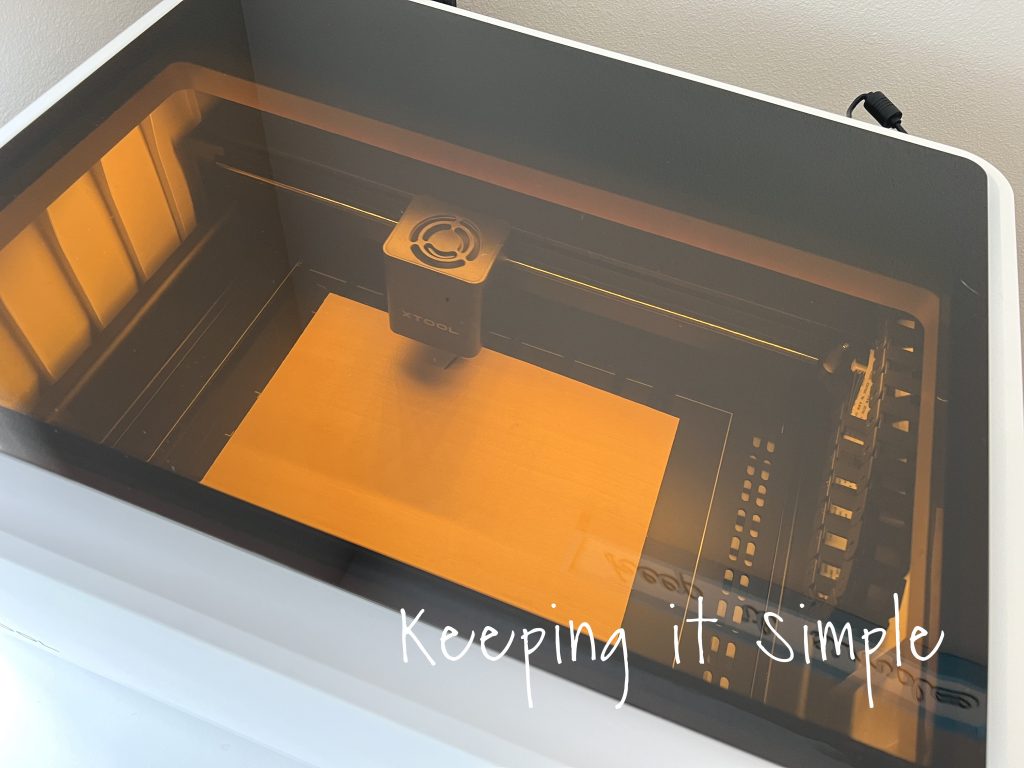
It’s s fun to watch it cut! It’s pretty amazing what it can do.
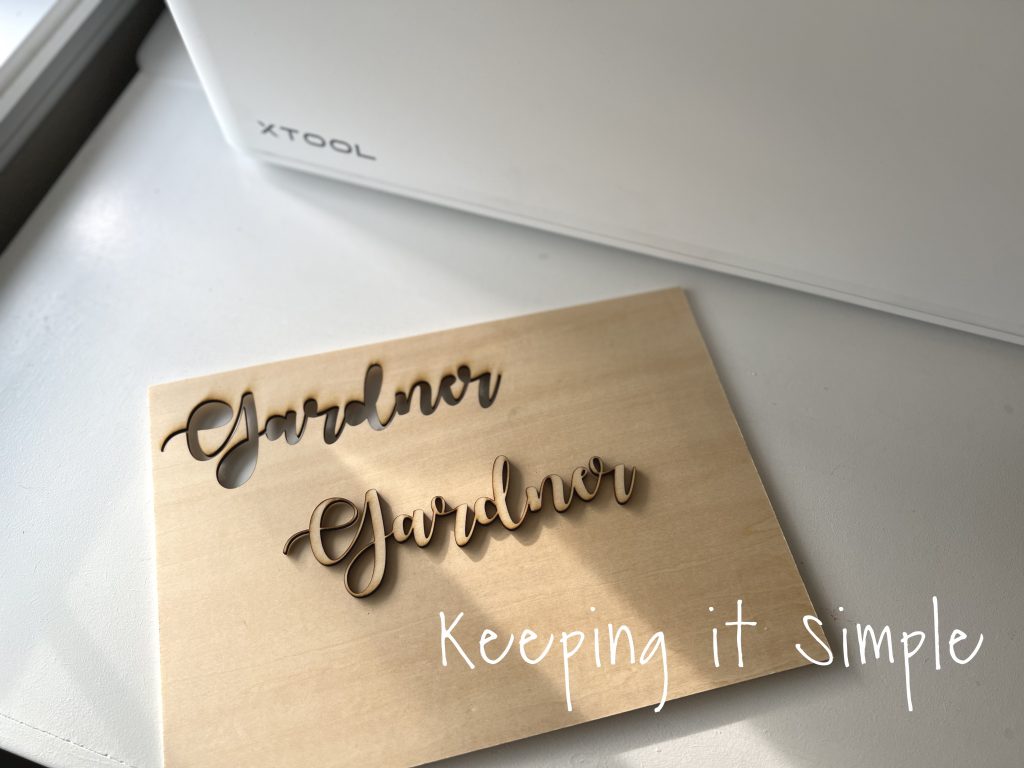
Here is my last name cut out wood! It looks so good! And there are some pretty intricate details in that cursive font and it didn’t even phase the machine, it cut it out with ease.
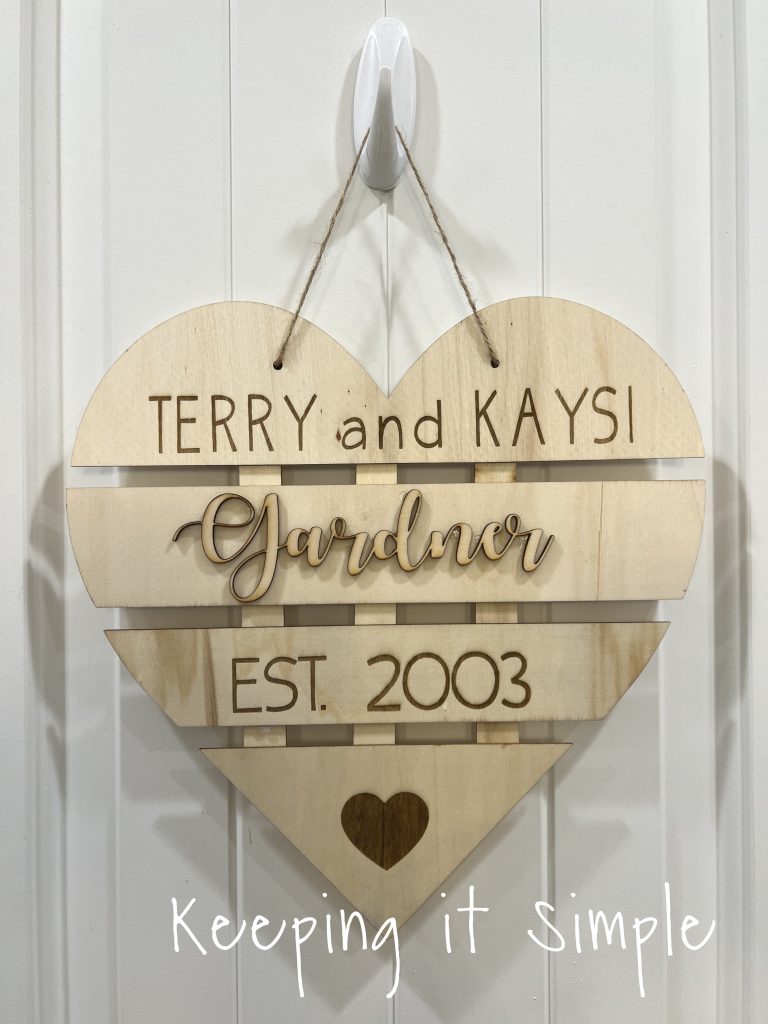
The next thing I did was engrave a wooden heart I found at the dollar store. I took out the triangular prisms and placed the heart right onto the base of the machine. I then lined it up as best as I could because I wanted the engraving to be straight on the heart. Once I closed the lid, the picture of the heart came up into xTool Creative Space. This is the best feature, it’s so nice to not have to do guess work and try to line things up yourself, you can see exactly where it is going to mark the wood. I then arrange the words to my liking and then highlighted all of them that I wanted to engrave. If you don’t highlight it, it won’t cut/engrave even if it is on the wood.
I then went to the side of the screen and picked out my settings. This isn’t xTool material but I still used the same setting as I did for the basswood. I then used the auto-measure to measure the thickness. I then clicked the engrave button. The machine then gave me the settings. I then processed the words. Just a quick note, engraving does take longer than cutting does but it’s totally worth it!
Look at how good it looks!! It turned out better than I had hoped!
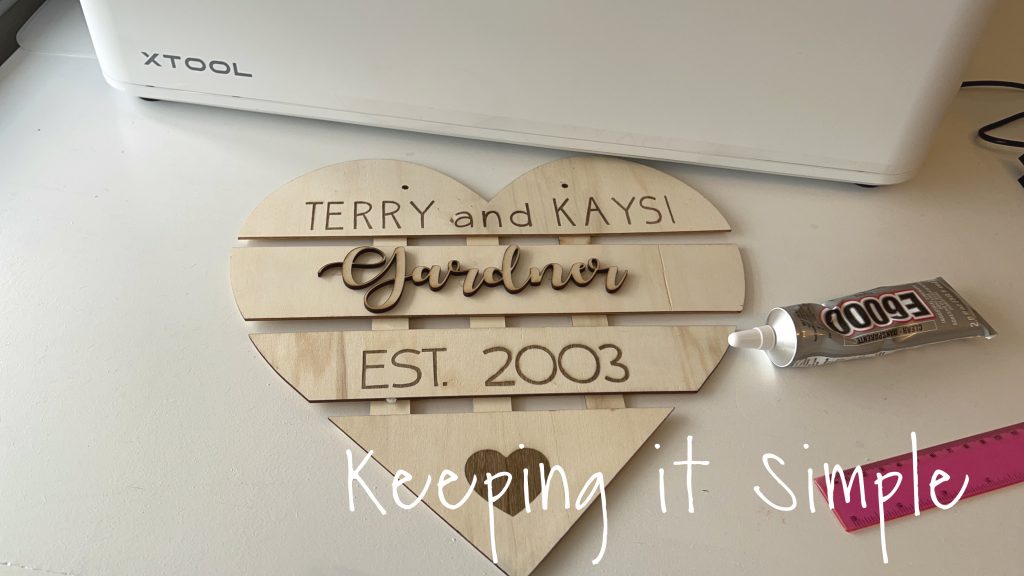
Now to put the cut out word and the engraved heart together. Using E6000, I glued my last name onto the heart.
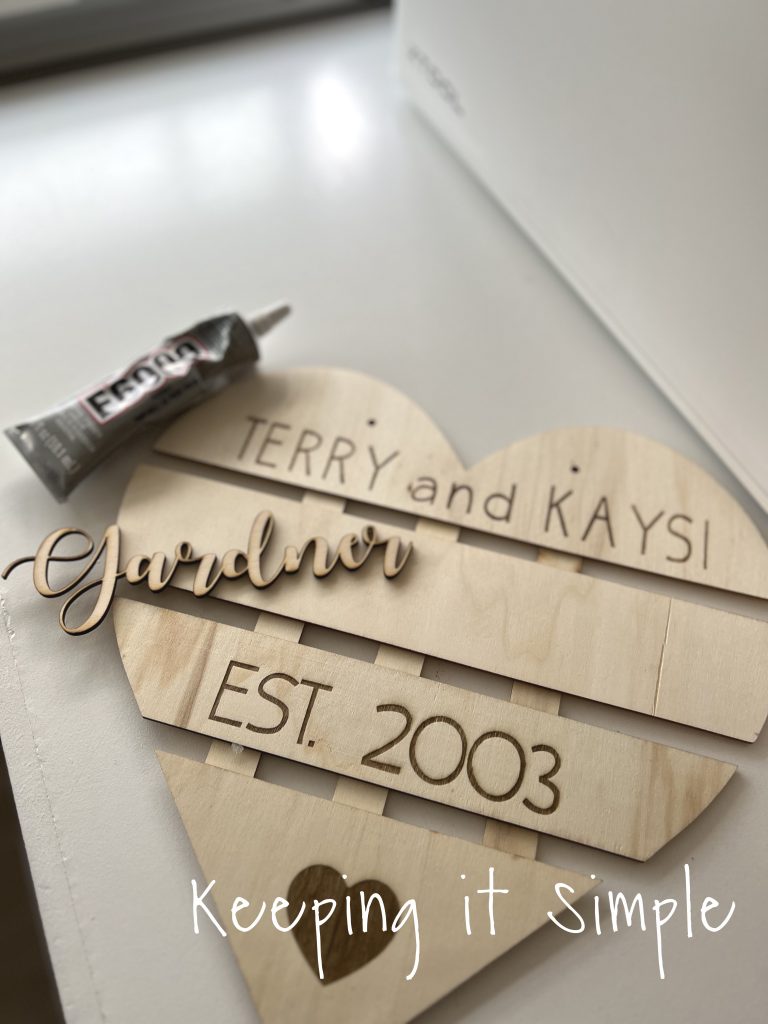
I could have painted the wood or stained it but I love the look of the natural wood. I especially love the sides of the cut wood, it just looks so cool to me.
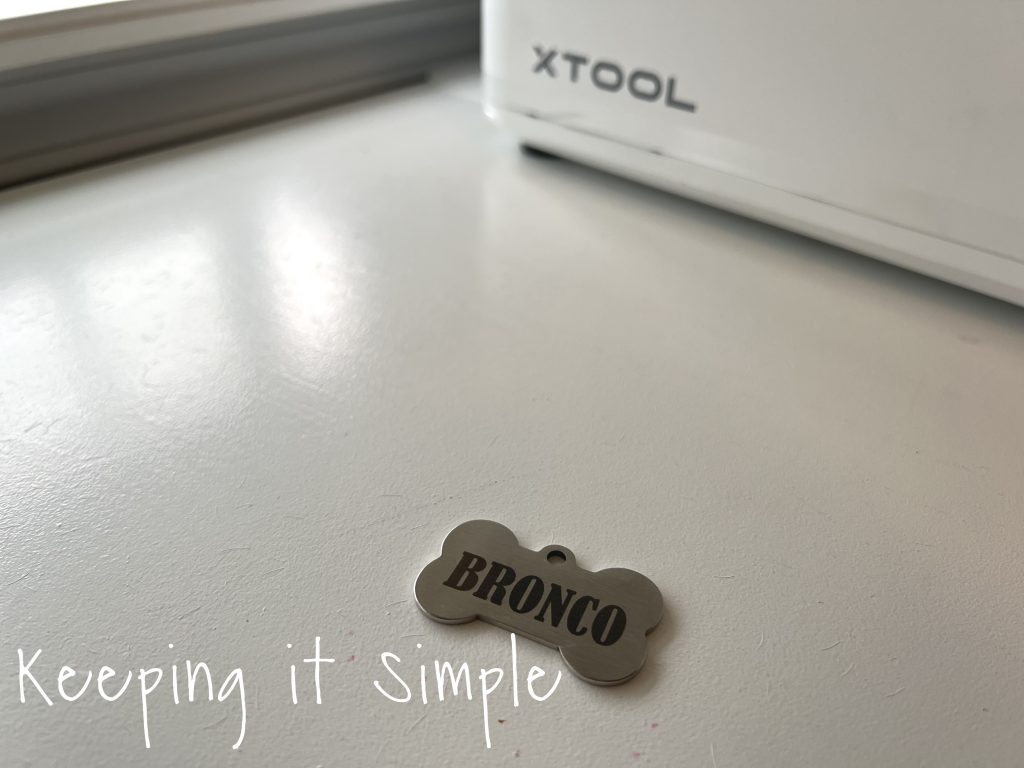
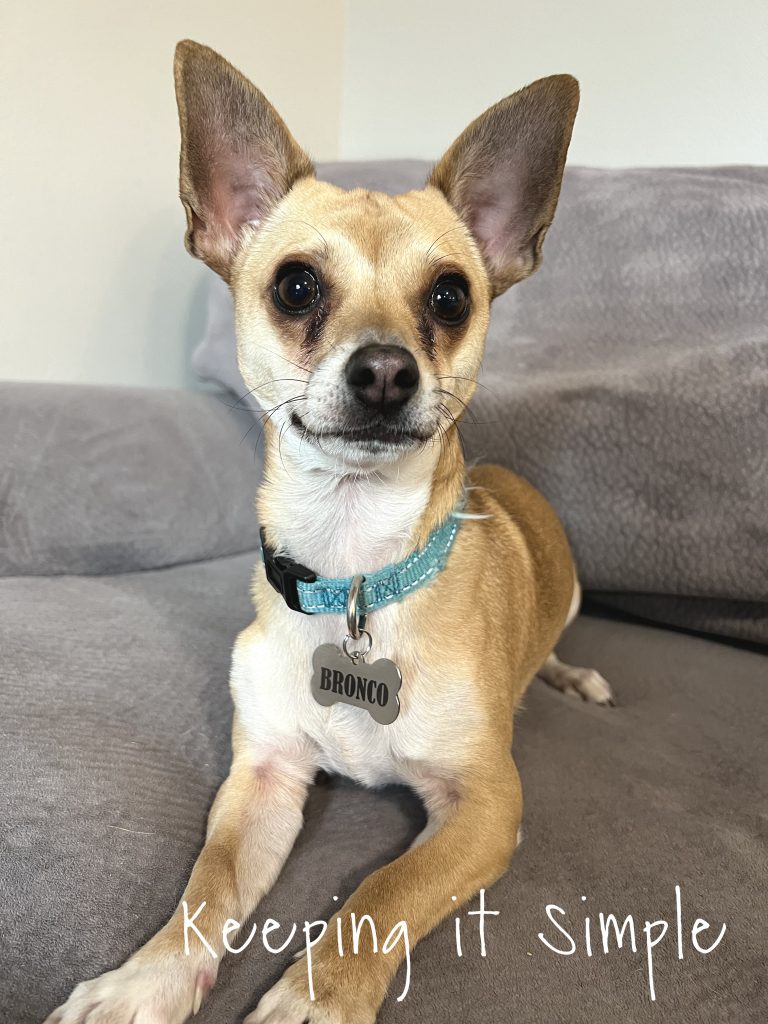
The last project that I did was engrave the little metal dog tag. My dog needed a new tag so this was perfect for him. Here is a detailed video tutorial on how to engrave metal on the XTool M1.
The first thing I did was put the metal dog tag into the machine. I put it right under the red laser light. I lined it up and made sure it was straight. I then added text in Creative Space and made it small to fit the dog tag. I positioned it right in the middle of the metal tag. I then setup the settings. I picked the silver bone dog tag and clicked engrave and then all I had to do was push process, super easy!
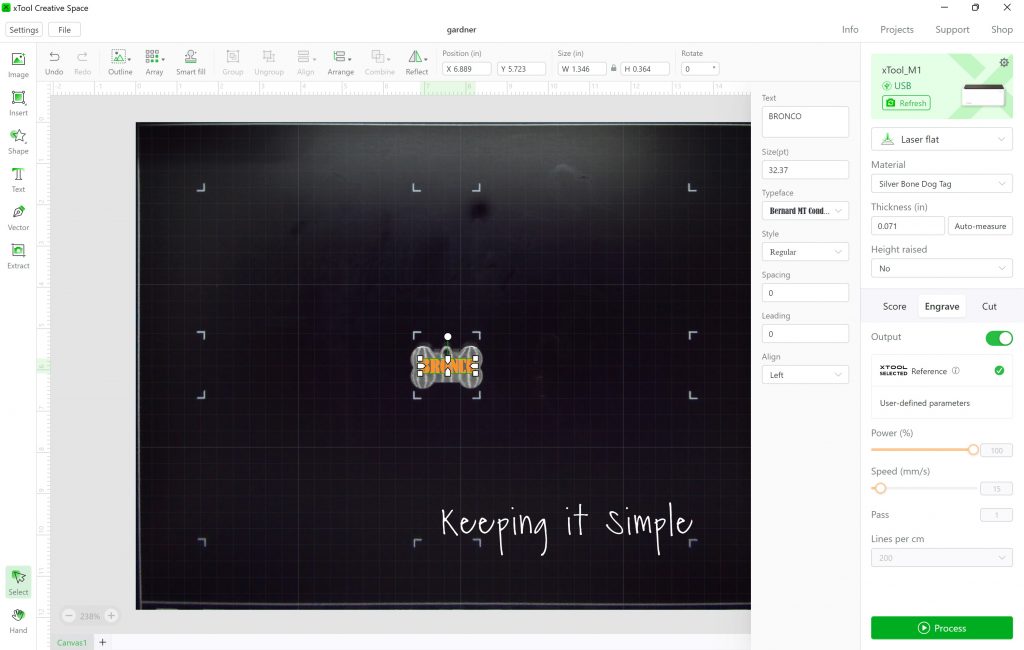
Here it is working on it, the camera is so impressive, it really knows exactly where to cut or engrave.

Here is the little dog tag with my dogs name on it!! I did engrave the other side with my address and phone number but won’t share that for obvious reasons.
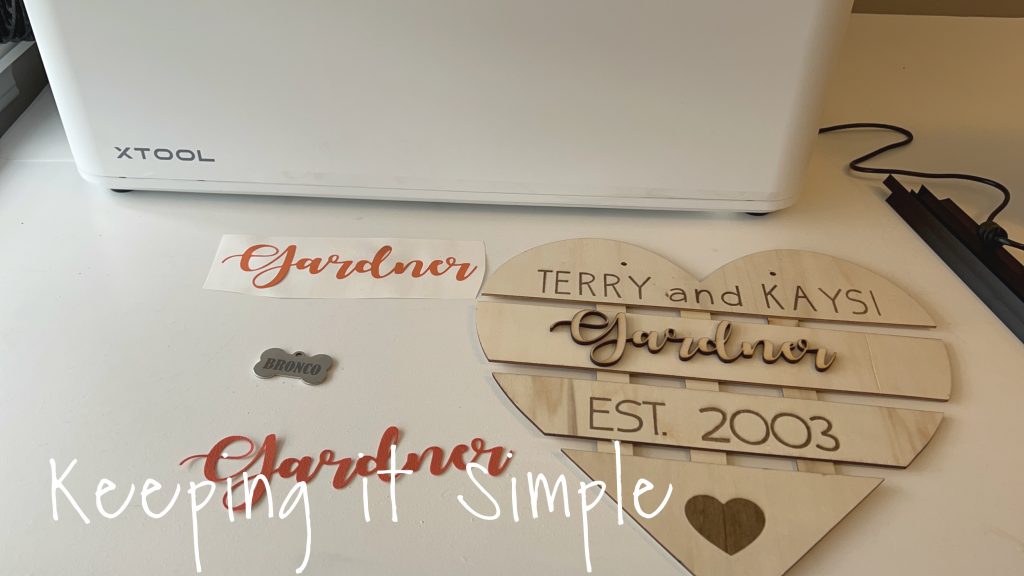
And that’s it! Here are the 4 projects I made with my xTool M1 machine! I cannot wait to create more with it. I started small for my first projects but soon I will dive deeper and try harder and more detailed designs. I cannot wait to share them with you.
Here is the cute wooden sign on display in the kitchen.
And here is my cute dog sporting his new personalized dog tag!
After playing with the xTool M1 machine for a couple weeks, I have been very impressed with it. I’m not going to lie, I have failed on a few projects. There is definitely a learning curve, especially when it comes to figuring out the cut settings. I am now getting the hang of it and getting more of an understanding of it. But I’m sure as I continue to play with it and try new things, there will be a lot of trail and error.
I would 100% recommend the xTool machines to a friend. They have a few different models and they all look amazing. The M1 comes in 5W and 10W, the 10W has more power and can go faster. They also carry the D1 model that is just a laser cutter, it doesn’t have the blade cutting option. They come in 10W and 20W and have a pro model as well. Both models, the M1 and D1 have attachments, accessories and risers that give them even more options! There is a RA2 Pro attachment that is used to engrave tumblers and other cylindrical objects. That just sounds awesome and I definitely want to get that and engrave all of our tumblers. Another thing I want to get is the risers, because that lifts the machine and makes it so you can engrave objects that are larger than 10mm. Seriously, the possibilities are endless with this machine. So many things can be made with it. I cannot wait to dive in and start creating all the things.
UPDATE: I’ve added to my xTool, I installed the Air Assist attachment and it is AMAZING, it helps prevent scorch and burn marks!! You can read all about it here!

**Another update**
I bought the RA2 Pro attachment and it’s awesome! You can see how to install it and use it on this post here.
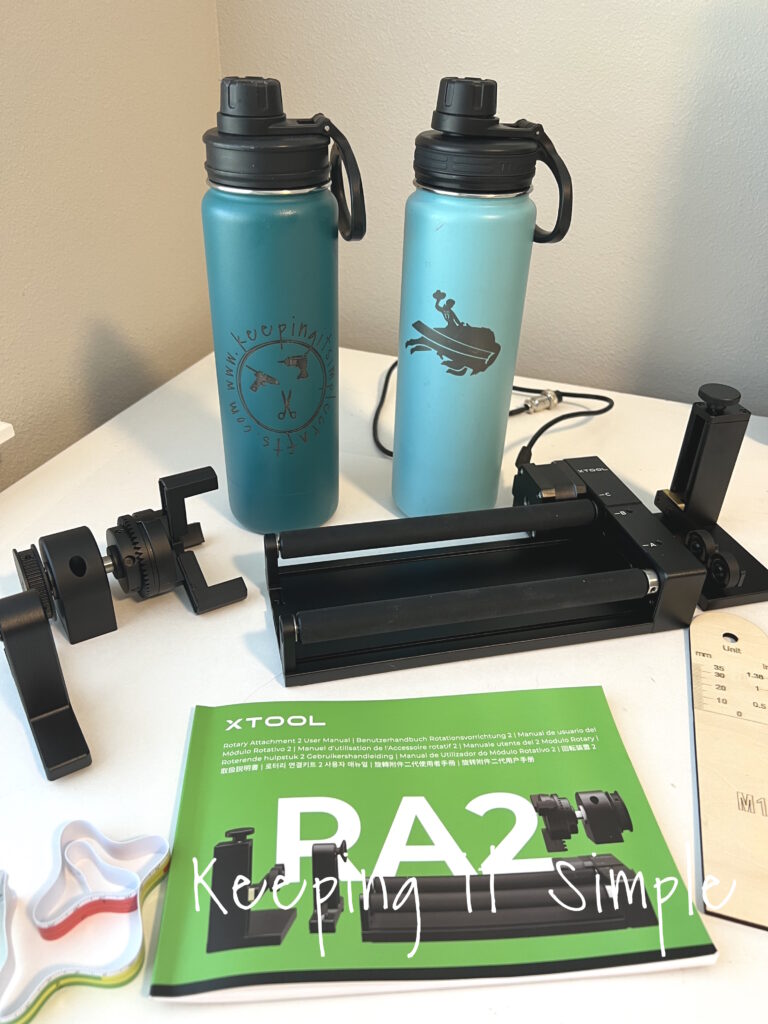
Pro tip- you are going to buy an xTool machine, get the bundle with the air assist and RA2 Pro attachments, you won’t be disappointed and it is cheaper to buy it in a bundle than individually.
This post contains affiliate links.
Leave a Reply
You must be logged in to post a comment.