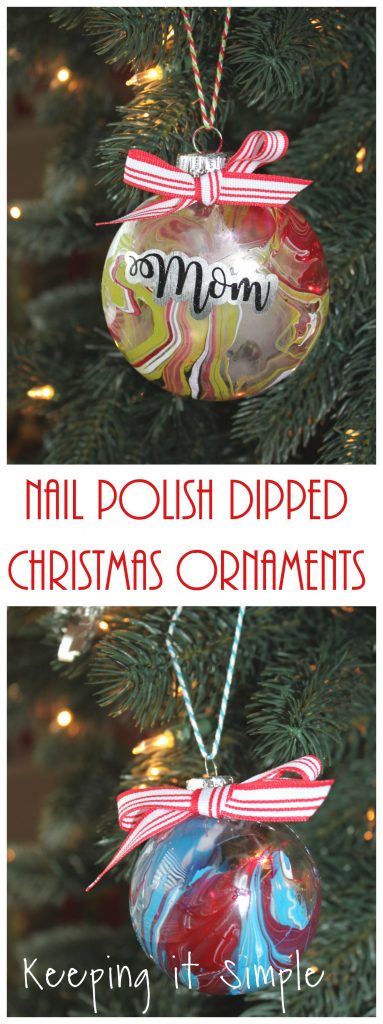
I have seen so many people make things by dipping them into nail polish and it looks SO COOL!! Well with Christmas so close, I thought it would be so much fun to do this with Christmas ornaments and boy was I right!! These nail polish dipped Christmas ornaments are SO MUCH FUN and addicting!! I seriously want to do like 100 of them. They are so easy to make and I loved how they turned out!
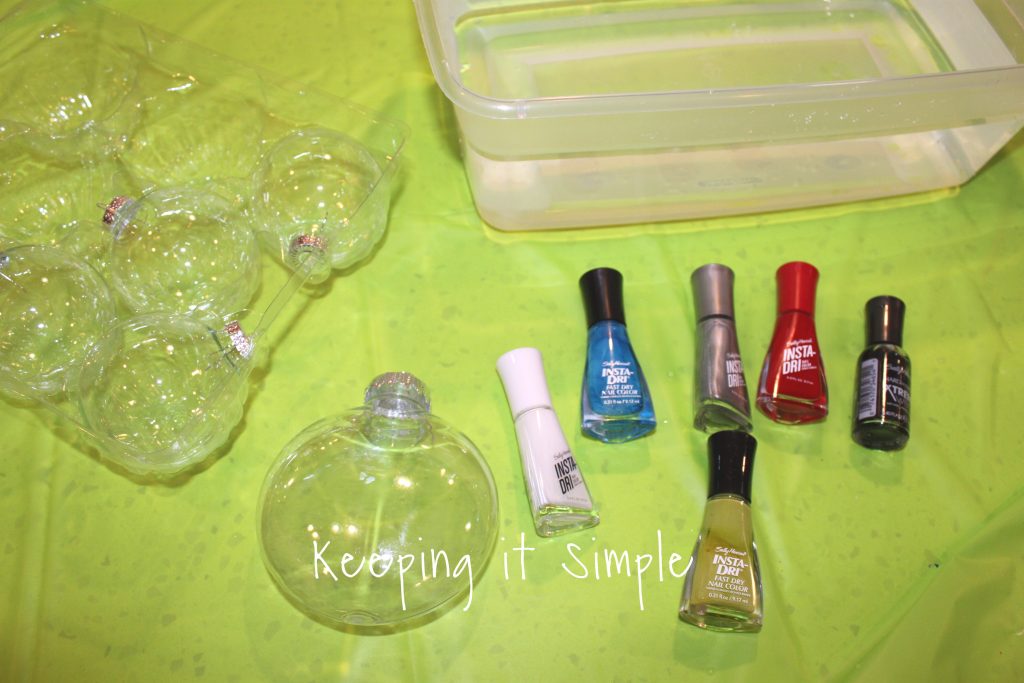
Before I get to the tutorial, I wanted to let you know that it does matter what kind of nail polish you use. I bought some from the dollar store and although it worked, it did not work nearly as good as the good kind. I ended up using Sally Hansen nail polish and it was sooooo much better than the other kind. It spread a lot better and wasn’t as thick as the other kind and over all it just looked better, so don’t use the cheap kind. Also you have to use luke warm water, if it’s too cold the polish will bead up and it doesn’t work as well either.
Here is a video of the process of making these, it’s so much fun to watch these come to life!!
This is how I made them:
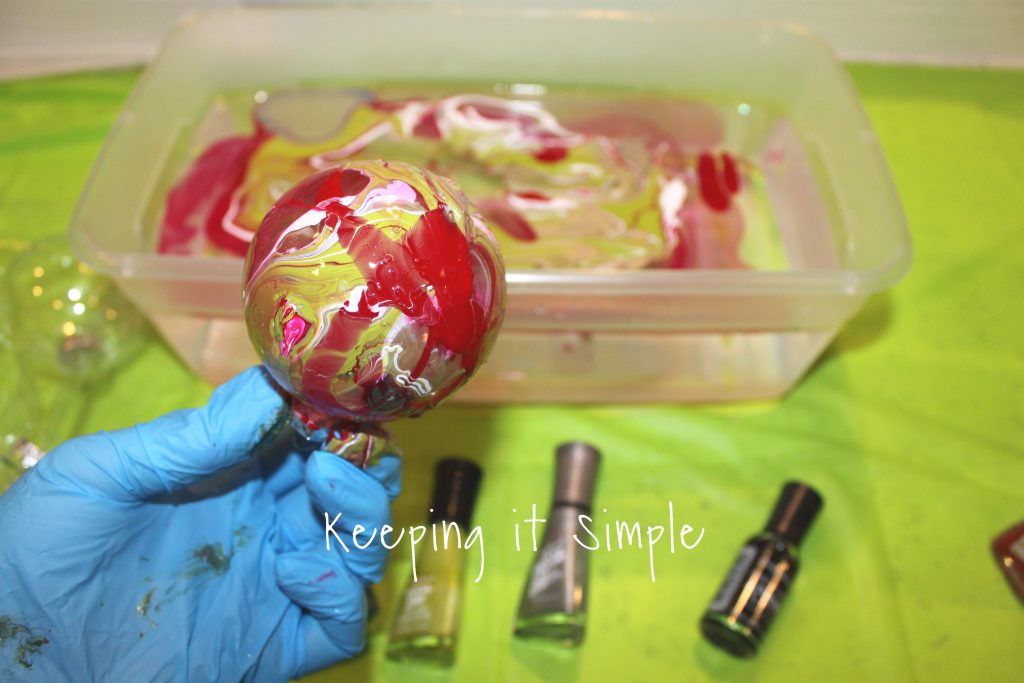
I took some clear ornaments (both glass and plastic) and then a container (it has to be deep enough that you can dip the ornament completely) filled with luke warm water and then the nail polish. You will want something under everything (I used a plastic tablecloth).
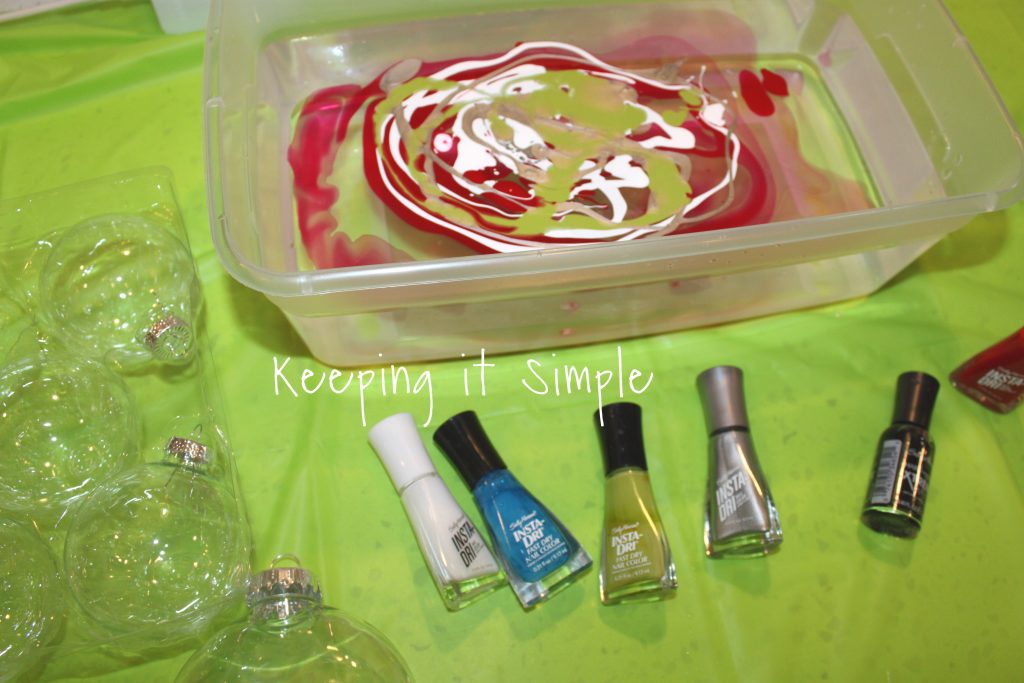
I added the nail polish to the container, one color at a time. I did find the first color you put in won’t show up as much as the last color you put in, so think about that when you are putting the colors in. After I put the nail polish in, I swirled it a little bit with a toothpick.
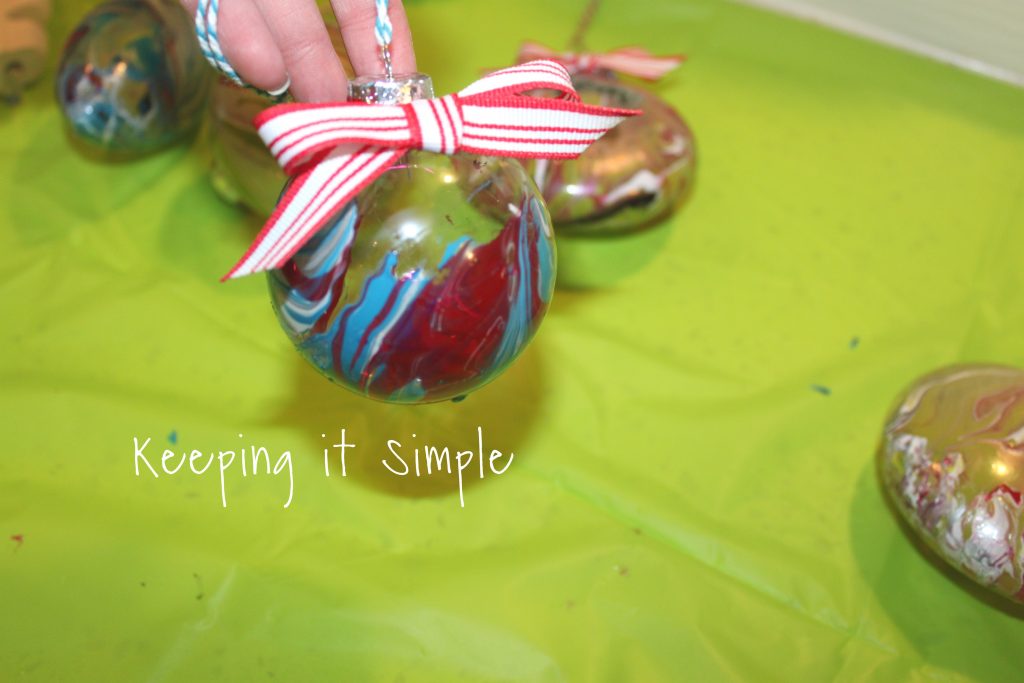
I then dipped the ornament into the water. This is the really cool part, it’s really cool to watch color attach to the ornaments.
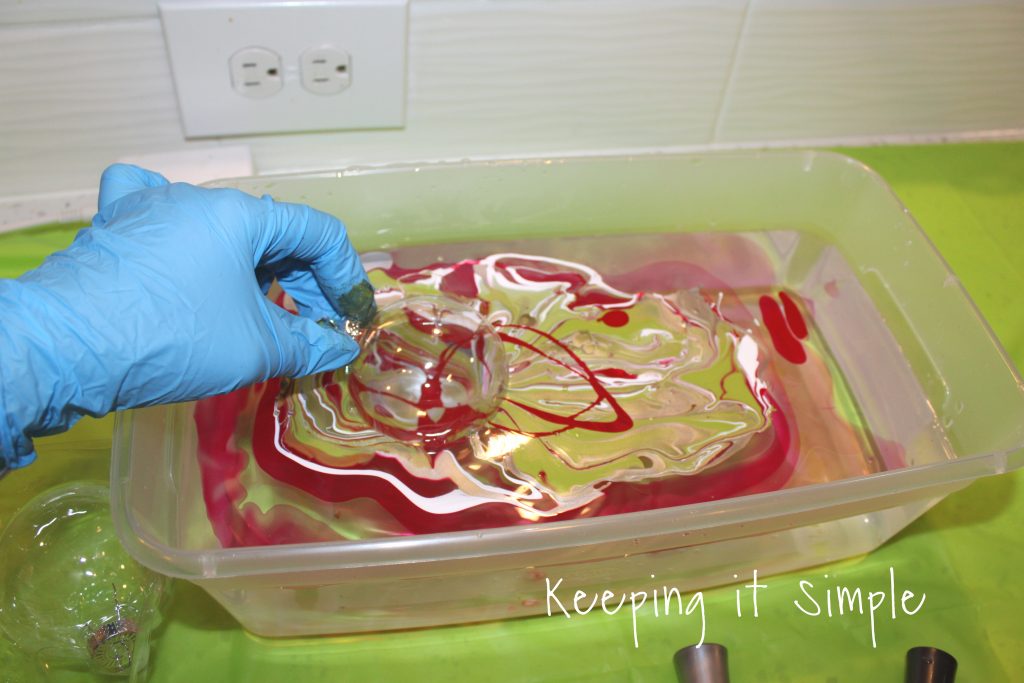
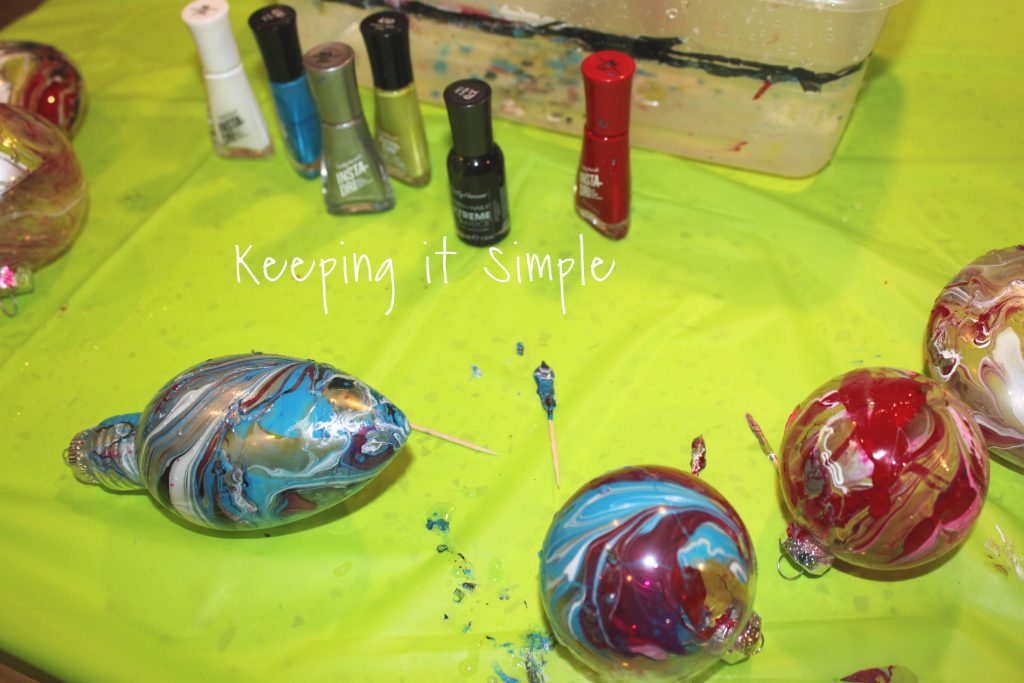
Here is what it looks like after being dipped, so cool huh?! To let them dry, I put some baker’s twine onto them and then hung them on a hook with a paper plate under them. You could also have some kind of set up with a dowel or something like that too. Or you can just put them onto the table cloth but there are chances of them getting messed up if you do that (I did that while I was making the video for time reasons but when I made my kids’, I hung them up to dry).
Here are a few more that I did. Whenever I switched colors (like when I did black, white, silver and blue) I emptied out the container and added new water. I love how the blue ones look, they are my favorite!
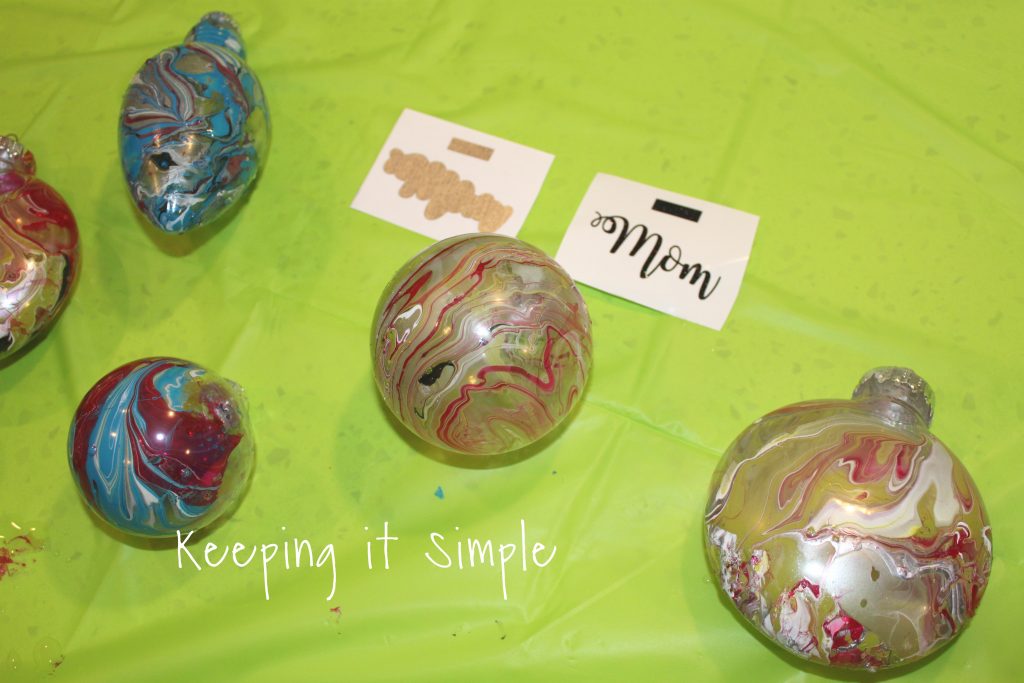
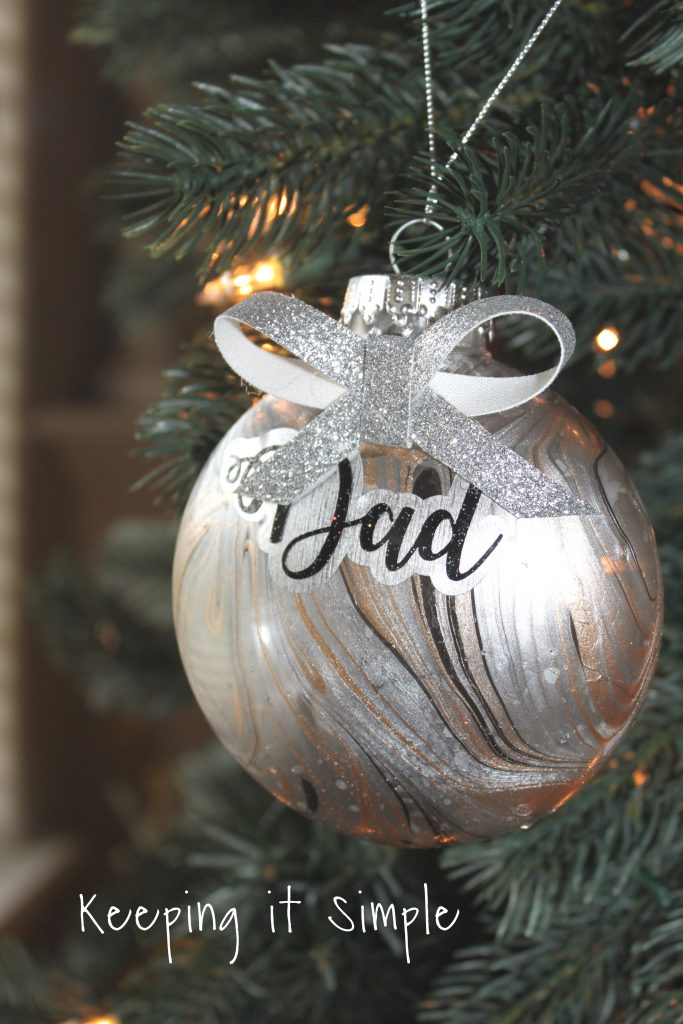
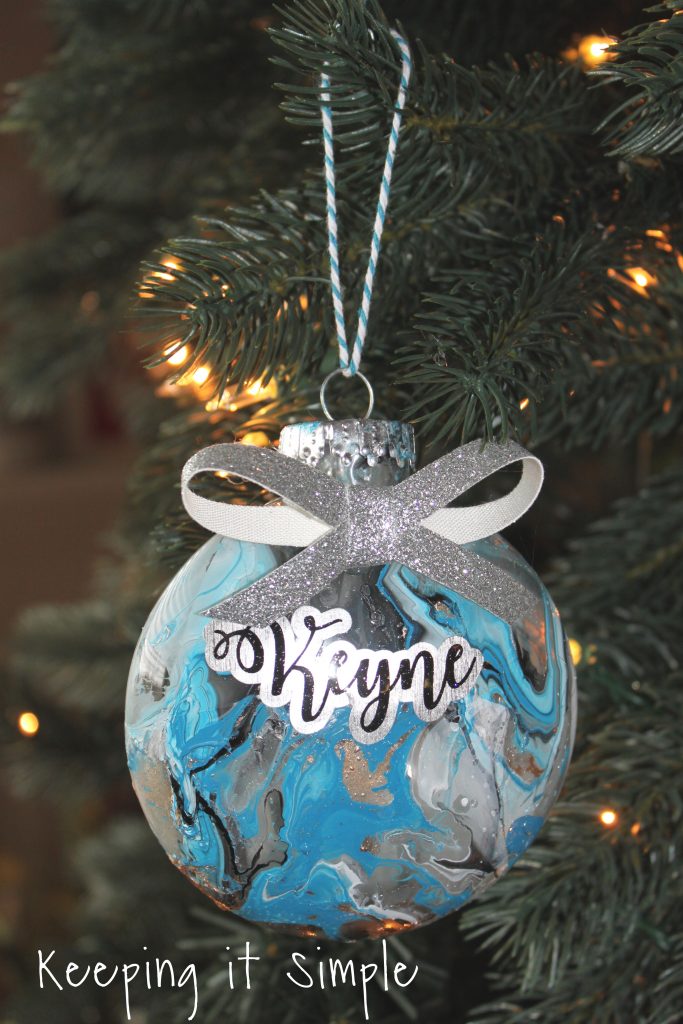
I think it would be soooo cool to have everyone is my family make these nail polish dipped Christmas ornaments and then add some vinyl to them with their names (I think we are going to do this later this week). I cut the names out with my Silhouette CAMEO. I had two layers, the bottom layer was a metallic silver vinyl and the top layer was a black glitter vinyl. The rectangle on the top is a guide so I can match up the layers by matching up that rectangle.
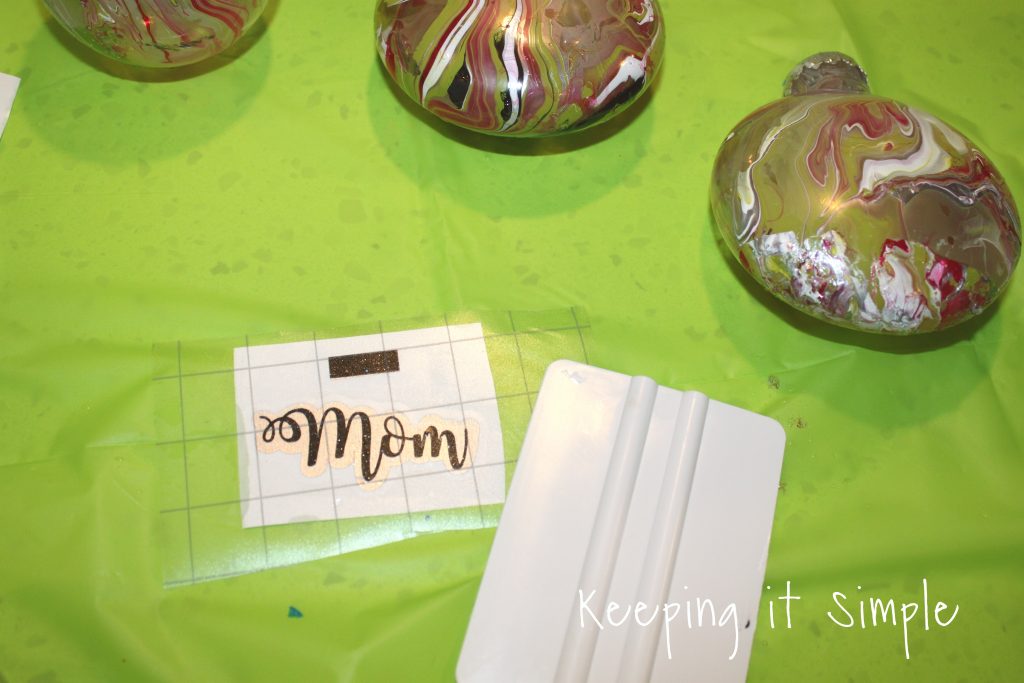
Here is the vinyl put together (see how the rectangle is matched up?!). I used the clear grid transfer paper to put the vinyl onto the ornament.
Doesn’t it look so cool? I love how it turned out!!

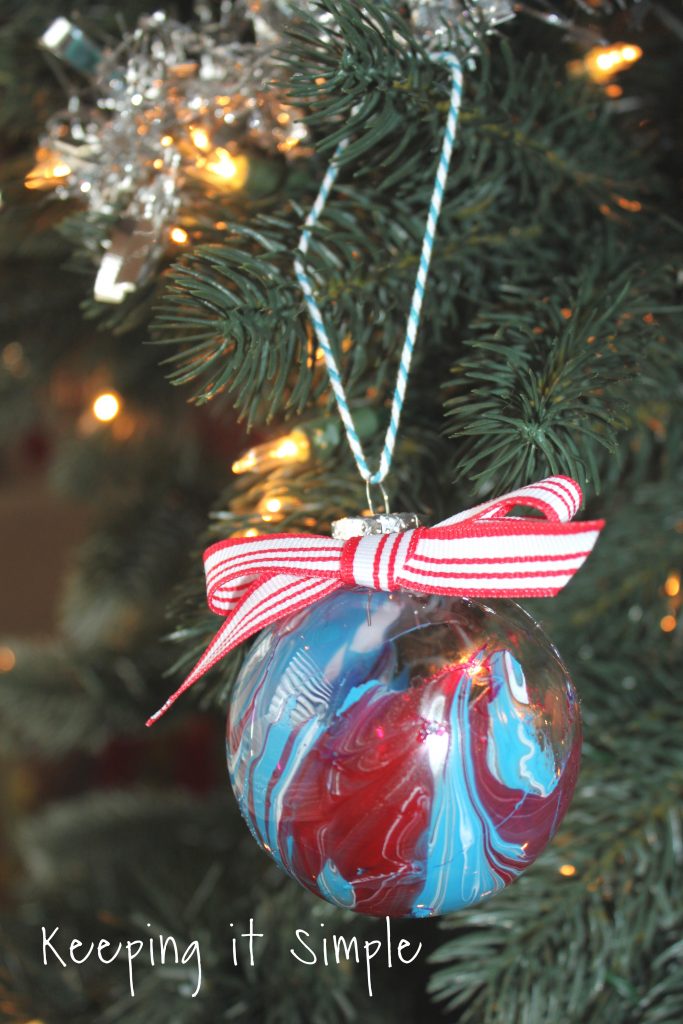
Here is another one that I did with the red, blue, black, silver and white nail polish. I just added some ribbon to it and some baker’s twine so I can hang it on the tree.
And that’s it!! I love how they turned out! So easy and SO MUCH FUN!! I am seriously going to do some more with my kids this week!
I can’t wait to have all of my family have their own ornament to put onto the tree :).

Here is a more elegant, neutral one that I made using gold, silver and black. I love it so much!
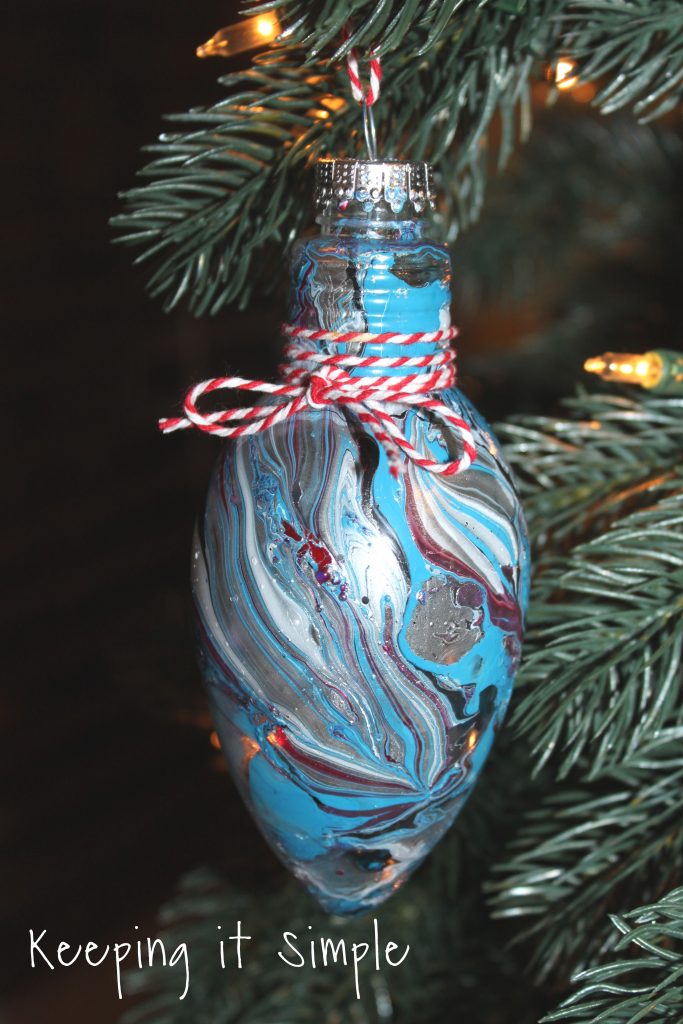
Here is another one that I did in the video, I love the swirls on this one and the shape of the ornament is so much fun!
This one turned out so cool, I knew the second I took it out of the water I would like it! There is a big section that is silver and then other colors are swirled around it, it’s so cool!

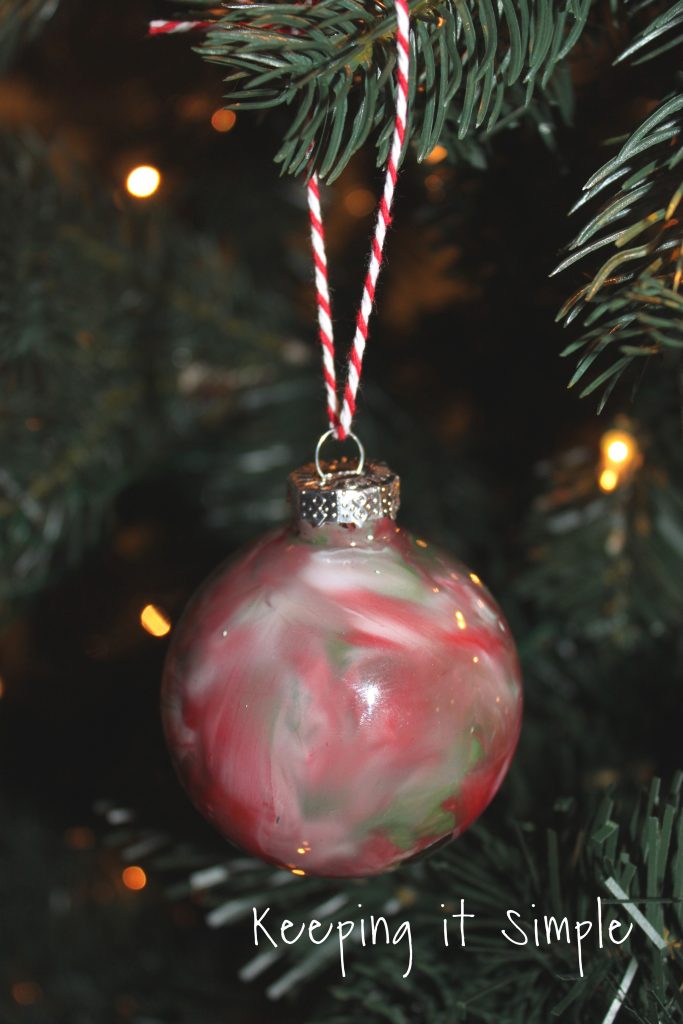
Here is one that my son made all by himself, he is pretty proud of it and I love how it turned out!
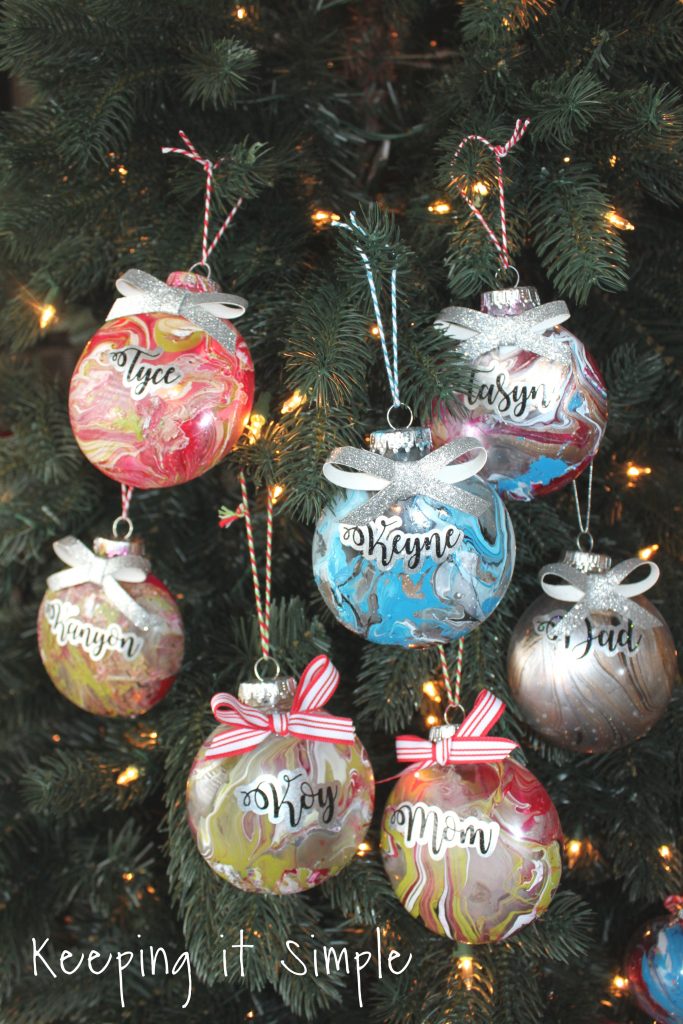
I let everyone make their own and I put their names onto them, here are all 7 of them :). I love that they are all different but all look so cool!
Want some more fun and festive Christmas ideas? Check these out:


This post contains affiliate links.
Leave a Reply
You must be logged in to post a comment.