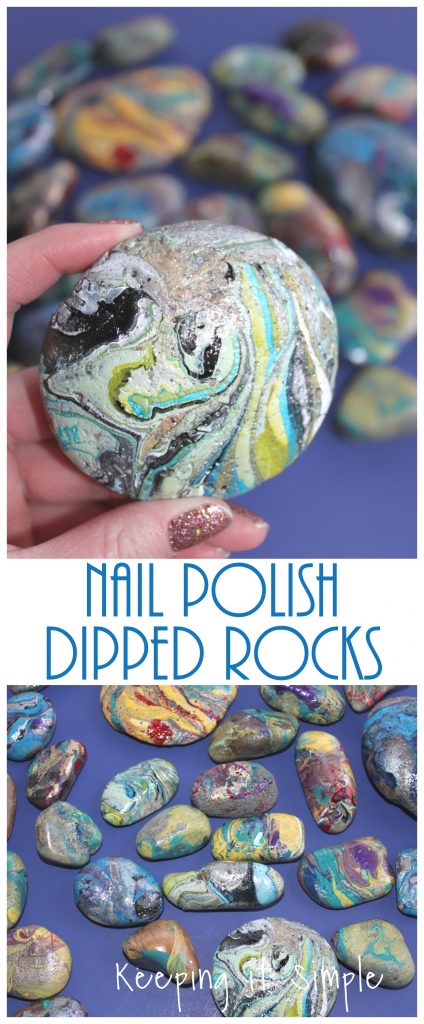
Have you gotten into the painted rocks phase? I have been wanting to do it with my kids and finally over winter break we had the time to sit down and do it. If you don’t know what the whole painted rocks thing is, people will paint rocks and then hide them in public places like parks for other people (kids) to find. It’s a fun activity to do with the kids and it’s always fun to find painted rocks when we go to a park. I wanted to do something fun with rocks, not just the normal paint them kind of thing. So when I did the dipped nail polish technique to ornaments this year, I knew that I wanted to do it again and rocks seems like the perfect thing to do! The kids and I had a fun time dipping rocks into the nail polish to get some fun marbled looking rocks!
Here is a video to show how awesome it is!
*** The temperature of the water does matter and so does the brand of the nail polish. The water needs to be luke warm (when it’s cold the nail polish just goes into droplets instead of spreading. Also I found that Sally Hansen nail polish works the best but you can use other things, it just won’t spread as well but since these are going on rocks, it’s not a big deal. When I did the ornaments I only used the Sally Hansen because I wanted those to last and look nice. Also I didn’t notice a difference between the Sally Hansen ones, so the cheaper ones works just fine.***
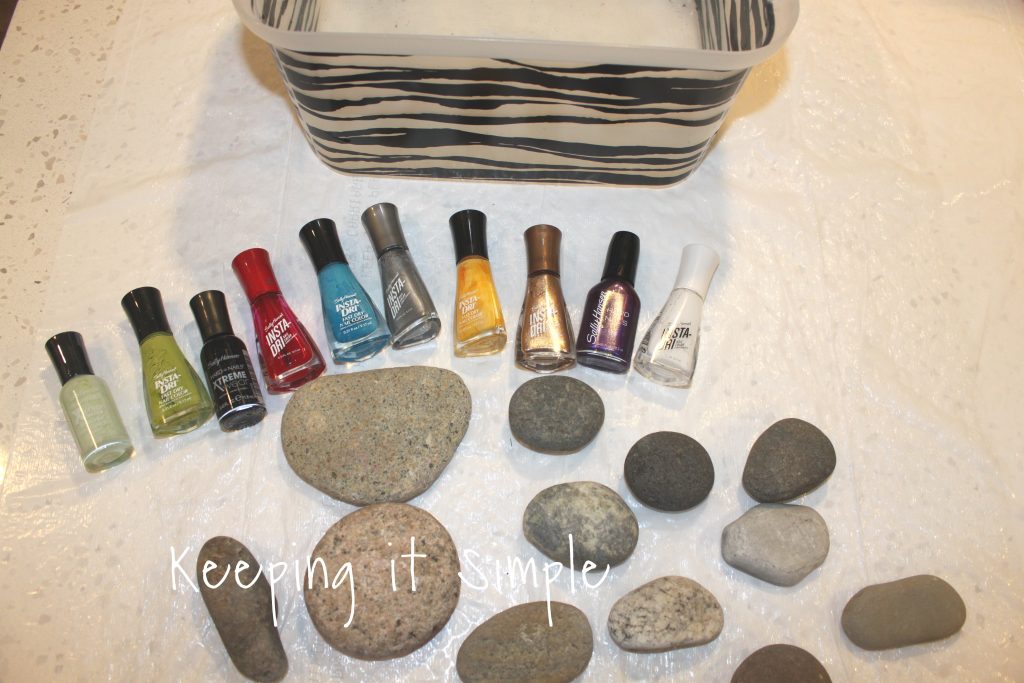
This is how we made them. I had my kids do these too and they loved it, we just had a plastic garbage bag under everything and they wore gloves too, so it’s not as messy as it might look :).
Fill a container with luke warm water, make sure to fill it up with enough water that you can dip the whole rock into it. Then add the colors of nail polish that you want into the water. You will want to add it in a circular motion so it doesn’t bead up and go to the bottom of the water. When you have all of the colors in the water, take a tooth pick and swirl the colors together. I have found that the last color you add will be the most vibrant on the rocks.
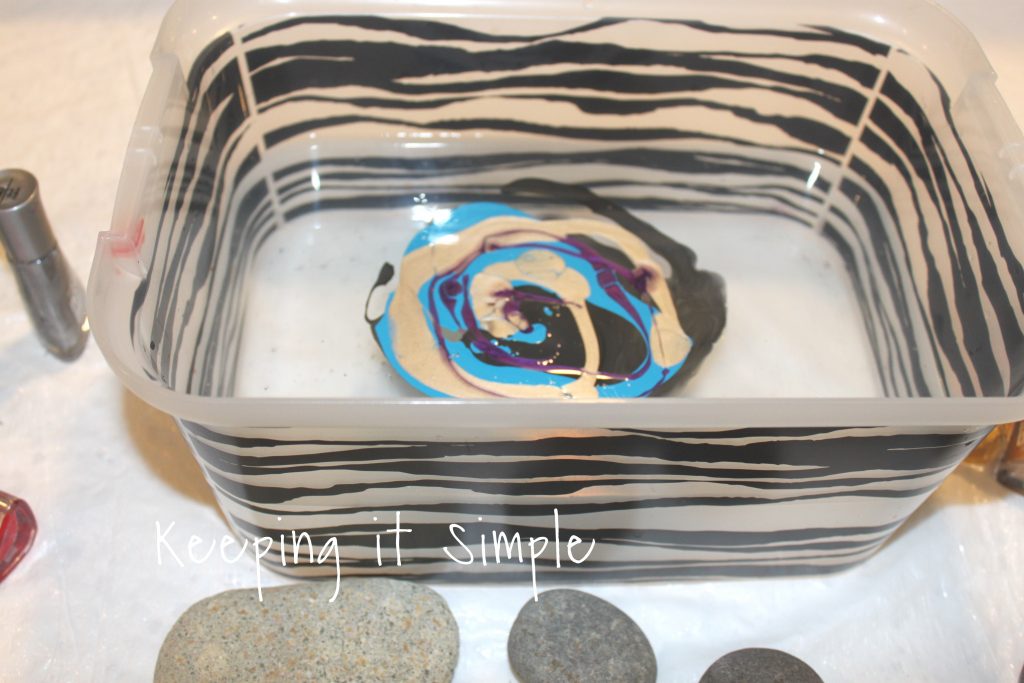
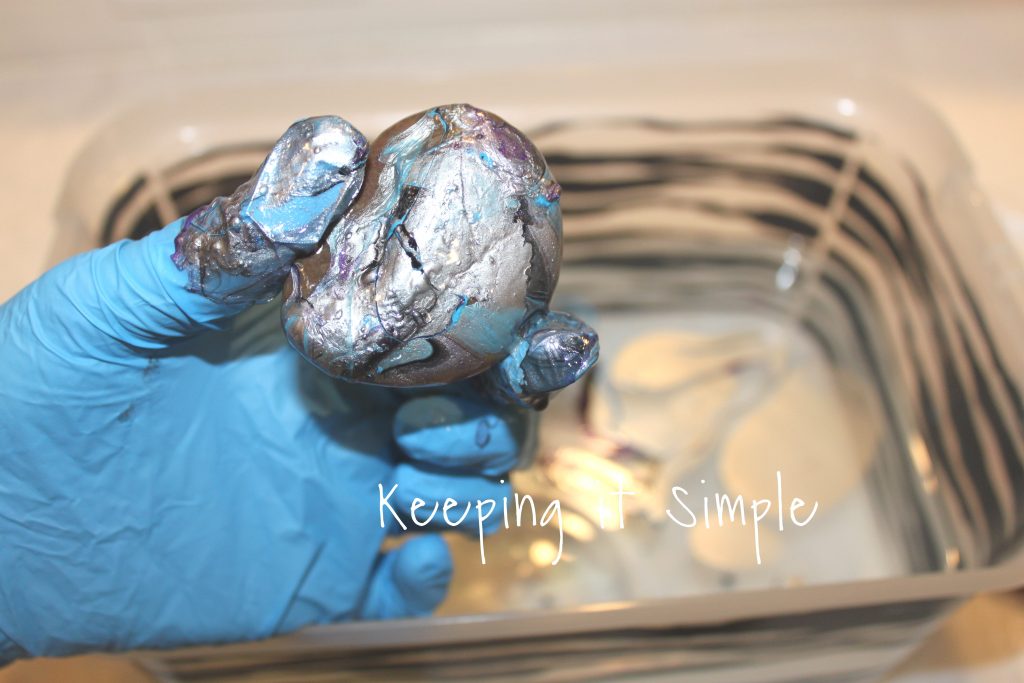
Take a rock and then dip it into the water where the nail polish is. Make sure to wear gloves because it does get on your hands. When you are dipping the rock into the water, the part that goes in first will get the most paint so that will most likely be the top of rock, so you will want that side to be smooth.
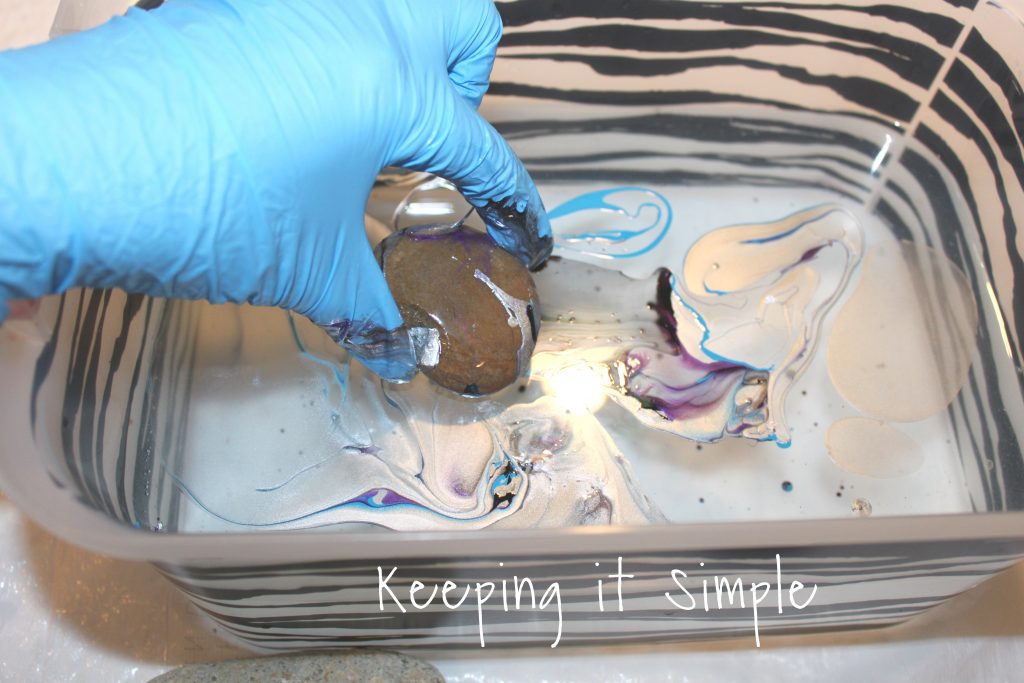
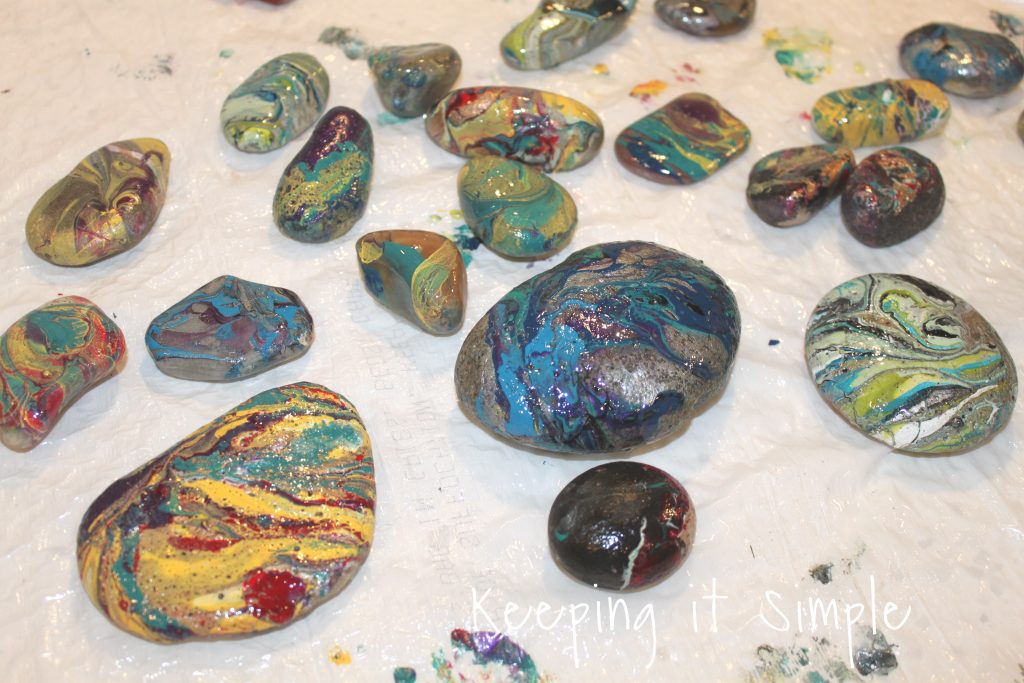
Here is what the rock looks like when it comes out, isn’t it so cool! I love how the nail polish looks on the rocks, it’s so fun. I could get about 3-4 rocks with each color combination. When I was done and wanted to change up the colors, I just took a toothpick and swirled it around the water and it picked up the nail polish and then I was able to put other colors into the water.
I let the rocks dry and then added some clear acrylic glaze on it, since they are going outside this will protect them a little bit from the elements.

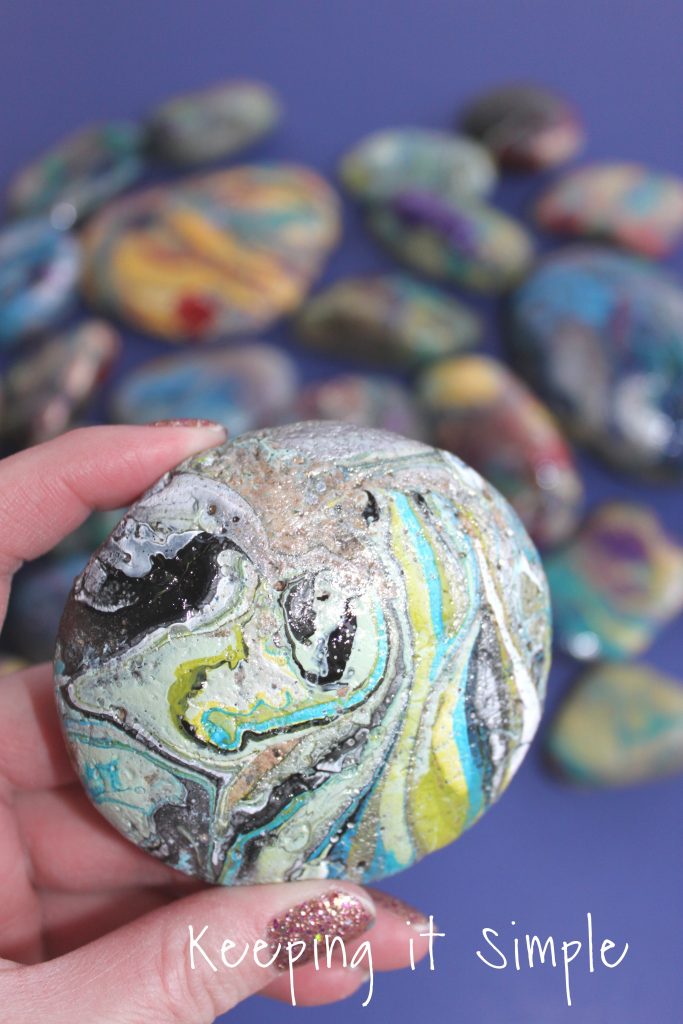
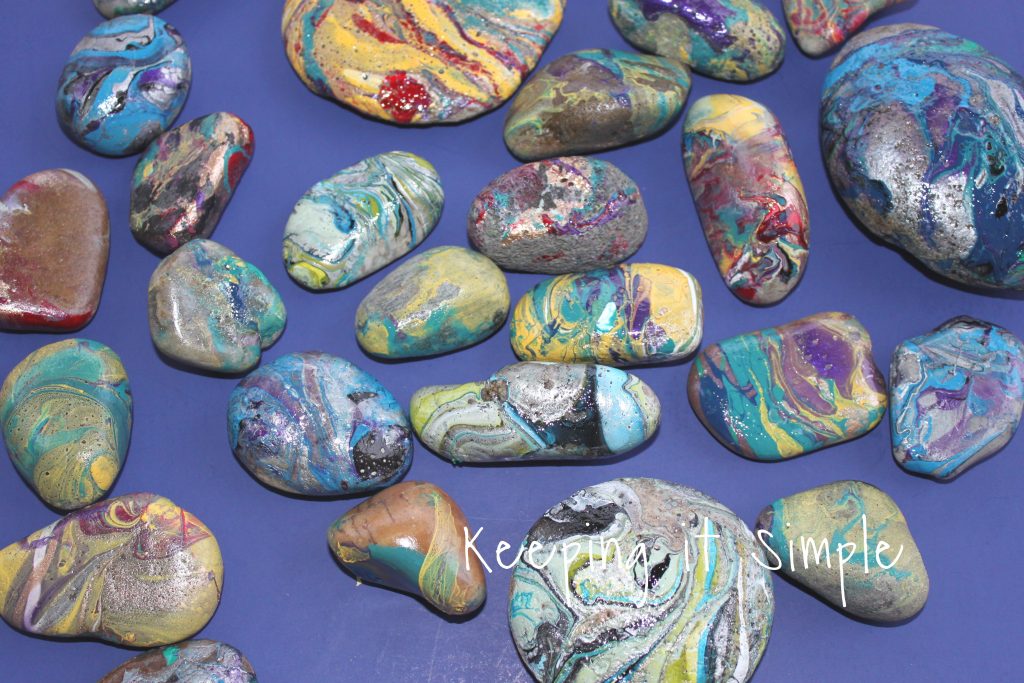
Here are some of them with glaze, aren’t they so much fun?
And that’s it!! I love how they turned out, this blue, green, white, black and silver one is my favorite but all of them look so cool!
We are excited to take these out to the park when it gets a little bit warmer, luckily for us there isn’t any snow on the ground so we could bundle up real quick and take them soon! I think that kids will get a kick out of finding these because it’s not something you see every day and there are so many fun colors and designs!
Need another fun activity to do with kids? I have a bunch of them, check them out here!
This post contains affiliate links
Leave a Reply
You must be logged in to post a comment.