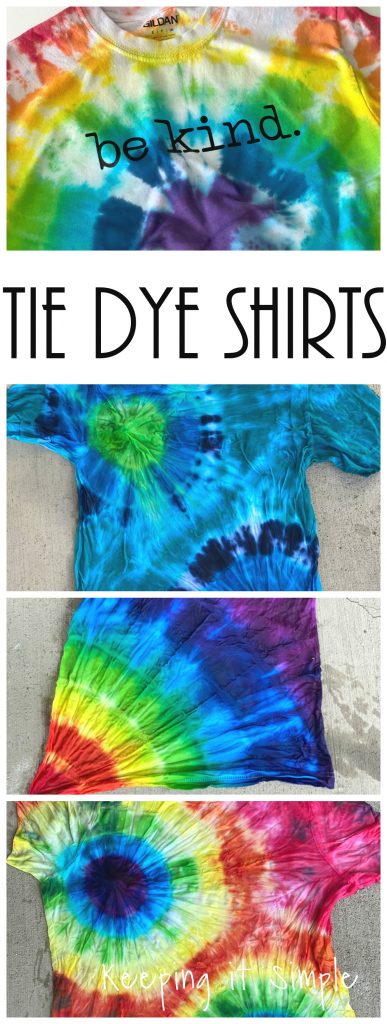
Tips and Tricks on How to Tie Dye Shirts
Tie dye is back in style and I am so excited about this!! I LOVED tie dye shirts in the 90’s and had several. I had one special one (I actually still have it) that I wore to almost every single meet that I went to in high school, starting with my 9th grade year. Since tie dye shirts are coming back into style, I decided that it would be a great thing to do with my kids and I was right. My kids have loved making these and are so proud of their shirts, they wear them ALL THE TIME now. It’s so fun! We have made a lot of shirts, and when I say a lot, I mean like at least 30, possibly even more :). We have learned a lot along the way, things to do and things not to do. I thought that I would share with you all the things that we have learned.
Here is a quick video to show you the process of how I make them.
This is how we made these awesome tie dye shirts.
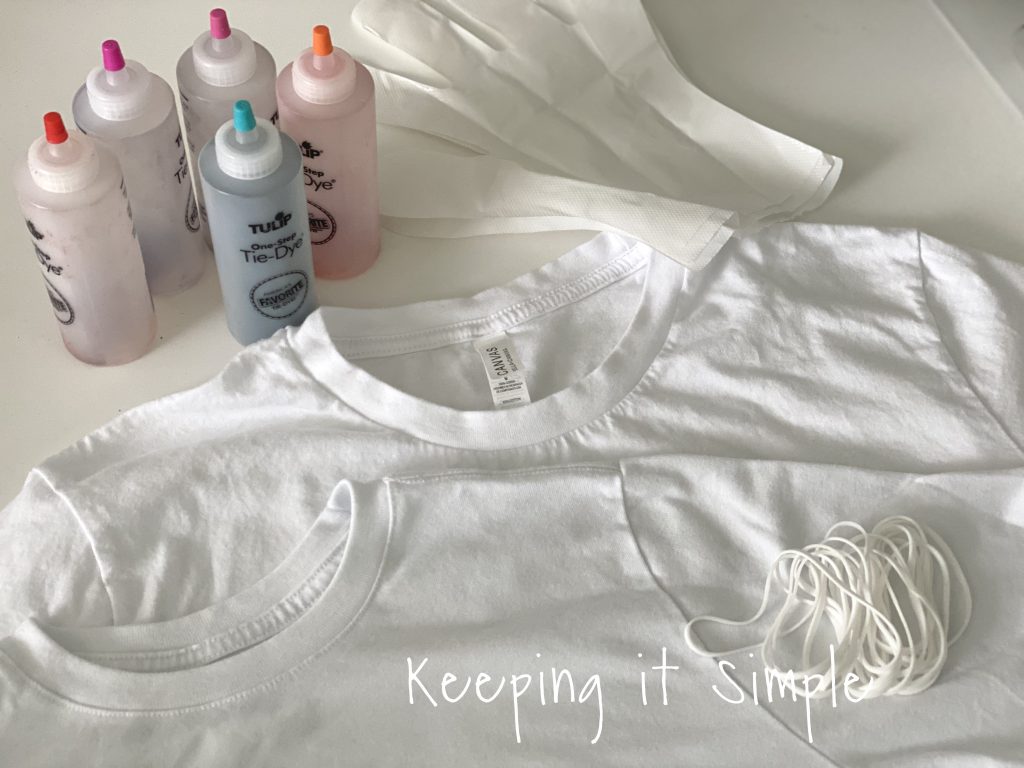
This is what you’ll need:
White shirts– 100% cotton works the best for sure. I got several different shirts and brands. When it comes to actually absorbing the dye, Gildan shirts did well but they shrink and aren’t super comfortable, kinda scratchy. But they are cheap and dye well, so I got them for my kids. Walmart brands, George and Wonder Nation and great because they are thicker and nicer shirts but they are not 100% cotton, so they are not as vibrate. They are still awesome, just not as bold of colors. But they are super comfy. And lastly, I used Bella and Canvas shirts. These are 100% cotton, softer feel and overall a great shirt. I have had great success with all of these shirts and would recommend all of them, but my favorite ones are the Bella and Canvas shirts, they really do fit the best, are soft and dye really well.
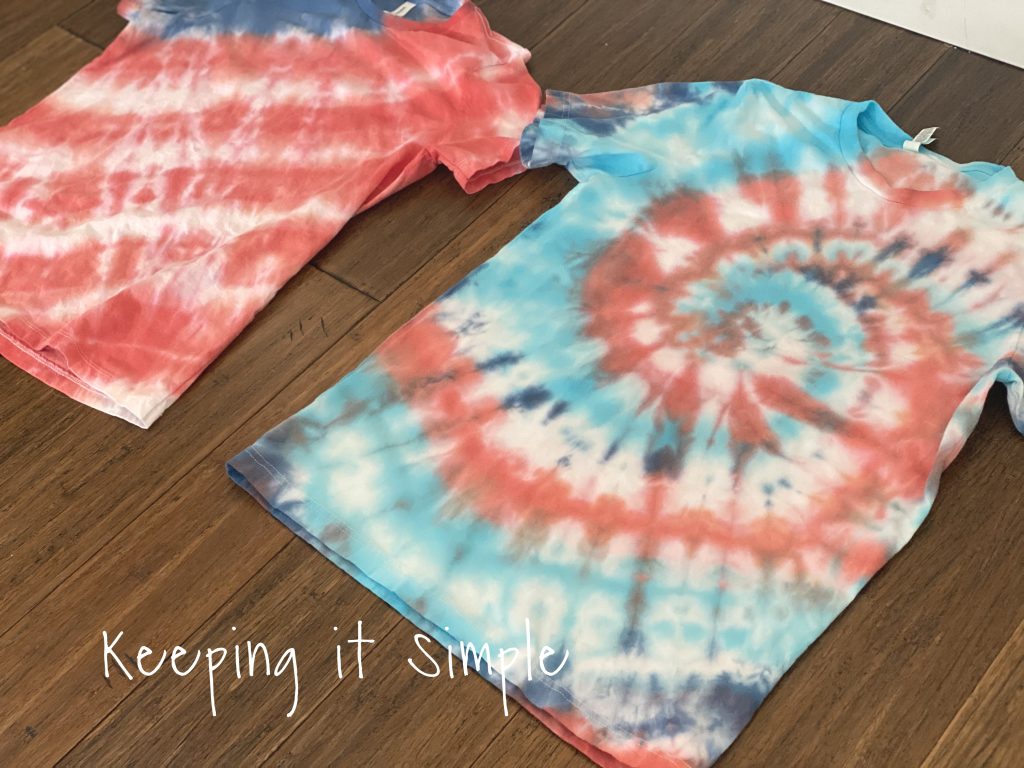
Tie Dye– Tie dye comes in kits or in individual bottles. I personally like the kits because I like a lot of different colors. I definitely recommend the Tulip brand, they are the BEST. We tried an off brand and I was not impressed at all, the colors were so muted and didn’t stand out at all. The brand was called Just My Style and it was cheaper but not as good. I will tell you though, the red in it was AMAZING and better than the Tulip brand red, I plan on using that red for our 4th of July shirts. I have found no matter what I do, the Tulip brand red is more of a pink than a red when it gets washed.
You will also need rubber bands, gloves, wire rack and plastic wrap.
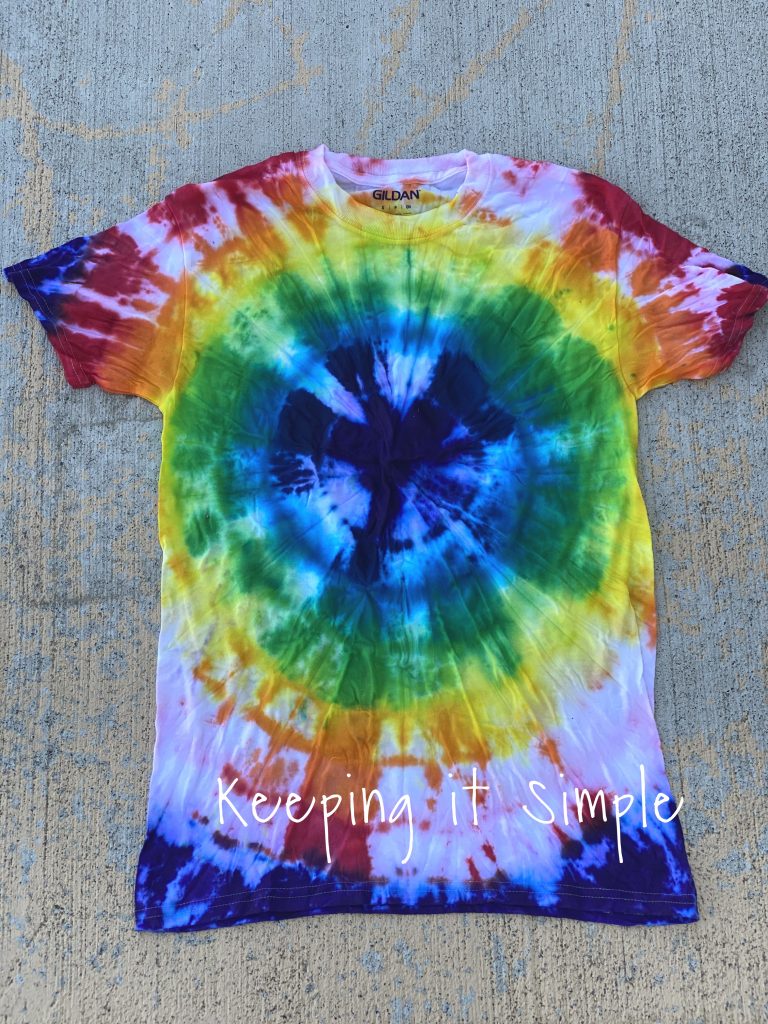
Alright now let’s get to the actually tie dyeing! The first step is to tie your shirt. There are a lot of different designs and there are instructions on how to do them with the tie dye kits. My favorite ones that got the BEST results every time were bullseye, double bullseye, swirl and the corner technique. You can see those in the video.
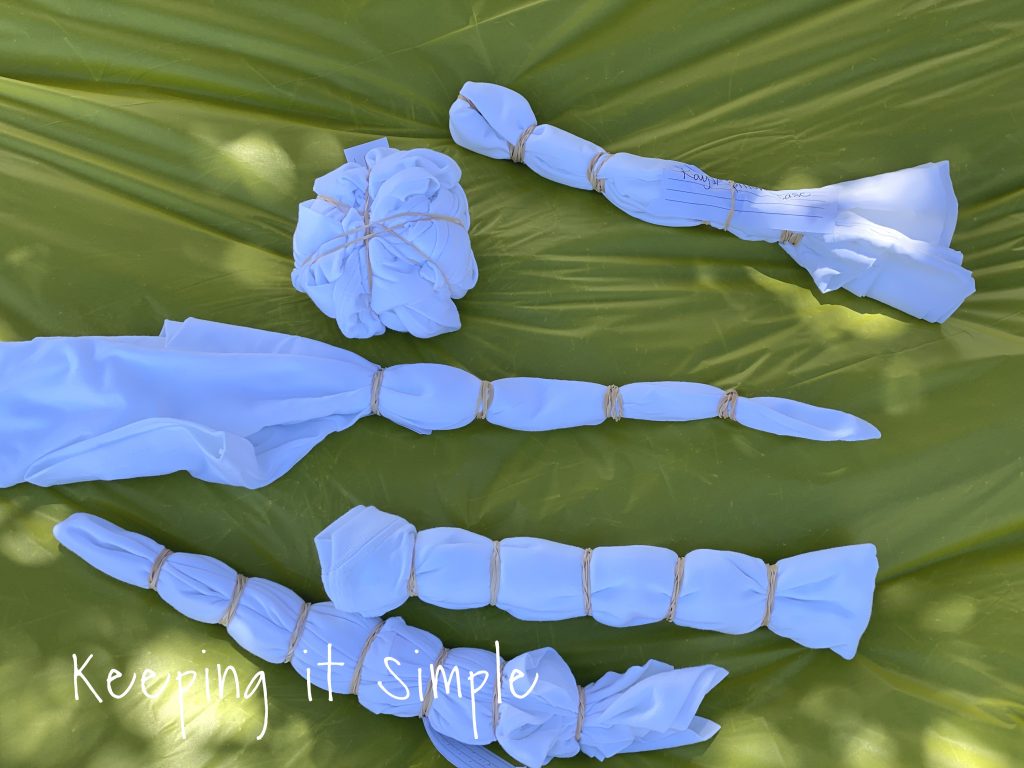
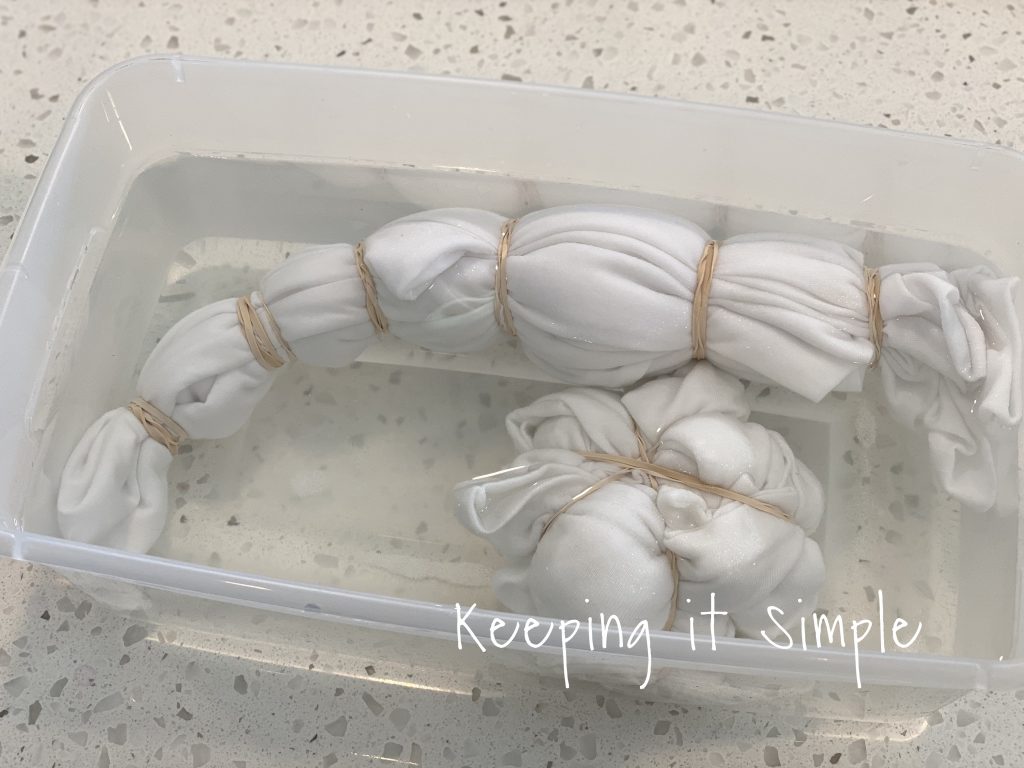
Once you have tied up the shirts, you need to make them damp. If you want, you can also soak them in soda ash for 20 minutes before dyeing them. I didn’t feel like this step was needed with the Tulip brand dye but when I did it, they shirt adsorbed the dye better, so really it’s totally up to you whether you do it or not. When I just put the shirts into some water for a minute and then rung out the water by twisting it, they turned out good too.
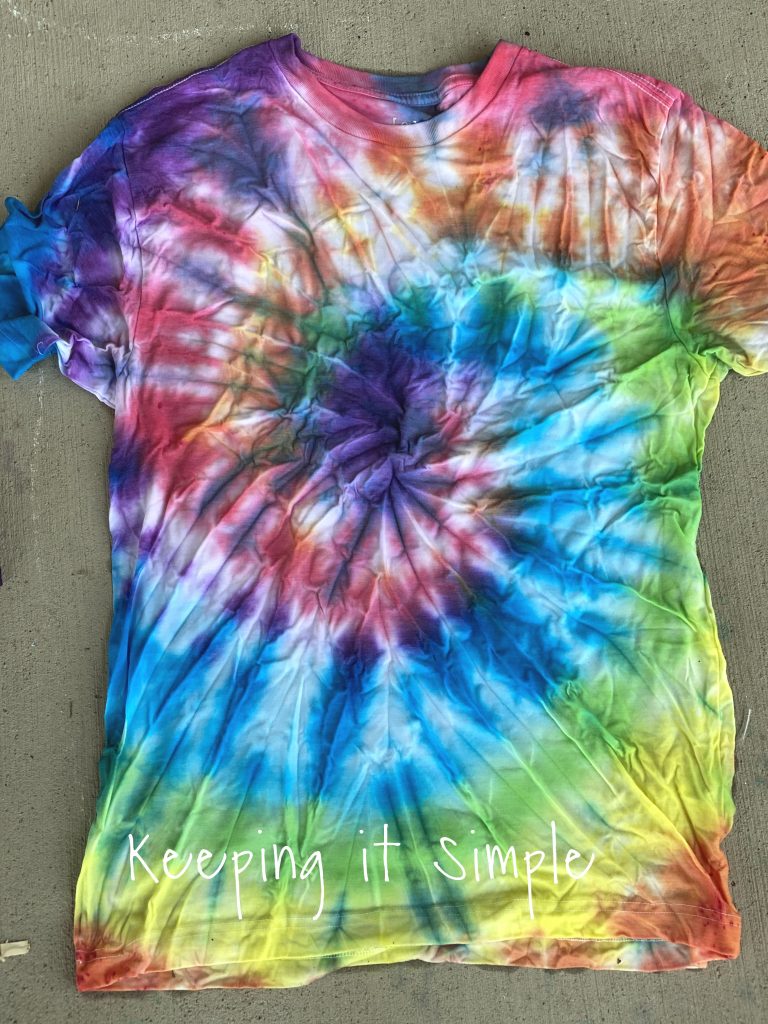
Now time for the actually tie dyeing. For this shirt I did the bullseye method and basically you just lay the shirt flat and then pick up the middle of the shirt and put a rubber band around it. Then you continue putting rubber bands on it, the amount depends on how many circles you want in your design. You put enough dye on the shirt to penetrate it but not too much that it’s dripping all over the place. Using a wire rack is the best way to do it because if you don’t, the colors will blend and bleed and each other. You will want to wipe down or wash the rack in between each shirt because there will be dye left on it from the other shirt.
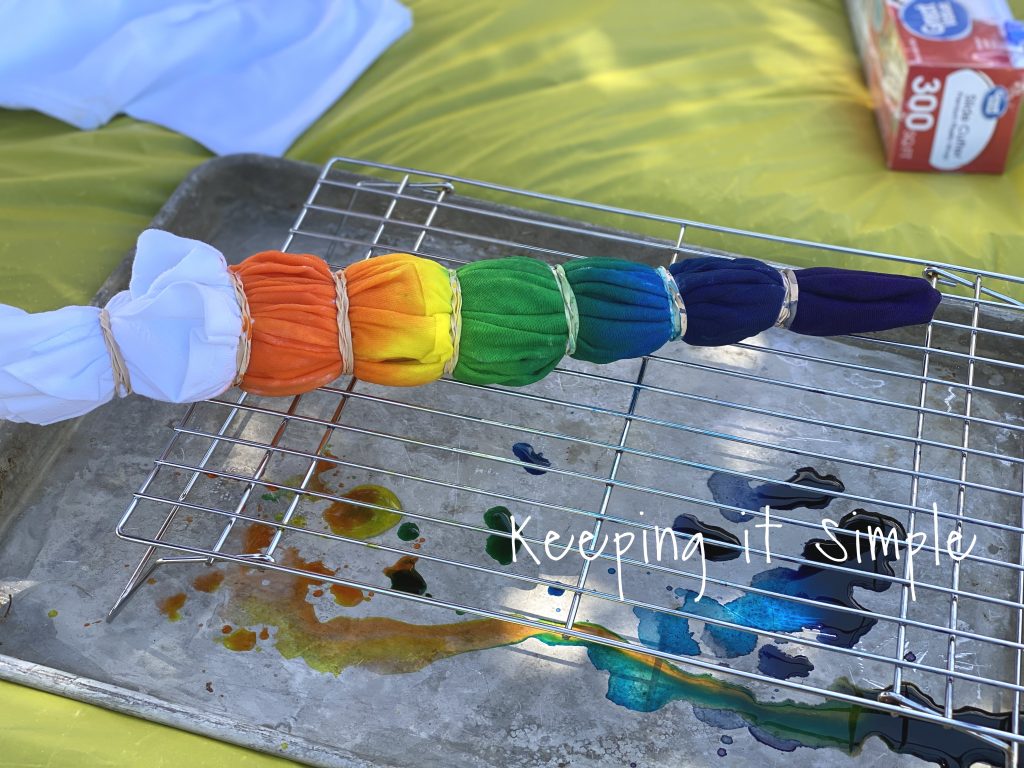
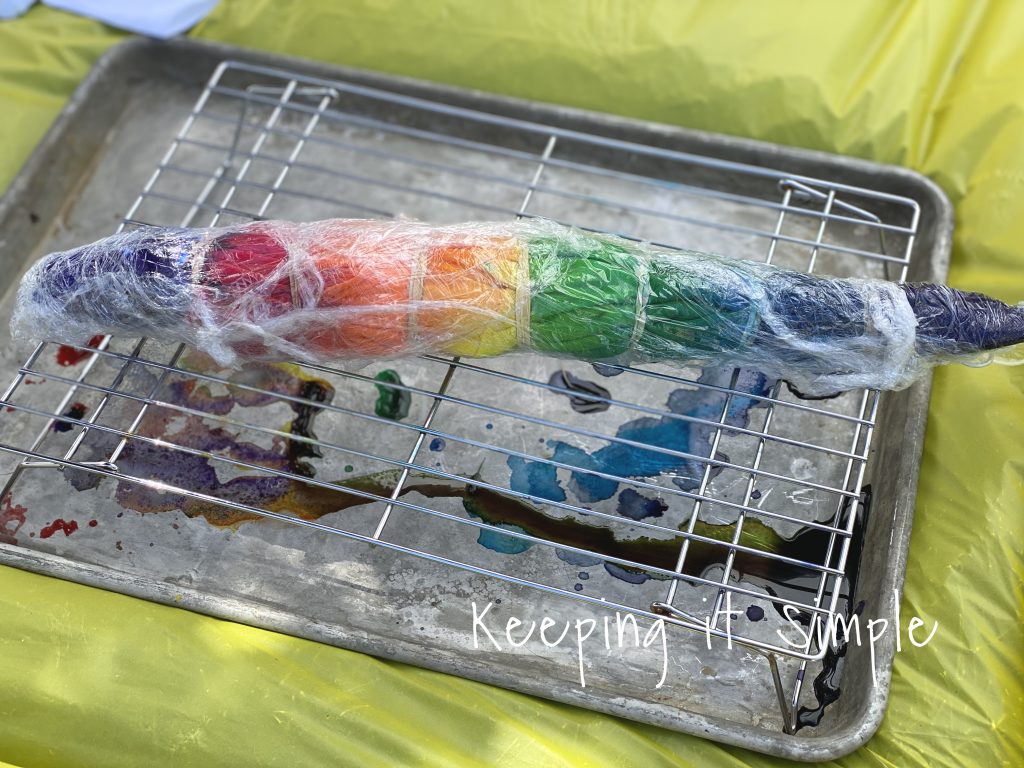
Once you are done dyeing the shirt, you will wrap it with plastic wrap and let it sit for at least 8 hours. I usually let ours sit over night.
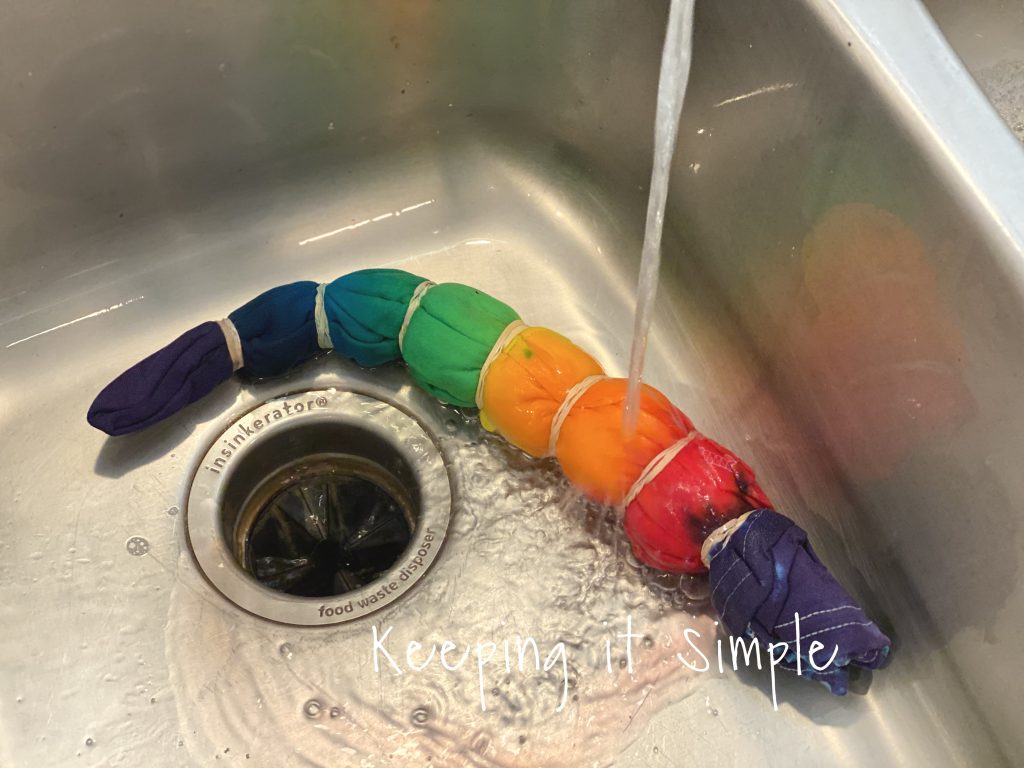
Once the dye has set, you rinse it with cold water. You rinse it until the water runs clear off the shirt. This might take awhile and a lot of water.
****Another step you can do is soak the shirt in vinegar for 2 hours to make the colors more vibrant, you do this after you rinse the shirt. For every gallon of water, you use 1 cup of vinegar****
Once the shirt is rinsed, I cut off the rubber brands and laid the shirt flat to let it air dry a little more before washing it. Then I washed the shirts in a load of their own. Instead of soaking the shirts in vinegar, I put about a cup of vinegar in the washer with them on that first wash. I don’t know if helps or not, I just do it because I hope that it helps :).
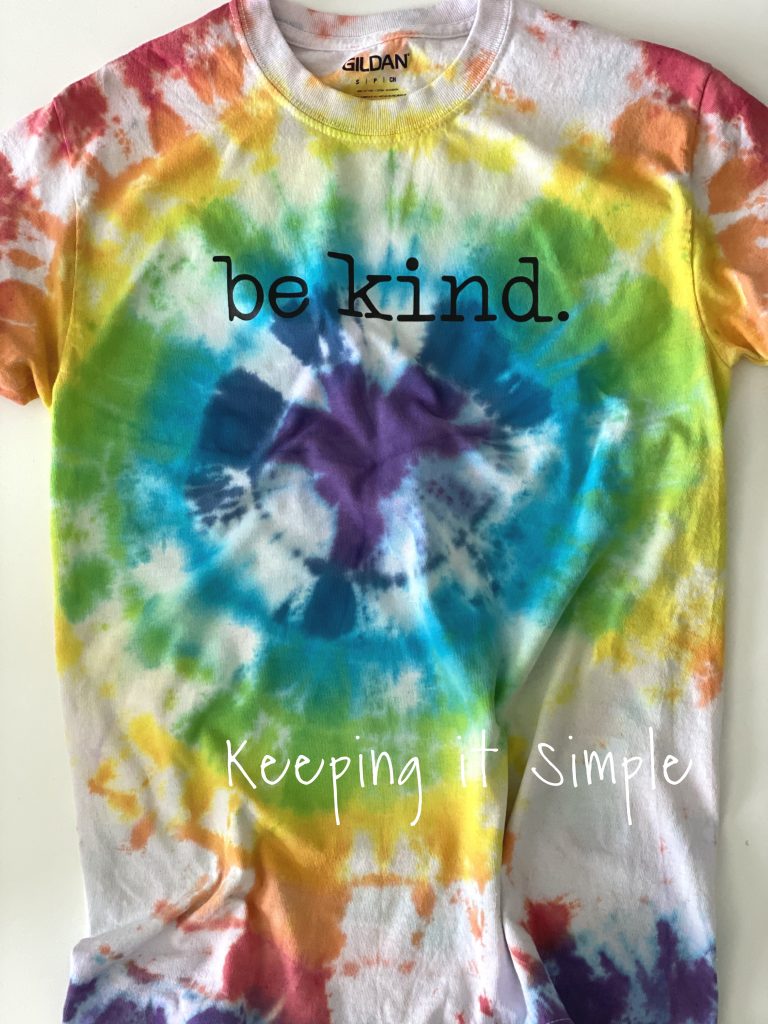
The colors fade a little bit once the shirts have been washed but they still look amazing!! I decided to add some heat transfer vinyl cut by my Silhouette CAMEO to the shirt for fun.
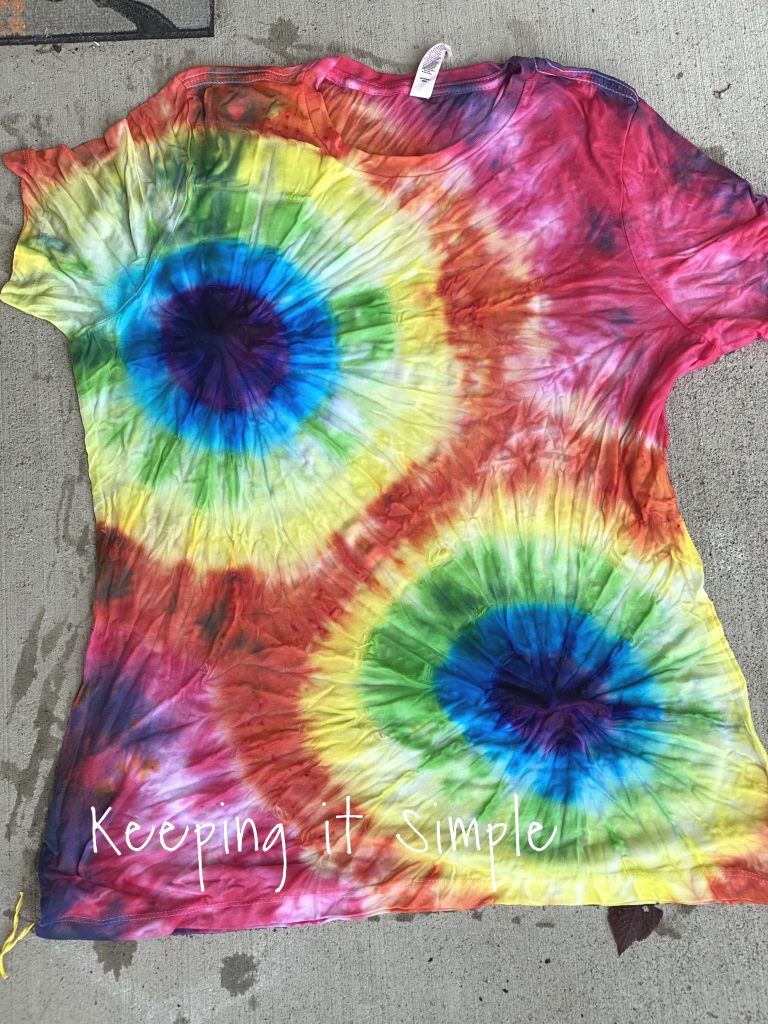
Here is another rainbow one that I did with the corner technique. I just started at the corner of the shirt and then tied it from there.
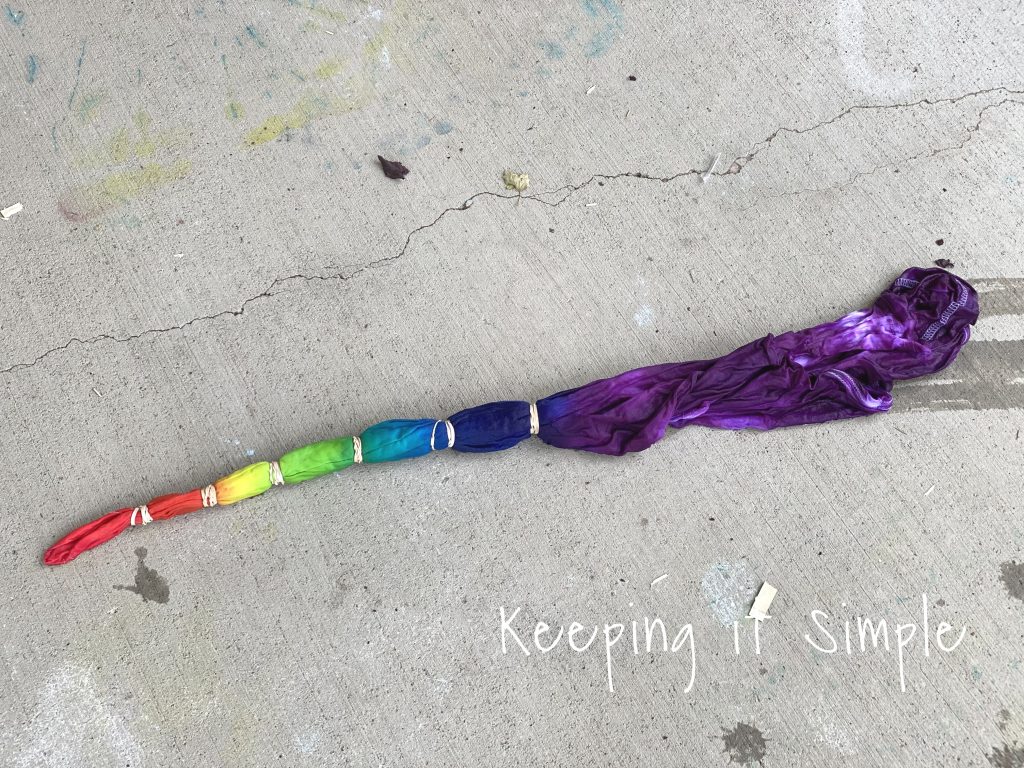
This is what that technique looks like, I love it!
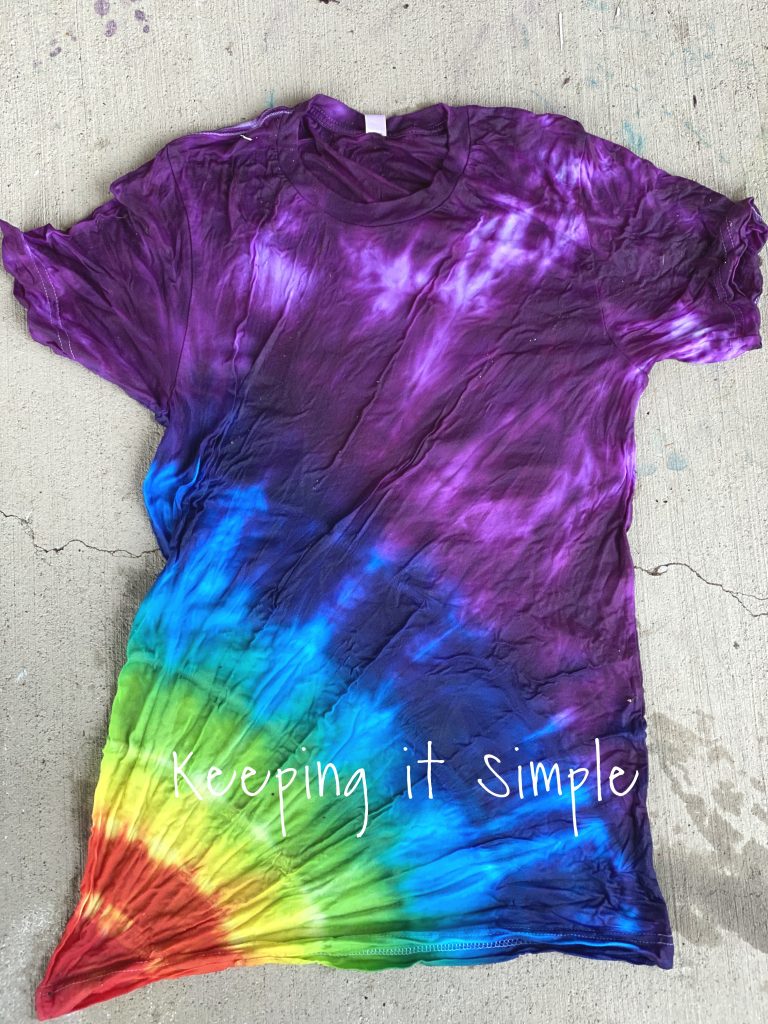
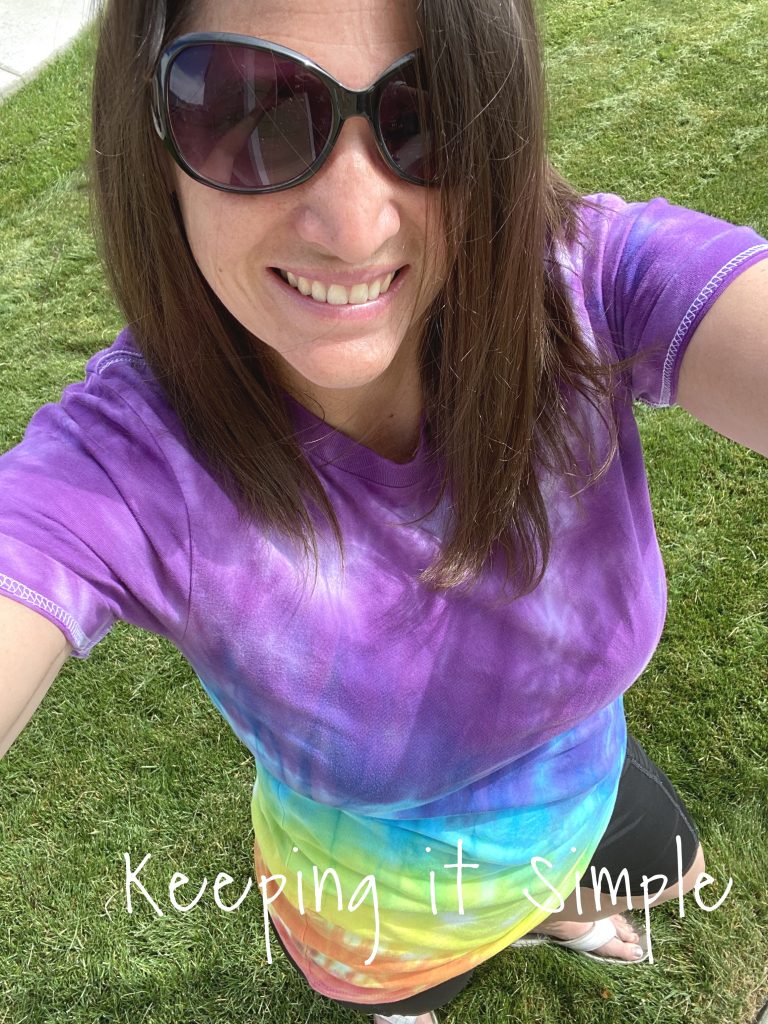
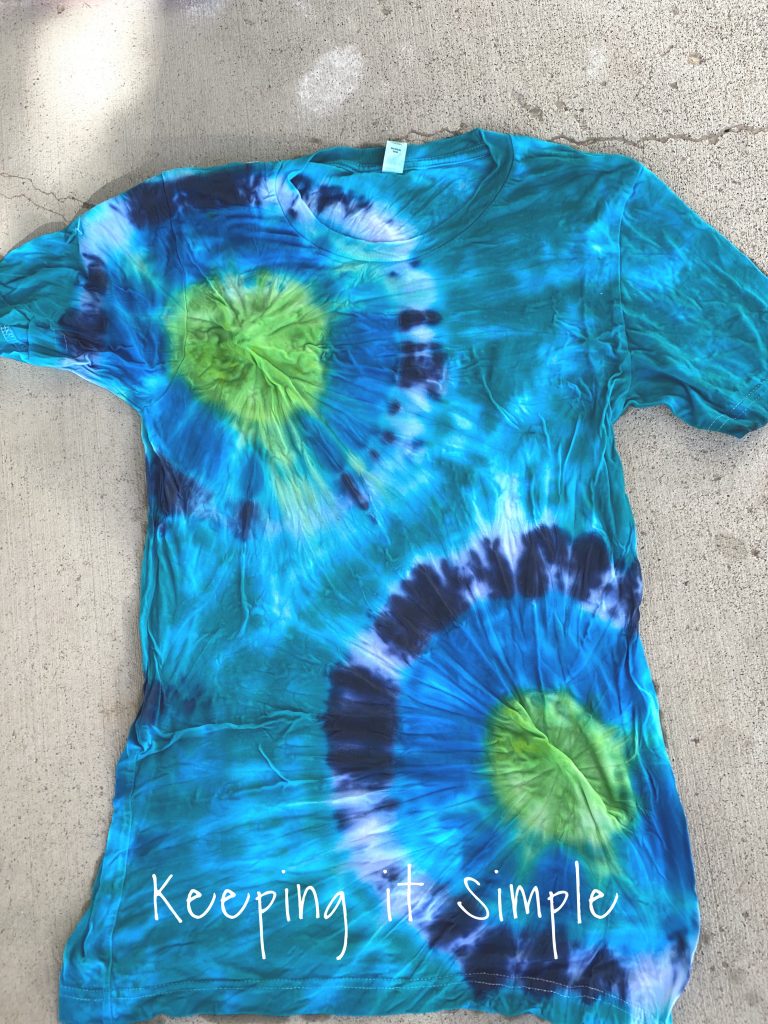
This shirt turned out amazing, this one is a Bella and Canvas shirt and I soaked it in soda ash before dyeing it. The colors are vibrant and didn’t fade in the wash. After seeing the results of this shirt, I’m thinking that the extra step of using soda ash it worth it and using a 100% cotton shirt is definitely the best way to go. I’ve gotta great results doing it with the other sides and without soda ash, but I got the best results with it.
I wanted to try out the two minute kits and see if they worked out as good as the letting it set for 8 hours method. This method, you do everything the same except instead of wrapping it and letting it set, you put it into this special container and cook it in the microwave for 2 minutes and then let it set for 15 minutes in the container.
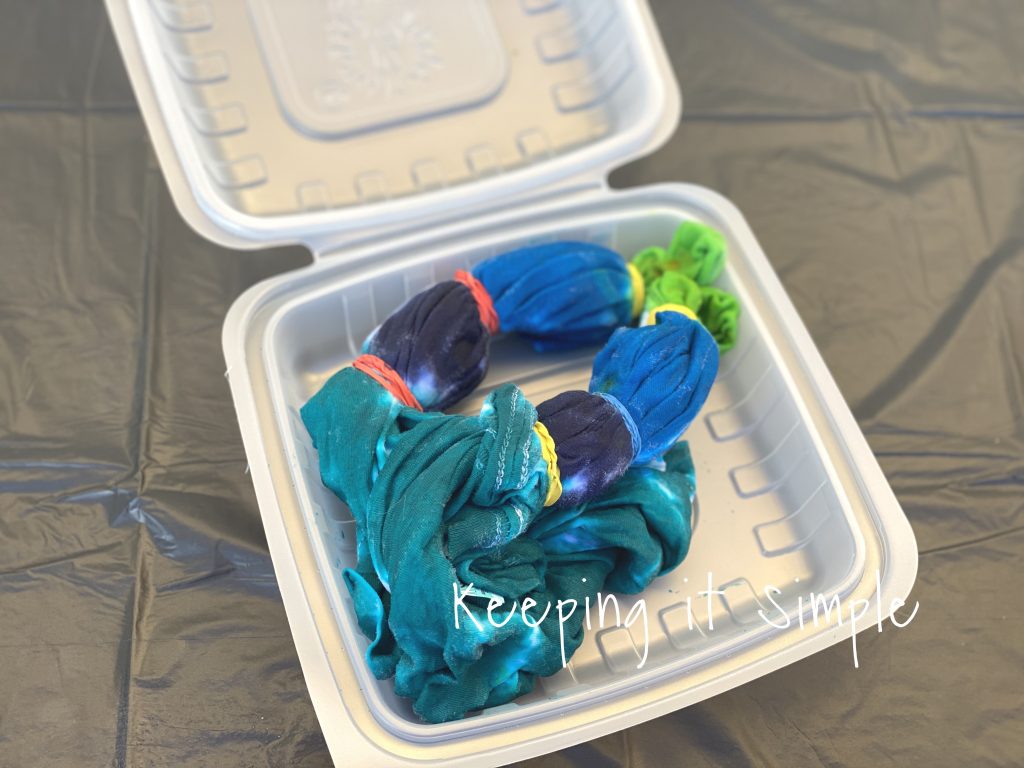
It worked pretty well, I didn’t wash it until I let it dry over night but this one turned out pretty good. BUT when I tried it with the rainbow colors, I didn’t have as good of results. Also depending on how you tied the shirt, when you put it into the container, there was a chance that the dye would get messed up.
Here is another double bullseye design that I tried in the 2 minute container and when I was putting it in, the purple dye ran into the red dye, messing up my design.
A similar thing happened with the I used the container for this swirl rainbow shirt. So if you want to use the 2 minute container, I would only use it when you have 2-3 colors on your shirt and they are similar colors. I noticed that there was a lot more bleeding in the container than when I just used plastic wrap, especially on the back of the shirt. It’s definitely not my preferred way of making the shirts.
Here are a few more shirts that we made. The swirl method is a little tricky but the results are amazing if you do it right. When you are swirling it for the middle, you will want to make sure your folds are flat and not bunched together. When you put the rubber band around it, don’t loop it twice, just put it on. 3 rubber bands are perfect for this, making 6 sections.

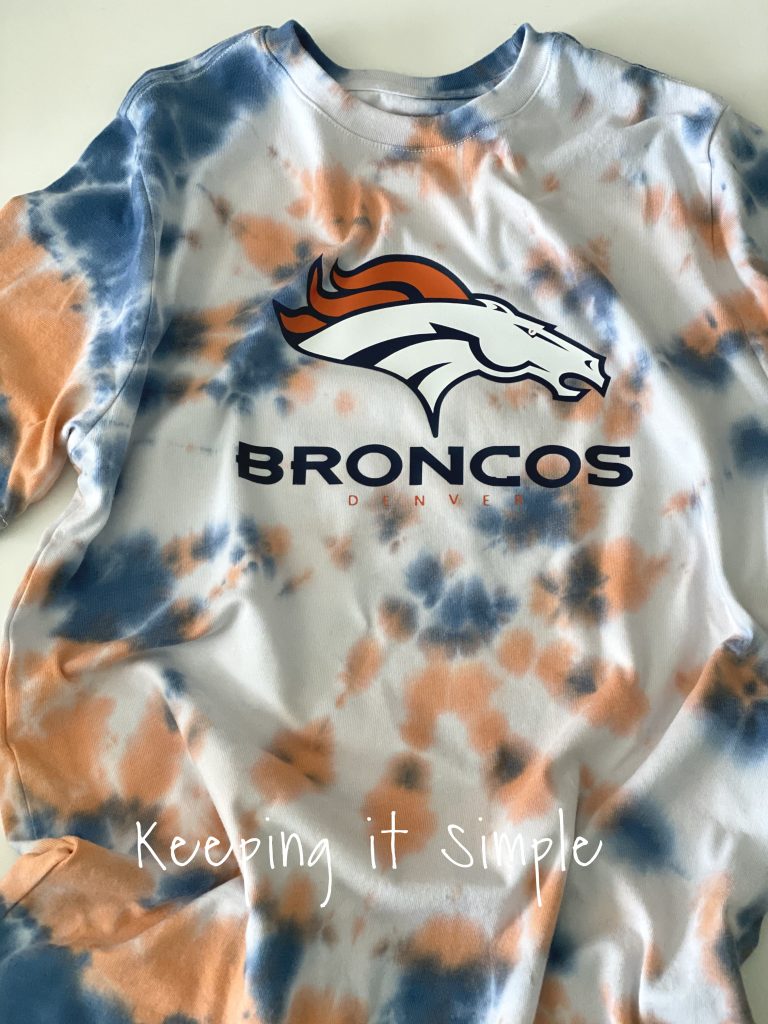
Another thing we have done is do the shirt in certain sport teams’ colors and then I added heat transfer vinyl to it, like this Denver Broncos tie dye shirt.
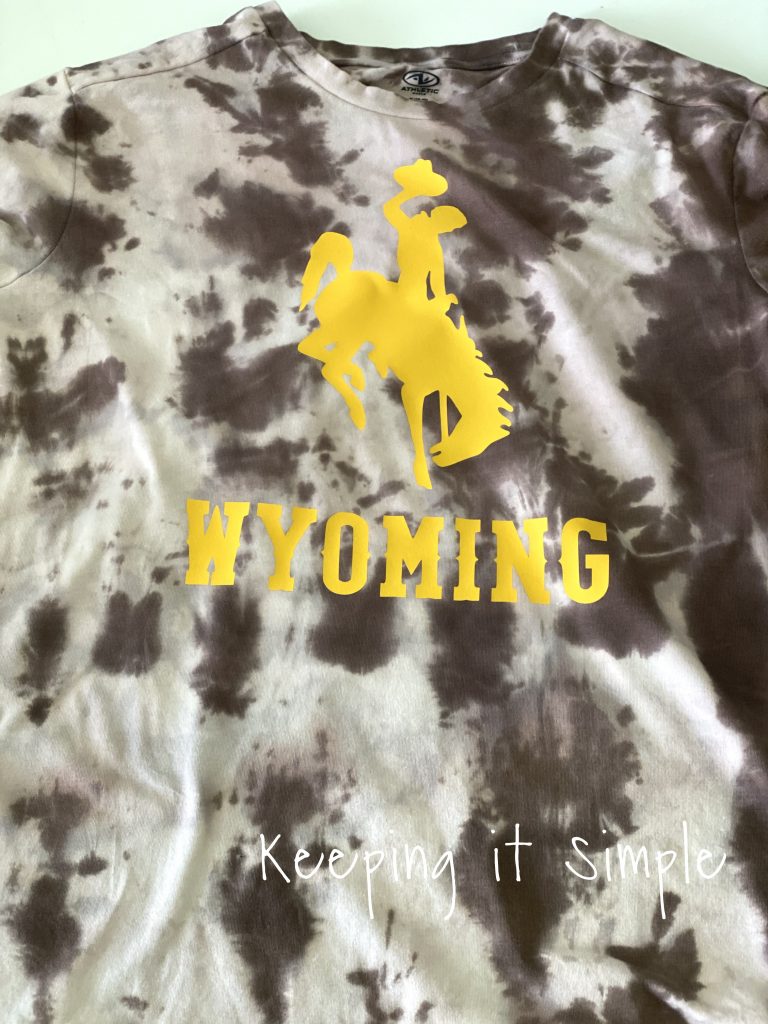
We also attempted the tie dyeing with Rit Dye. This ONLY works when you are doing just one color. The Rit Dye will dye the whole shirt, not leaving any white. So it worked perfectly with this Wyoming Cowboys shirt because we made the whole thing brown but when I tried to do it with brown and yellow, it was a big fail. The way that I made up the dye, is I took a condiment bottle and put a tsp of salt into it, then I added about a TBSP of liquid dye into the bottle and filled it up with hot water. Then I mixed it up by shaking the bottle. We did it the same way as the Tulip dye after that.
Here is a fun video showing all of us making them, it was a lot of fun and we learned a lot that day. One major thing I learned was NOT TO use cable ties, definitely use rubber bands because when you are cutting off the cable ties, there is a chance that you will cut the fabric…. I did that multiple times.
You should definitely try making tie dye shirts, it’s been a blast and we have really enjoyed doing it!!
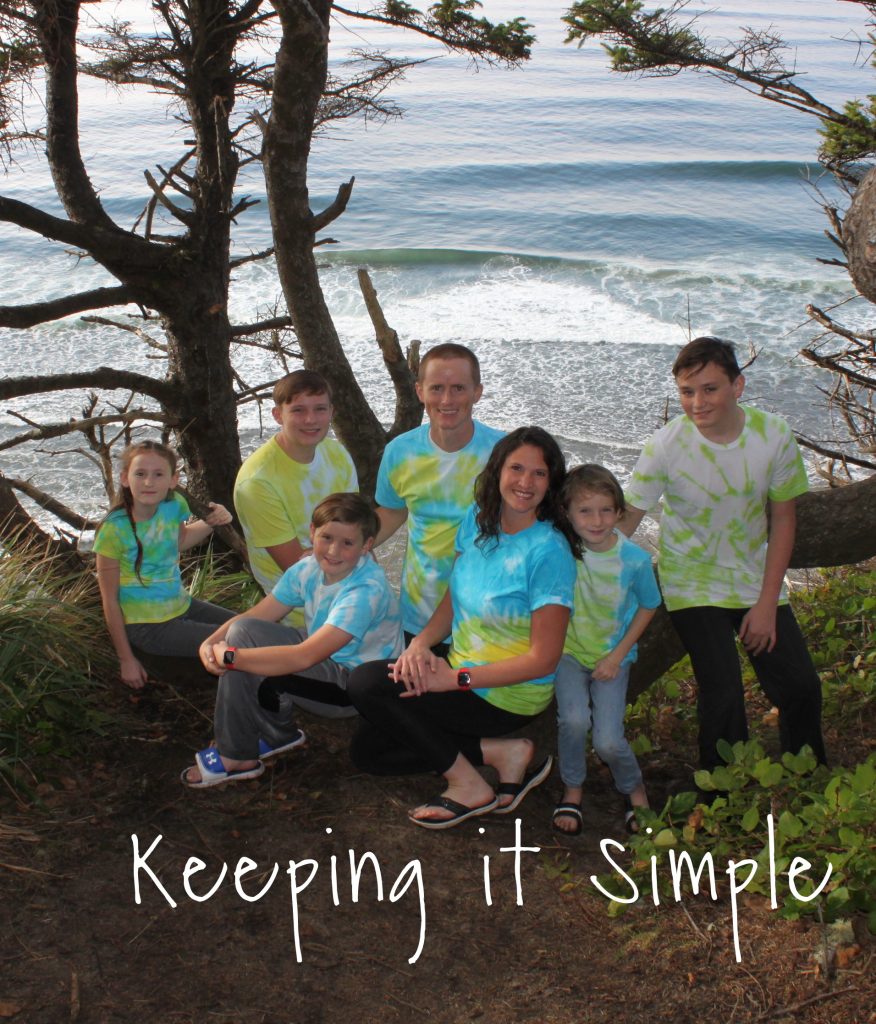
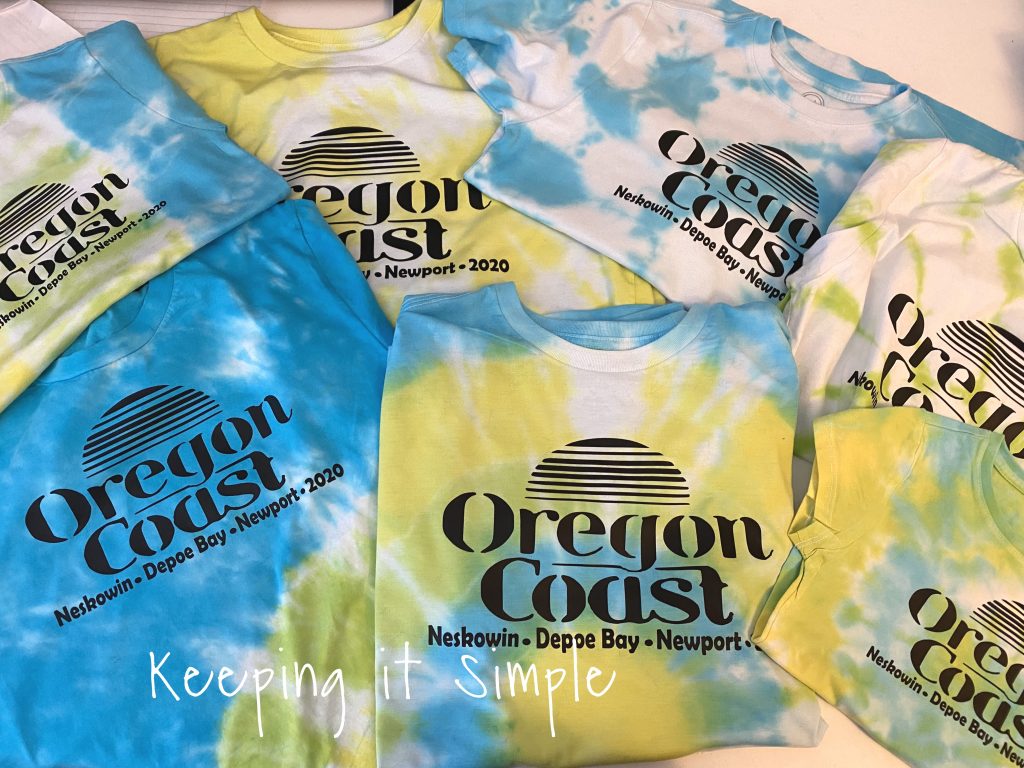
We loved tie dye so much that we did family picture in tie dyed shirts! I just used three colors, turquoise, lime and yellow and then made each shirt a little different. For these I used soda ash and vinegar and the colors were very vibrate, so it made a difference. The designs I used are from left to right: swirl, double bullseye, swirl, bullseye, corner, stripes and swirl.
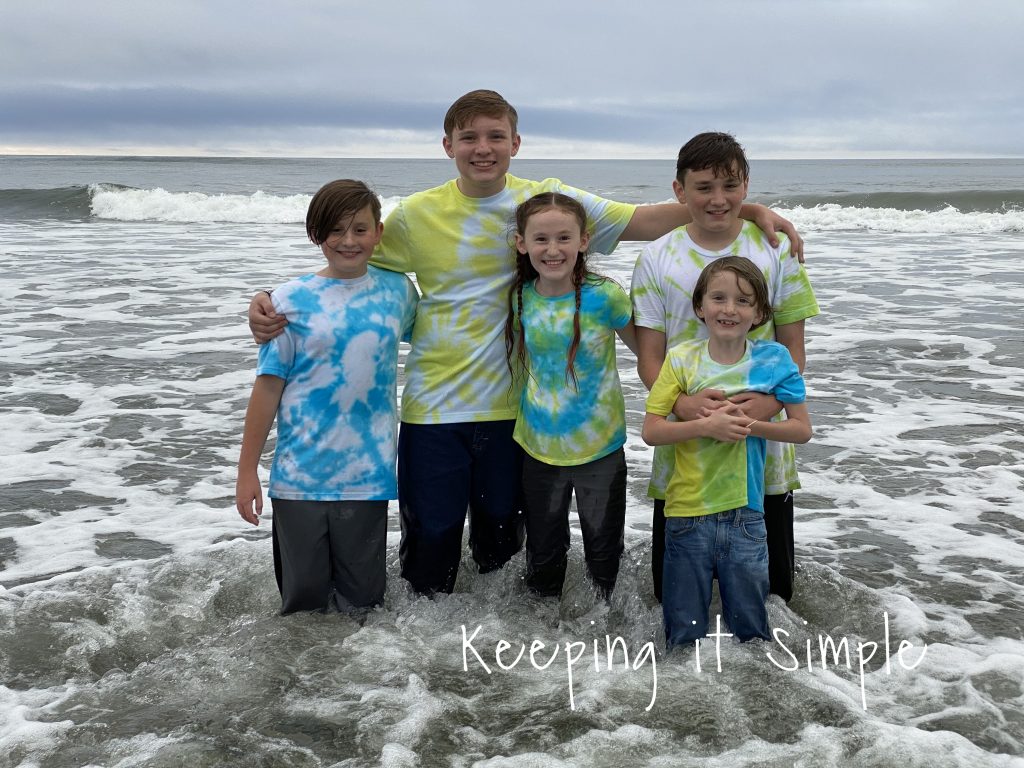
Here is a closer look at the kids’ shirts. The designs are swirl, double bullseye, swirl, swirl and stripes.
To do family pictures, we headed to the Oregon Coast on vacation. Once we were done with the shirts, I decided to turn them into souvenirs and put some black heat transfer vinyl onto it. I loved these shirts to begin with but now I love them even more because they remind me of the great trip that we had at the Oregon Coast.
Make sure you check out my other shirt ideas!

This post contains affiliate links.
Leave a Reply
You must be logged in to post a comment.