
A couple of weeks ago something happened in my kitchen, I don’t know what or who did it, but my super cute dry erase board that my mom gave me fell and broke. So I had planned on making something else, possibly a ribbon board and dry erase board combo. The problem, I really really really needed my board, that’s where I put all of the weeks activities and I was forgetting what was happening, and I just wasn’t motivated enough to tackle the big project that I was planning.
Well last Monday, you ladies came to the rescue and gave me the best idea. So after reading a couple of posts, I decided to make this. It is much easier to make than what I was planning. The best part, it was absolutely free! It just happened that that very day I found this cute frame on top of a hutch (not quite sure what it is for, so hopefully I won’t get in trouble for using it 🙂 ) and had left over fabric from my other decorations in the kitchen.

This is what I did:
It seriously only took 15 minutes, start to finish and that included ironing the fabric
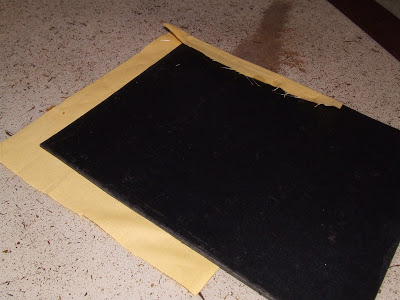
1) Took a frame and covered the backing with fabric. I used a hot glue gun and glued the back

2) I used two pieces of fabric because it matched my other decor. I then added a piece of ribbon to the middle

3) I glued everything down, not too pretty in the back, but it doesn’t matter what the back looks like 🙂

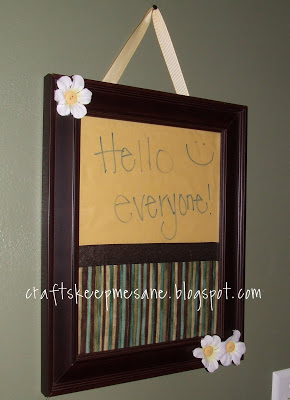
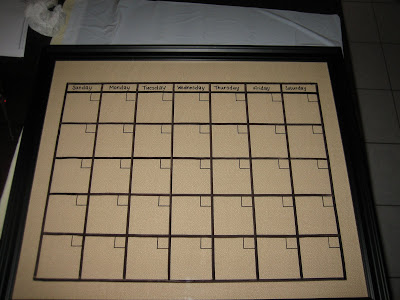
4) The front looks much better!!

5) Using a staple gun (who knew when we bought it that I would be using it for so many crafts) I stapled ribbon to the top. I always put in 3 or 4 per side, just to be safe

6) I added a couple of flowers to the frame and hung it up.
So simple and so wonderful! Now I won’t forget everything and feel more organized. I put a couple of mounting squares on the sides to stabilize it a little more, it moved a bit when I wrote on it.
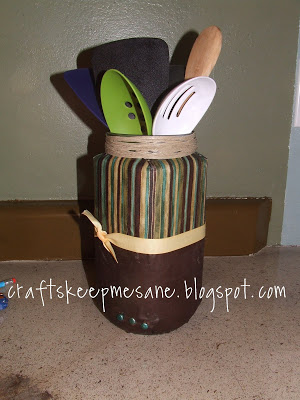
And it goes perfectly with this
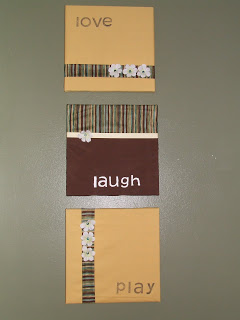
and this
And here is my inspiration, thank you so much ladies!!!

Oh now that is very awesome! So cool! I love that it matches your other kitchen things that you have made, I think you just inspired me to do something similar!
Going in my "to-do" list!! Love it!
that turned out really cute!!
i understand the feeling of being lost w/o a 'spot' that you can go to for everthing!
it looks great!
Thanks for your sweet comment! I love your blog – I added it to my reader, and I'm so glad I did. Seeing this clever "white" board was a great way to start the day!
Then you write on the glass???
Very cute!
The Beck Bunch:
Yup, you just write right onto the glass, it wipes away clean (much better than my real dry erase board!)
Kaysi
Fun!! Love it
That is the best looking dry erase board I have seen. Fantastic!
I'm glad someone asked about the glass because I was confused. I couldn't see that it had glass. 🙂 Just had a "duh, now I get it" moment.
Michelle
http://www.TrashToTreasureDecorating.com
Great idea…it looks real nice! Thanks for stopping by and saying hi. Sandra
I love this idea! Looks great! I will put it on my craft wish list…
I love this idea! want to share it over at check me out saturdays http://www.iamonly1woman.blogspot.com
This is so pretty, I love your color combinations…and it matches your utensil holder too-SWEET!
-Mags
I am so thrilled that I found your blog! Your ideas are wonderful! I am sooooo doing this!! Thanks for sharing your skills :).
I love how it all matches and the way you used the different fabrics!
Love it, thinking I need one by next week.
Glad to inspire! Now, I need YOUR help!! I have some awesome T-shirts that don't fit right but I love the patterns… ideas? http://itsnotalwaysblackandwhite.blogspot.com/2010/03/your-mission.html
Awesome! I love how it matches everything too! Great job! : )
So cute, i have been wanting to make one of these for a while.
I love your version! Looks great!
Rebekah {All Thingz Related}
Looks great! I love all of the matching decor you put together as well!
Thanks for the shout out. I love your dry/earse board.. It turned out super cute.
Thanks for joining Get Your Craft on Thurs. Please join me next week for another great party.
Um, I love this. Which is why I featured it 🙂 Thank you for linking up to A Little Craft Therapy with Life in the Pitts!
Haha, it took me a minute to figure out how the fabric was dry eraseable! Then I realized you left the glass in there! I'm so used to taking the glass out when I use picture frames, haha. GReat idea! FOund you from the linky party on Somewhat Simple. I think I'll be back though.
Anna
Such a great idea! I love how you used coordinating fabric with other items in your kitchen!
Great job!
Thanks for linking to Make it Yours day!
So cute and practical! Thanks for linking up this week 🙂
That is so cute!! I love that idea! I would never have thought of that. You people are all so smart.
I love your dry erase board.
Looks great I really like that you added other elements to coordinate. Thanks for sharing with Made it Monday! Jules
Thank you for sharing your awesome project at Thursday’s Treasures last week! Come share your crafty projects in this week’s Thursday’s Treasures too!
http://treasuresfortots.blogspot.com/2010/03/thursdays-treasures-week-13.html
Thank you for sharing your awesome project at Thursday’s Treasures last week! Come share your crafty projects in this week’s Thursday’s Treasures too!
http://treasuresfortots.blogspot.com/2010/03/thursdays-treasures-week-13.html
Great job.
Thanks for posting to the party.
My favs will be up this evening.
Cheri http://www.itssoverycheri.com
Have you re-signed up to follow me at the new site. If not you won;t get my updates. Blame Google not me-I don't know why they want to keeo my followers-like what are they going to do with them–REALLY.
These are cute! I linked up to this project today — thanks for sharing!! 🙂
Oh that is GREAT! just clicked to follow!
http://www.creativejuicesdecor.blogspot.com
I love it but please tell how to make it dry erase? I dont understand how fabric would work>
I love it but dont understand how it works as a dry erase board, please tell
Very nice, you put fabrics together really well. I need to do more stuff like this. I continue to be inspired by fellow bloggers.
I LOVE this idea! Now I just need to find a frame I like…