I asked what people wanted to see more this year and several said refashions. So here is refashion that I did!

This is how I made it:
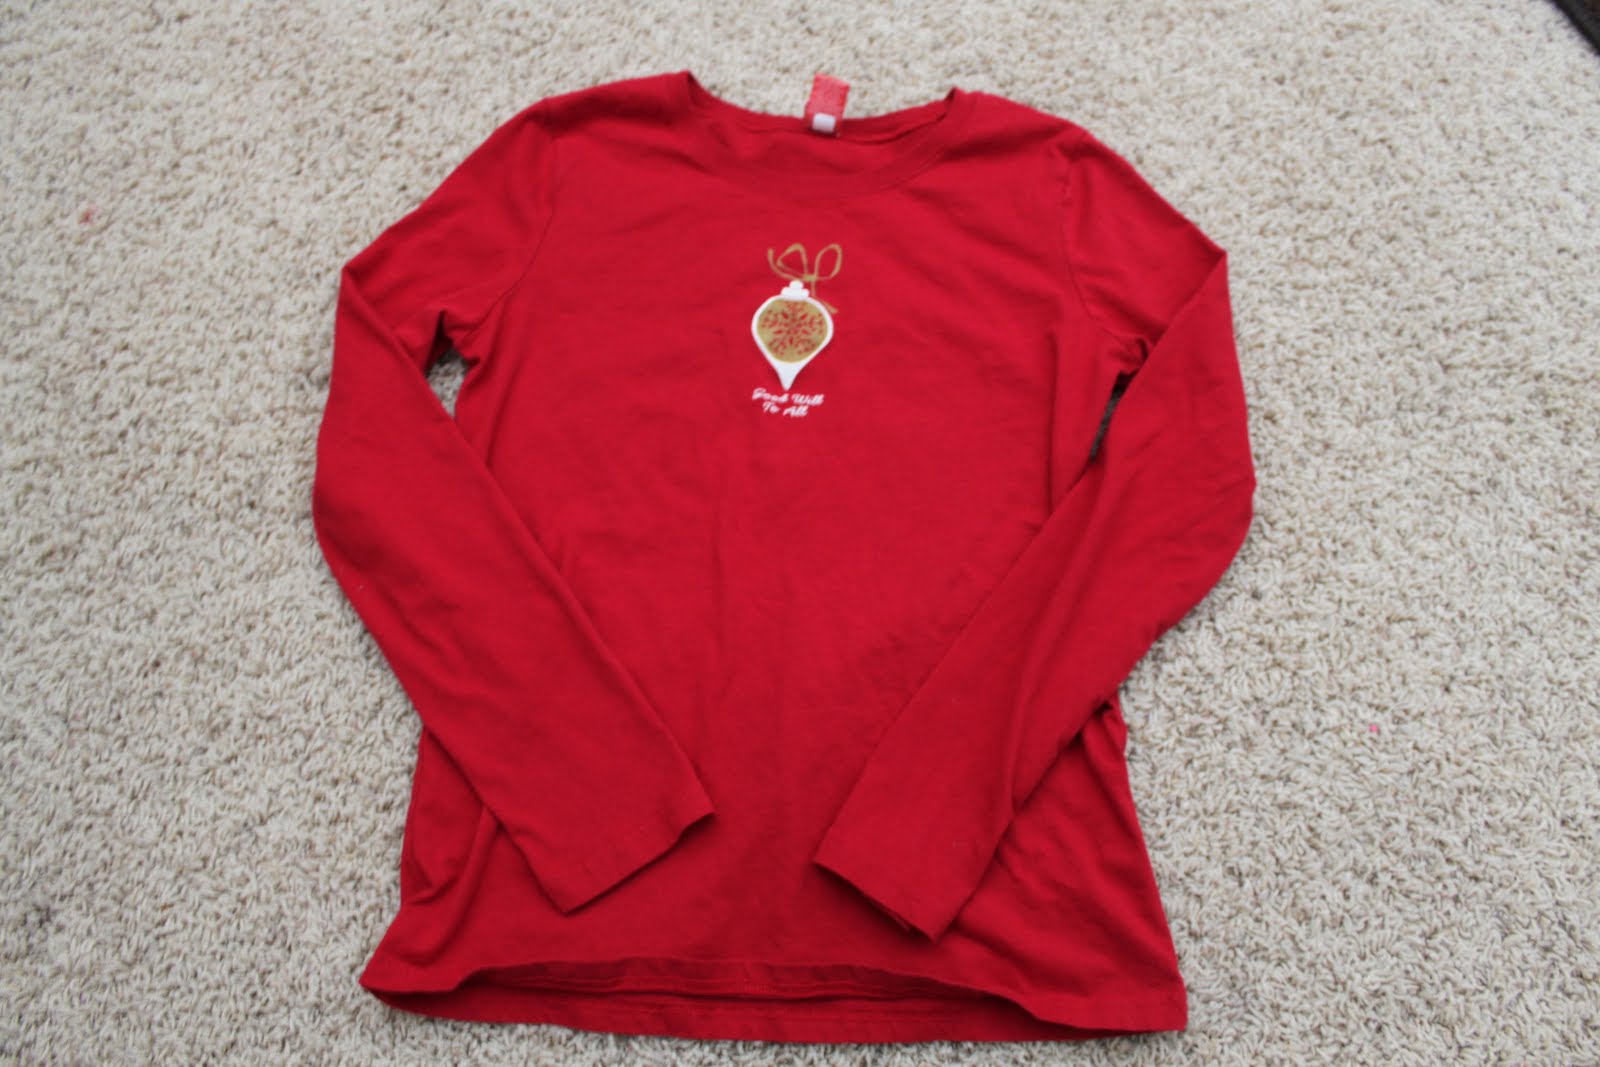
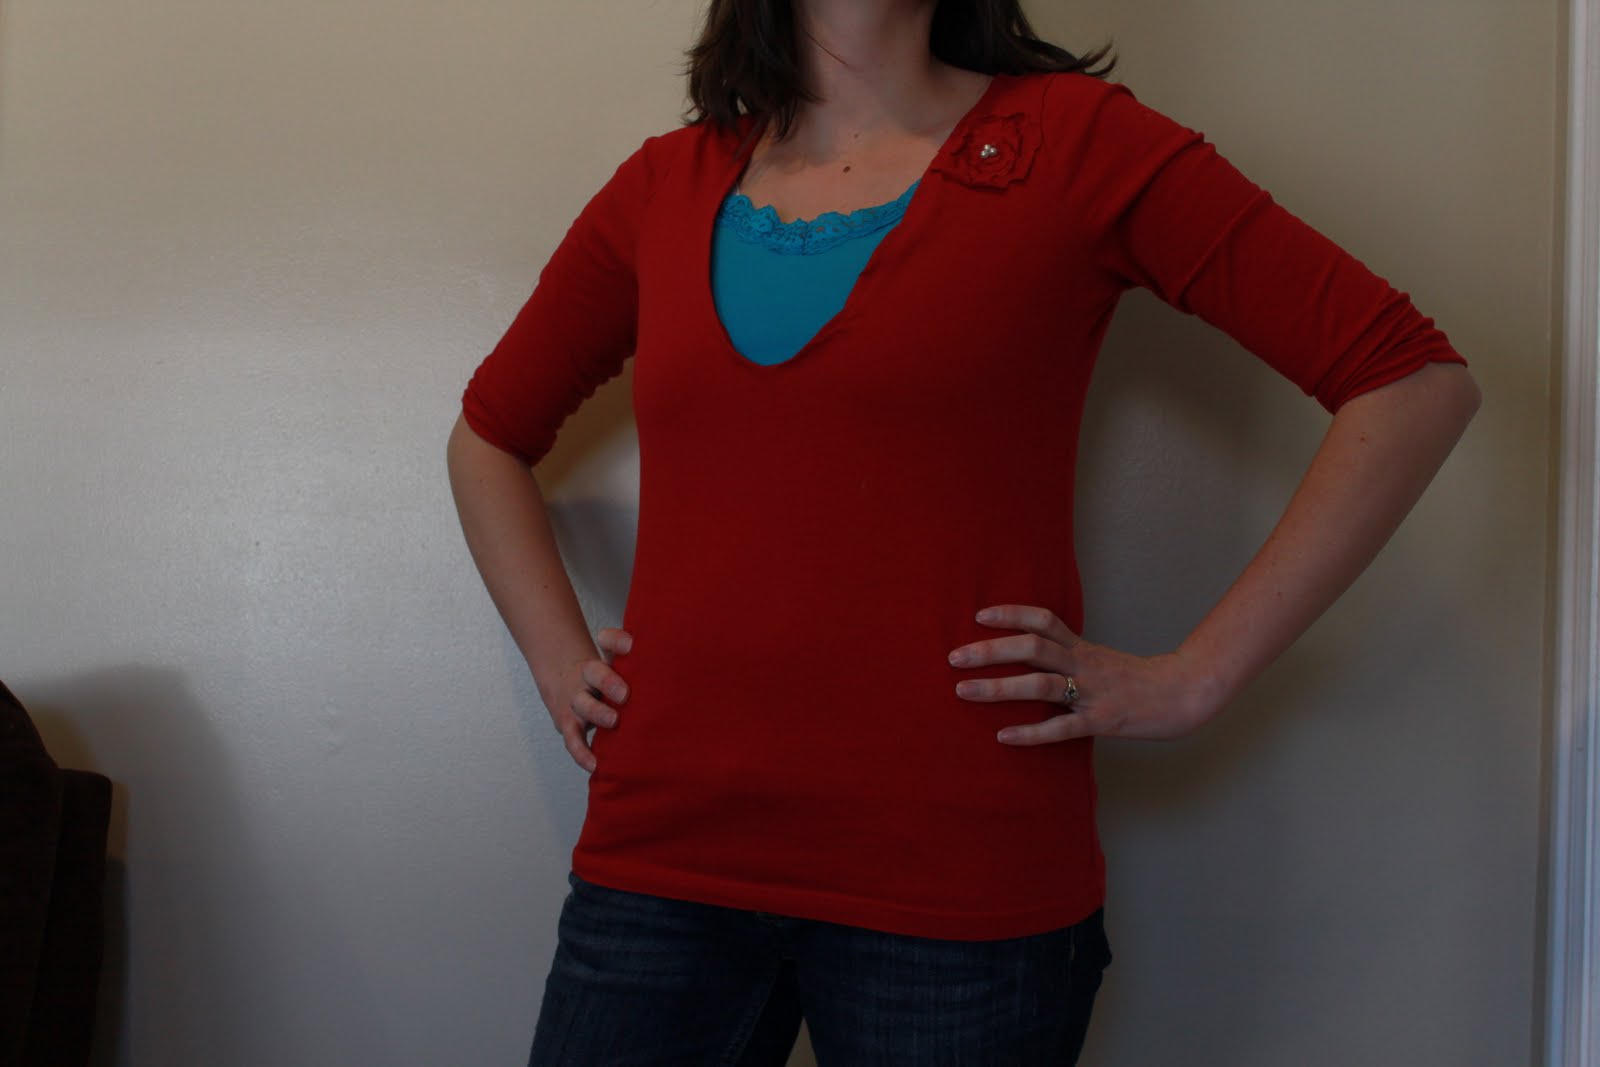
1) I got this Christmas shirt for $2 on clearance
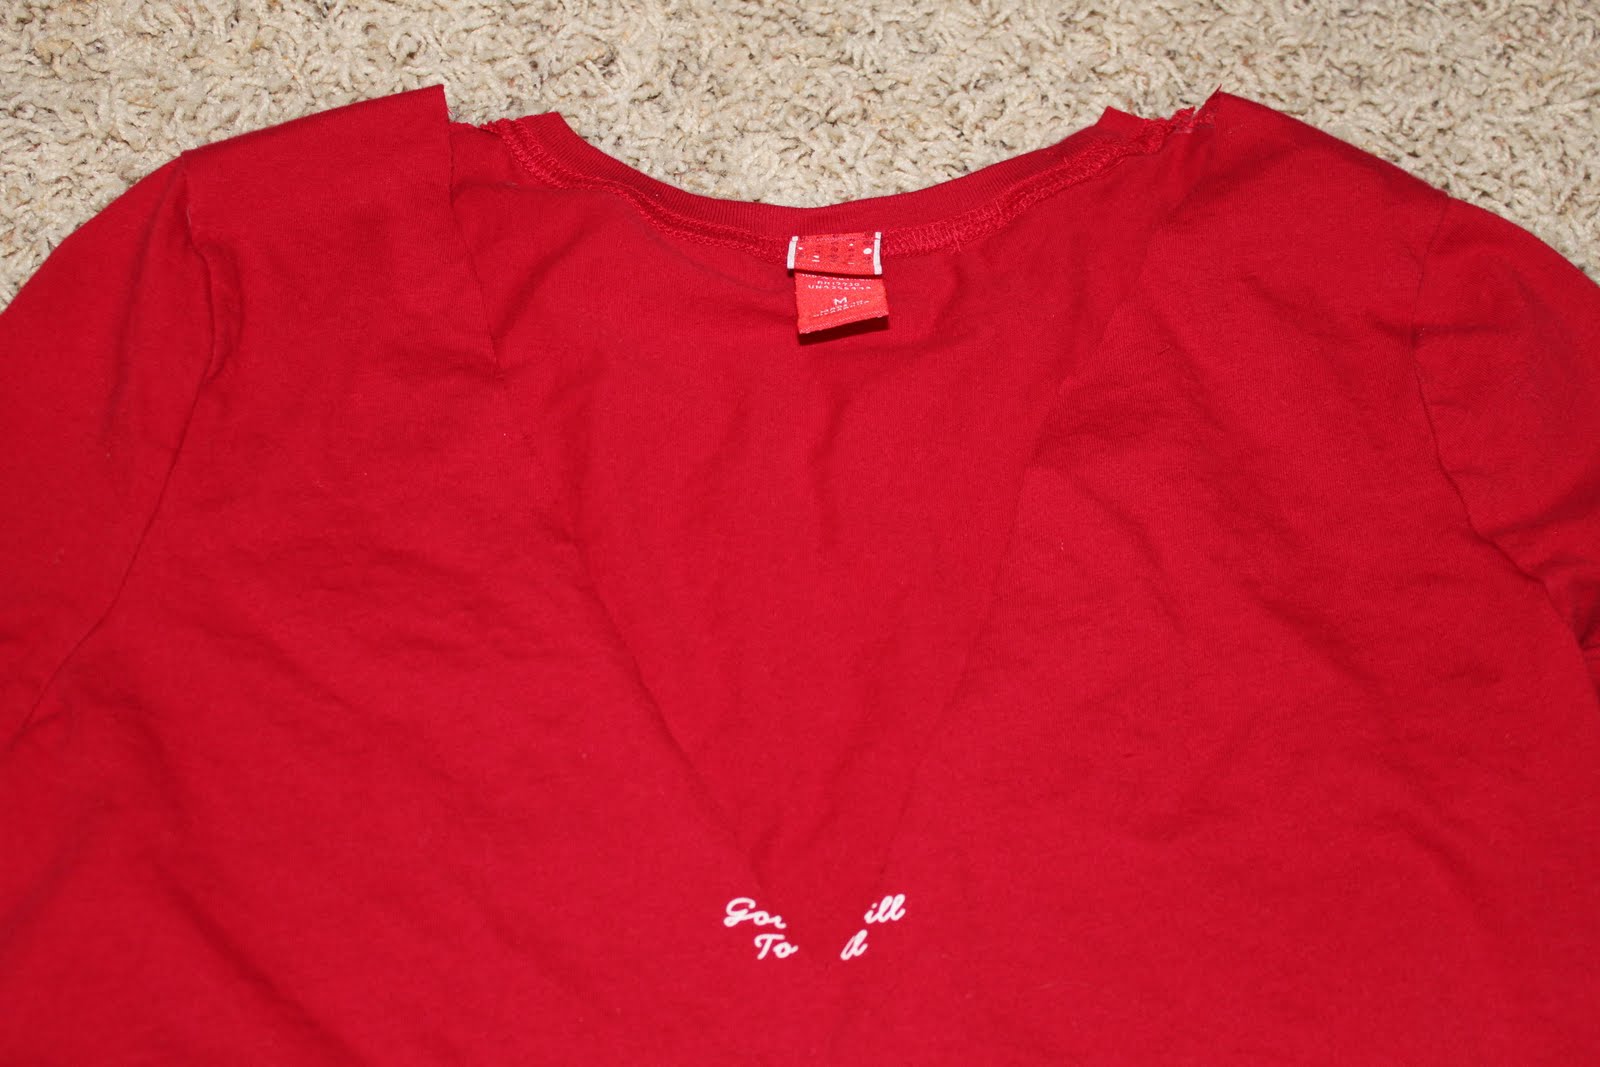
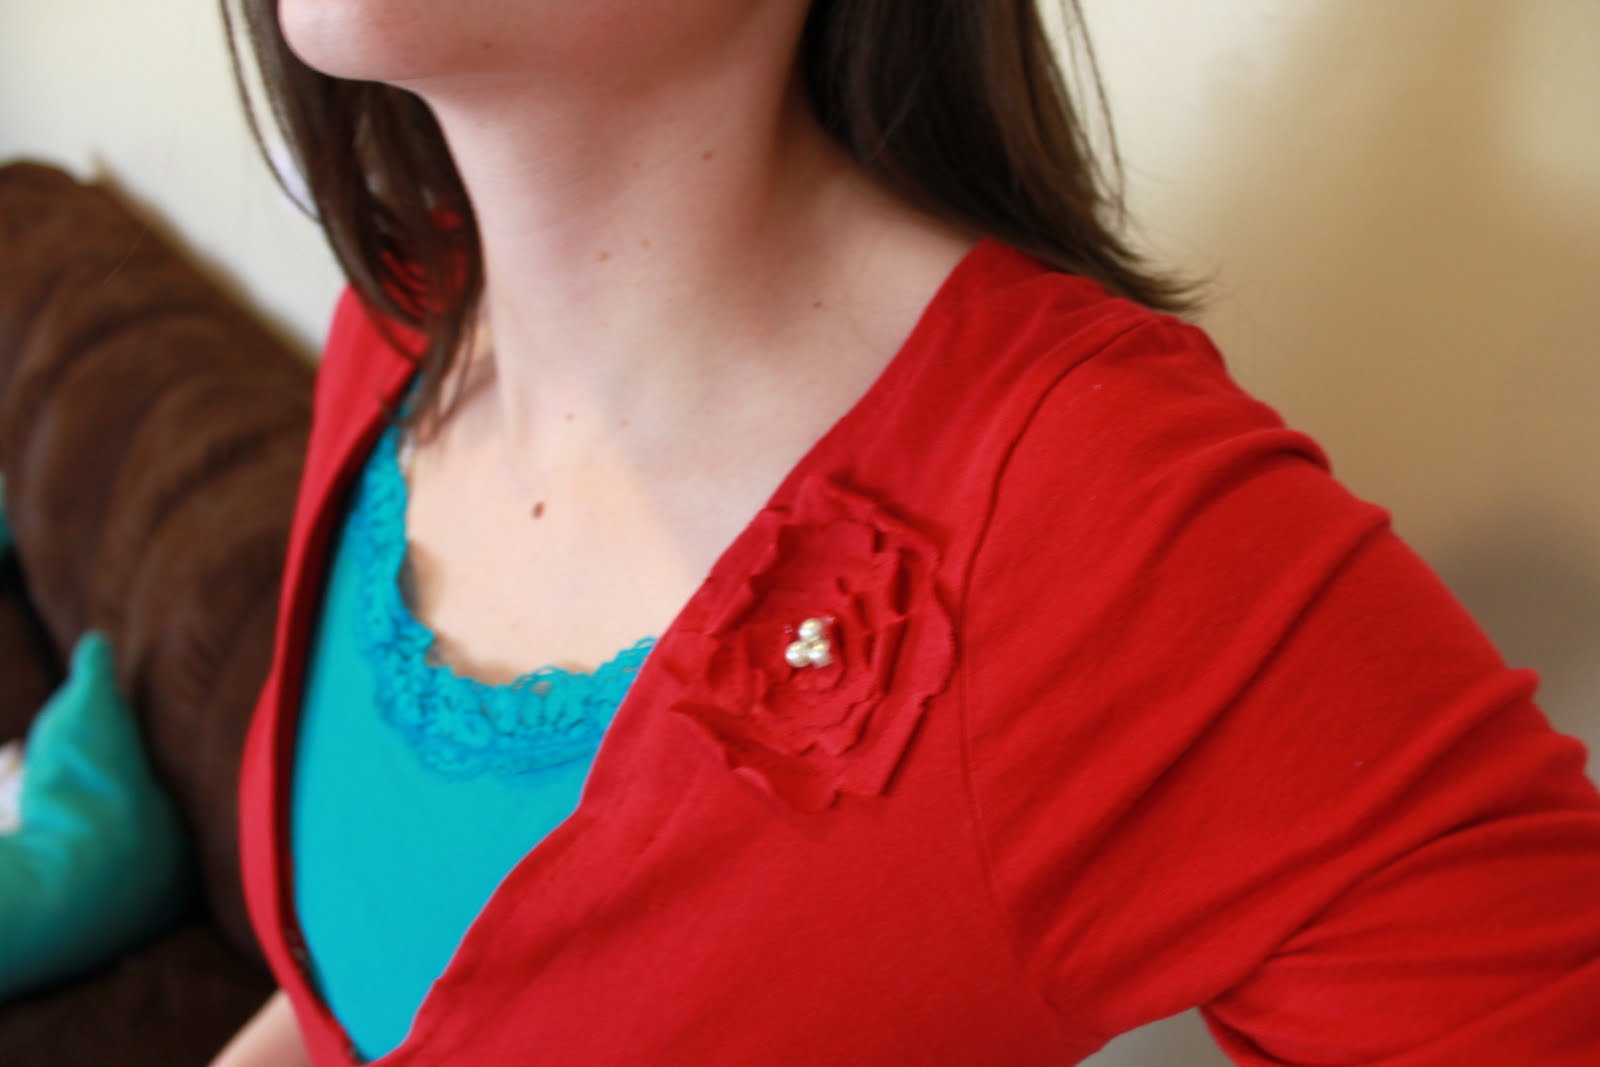
2) I cut out the design and hemmed the neck to a scoop/v neck
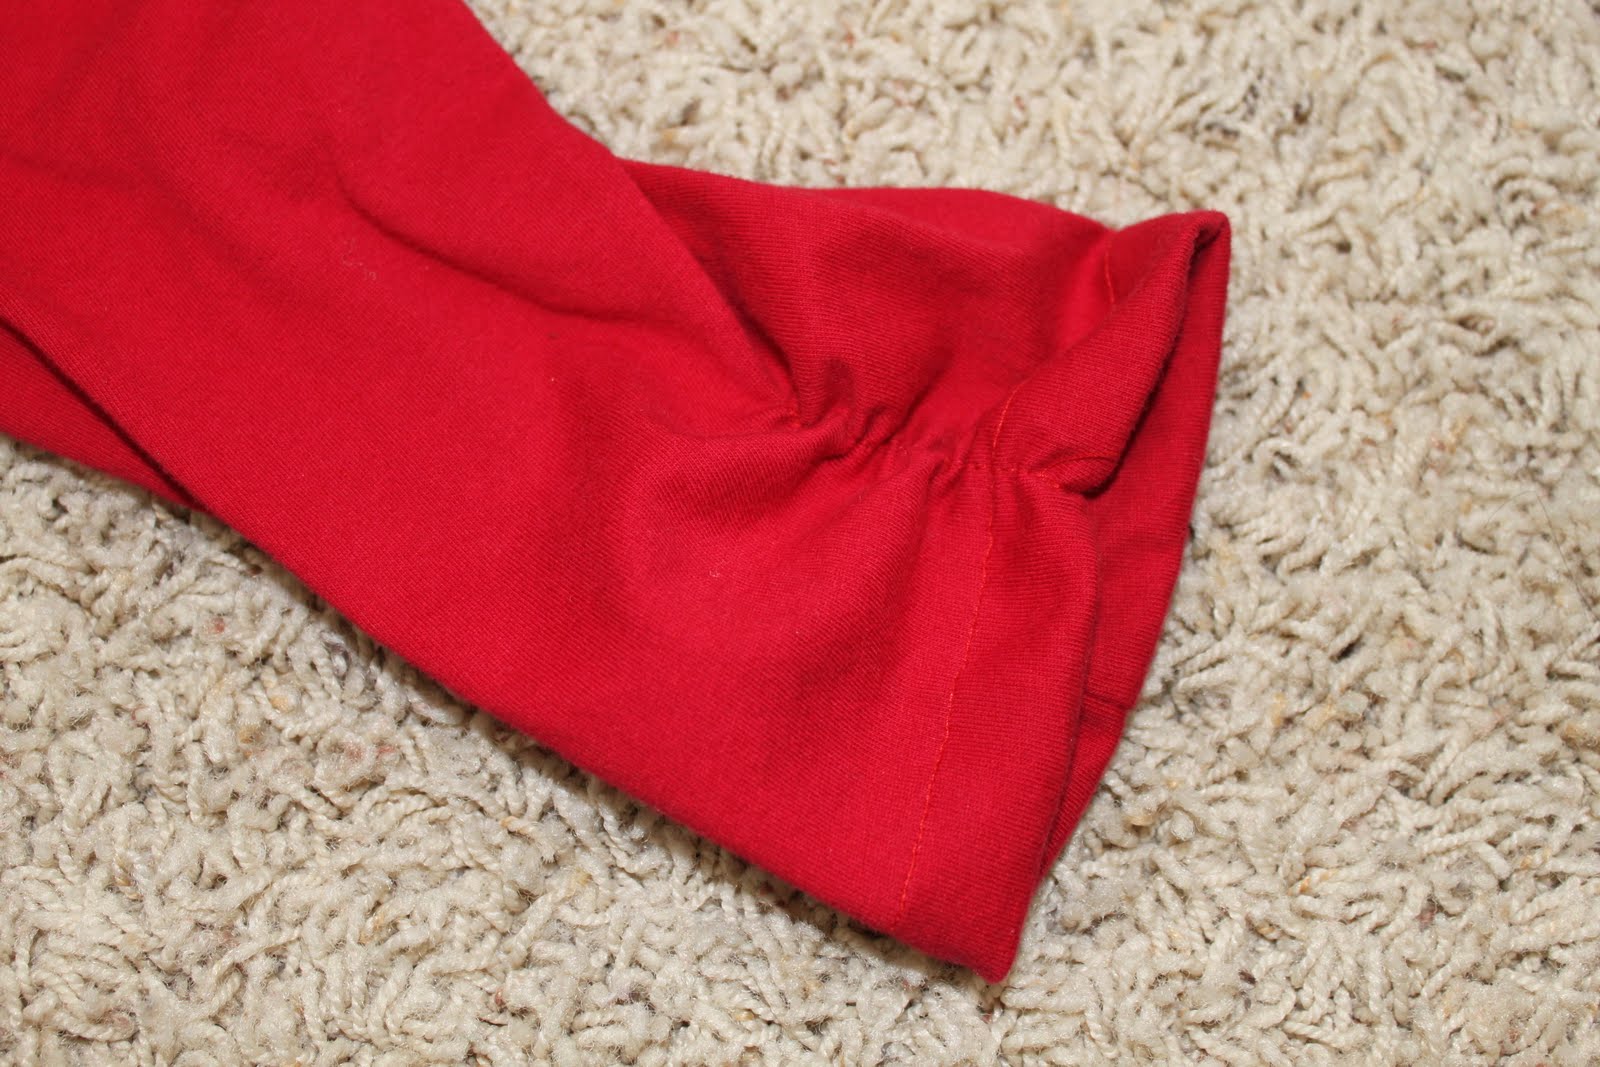
3) I then made the sleeves 3/4. I hemmed those and gathered about 3 inches on them with elastic thread.
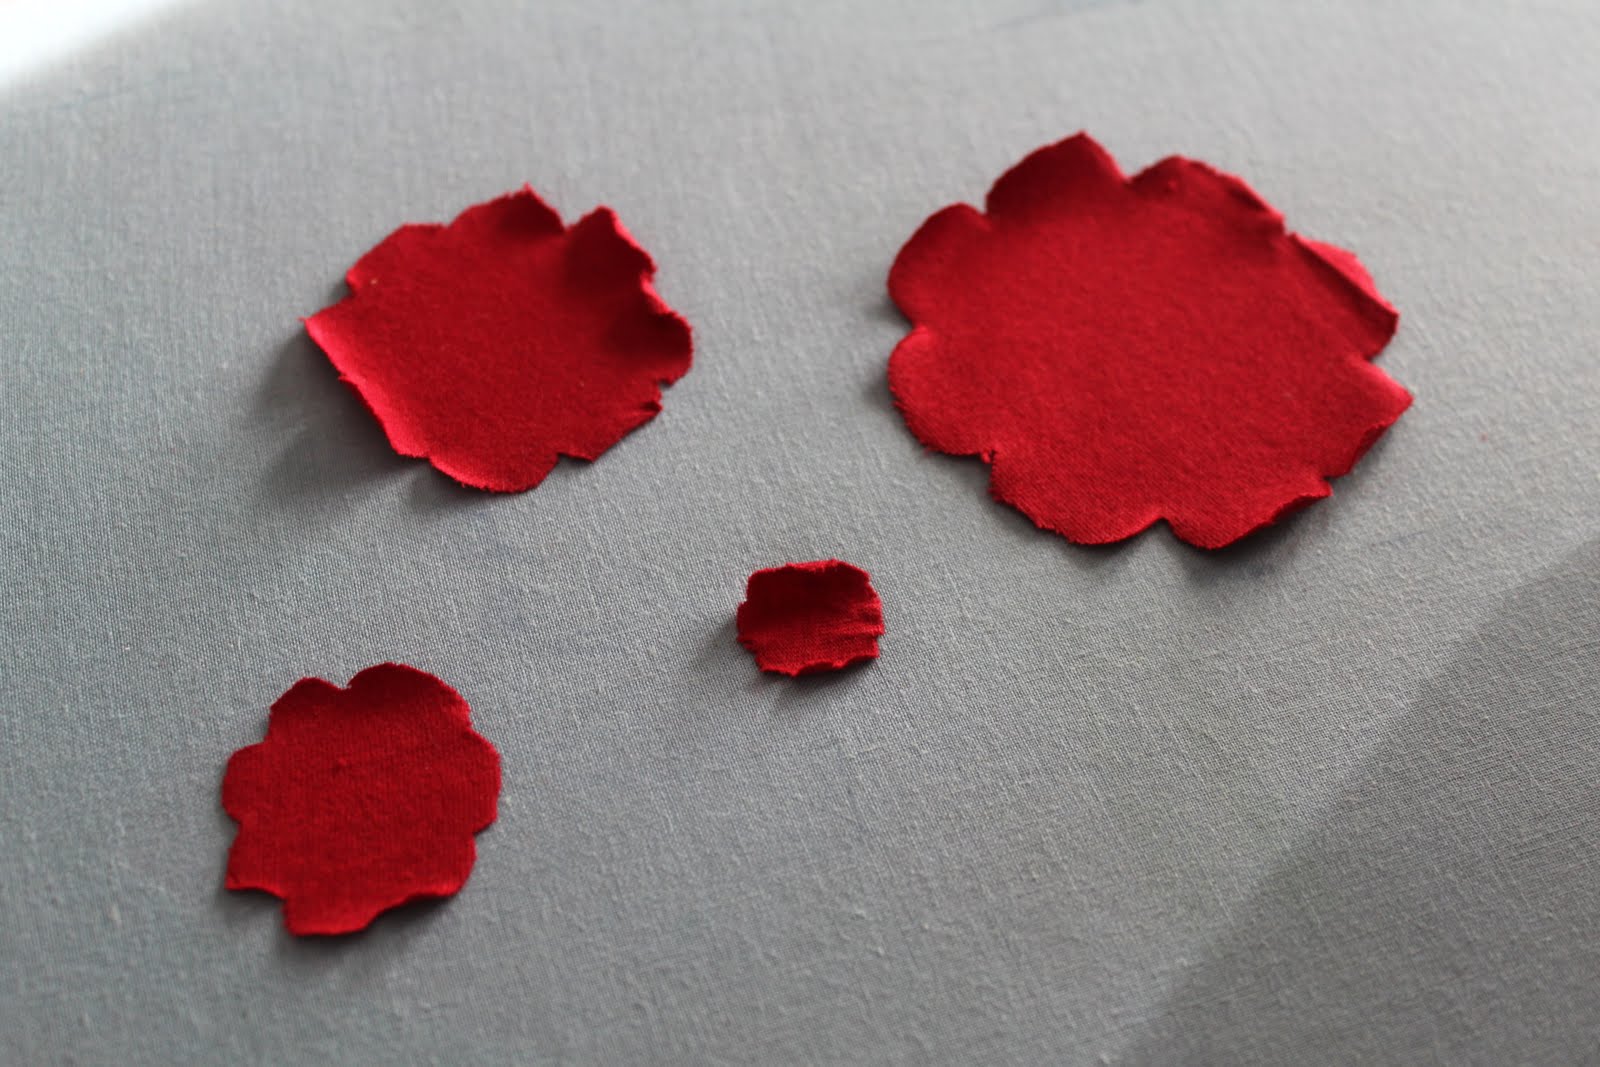
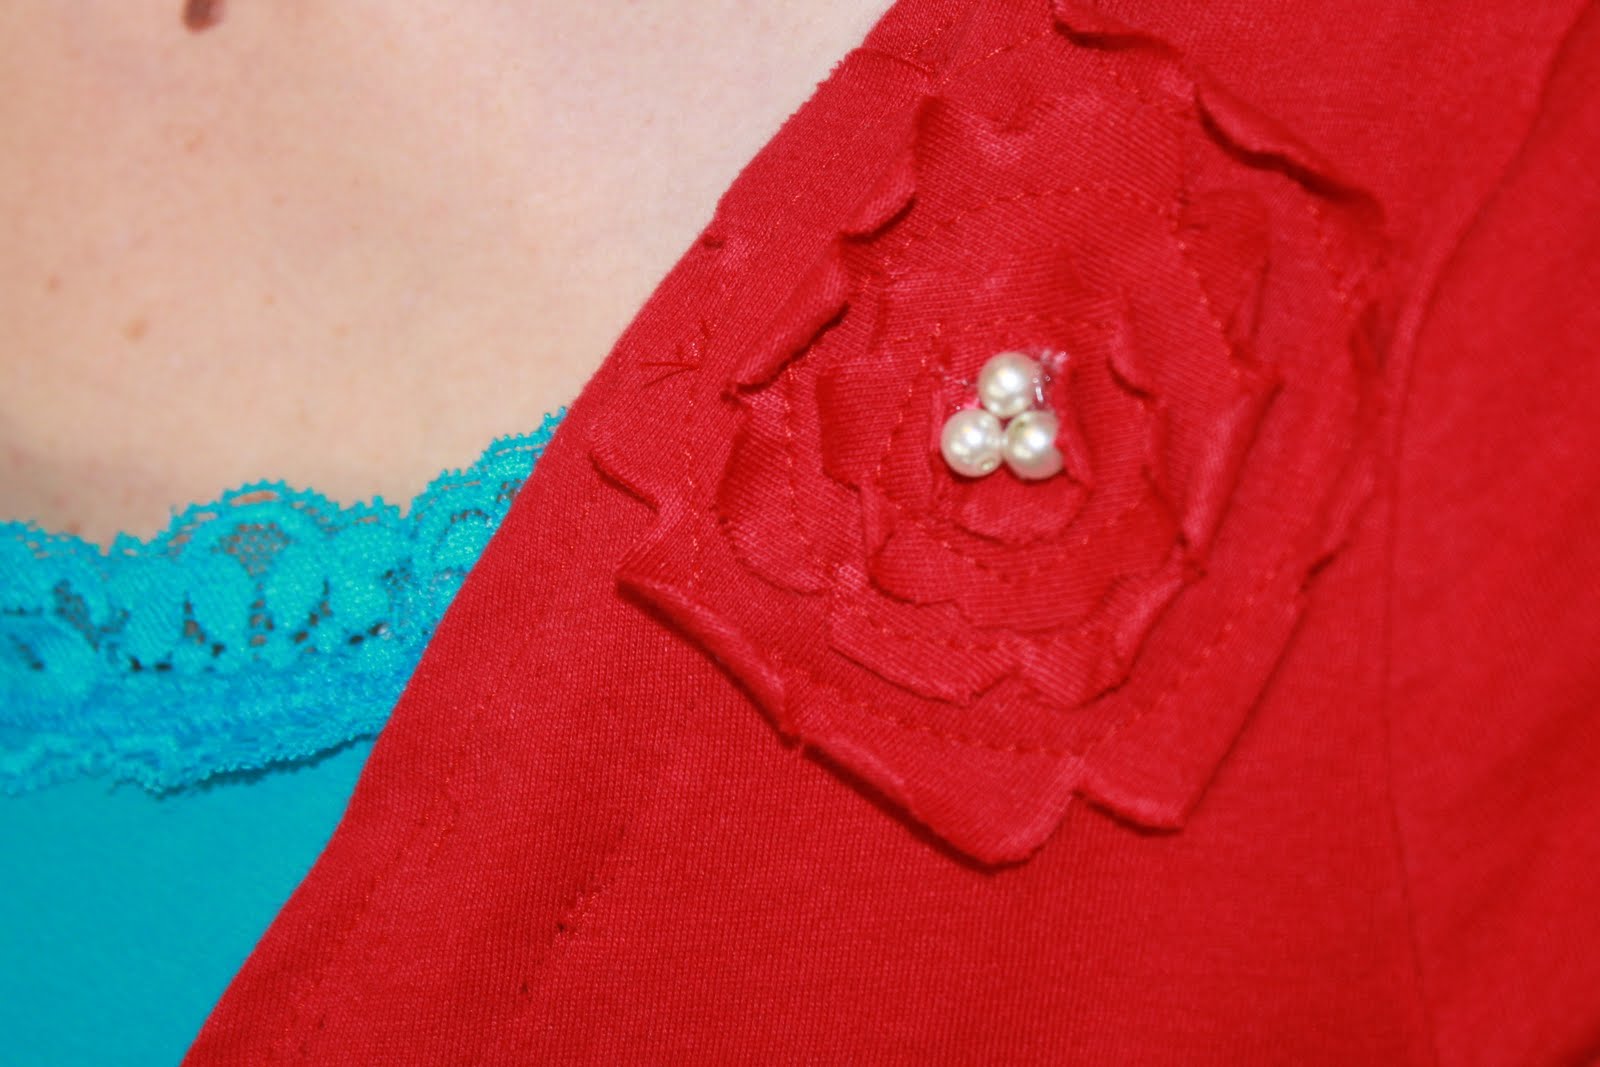
4) With the fabric from the sleeves, I cut out some flowers. I actually used my Epic 6 and nesting blossom die cut to cut the fabric, it worked pretty well.
5) I then sewed all the flowers onto the shirt.
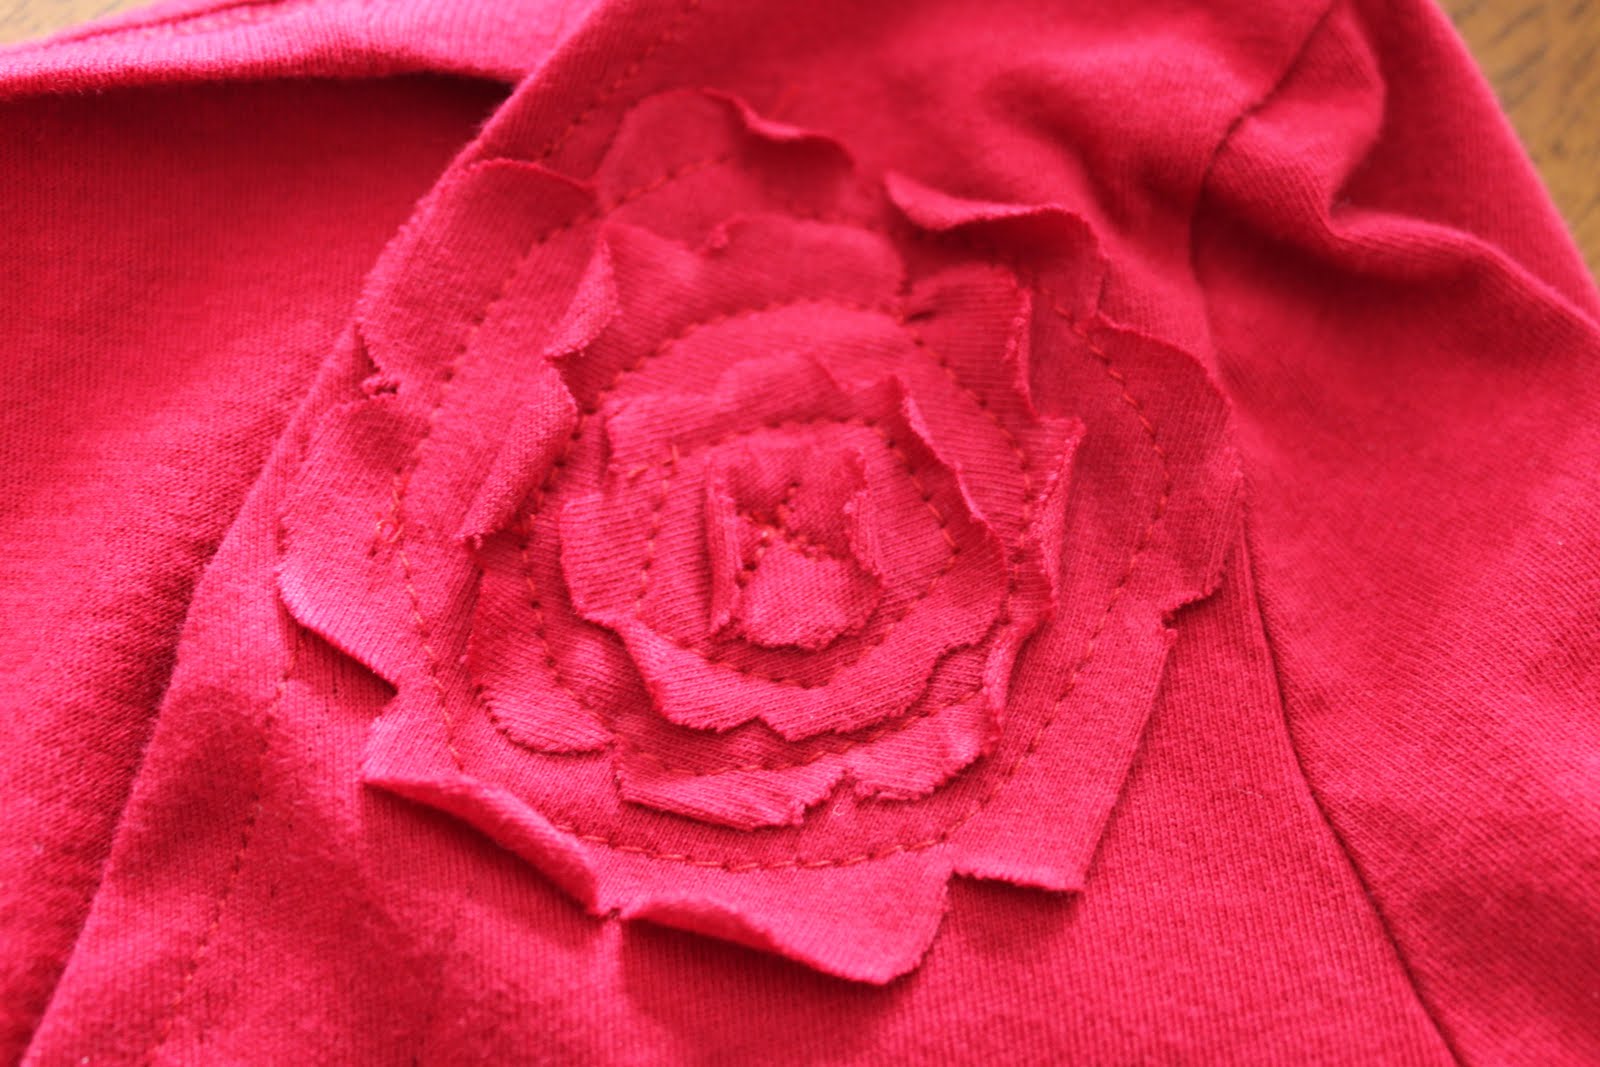
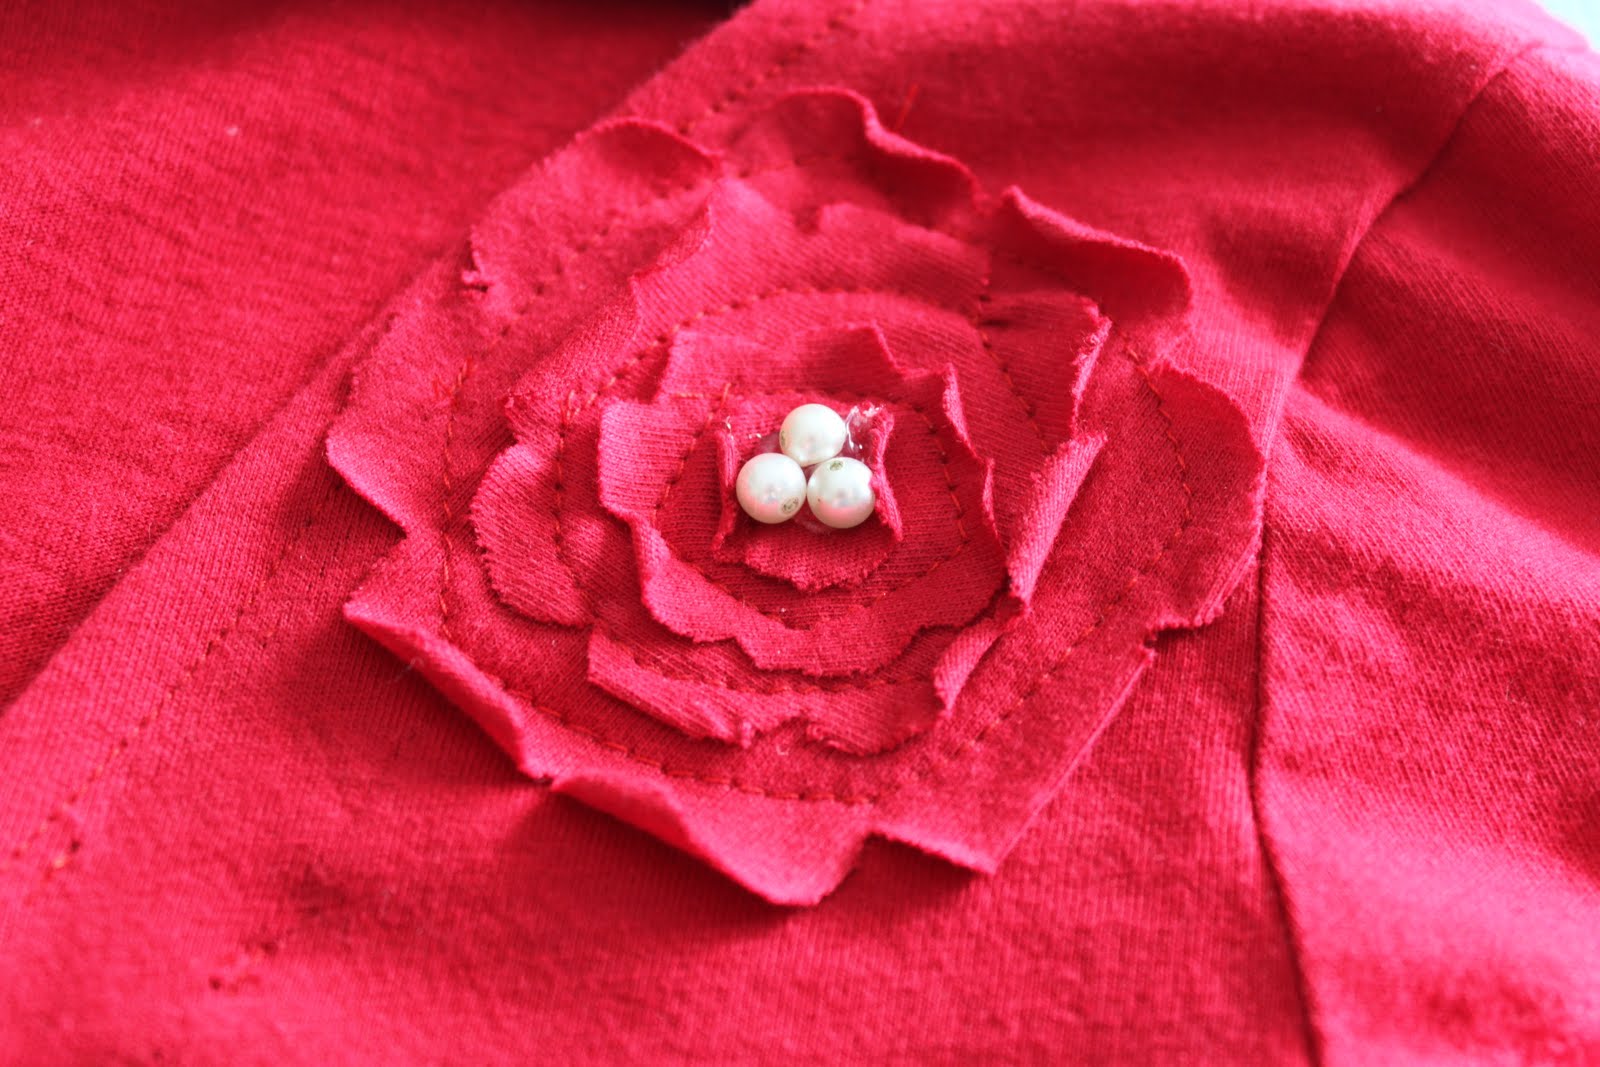
6) I then glued some pearls onto the flower
And that’s it! Not too bad for a $2 shirt, right?
Sorry for the dark picture, self portrait….
Here’s a close up of the flower

Very cute! I love it.
Looks great!
That turned out really cute! I love $2 shirts too! 🙂
Very cute!
What a steal! And such a creative refashion!
-caroline @ c.w.frosting
Check you out! You turned something Drab into Fab! I would love if you would consider linking this up to my "Drab to Fab" Link Party this Friday 🙂 The theme is turning the ordinary into extraordinary using a little creativity. This post embodies that, so I know my readers would love to see it! Here's a link for more info on the party.
http://www.amynjesse.com/p/drab-to-fab.html
Hope to see you Friday!
This is great! I love refashioning and your shirt turned out so cute. Thanks for sharing it.
What a fantastic idea… I will think twice when I see those clearances! So cute! I found you at Truly Lovely!
Carlee
http://www.ladybirdln.com
Wow you are very creative. Awesome!
Thrifted
That's really nice. I don't think I would ever have thought to cut out a design on a shirt like that, but it makes so much sense. I'm going to keep my eye out now.:)
Shiloh
everydaygameplan.net
You rock, girl! Thank you so much for sharing this at Drab to Fab! It's perfect.
Have a great week 🙂
that is quite nifty!
That turned out great! I love re-purposing! The flower is a super cute addition.
Very cute!
You should join me for Handmade 52! http://www.raisingoranges.blogspot.com –Katie
This looks like a fun project!
Please come share this at:
http://www.thezkids.blogspot.com
Awesome Kaysi.. A very simple and great idea!
Thanks for linking up at friday fun party..
Love
Hani
Girl, you always rock a refashioning project!! I love your red and aqua, too!! Thanks for sharing at oopsey daisy!
Awesome! This will change the way I look at clearance t's! Thanks for linking yet another awesome tutorial to Totally Tutorial Tuesdays…you never disappoint!
Great way to repurpose 🙂
Love for you to share this at JAQS Studio Linky Party:
http://www.jaqsstudio.com/2012/01/made-by-me-16-linky-party-and-features.html
So simple, but so cute! I think even I could pull this off! 🙂
I'm featuring it today at Creations by Kara. http://www.creationsbykara.com/2012/02/look-what-i-made-linky-party-2-1-2012.html
I am featuring this idea tonight.. 🙂 be sure to check out other features, link up and grab your button..
Have a great day!
Oh!!! Cute!!! Great idea!
Would you PLEASE link this up on my blog?
http://thediydreamer.blogspot.com/2012/02/from-dream-to-reality-linky-party-3.html