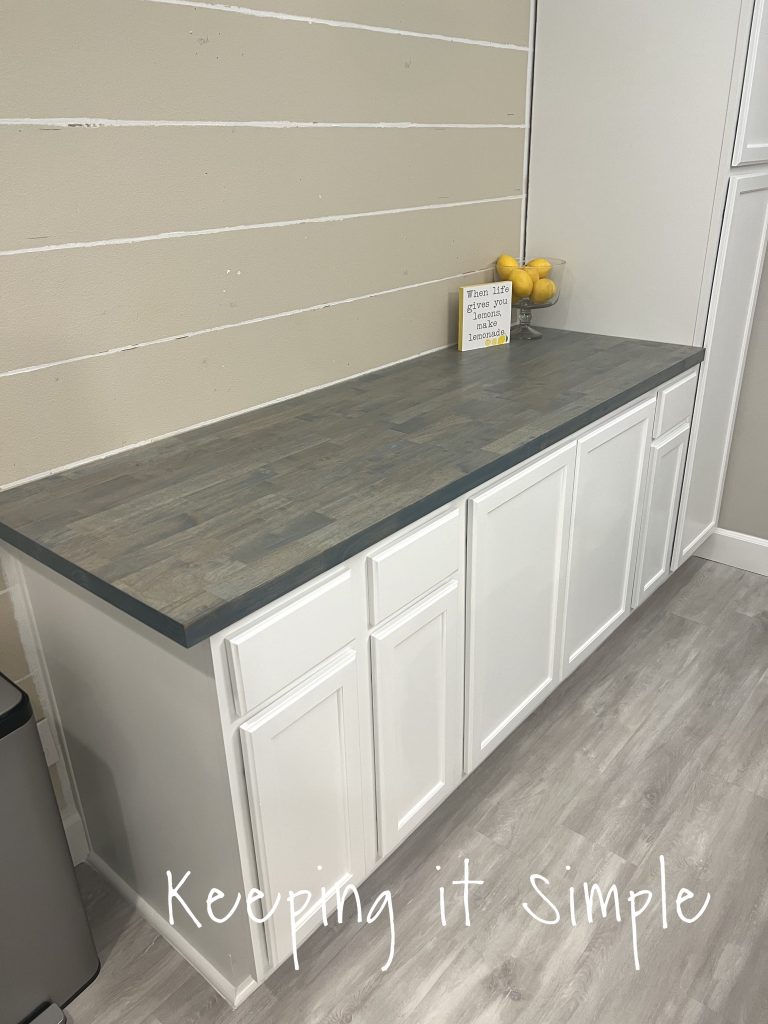
Dining Room Cabinets- How to Add Extra Kitchen Cabinets
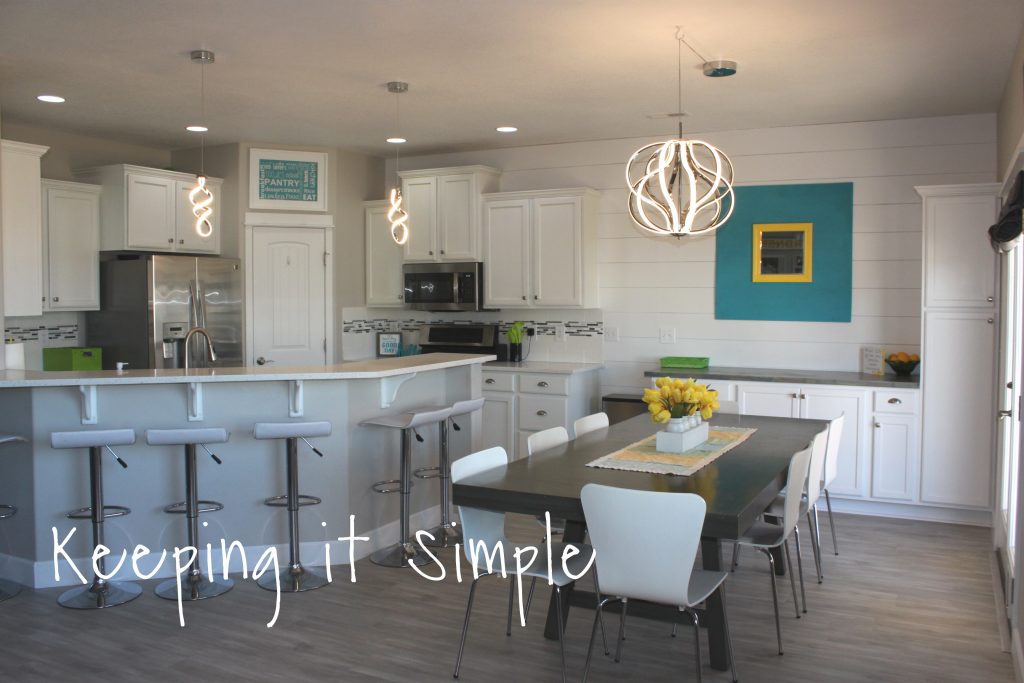
We have a storage problem in our house. We have a nice big house, with lots of open space but we do not have very big closets. Our pantry is small and we don’t even have a coat closet. So we have to come up with storage solutions all the time. Since we redid our floors this past year, it has opened up some more options in our dining room. Before we did the floors, there was a transition in between the living room and dining room, so the space in there was limited. I didn’t want to put anything on the dining room wall because it would make the area feel crowded, especially since we have a big table. Now that there is no transition, we could add something along the wall. For extra storage and counter space we decided to add some extra kitchen cabinets. I never thought about having dining room cabinets before now, but I am so glad that we did because it makes a HUGE difference in our kitchen. The extra cabinets really adds lot of storage space and the counter is great for serving.
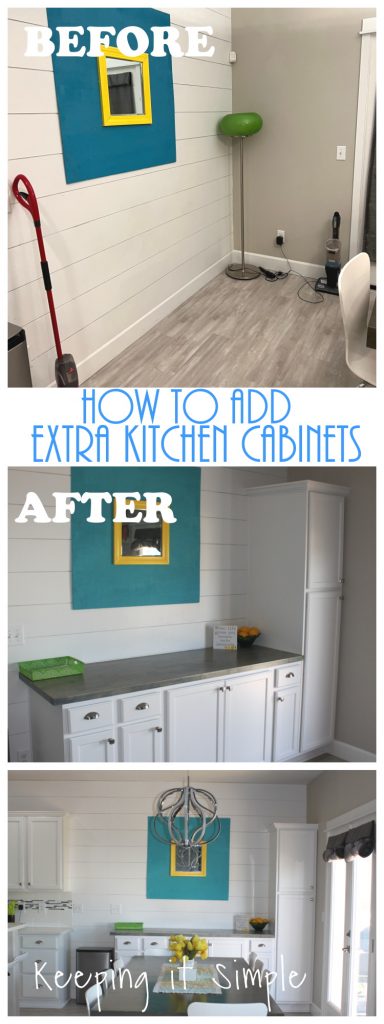
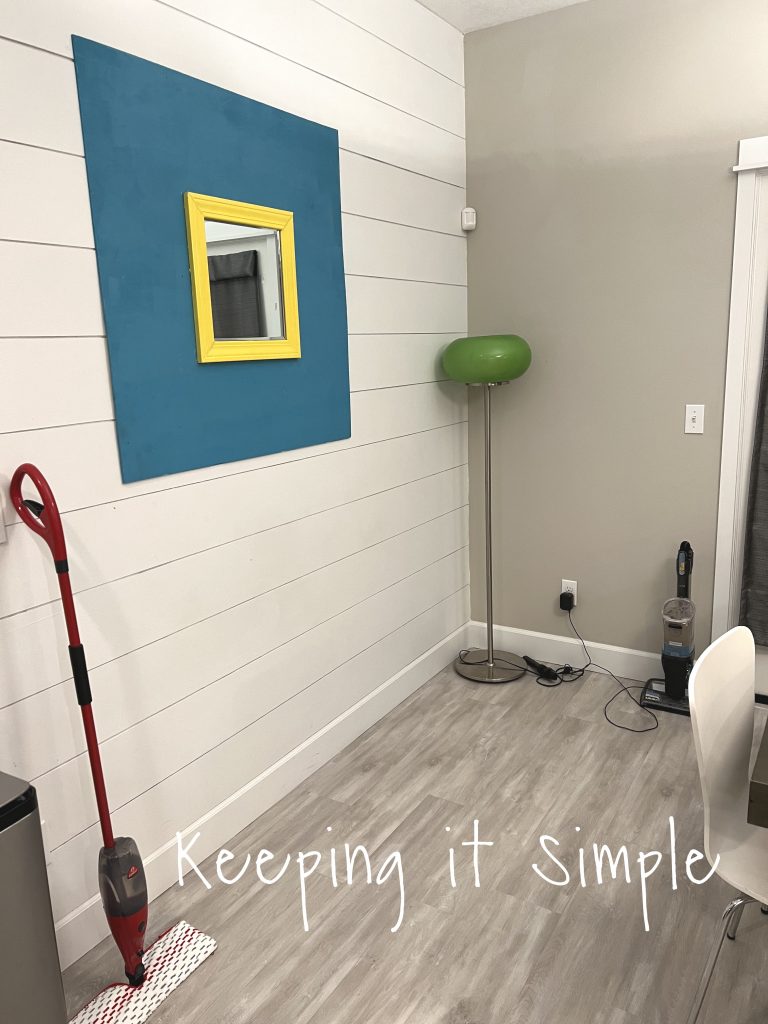
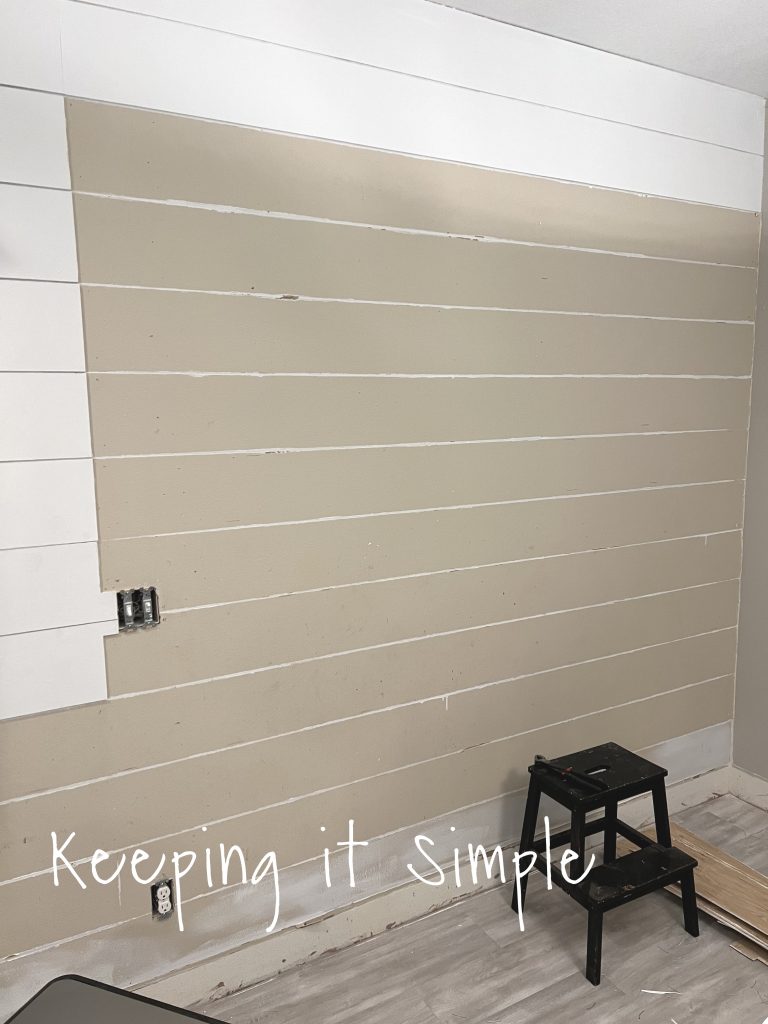
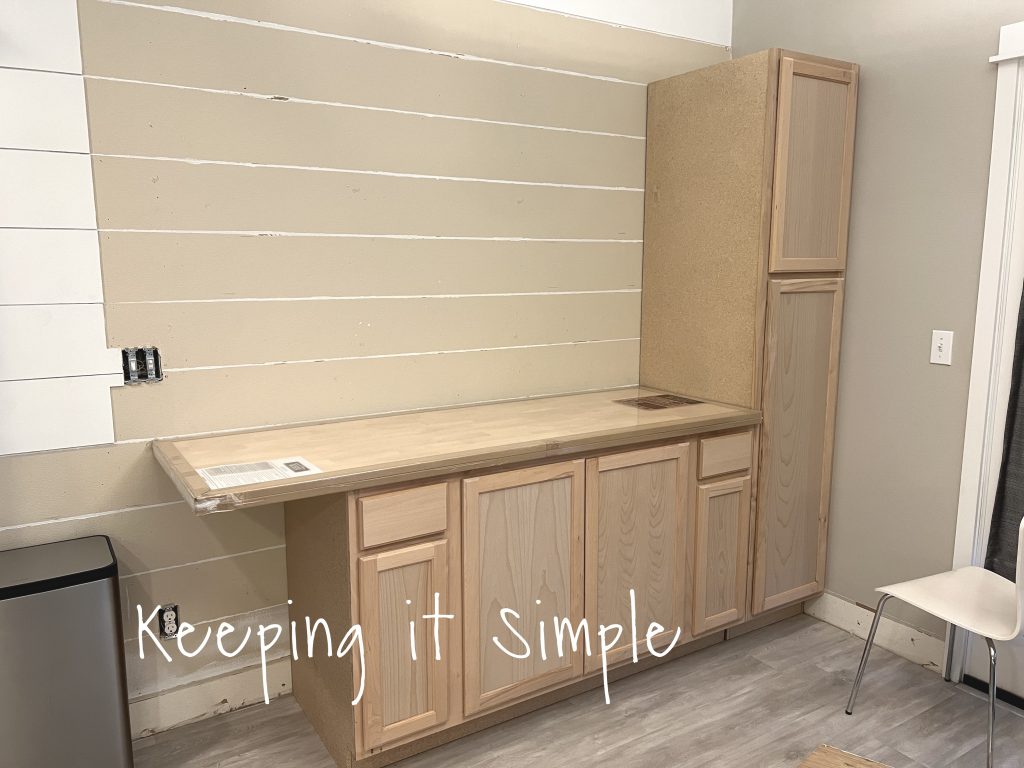
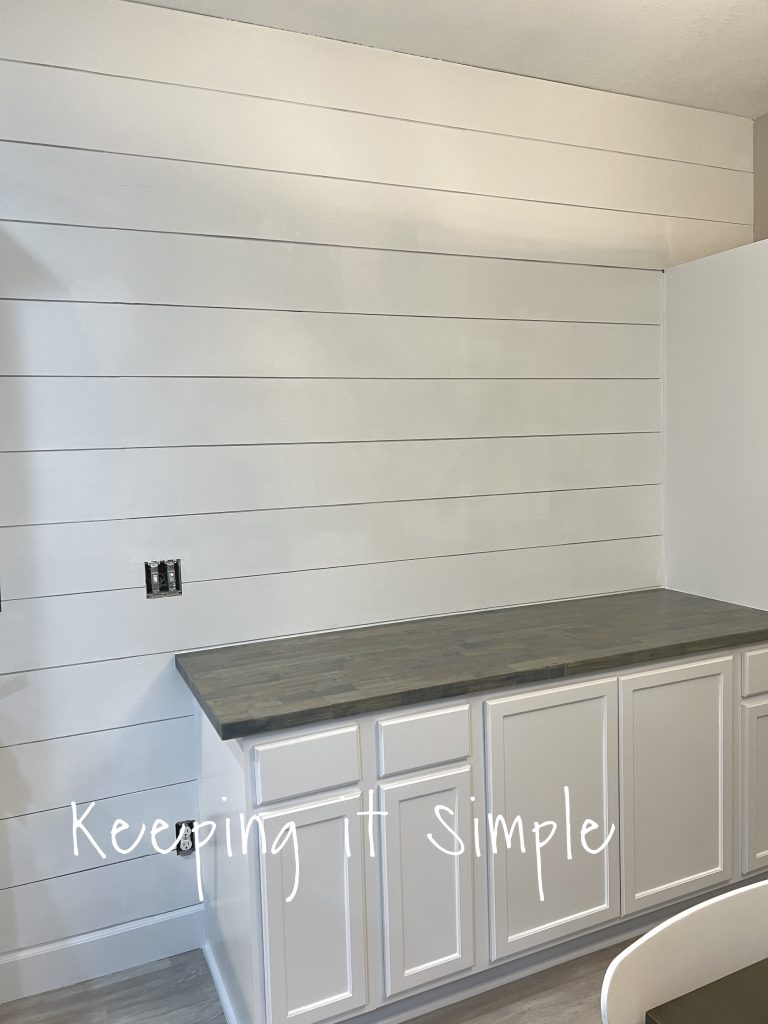
Here is a picture of the space before we put the extra kitchen cabinets in. It was just wasted space before.
This is how the space looks 95% of the time, I put my vacuum in the corner and my mop was just sitting out. Not super pretty.
This project was actually pretty easy to do and we were able to do it for under $1000. Considering how much storage space we got out of it, it was worth every penny!
This is how we added the extra kitchen cabinets in our dining room.
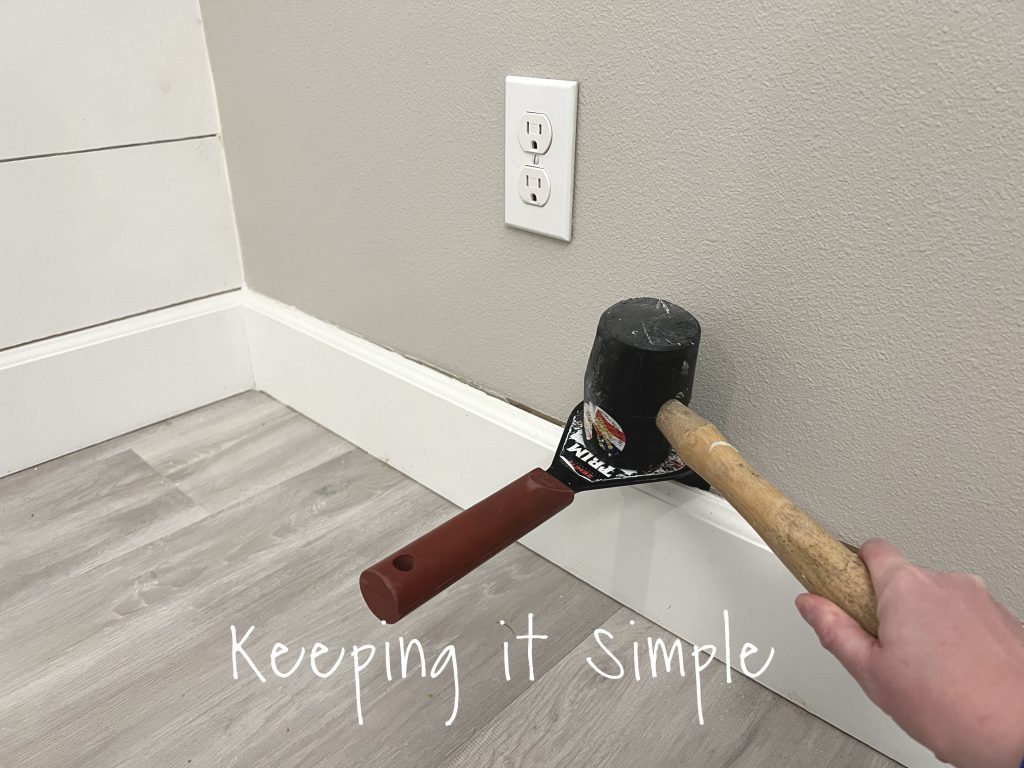
The first thing that we did was take off the baseboards and shiplap. These 3 tools are my favorite and they are a must have if you are doing any kind of DIY work in your house. The tools you need are a rubber mallet, trim puller and nail nipper.
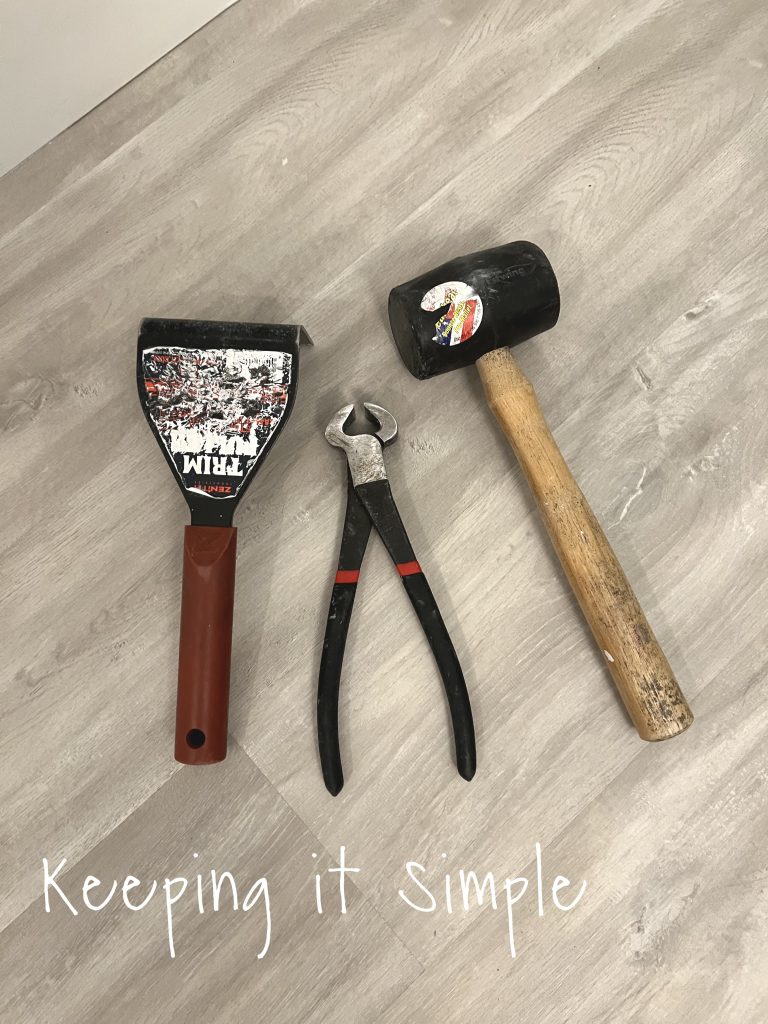
I used the trim puller and rubber mallet to take off the baseboards and shiplap. The trim puller is a must for taking off baseboards because it won’t damage your baseboards like a crowbar will.
Also, you will want a box cutter to cut the seal between the caulk and drywall, if you don’t do that, you can damage your wall.
After I took off the baseboards, I took off the shiplap. I removed all the nails from the wall and the boards with the nail nipper.
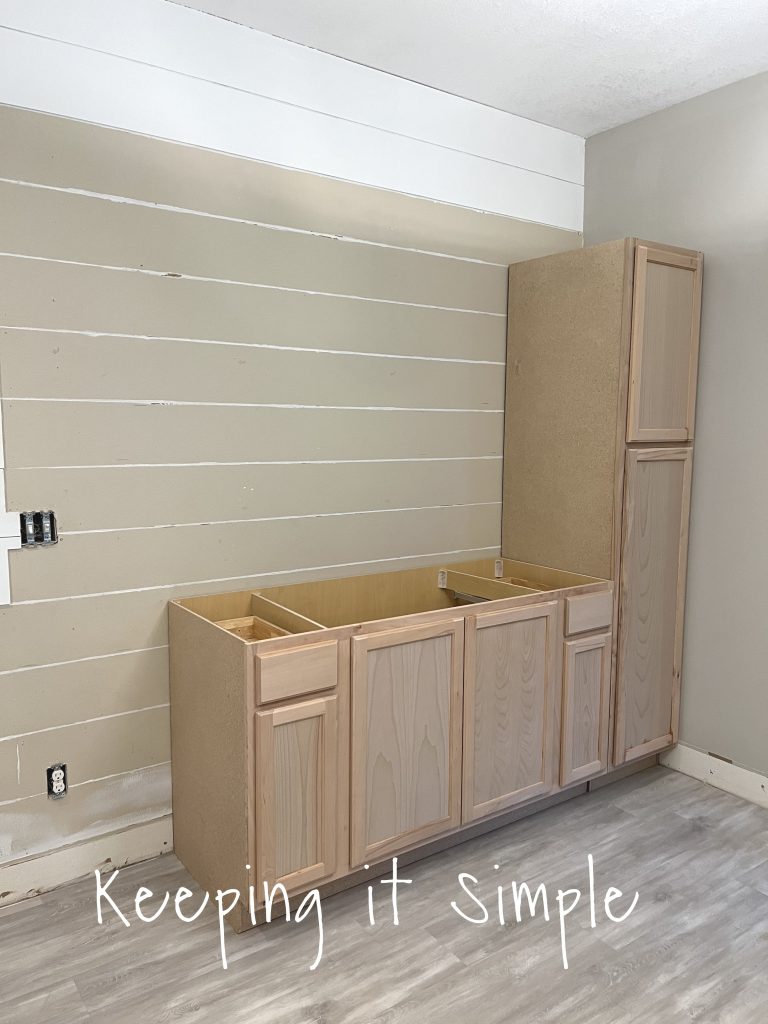
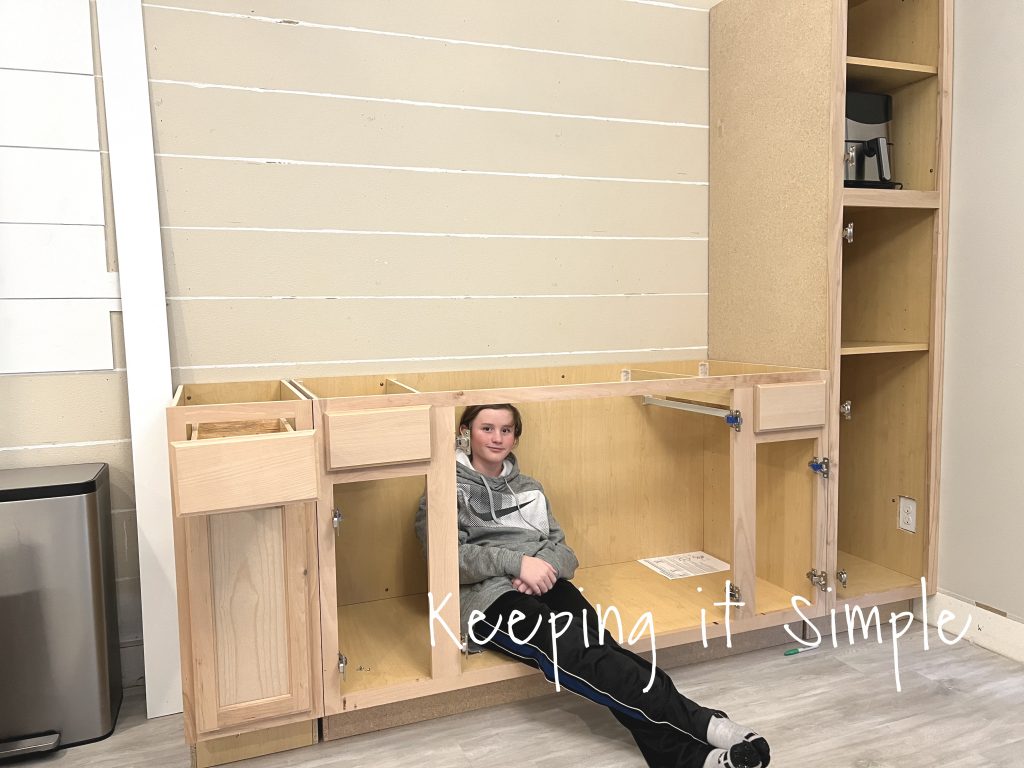
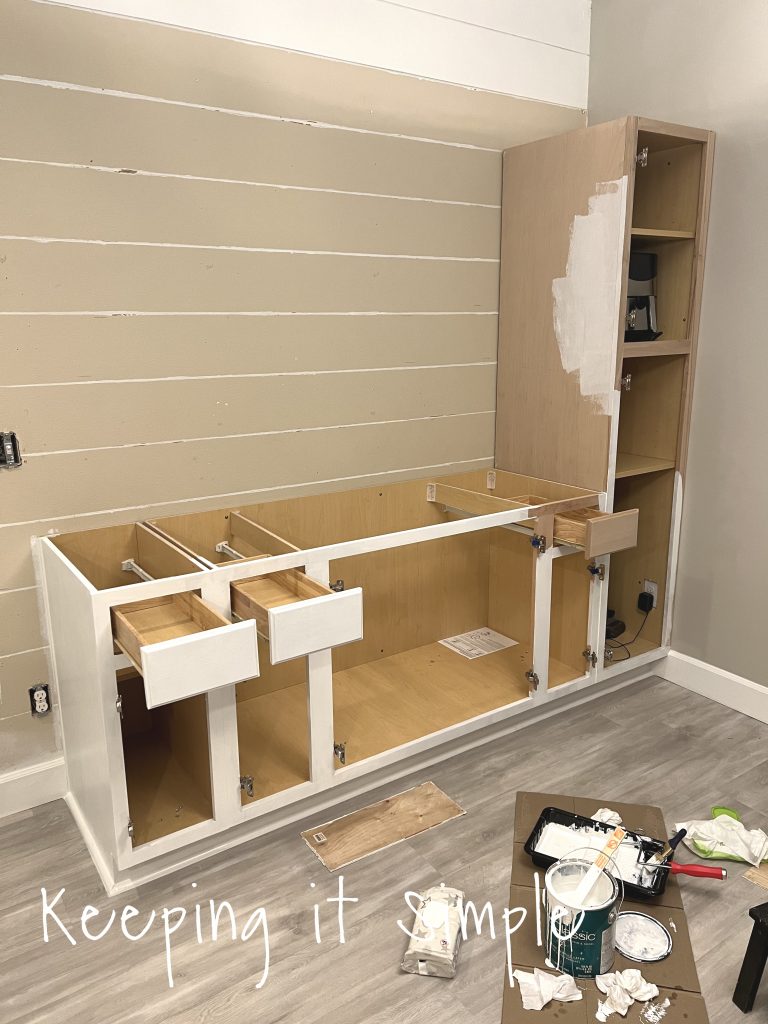
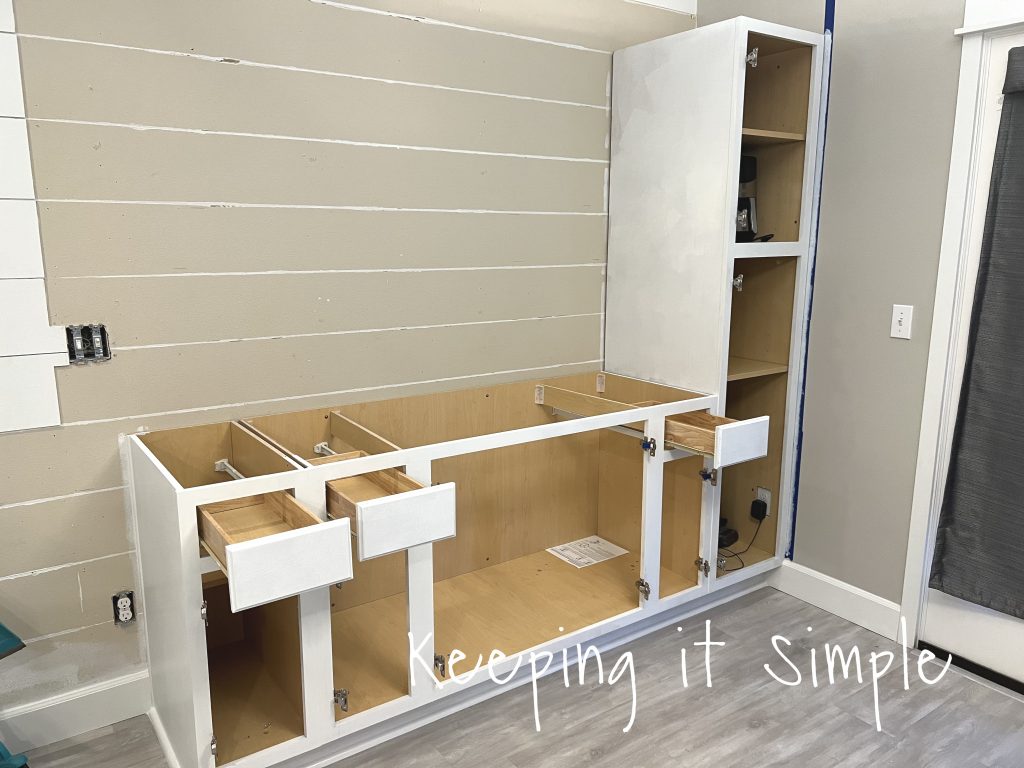
Now time for the kitchen cabinets. We headed to Home Depot and looked at all of the kitchen cabinets. We tried to find the cabinets that matched our kitchen cabinets the best and we found that the unfinished cabinets matched the best, so we got a few of those. I wanted lots of storage so I found ones that had a lot of room inside of them. We ended up picking out a pantry cabinet and then a 60 inch sink base cabinet. We chose the sink base cabinet in particular because the cabinet is wide open, without any shelves or walls. It was perfect for storage and that’s what we wanted!
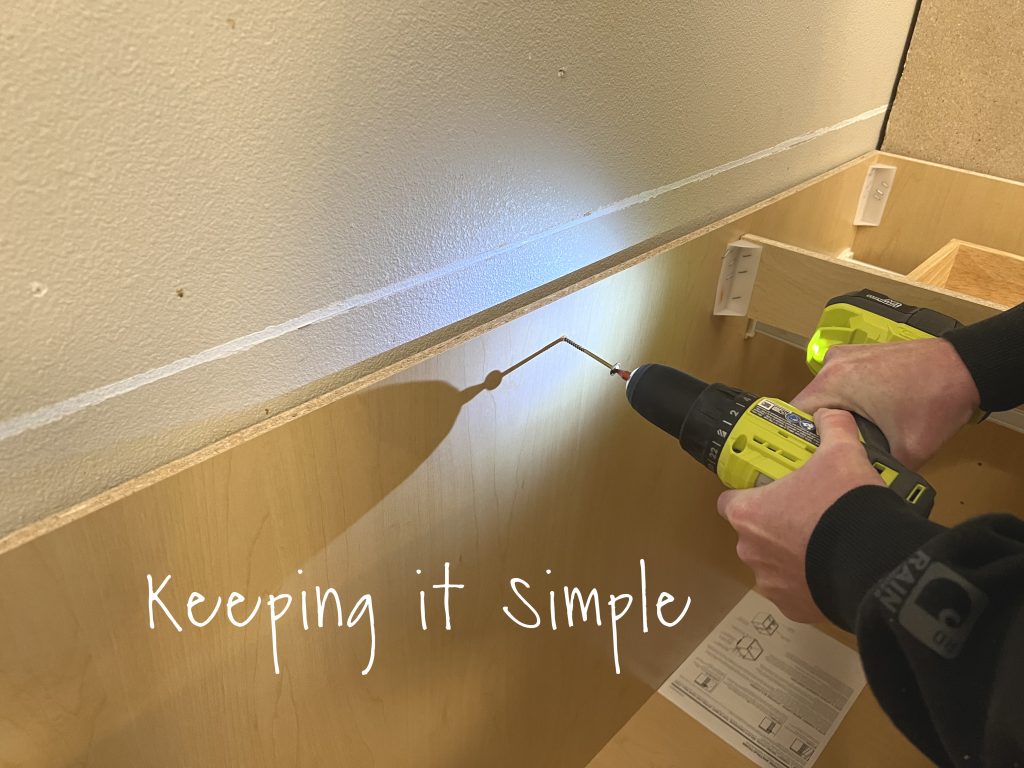
To secure the cabinets to the wall, we screwed them into the studs with cabinet screws.
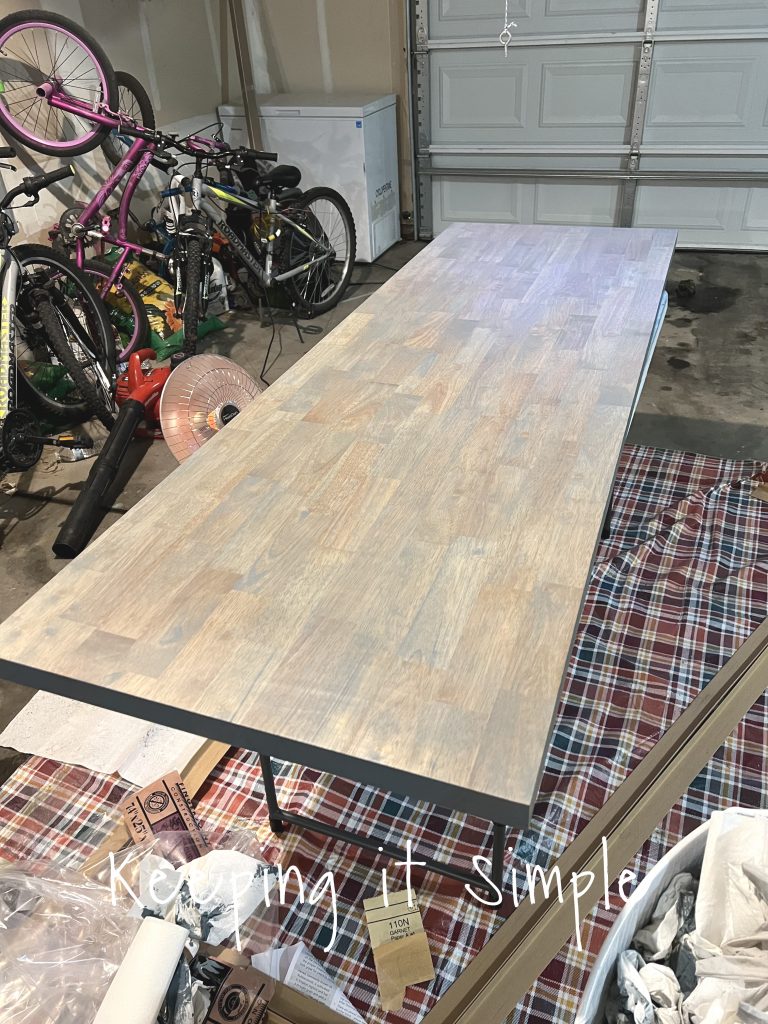
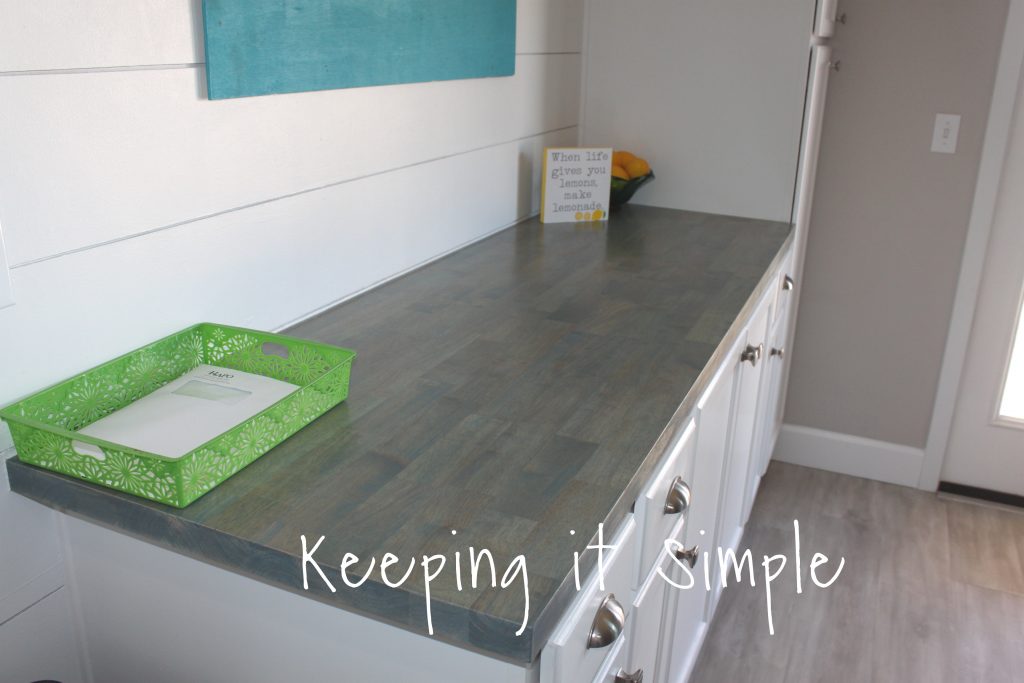
We decided on a butcher block for the countertop. They look great and are inexpensive, two great qualities to have! The butcher block we picked was 74 inches wide. It went past our cabinets, since they were only 60 inches, so we had a decision to make. We could put the trash can under it, use it as a desk area, cut the butcher block to fit the space or we could add another 12 inch cabinet to fill the space.
Since the whole purpose of this project was to get extra storage space, we found a little 12 inch cabinet and added that too. As you can see by my son sitting in the sink base cabinet, it’s huge in there! Lots of storage space :).
Since these are unfinished, we needed a finishing panel for the side of the cabinets. We bought the pantry cabinet panel and it worked for both spaces that we needed it for.

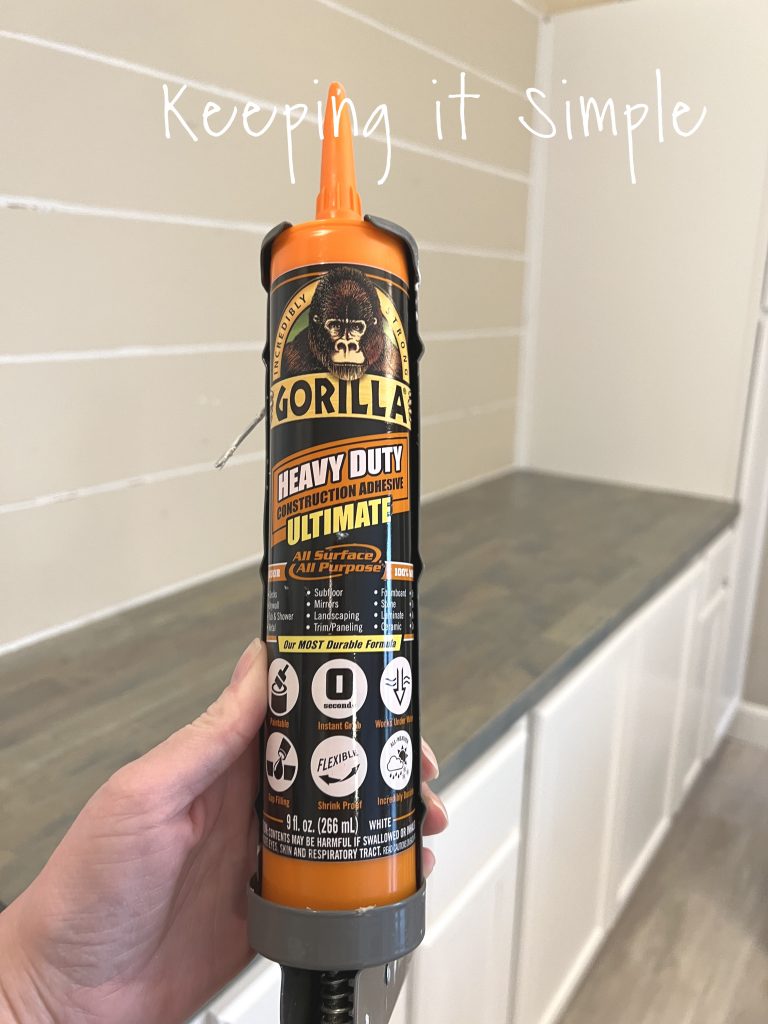
Using a strong adhesive, we glued the panels onto the unfinished sides.

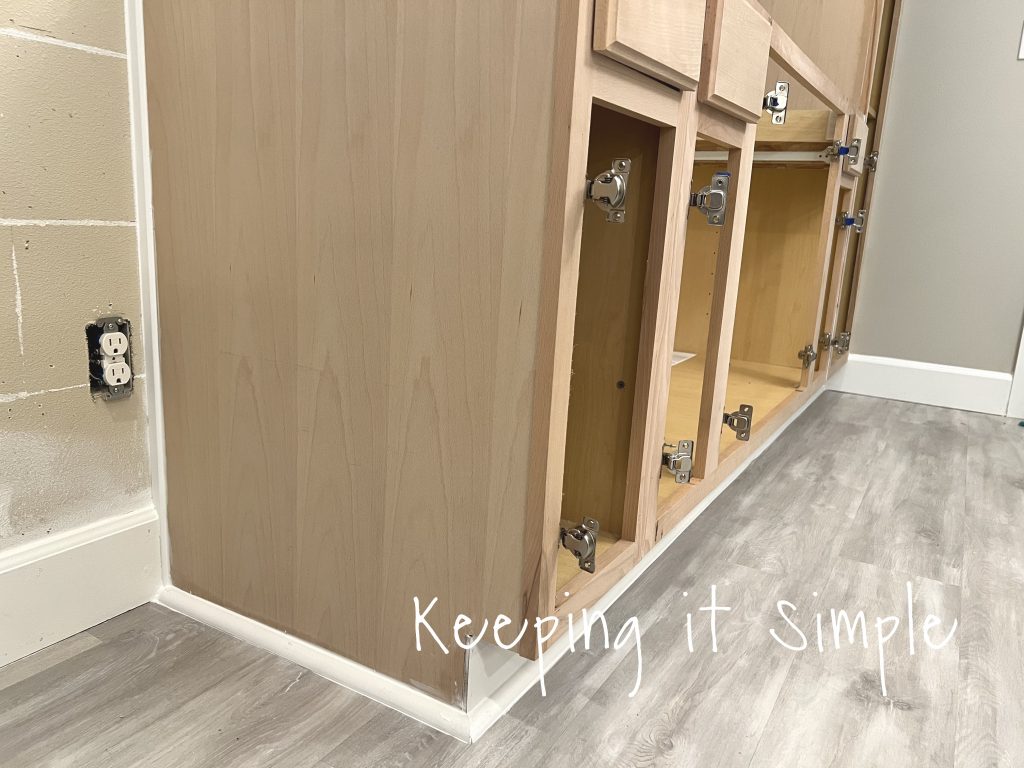
We placed the panels onto the sides of the cabinets with only glue. We also added a white toe kick. We glued it and then nailed it into place. 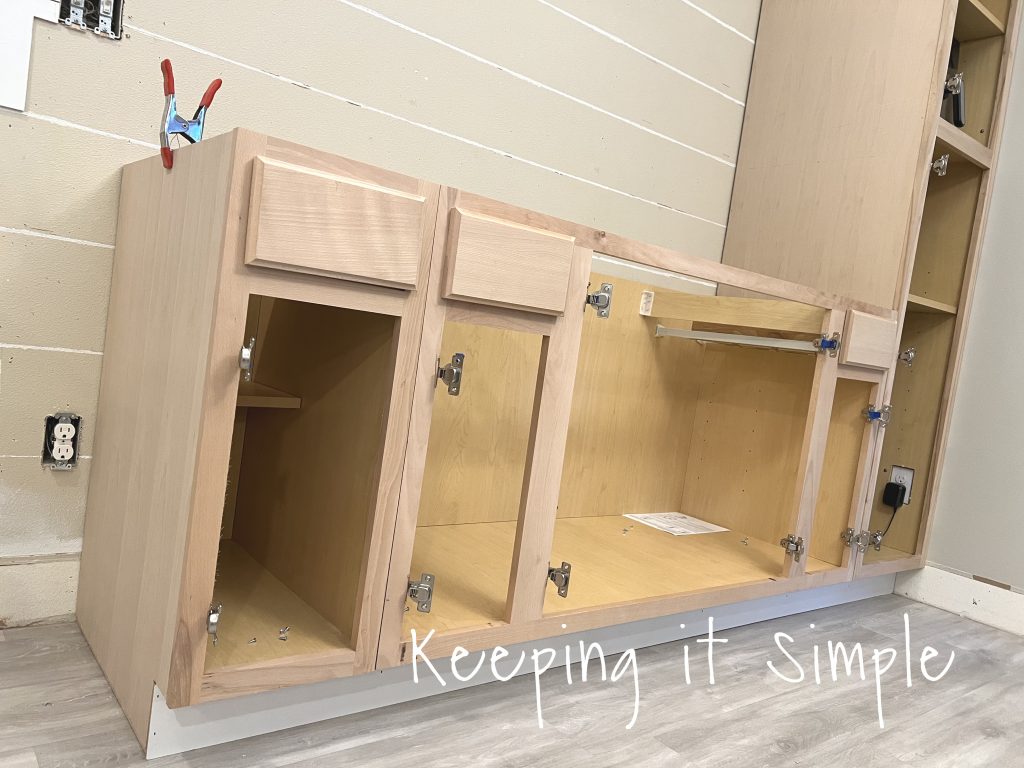
We then added some trim to match our other kitchen cabinets and to give them a finished look. We added a quarter round trim at the base and then a cabinet scribe on the side where it meets up with the wall. We glued both of the moldings on but only nailed the quarter round into the cabinet. We caulked the sides of both moldings. We also put the baseboards back on by nailing them into the wall. We had to cut them to fit with extra kitchen cabinets
Now it’s time to finish these unfinished cabinets! I took off the doors and place them onto little pieces of wood (that were wrapped with felt to protect the paint) so they would be lifted off the cardboard. That way the paint wouldn’t get ruined by touching the cardboard. Using a paint brush and roller, I painted the cabinet doors with a Pro-Classic paint from Sherwin Williams. It had a semi-gloss sheen, so they are easier to clean. I wrote a whole post about painting kitchen cabinets, you can see it here. I painted 3 coats on each side, waiting 8 hours in between each coat.
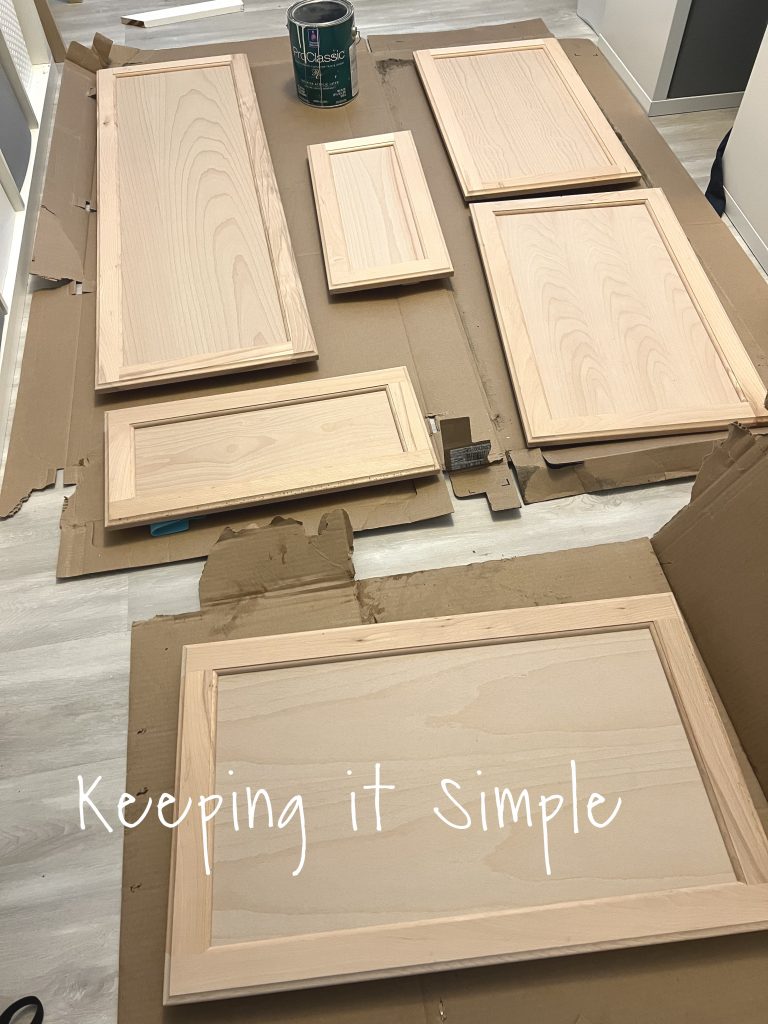
I also started painting the cabinets. I painted them the same way, 3 coats with 8 hours in between each coat. I removed the drawers, painted them and then put them back in to dry.
Here is what the second coat looked like. With each coat of paint the kitchen cabinets looked better and better.
While I was letting the paint on the kitchen cabinets dry, I stained the butcher block. I used a gray stain called Classic Gray, it was the lightest of the stains I could find. They have a gel stain made for butcher blocks but I didn’t end up using it. I put on one coat, let it dry and then added another coat.
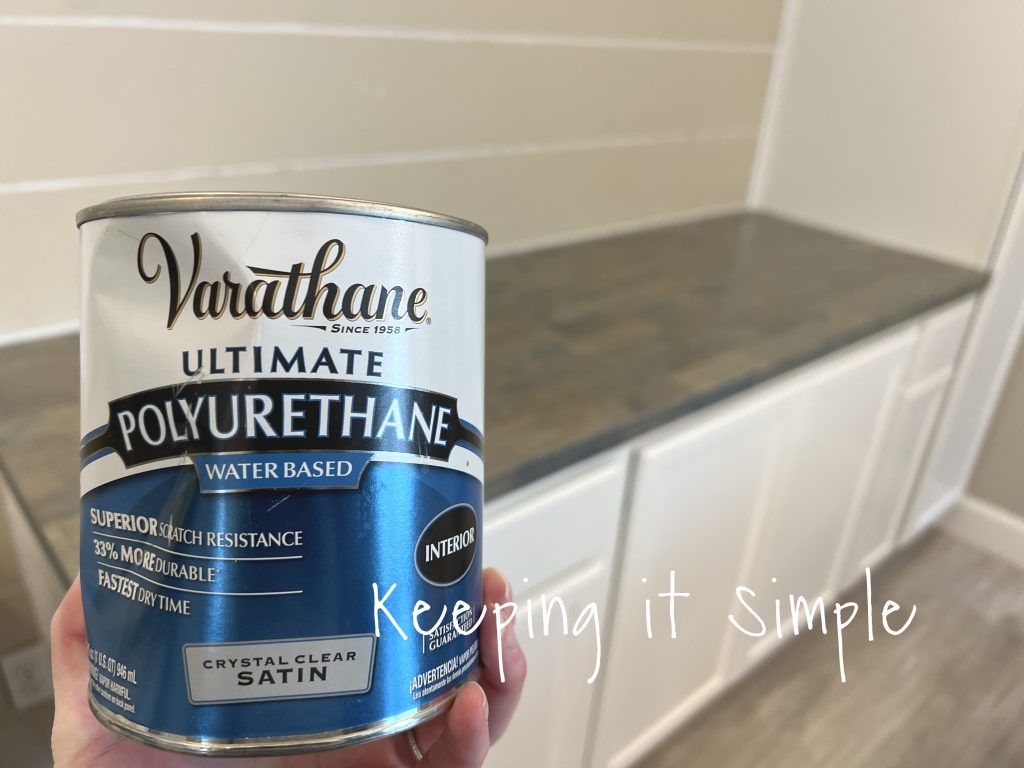
You have to put a finish on both sides of the butcher block, within 48 hours of taking off the shrink wrap. So I stained part of the under side, the parts that will not overlap the cabinet, and then added a clear coat to finish it and seal the butcher block. You can also use a oil or conditioner to finish it.
Once the cabinets and butcher block were dry, we put the butcher block onto the cabinets. Doesn’t it look amazing?! This is when I started getting really excited about this project and how it was going to turn out!
Using the strong adhesive, we glued the butcher block to the cabinets. You can also add brackets and screw the butcher block into the cabinets. We didn’t do that because it’s not our main countertop. If we were to put them in our kitchen, we would have done that.
Once the butcher block was on, we added two coats of this polyurethane. We added this to the top and bottom of the butcher block. Once it was dry, we then caulked underneath the butcher block.
Before putting on the shiplap back on, we added the cabinet scribe to the pantry cabinet.
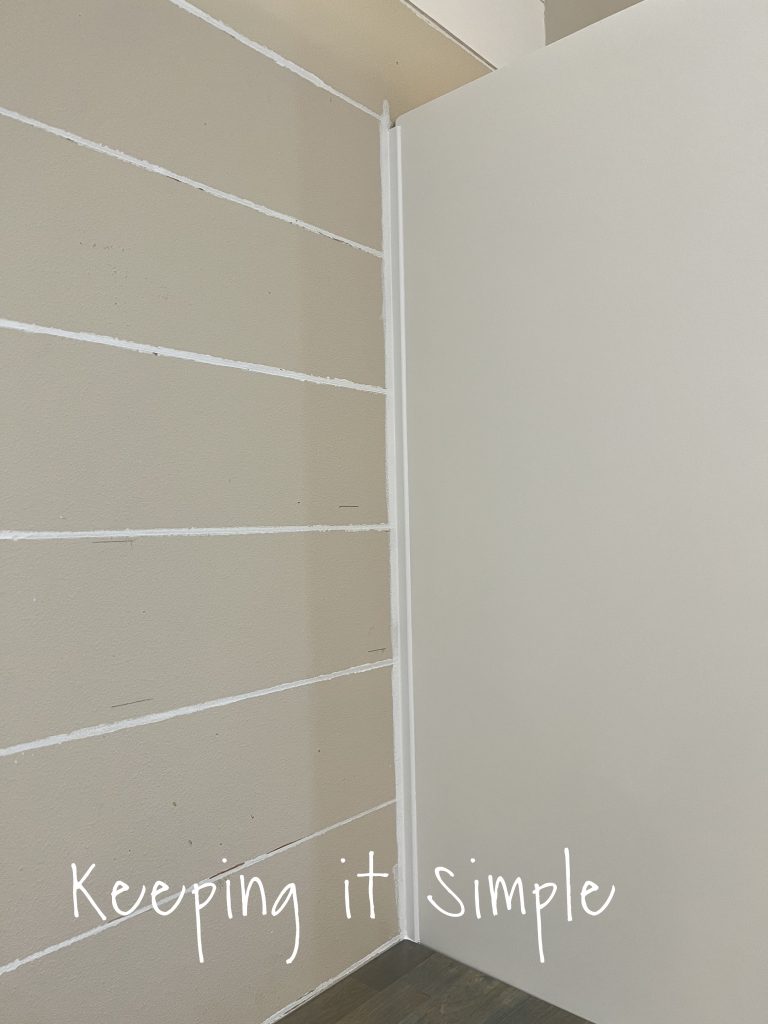
We added the shiplap back onto the wall and then painted it with the same semi-gloss paint we used for the cabinets. I love how white and bright it is!
To match the other kitchen cabinets, we added crown molding to the top of the pantry cabinet. We couldn’t find an exact match, so we went to a local wood store and found one that looked the closest to other crown molding.
Crown molding is a little tricky to put on. It’s not hard to do, but you have to cut it a different way, so make sure you buy extra so you have some to play around with. For the corner of the cabinet, it is a 45 degree angle, so you need to cut the molding at a 45 degree angle. You cannot cut it when it’s laying flat or with it just vertical. You have to place the molding onto the miter saw like it would sit on the wall/ceiling. So it is not just a vertical cut, it’s placed a little differently. If you haven’t cut crown molding before, make sure to watch videos and do some research before cutting it.
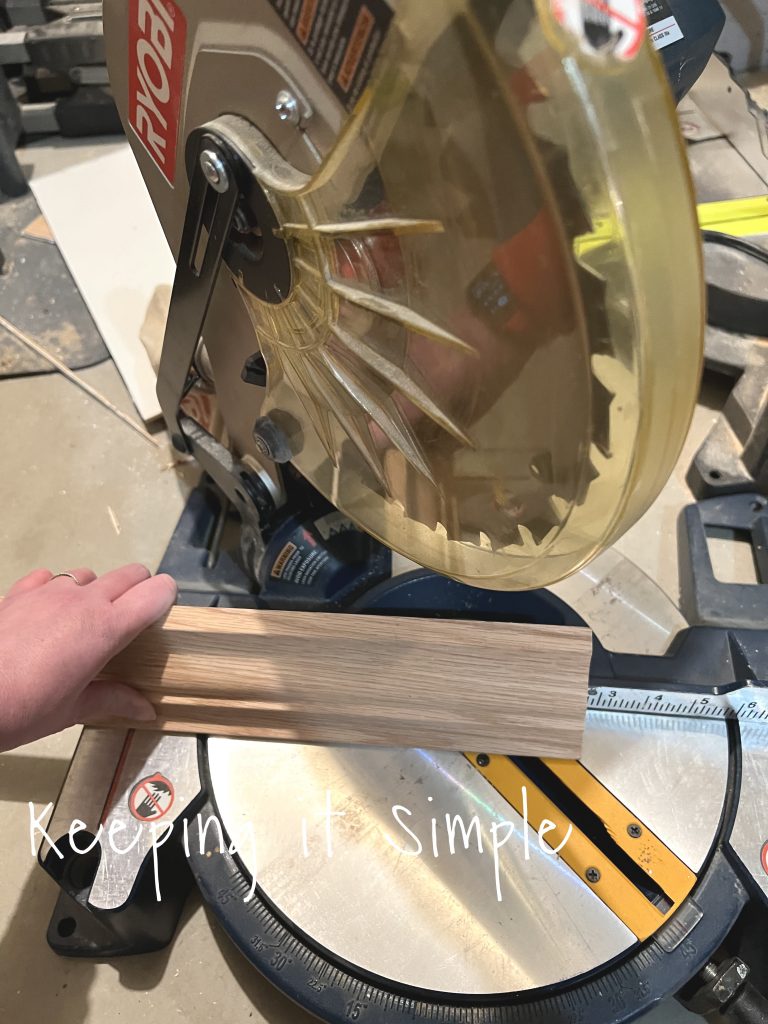
We cut both sides to a 45 degree angle, it matches up perfectly on the corner of the cabinet!
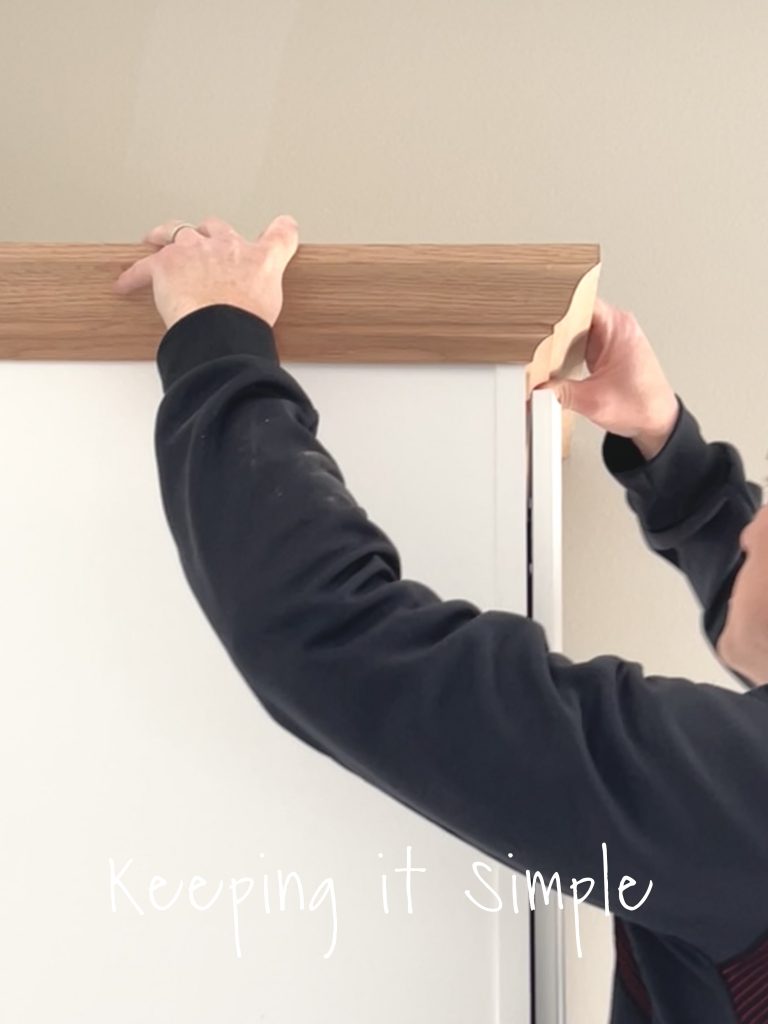
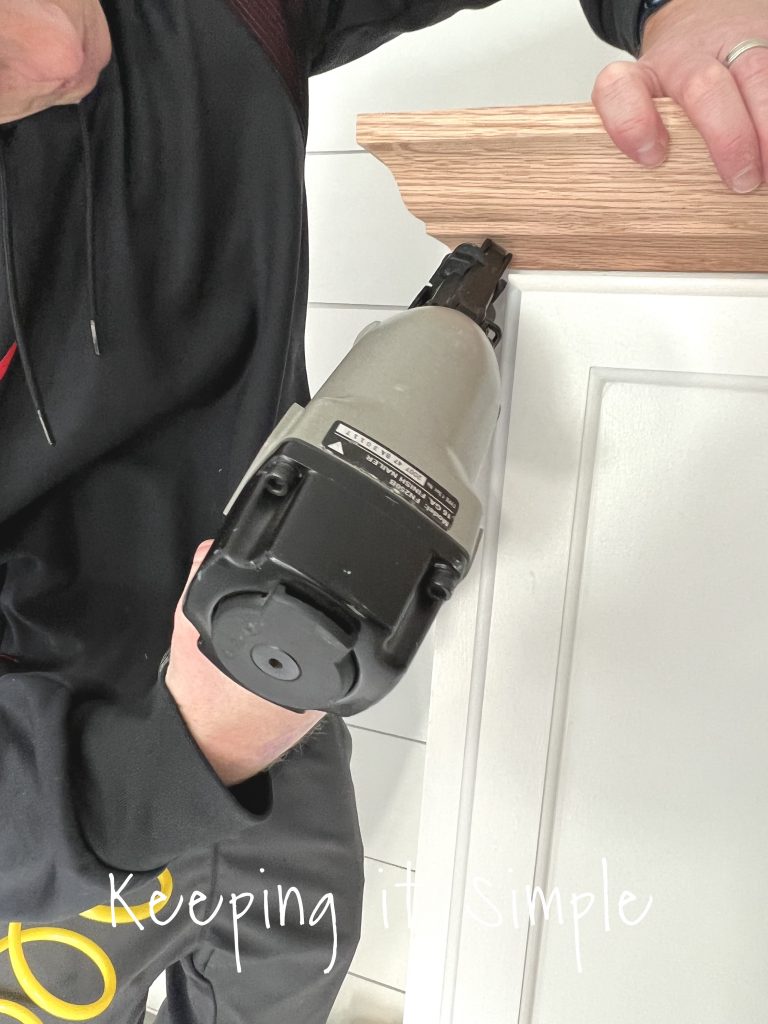
We glued the crown molding on and then secured it with a nail gun. I then painted it the same way I painted the cabinets, with 3 coats of the Pro-Classic paint.
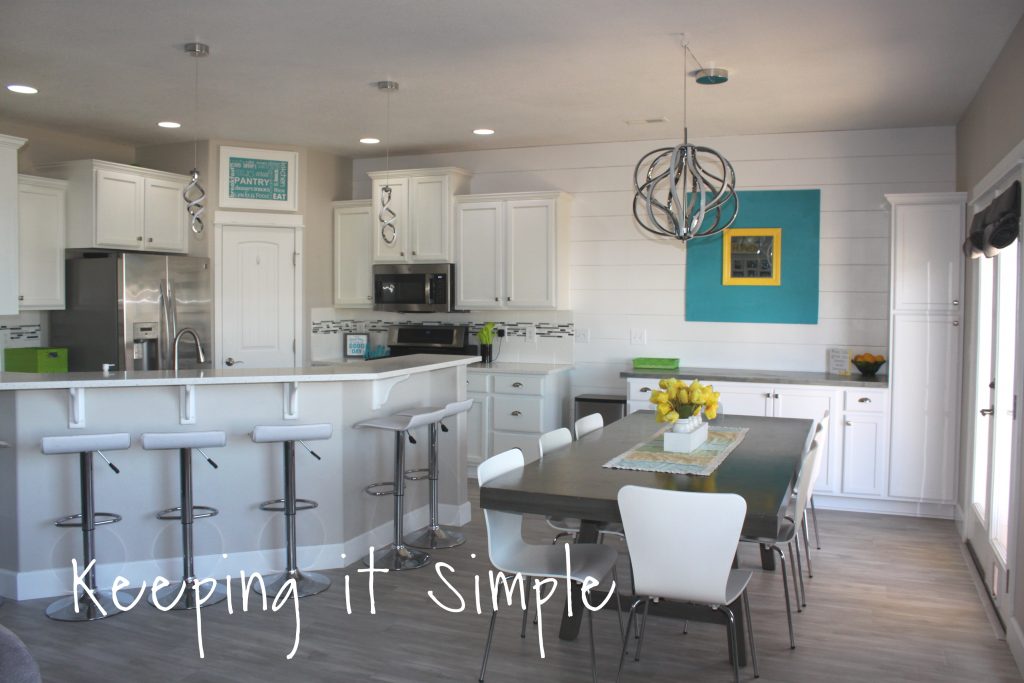
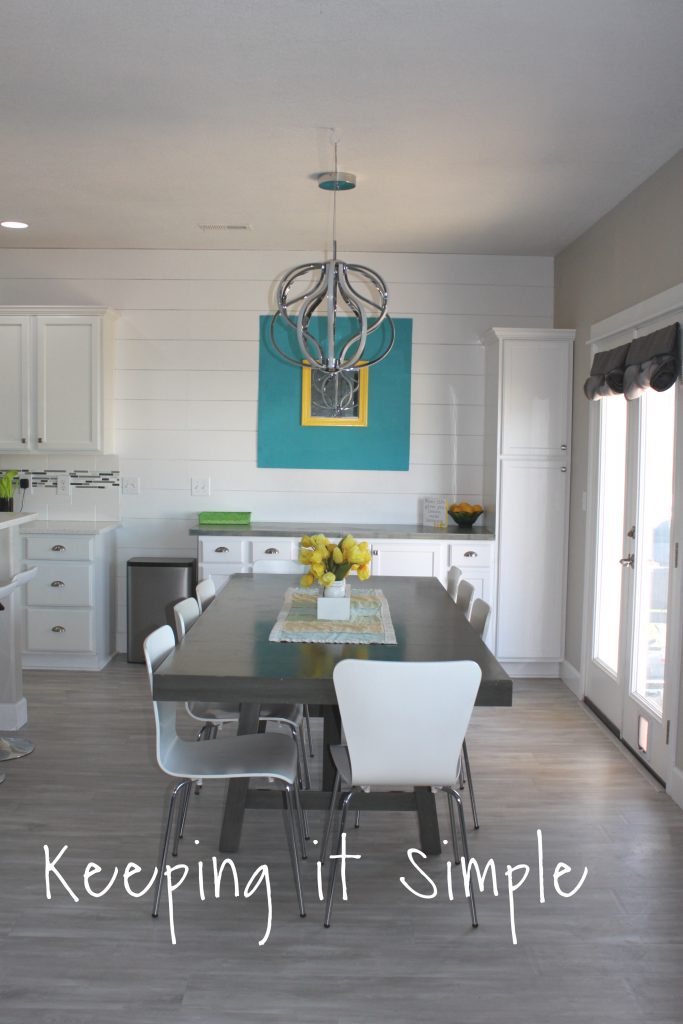
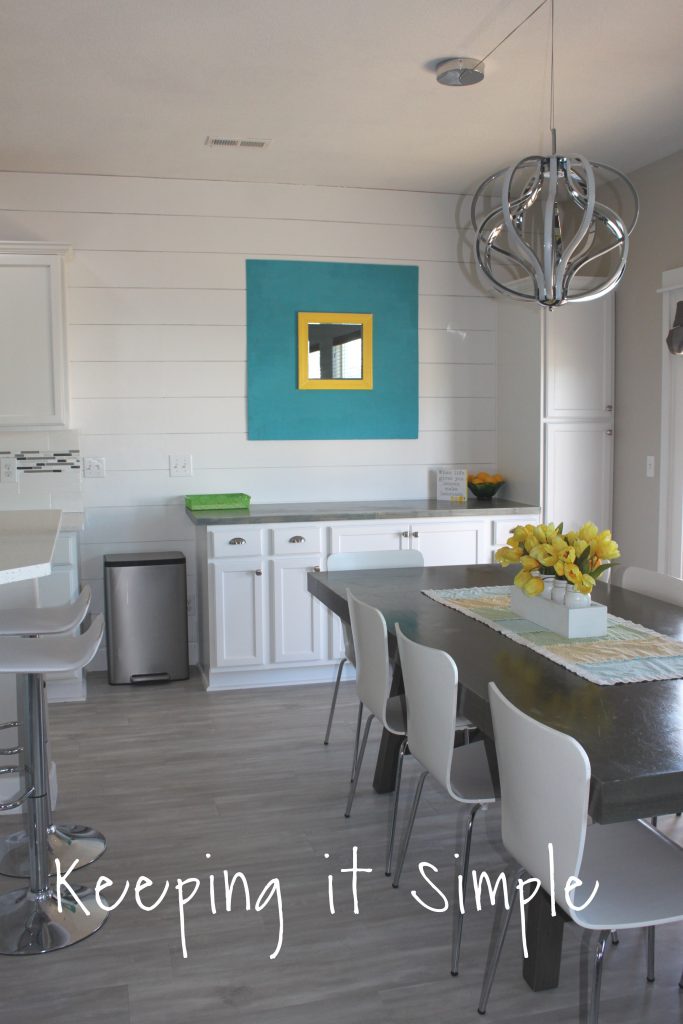
Since we added dining room cabinets, we had to swift our chandelier 30 inches because the placement wasn’t good anymore. Our current chandelier wouldn’t work, so we got a new one. To see how to replace a chandelier, check out this post.
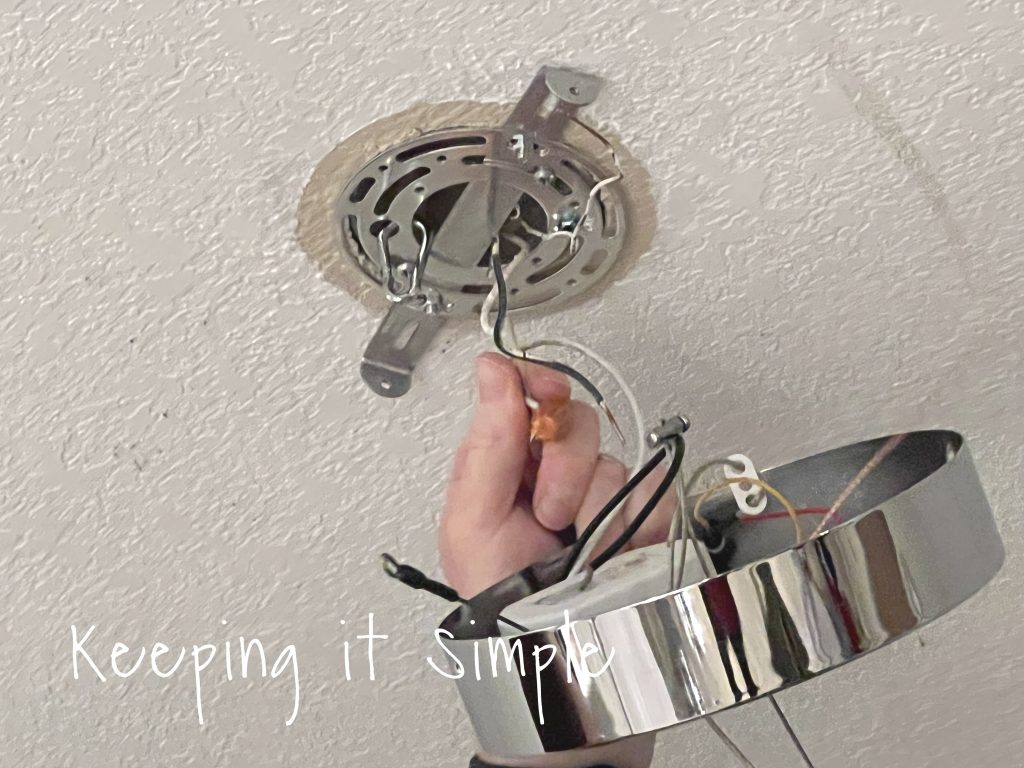
We plan on moving the junction box at a later date, but for now we decided to just get a fun chandelier and have it be on a hook. So we found this awesome modern chandelier that would work with a hook.

We added the same hardware to the cabinets and changed out the pendant lights with some that would match the new modern chandelier.
And that’s it! The project was a little time consuming because of all the painting but I love all the extra storage I have in my kitchen now!
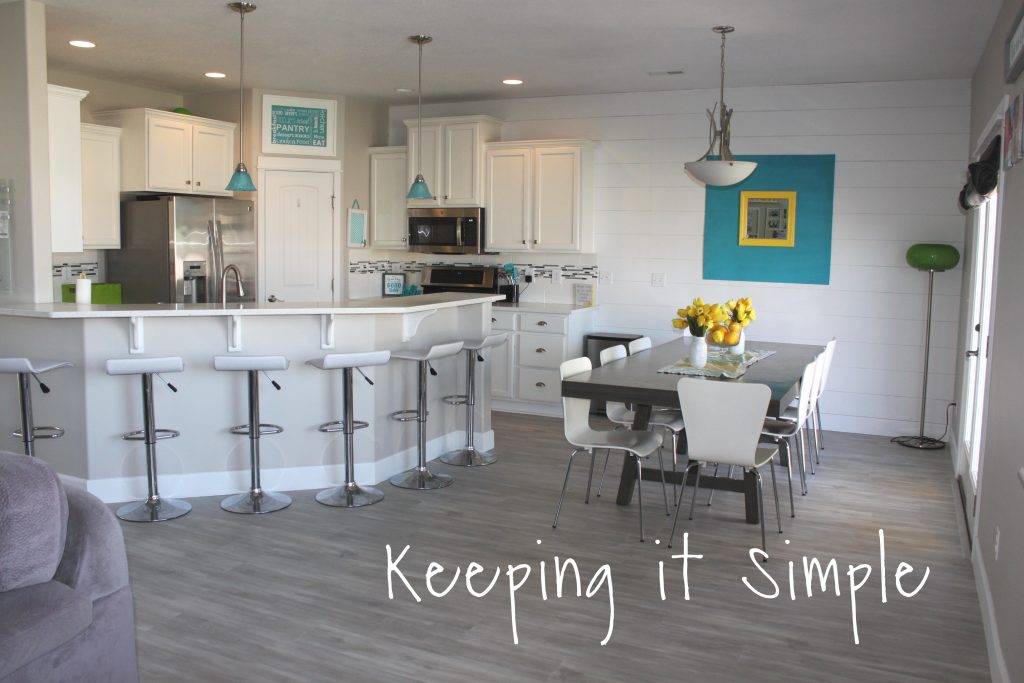
We took wasted space in our dining room and added a very functional area. We store paper products and other big things that were taking space in our pantry. In the pantry cabinet, we store our small appliances, like my crockpot, air fryer and Instant Pot. I even put my little vacuum in the bottom of the pantry cabinet. We cut out a hole for the outlet, so I can even charge it in there!
I thought that by adding the dining room cabinets it would feel tight in the dining room, but it’s actually opposite. I feel like there is more space in there now. Shifting the whole room 2-3 feet made more sense with the space we had. We were not using the space between the dining room and living room, now we are there is no wasted space.
Here is a breakdown of all the things we had to buy to build these dining room cabinets:
Pantry Cabinet– $235
Sink Base Cabinet– $159
12″ Base Cabinet– $91
Butcher Block Countertop– $169
Toe Kick– $25
Cabinet Panel– $23
Cabinet Scribe– $20
2 Quarter Round Trim– $15
Crown Molding– $20
Hardware– $35
Paint Supplies, Caulk, Glue and Stain– $50
Total is around $850 before taxes, not too bad for such a big space!

It is so great to have extra counter space. I feel like every kitchen could use extra counter space. We plan on having it empty for most of the time, but it’s going to be great as a buffet for when we entertain, or as a drink station for those hot days, or we could use it as a hot chocolate bar on cold days. I love that it has lots of options! I also love that it has opened up my other counter tops in my kitchen so I have more work space in there.
I am so happy with how this project turned out! I love how my kitchen looks now! I especially love how the awesome modern chandelier and pendant lights look on, they are so fun!
For more awesome ideas, make sure to check out my other home improvement projects here.
Leave a Reply
You must be logged in to post a comment.