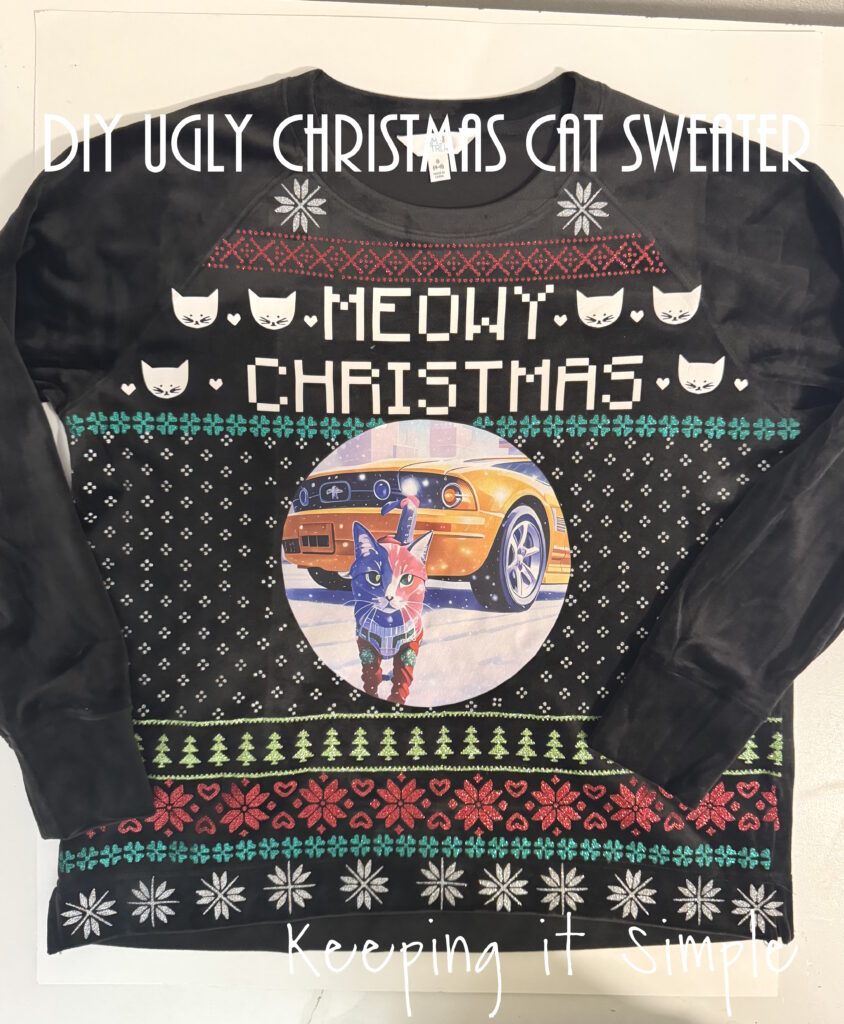
DIY Ugly Christmas Cat Sweater Made with Silhouette CAMEO
For the past 15 years, I have been a stay at home mom. I basically spent the majority of my time at home, in my pajamas. I rarely got ready in the day. Well now that I work at a school, I get ready everyday and somewhere to go. I’ve had a lot of fun buying new clothes and having a reason to get dressed. This Christmas season we had a spirit week and one of the days was Sweater Weather. So naturally I wanted to wear an ugly Christmas sweater. I thought about going to the store and picking one up, but making one sounded like more fun :). I had an extra DTF transfer from my Christmas pajamas, so I used that and made a DIY ugly Christmas cat sweater. I love how it turned out!
Here is a quick video of the process of how I made the DIY ugly Christmas cat sweater.
This is how I made the ugly Christmas sweater.
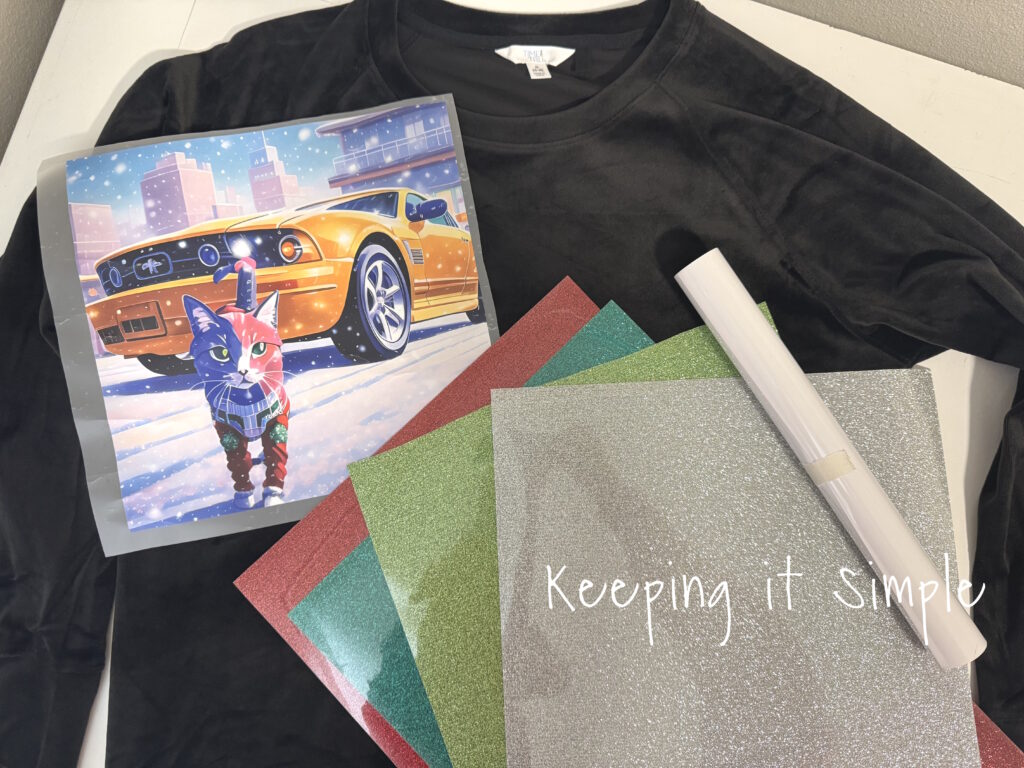
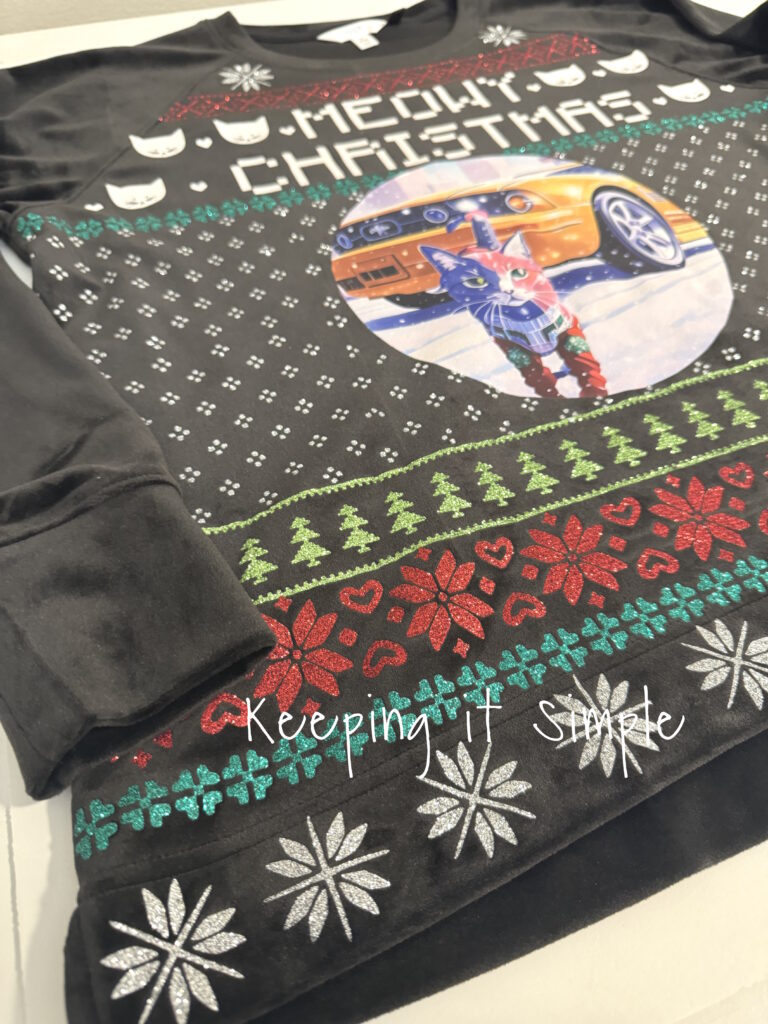
I started out with a black sweatshirt, a DTF transfer of my cat and yellow mustang, and then some awesome glitter heat transfer vinyl. I used colors green, red, light green and silver. I also used a white EasyWeed.
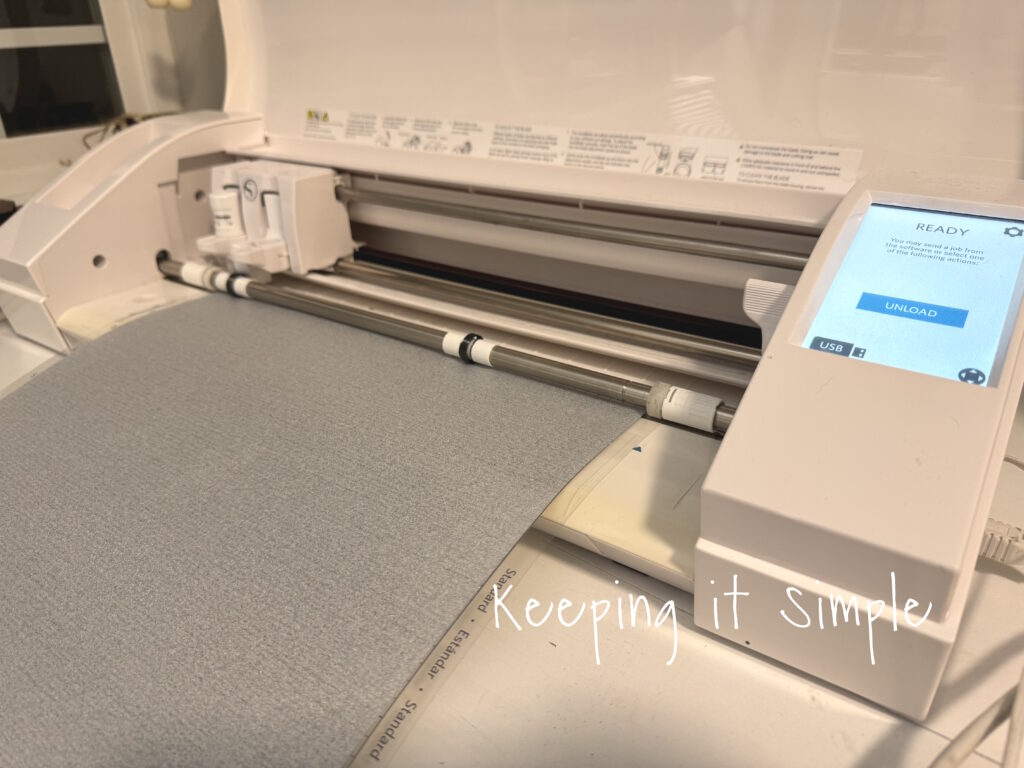
Using my Silhouette CAMEO, I cut out all of the designs for the ugly sweater.
Once I got all of the HTV cut, I weeded it.
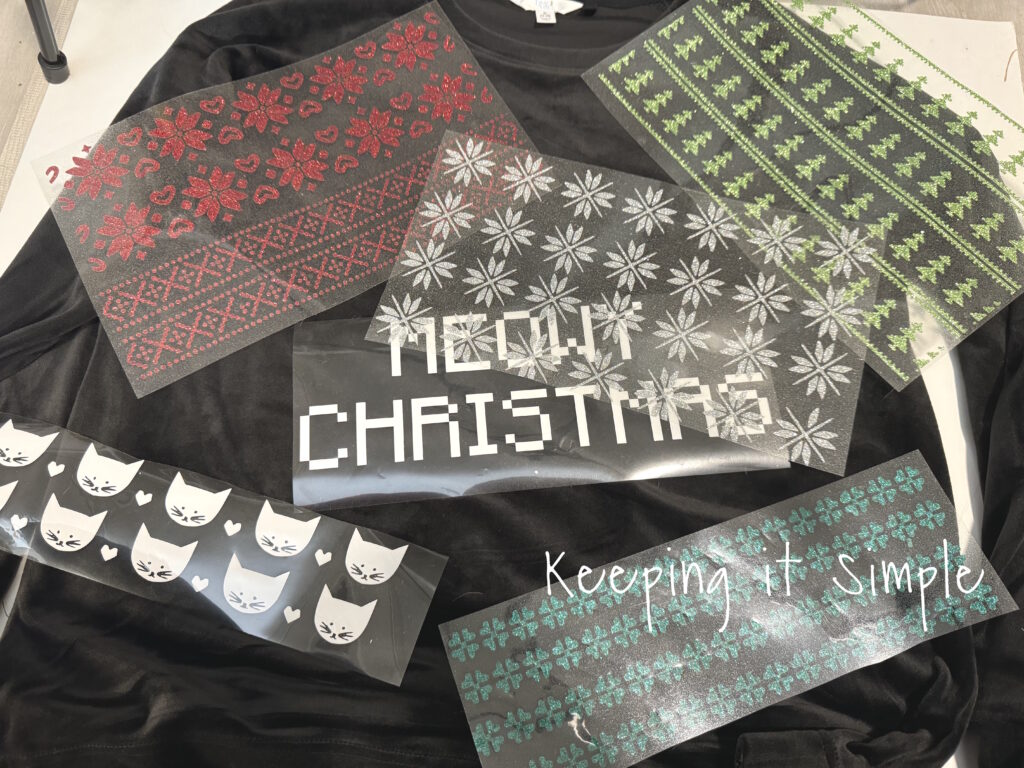
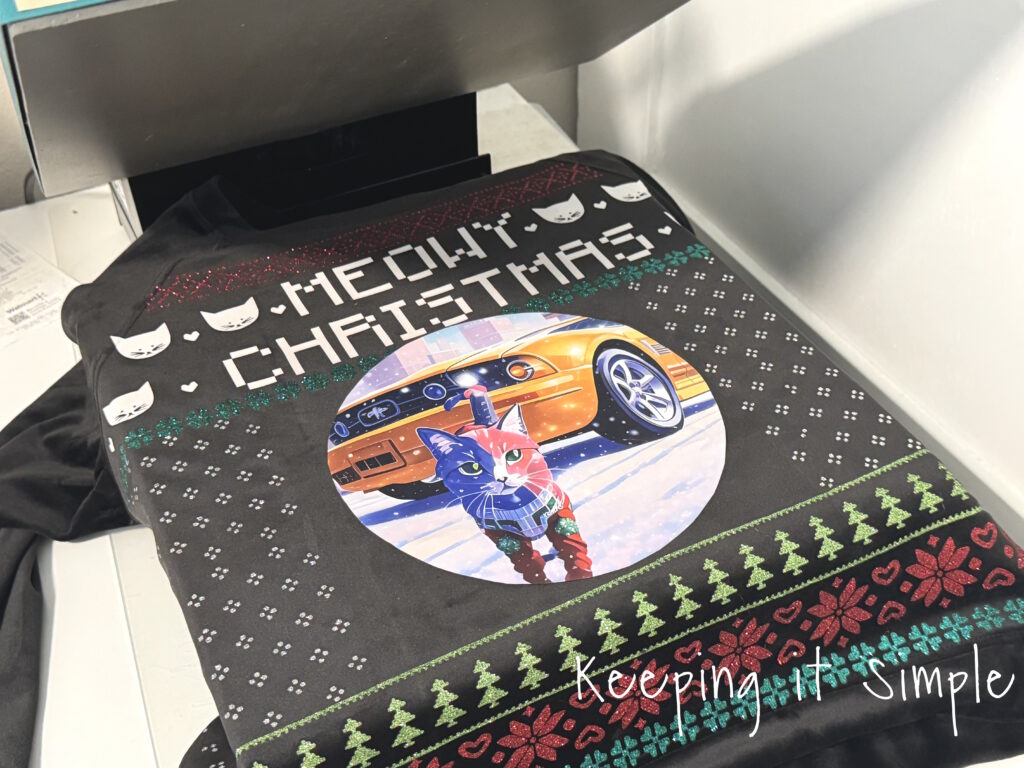
Once the HTV was all weeded, I then arranged onto the shirt. I cut the DTF transfer into a circle, just for fun.
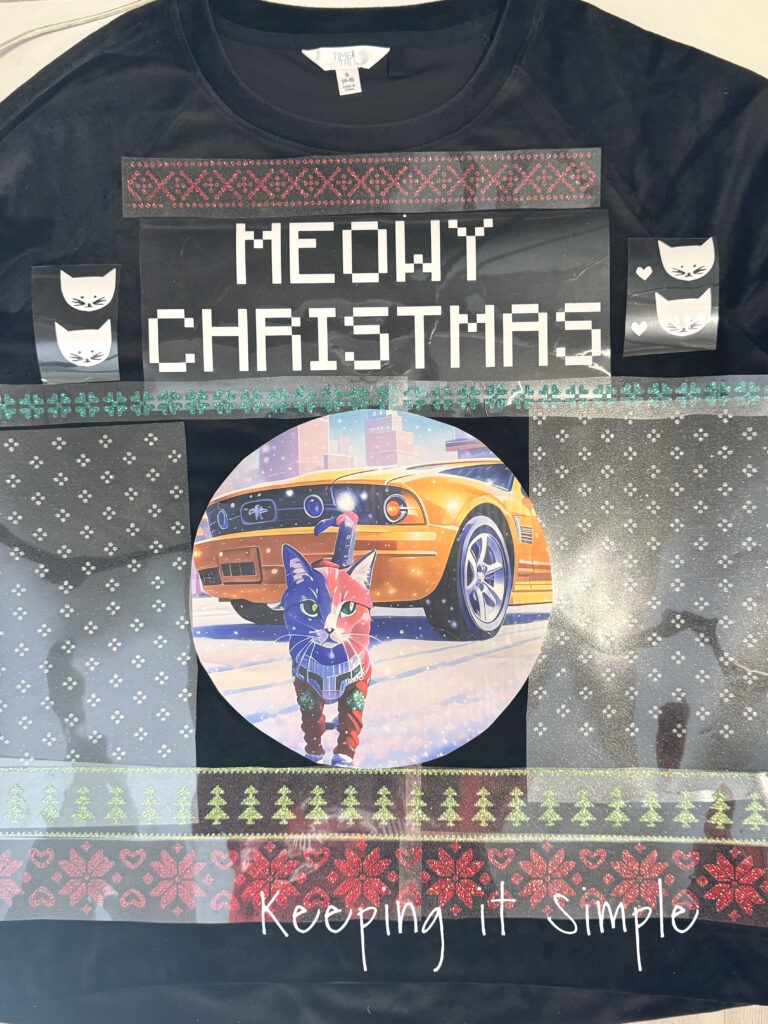
Once I got everything figured out, I then pressed the HTV onto the shirt. I did each line separately, starting from the top. For the glitter HTV I set my heat press to 320 degrees and pressed it for 15 seconds.

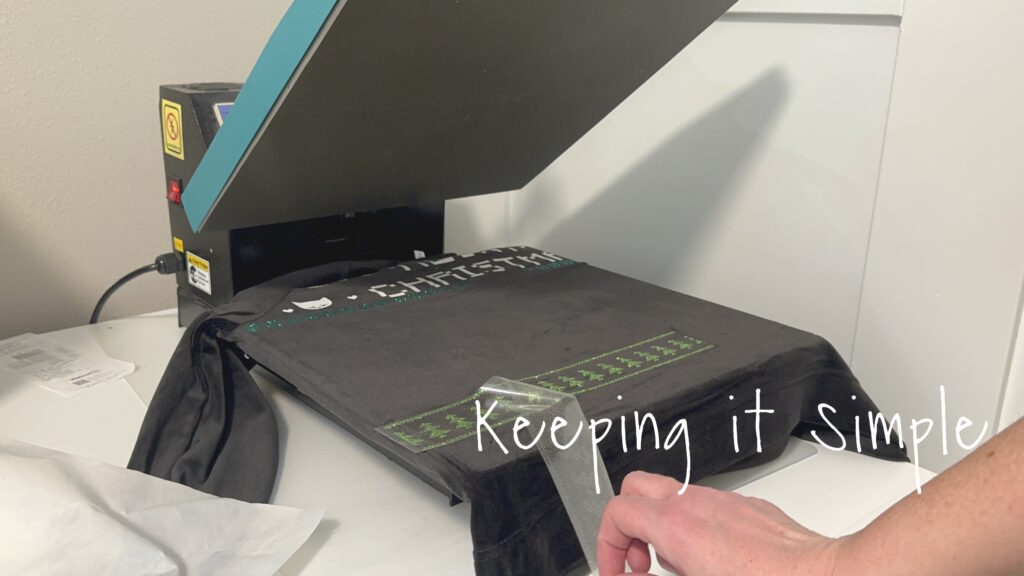
I continued adding the HTV to the shirt. For each layer, I placed a cover sheet over the design before pressing it again. You cannot layer glitter HTV, so I had to make sure the glitter didn’t overlap.
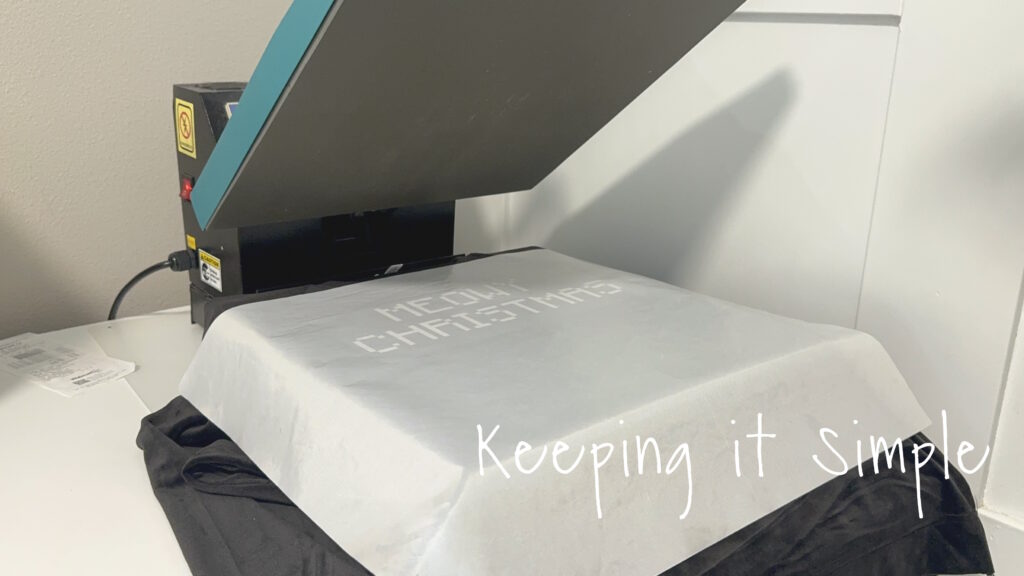
I continued adding the HTV. I tried to put all of the HTV onto the shirt before I put on the DTF transfer.
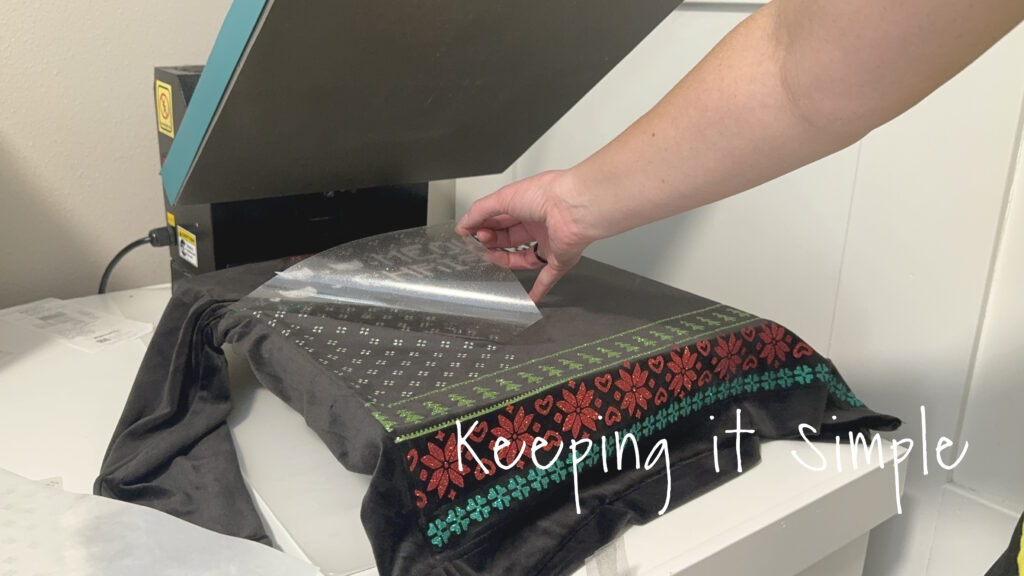
Once the majority of the designs were pressed onto the shirt, I then pressed the DTF transfer onto the shirt. I did turn down the heat press to 270 degrees and pressed it for 15 seconds.
Once the DTF transfer was completely cool, I peeled off the plastic.
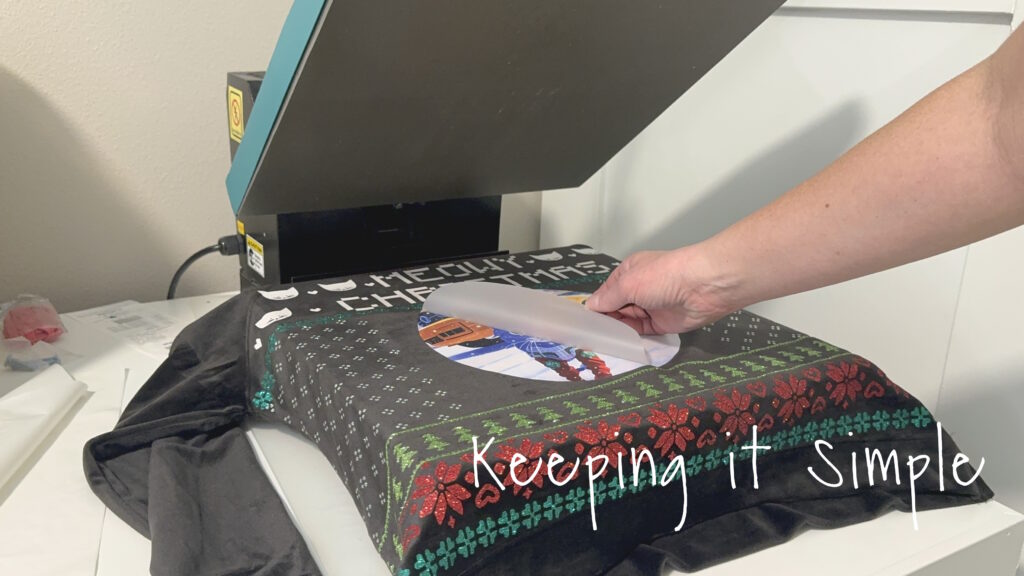
I then filled in the gaps with the left over HTV, also pressing the DTF transfer again. I used the cover to protect the designs.
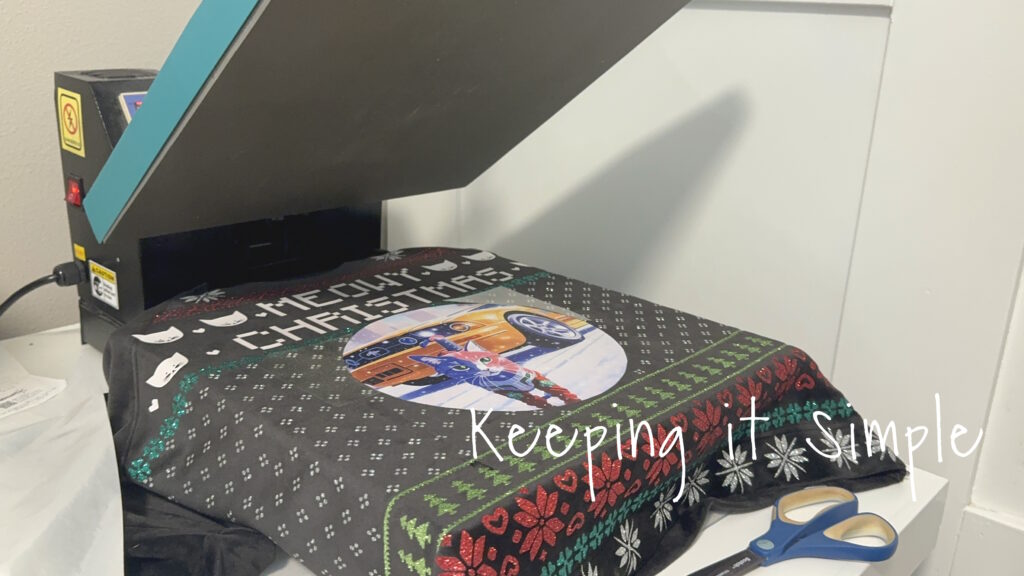
And that’s it!! It turned out so good. I just love the glitter heat transfer vinyl, it makes my heart happy!
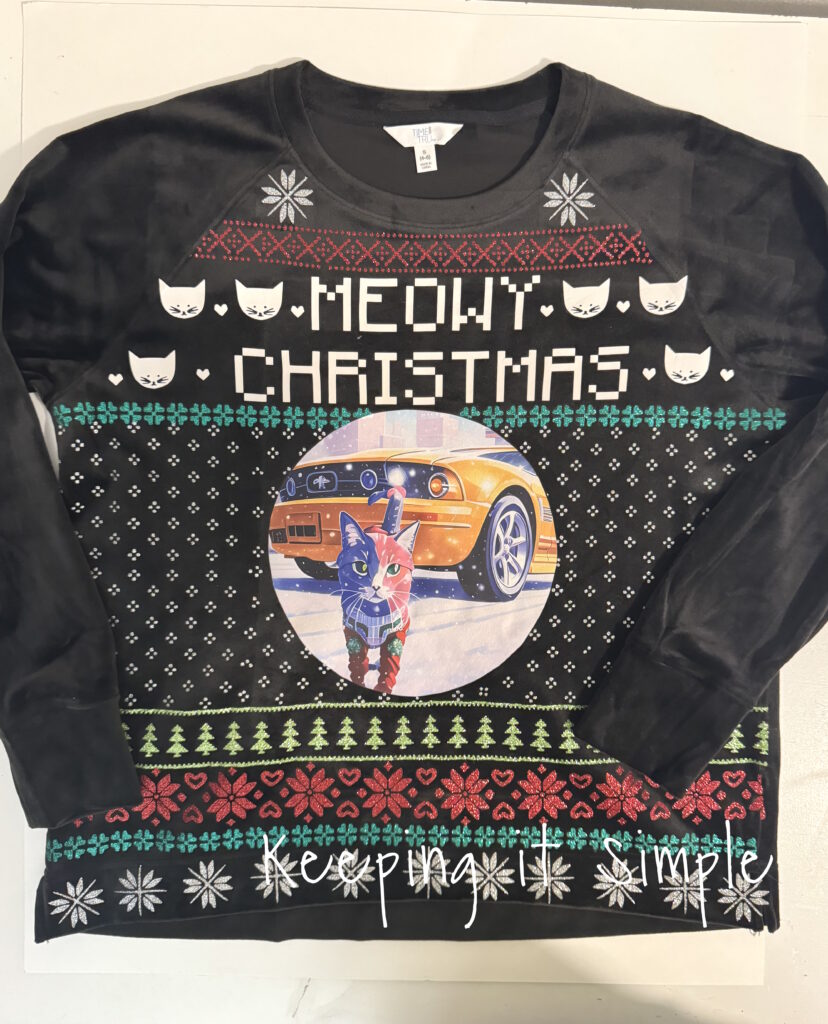
I paired it with a Santa hat and it was perfect to wear to school!

Check out all of my other Christmas craft ideas here!
This post contains affiliate links.
Leave a Reply
You must be logged in to post a comment.