How to Engrave Handwriting onto Metal with a xTool
If you are new to the xTool and laser cutters, check out my beginners guide to the xTool.
There is something special about unique and personalized jewelry. It is so fun to have something to wear that is sentimental and you can’t just go to the store to pick up. When I got my xTool, I knew that I wanted to engrave all the things, especially necklaces and jewelry. You will be shocked by how easy it is to engrave metal and how easy it is to use someone’s handwriting. It makes it even more special and unique.
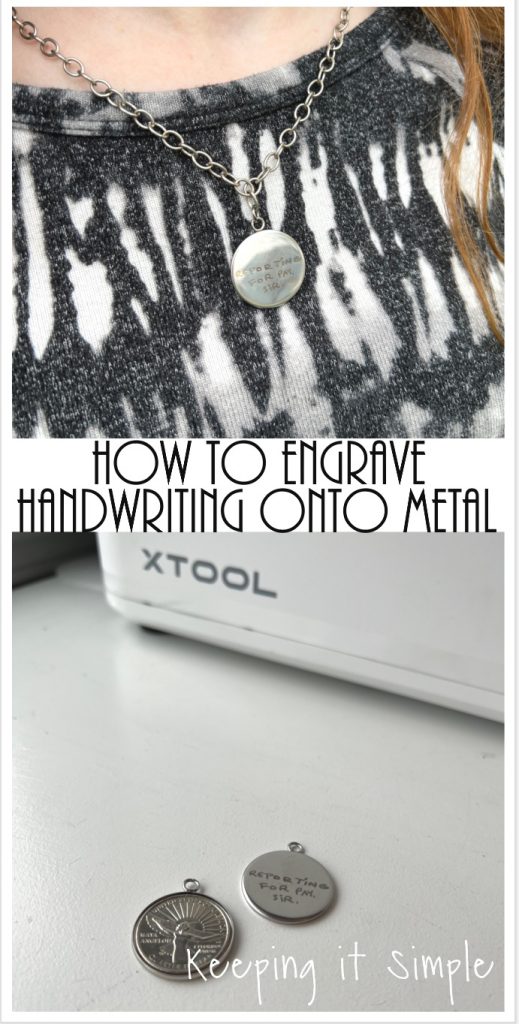
Before I get to the tutorial on how to engrave handwriting onto a necklace, I wanted to share a story about the saying on the necklace- “Reporting for pay, sir”. All of my life I have been reporting for pay. My dad had to do it in the army to get his paycheck, so growing up we had to report for pay to get our allowance. After several years of reporting for pay for our allowance, my dad stopped that and it ended up being for the grandkids. Whenever they came to visit, they would report for pay to Grandpa and then he would give them a quarter before they went home. He has been doing it for as long as I can remember and it is something that we love about my dad.
About a month ago, my dad passed away. To honor him and remember him, we all reported for pay one last time at his funeral. Everyone got a quarter from the funeral. I didn’t want that quarter to be just another quarter, I wanted to display it and remember my dad when I saw it. So I came up with the idea of engraving his handwriting on the back of a pendant that held the quarter. Luckily it was super easy to do with the xTool and I was able to make several of them for all of my family to have.
Here is a detailed video tutorial on how engrave handwriting onto metal.
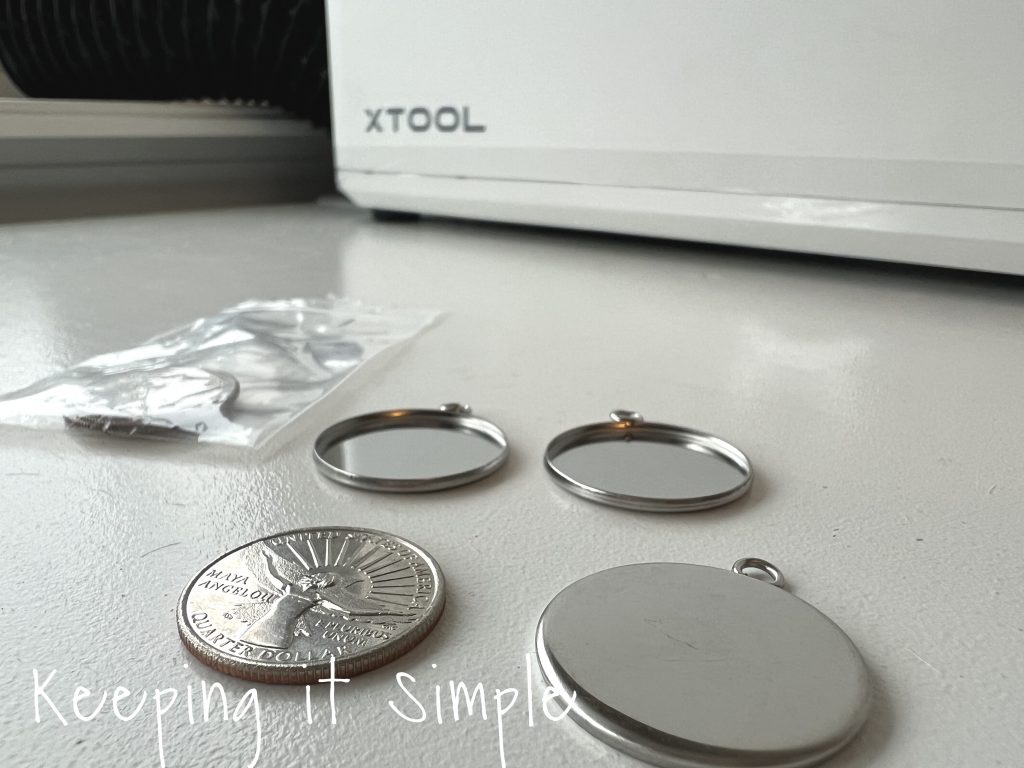
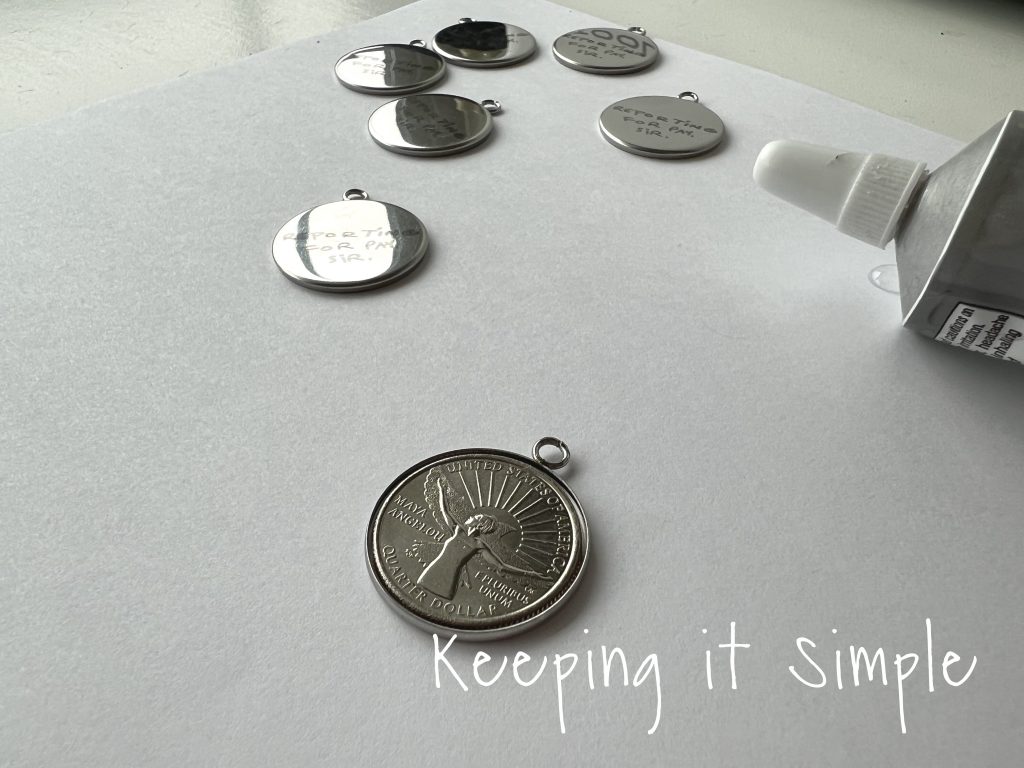
First thing I did was found one inch circle pendant that would fit a quarter into and was blank on the back.
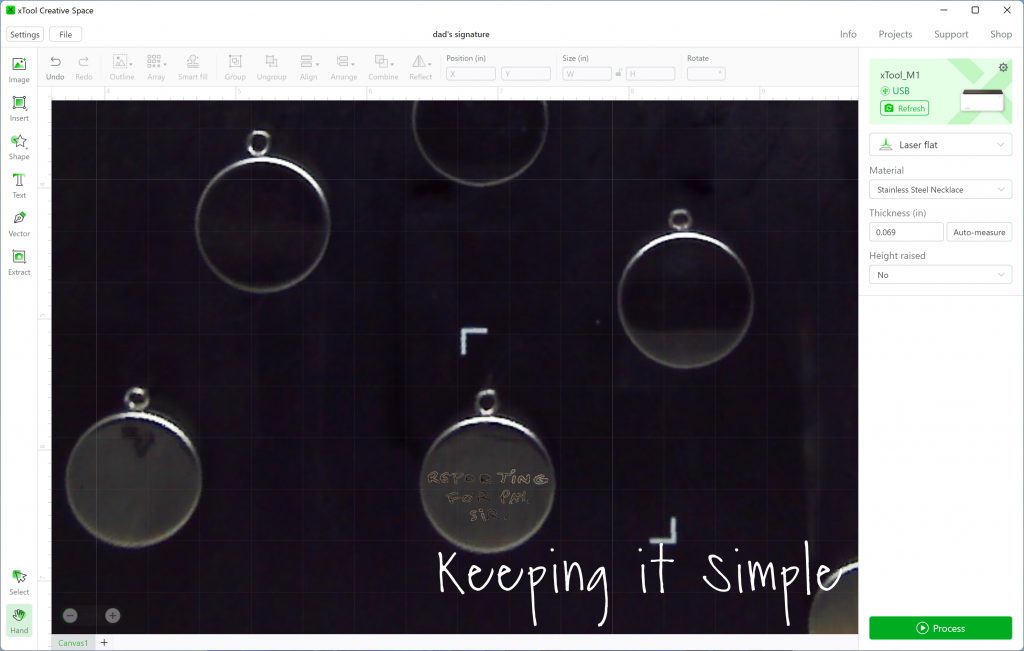
Now to design it in xTool Creative Space. I had my mom send me a picture of my dad’s planner with his handwriting. I clicked on the image button and then opened it in Creative Space.
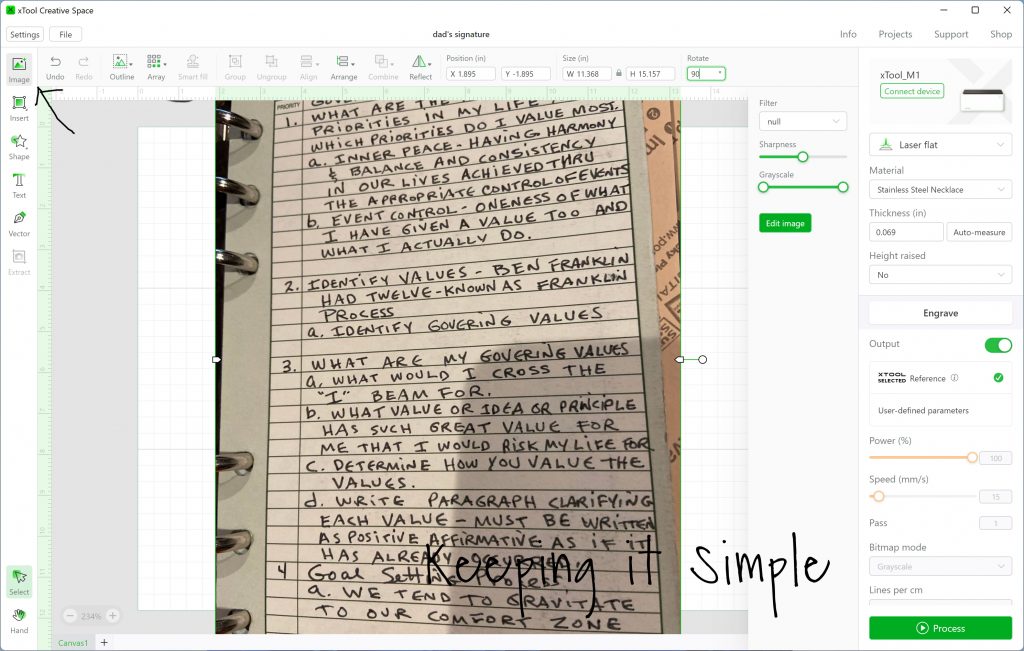
I went through the handwriting and tried to find words that had the letters together. I found the word FOR, so I pulled that one out first. I clicked on the crop button and then highlighted the word for. Then I clicked the checkmark.

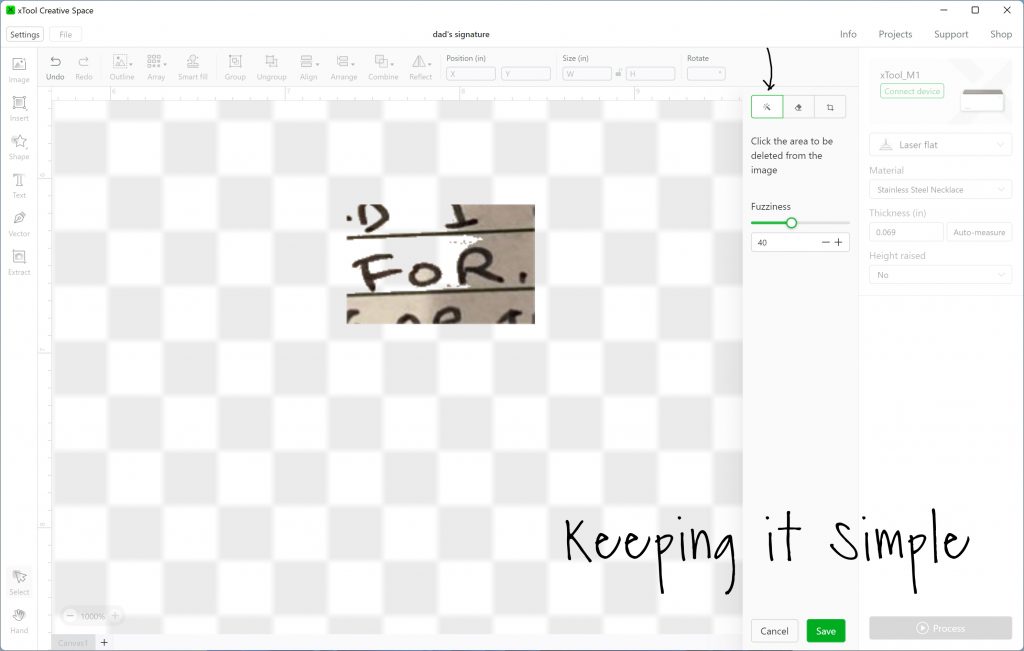
Once I got the word FOR, I then had to clean it up. I clicked on the magic wand and then removed the background from the image. I clicked all around the word, including inside the O and R.
I then cleaned up the whole thing with the eraser. I erased everything except the word FOR. Then I clicked save.
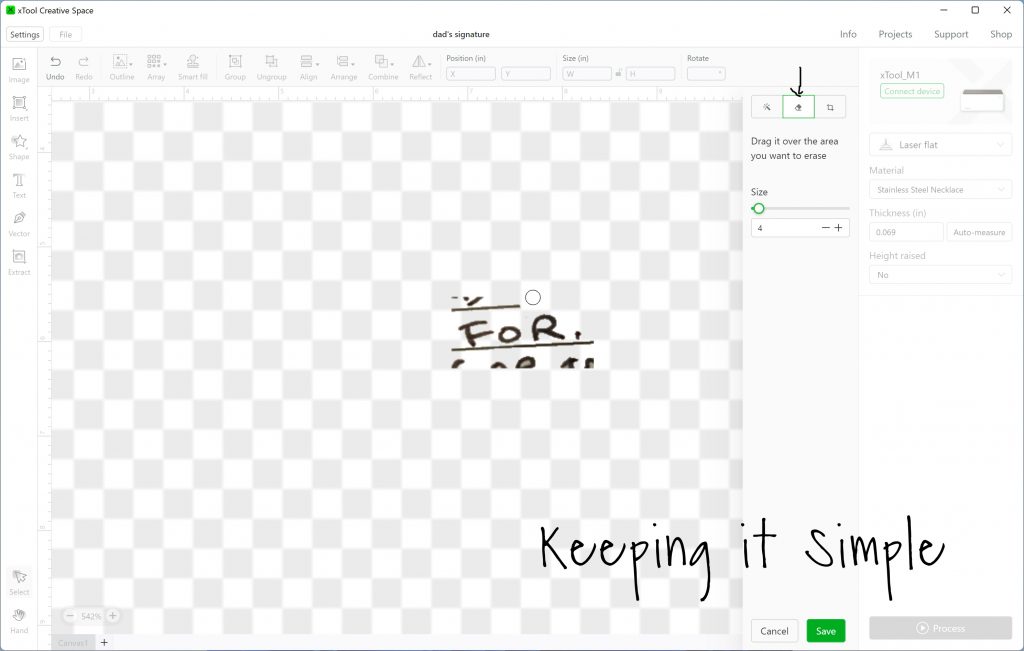
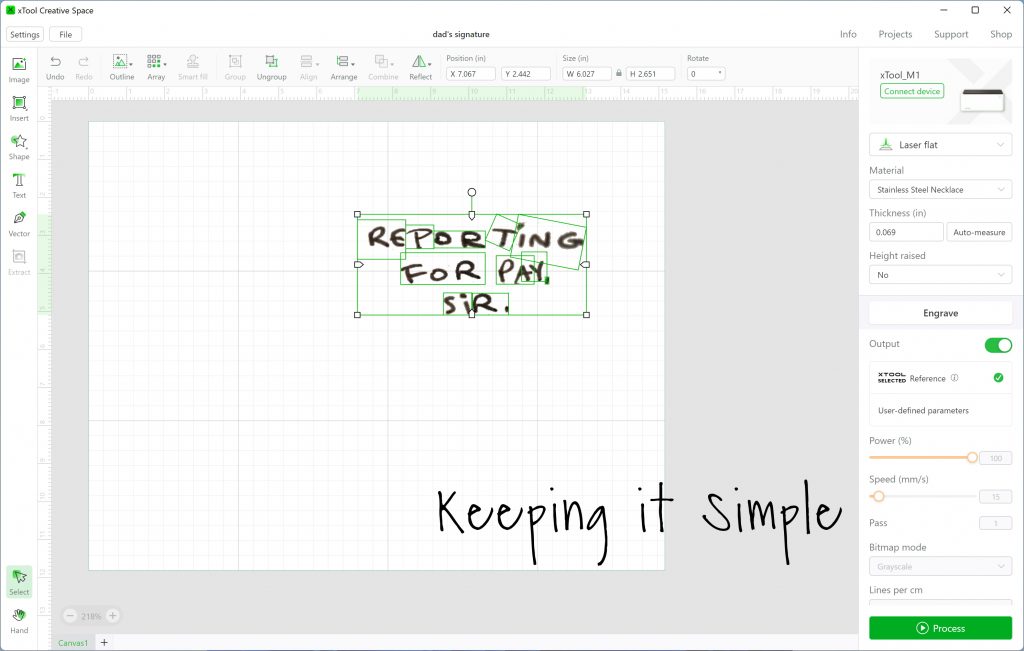
I then repeated the process again and again until I had all the letters in “Reporting for pay, sir.” I had to click on the image button every time I pulled out a letter or two in the saying. I then had to crop it, remove the background and erase the lines with each letter. Once I pieced it all together, I centered it and arranged it how I wanted.
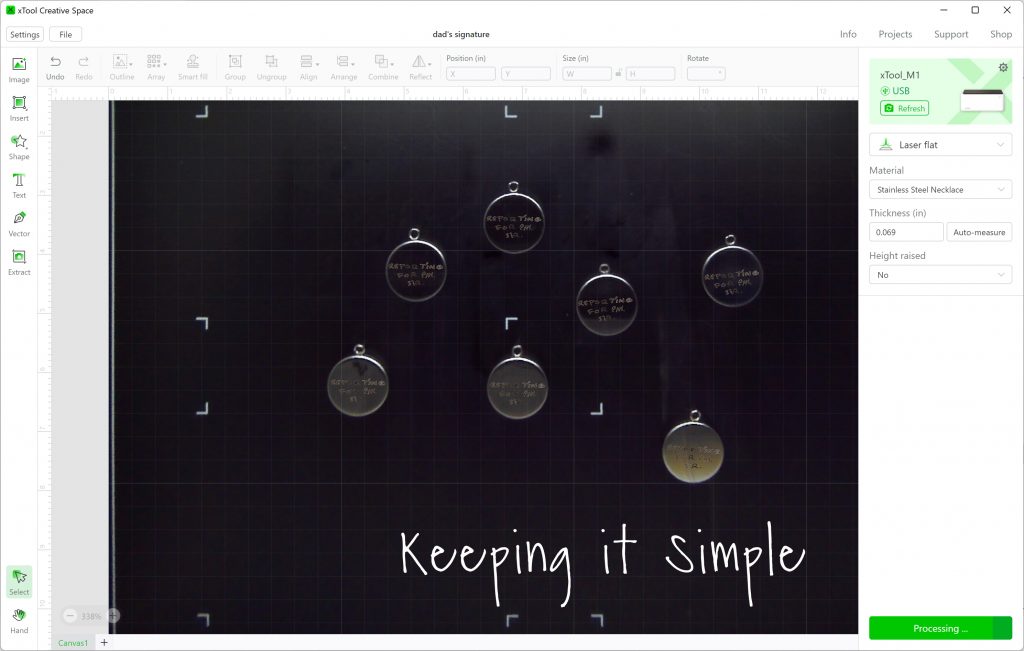
I then put the pendants into the xTool. I did 7 at a time but could have done more. I tried to put them in as straight I could.
 I closed the lid and then the camera put them on the computer screen. I then put the words onto the pendant.
I then put the saying on all of the pendants, highlighted them all and then sent it to the xTool to engrave it. The setting I used was the stainless silver necklace setting.
I pushed start and watched the magic happen.

It did a great job engraving all of the pendants, even when they weren’t lined up perfectly! 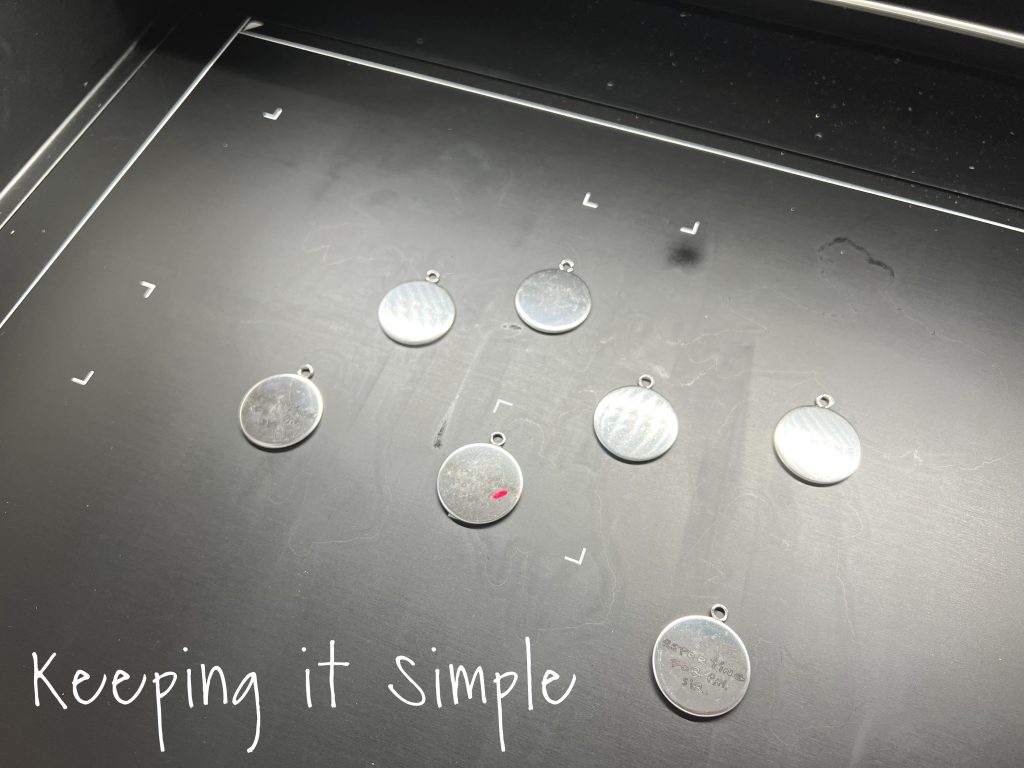
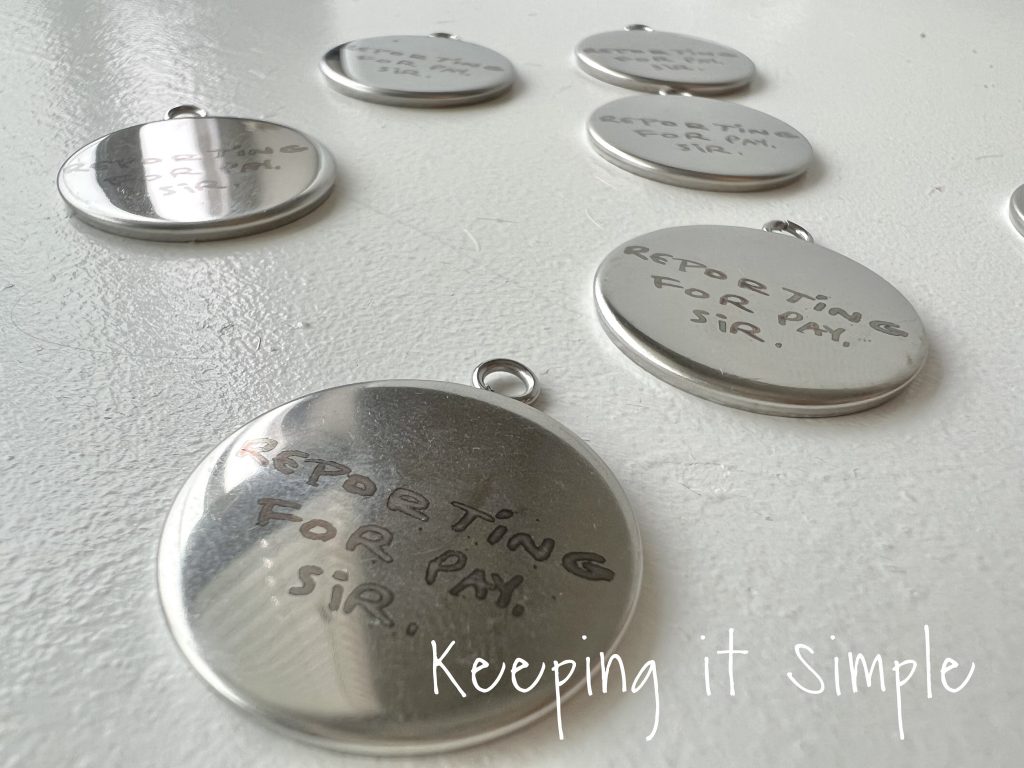
Here is a close up of the engravings of his handwriting.
Time to put the quarters into the pendants. I used E6000 glue to put the quarter into it.

And that’s it! Super easy and oh so special.

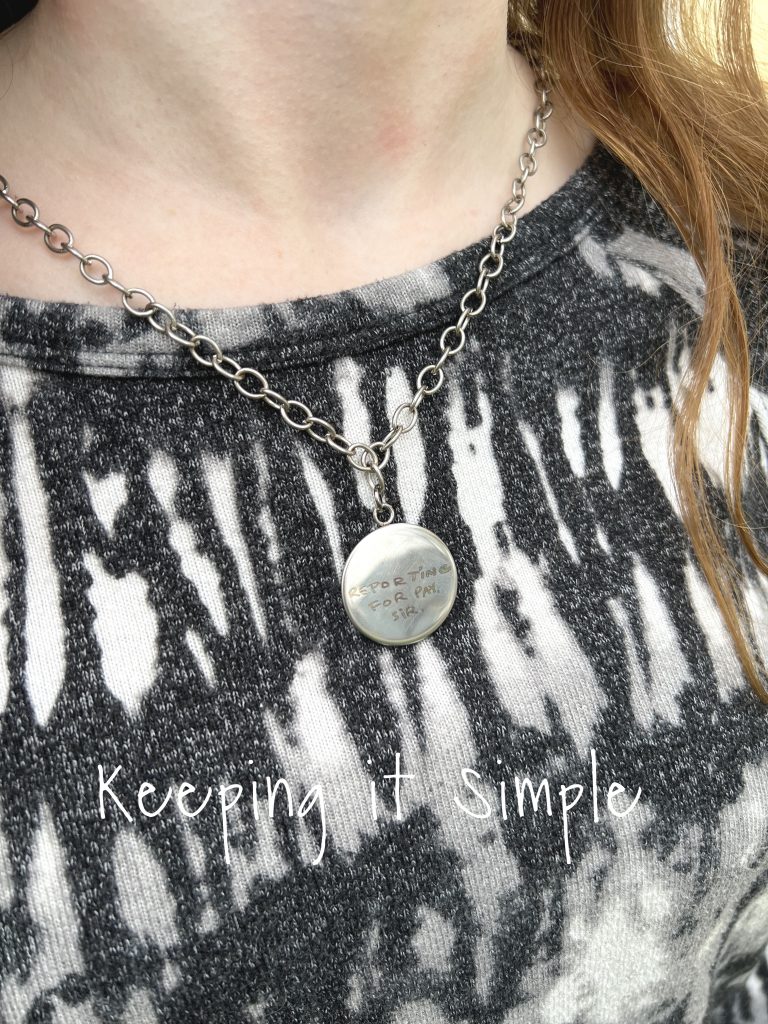
I added it to a necklace chain for my daughter. The best part about it, it’s two sided so you don’t have to worry about it being backwards when you are wearing it :).
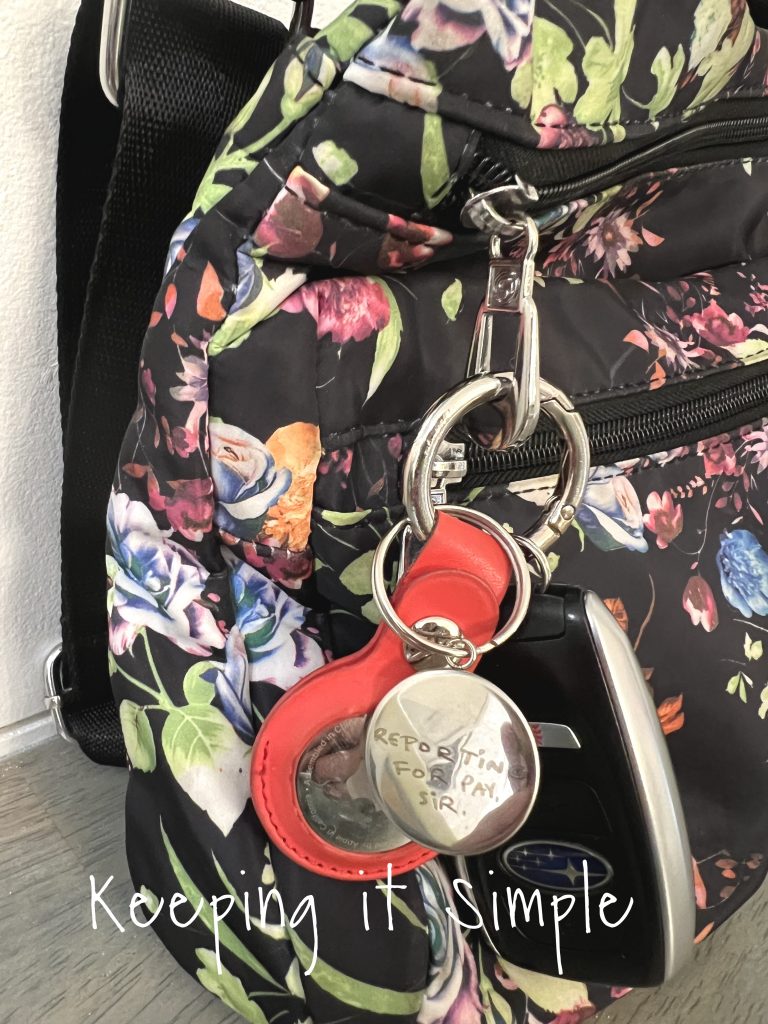
It totally works as a keychain too! Either way, it’s a special way to honor and remember my dad.
Check out all the other projects I have made with the xTool!
This post contain affiliate links.
Leave a Reply
You must be logged in to post a comment.