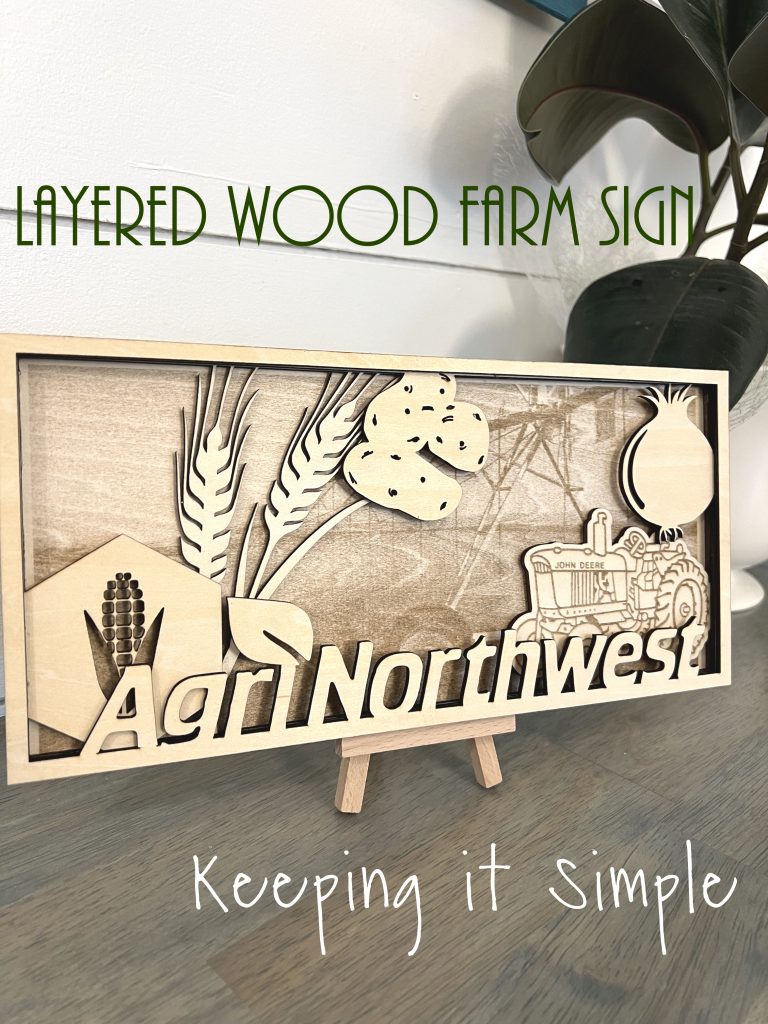
Layered Wood Farm Sign- How to Engrave and Cut Wood at the Same Time
***UPDATE xTool is having a big sale right now! The sale is through June 8-28, 2026. If you have been dying to try one of their machines, now is the time to do it! The new xTool M2 just got released and it looks amazing! Along with the laser, it has a printer! So you can print on the wood and then cut it out! That would make this sign even cooler, especially if you could print the picture in color! Right now you can get this amazing machine for only $549! ***
If you are new to xTool and laser cutters, check out my beginners guide to the xTool M1.
A couple months ago my husband asked me to make him something to display at his work. I had had my xTool M1 for about a month and was making all the things and he wanted me to come up with something for him. After seeing the layered wooden plaques I made for the band kids, he decided that he wanted something like that, but bigger and more detailed. I’m not going to lie, my husband was one of my pickiest and hardest clients I have ever had. He wanted me to use real pictures of the farm and cut plants that looked realistic. He made me really think outside the box and really test out the xTool and what it could do. Even though designing this layered wood farm sign was a little tricky at first, I absolutely love the outcome. It looks amazing and I love all the details in it. I’m grateful that my husband gave me a challenge, because I learned some new tricks along the way.
Here is a quick video on how I made the layered wood farm sign.
This is how I made it.
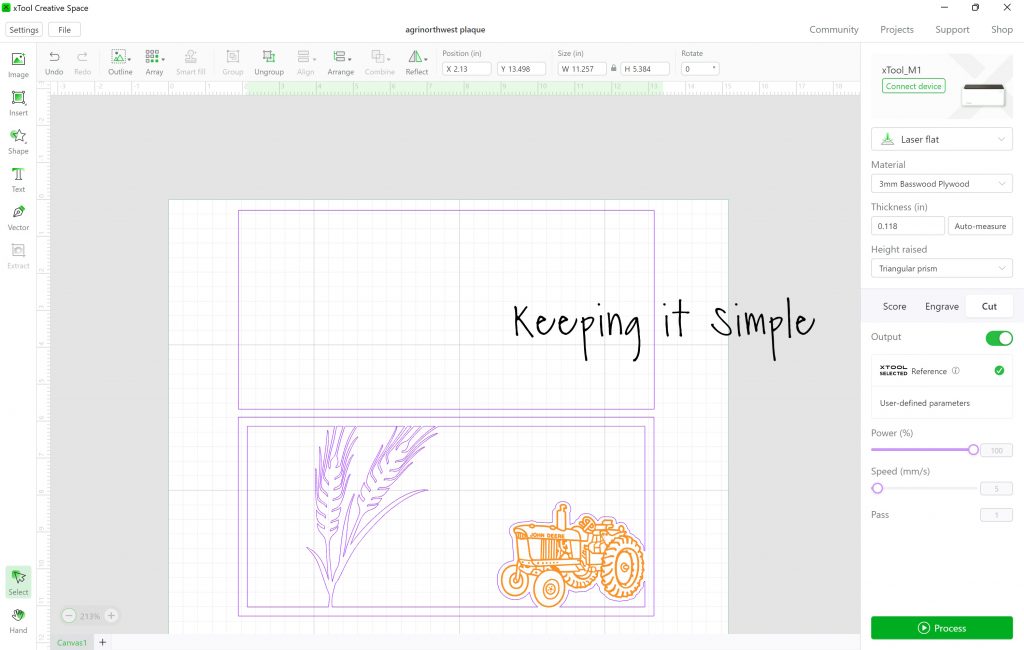
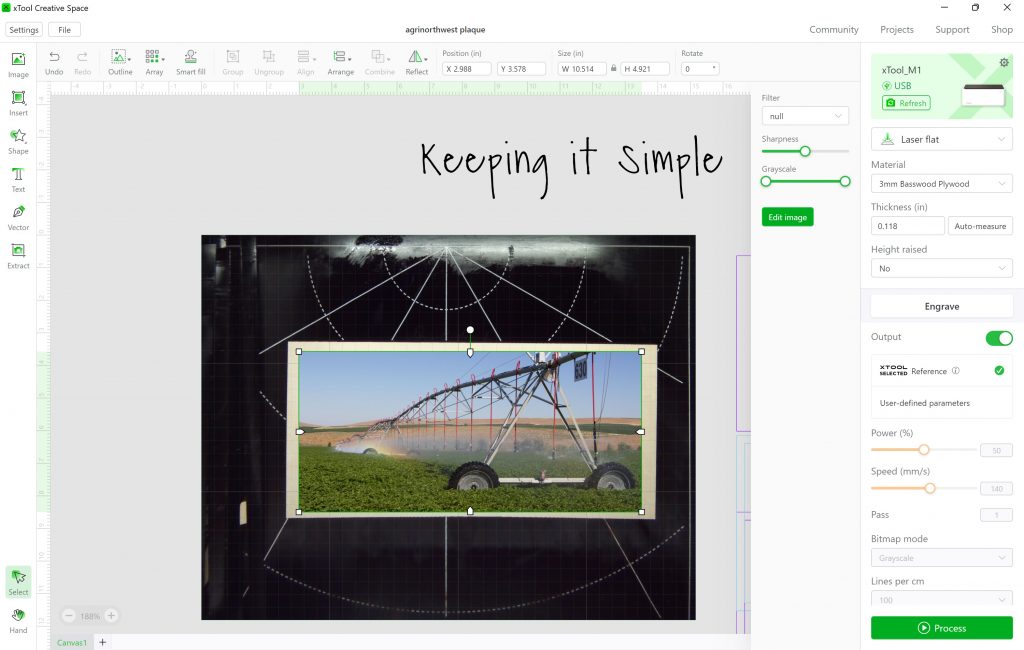
The first thing I did was created an SVG file with the design. I designed it in another program and then uploaded it on xTool Creative Space by clicking the image button. Once I got the SVG file open, I then grouped the different layers together and sized them. The layered wood sign is about 5×11 inches. I wanted to engrave and cut at the same time on xTool, so in order to do this you have to go in and click on the sections that you want to be cut and the sections that you want to be engraved. I have found that this is the best way to do this when you need to cut and engrave a design, I can’t get it lined up perfectly when I cut it first and then engrave. Also another thing I learned was that you can only engrave and cut at the same time if both designs are SVG or cuttable. Meaning, you can’t engrave and cut at the same time if the design you want to engrave is actually a picture and not SVG. Hopefully this will make more sense once I get to the part where I engrave an actual photo.
As you can see from the picture, the lines that are purple will be cut and the ones in orange will be engraved.
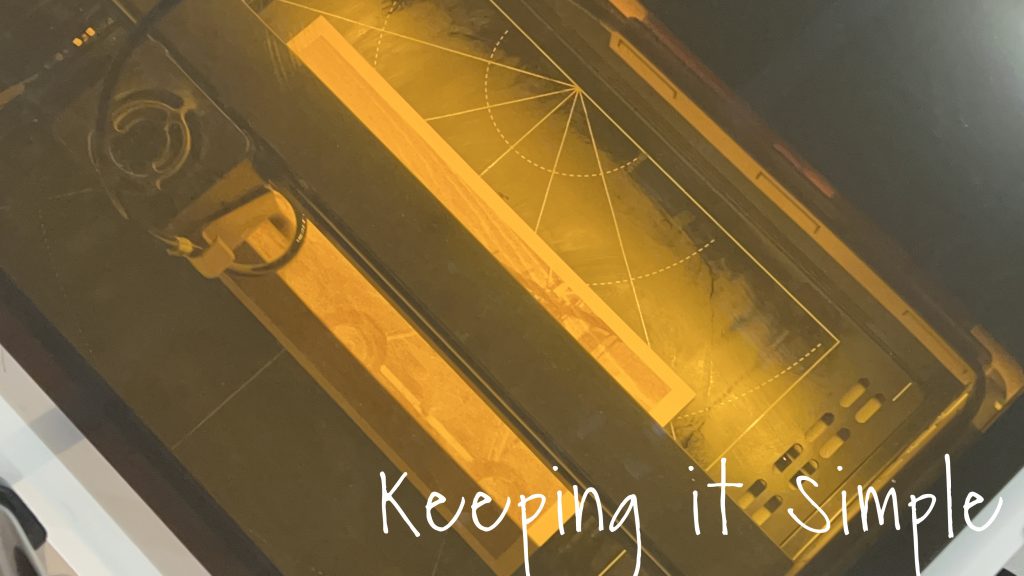
Once I got everything situated and where I wanted it to be, I then cut it out of 3mm basswood plywood. I have found that the lighter wood looks best when engraved. The darker wood is harder to see the engravings. I sent the design to the xTool M1 machine and it did great! The machine will engrave the image first and then will cut it out. It lines up perfectly when you engrave and cut at the same time on xTool.
For the next two layers there is no engraving, so I just have to size it and situate it onto the wood and click process.

All the tiny little details of the plants and logos were not a problem for the 10W laser of the M1.
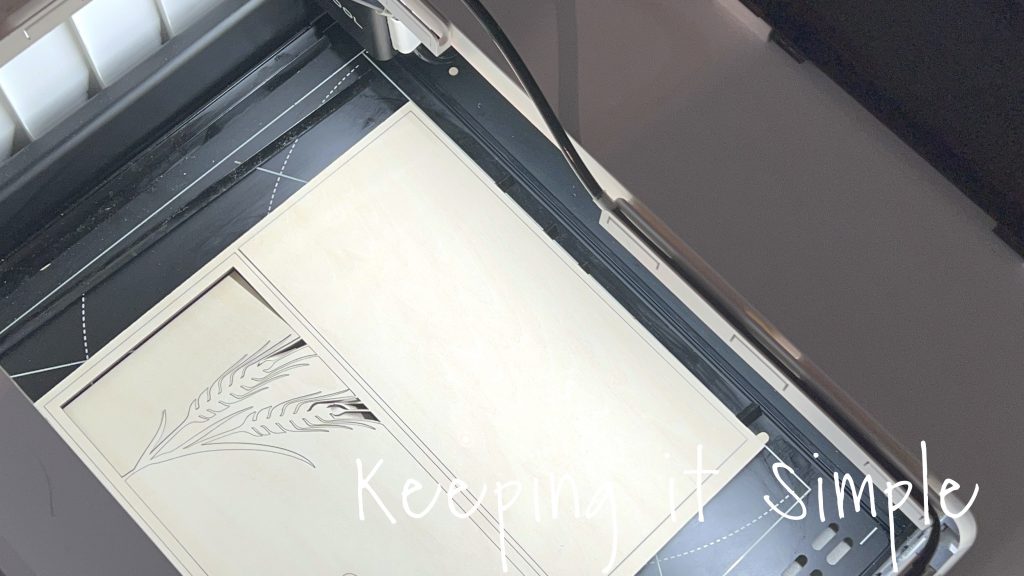
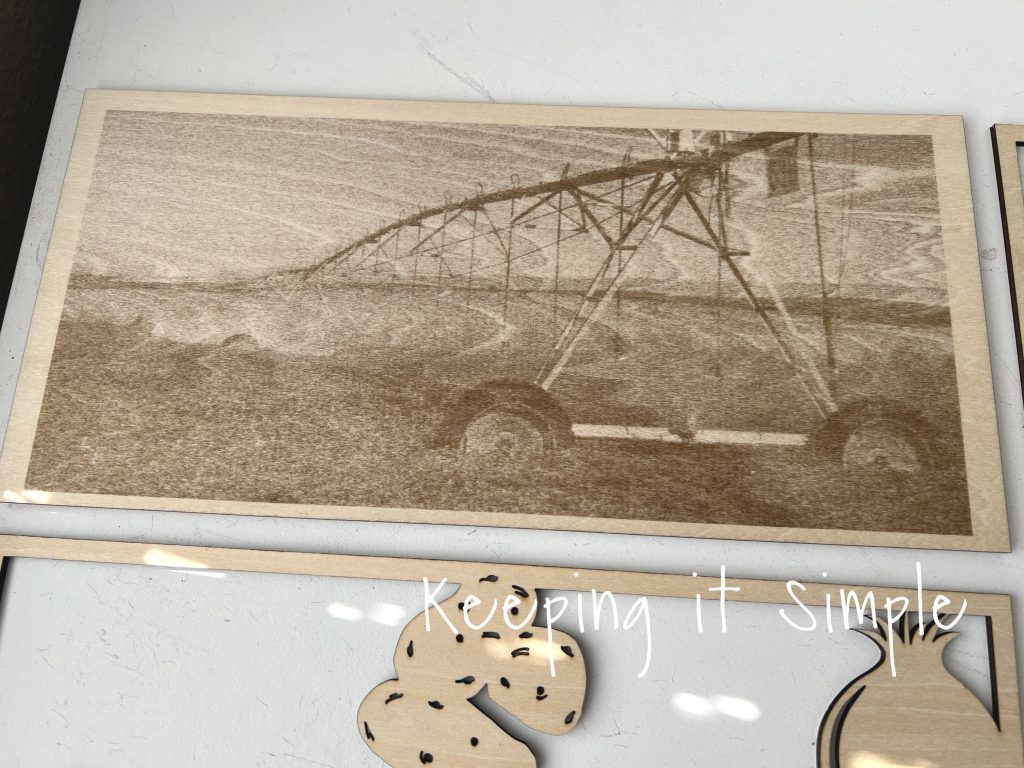
Now for the base layer of the layered wood farm sign. My husband wanted an actual photo of the farm, so we found a super cool one with potatoes and a pivot. Since this is an actual picture, I couldn’t engrave it at the same time as cutting it. So I put the back piece into the xTool M1 and engraved it after it was cut. When doing this, I found that it does a better job lining up if you take out the triangular prisms and put it directly onto the base plate. Also, when the laser cuts wood, it will leave a sap on the base plate. So I cleaned the base plate with a paper towel and rubbing alcohol before placing the wood down onto it.
The xTool did a great job engraving the picture onto the wood. I was amazed by how good it looked! I do want to let you know that engraving photos takes a long time, this took an hour to do this one.
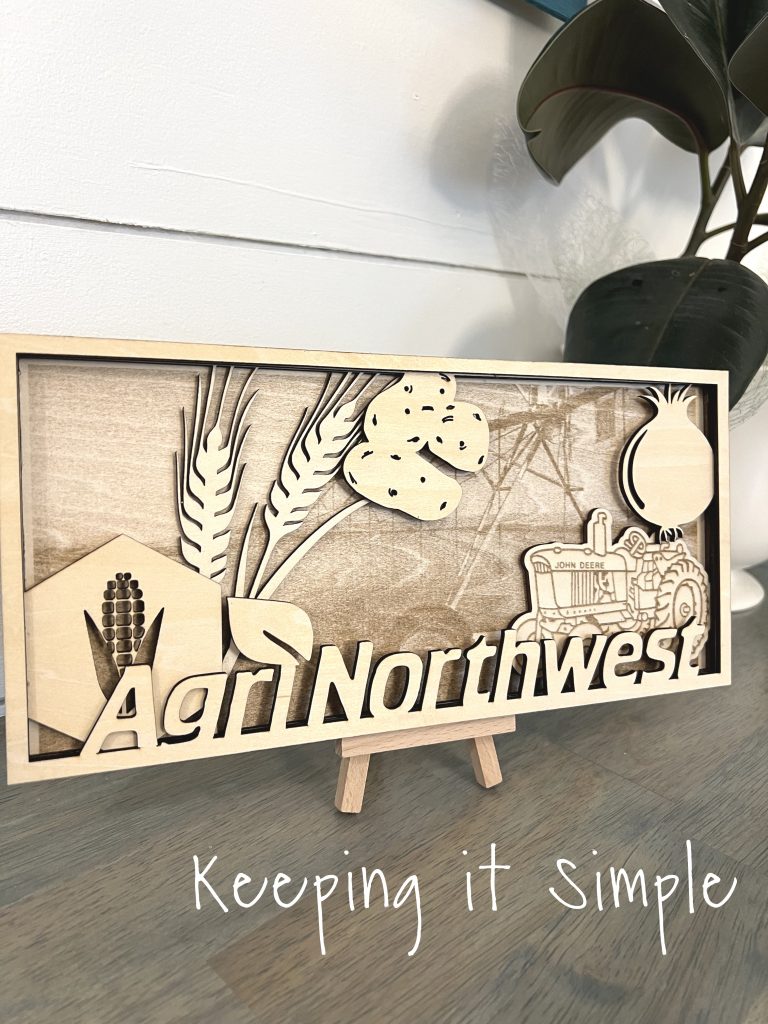
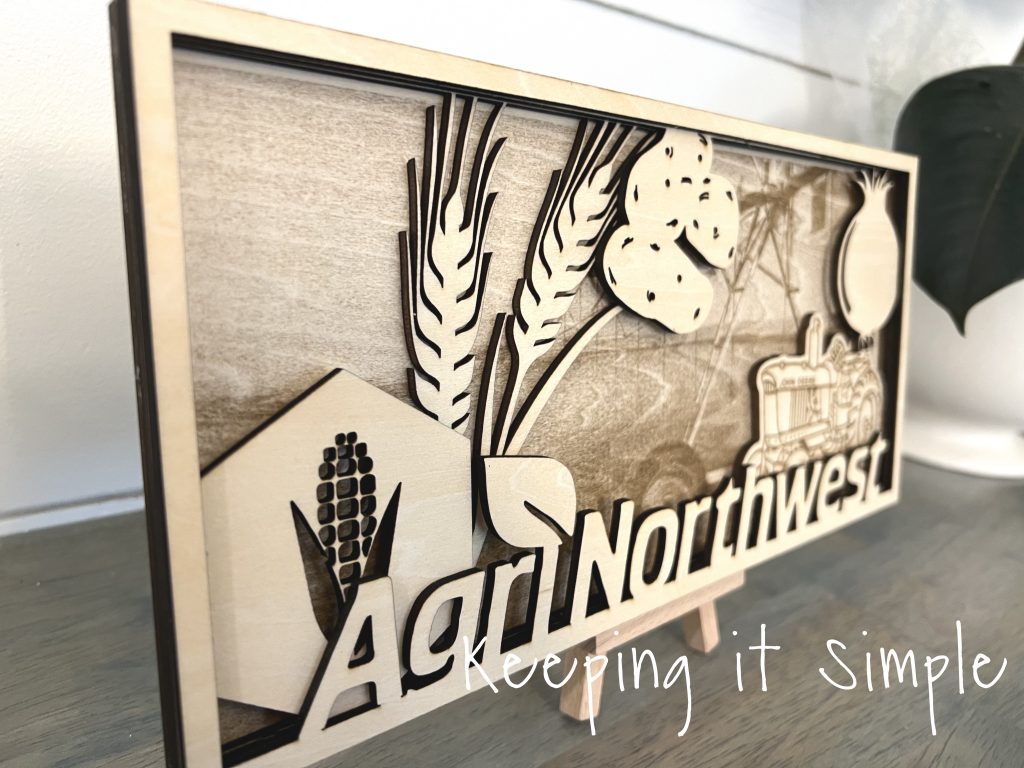
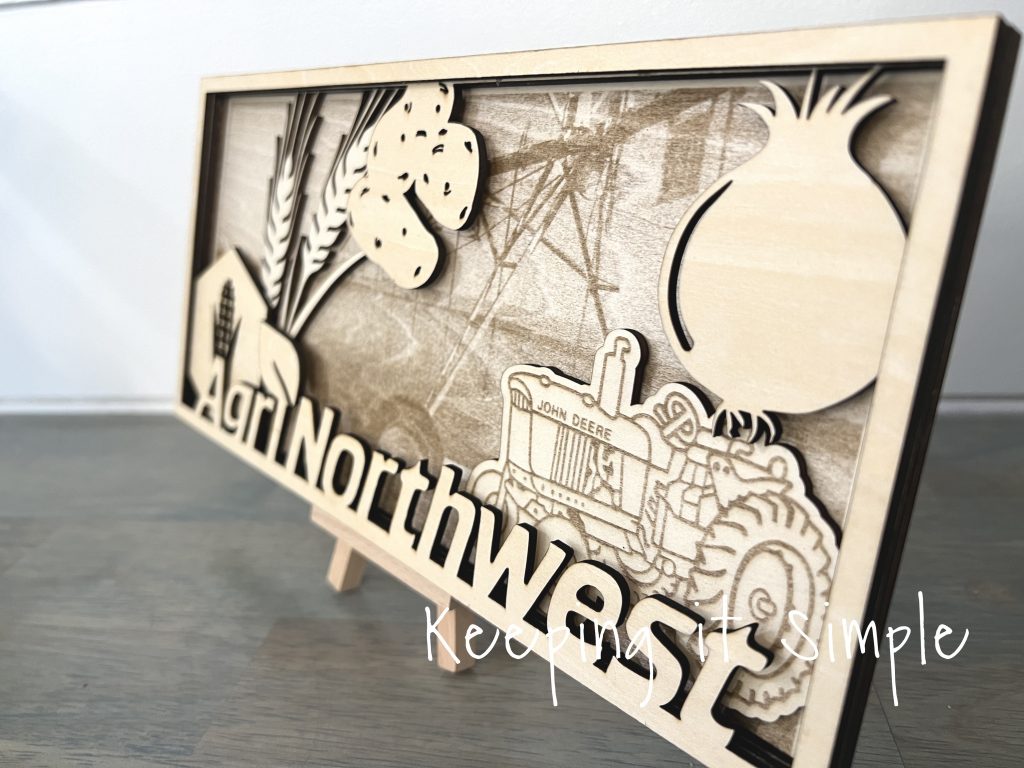
Here are the four different layers of the layered wood farm sign.
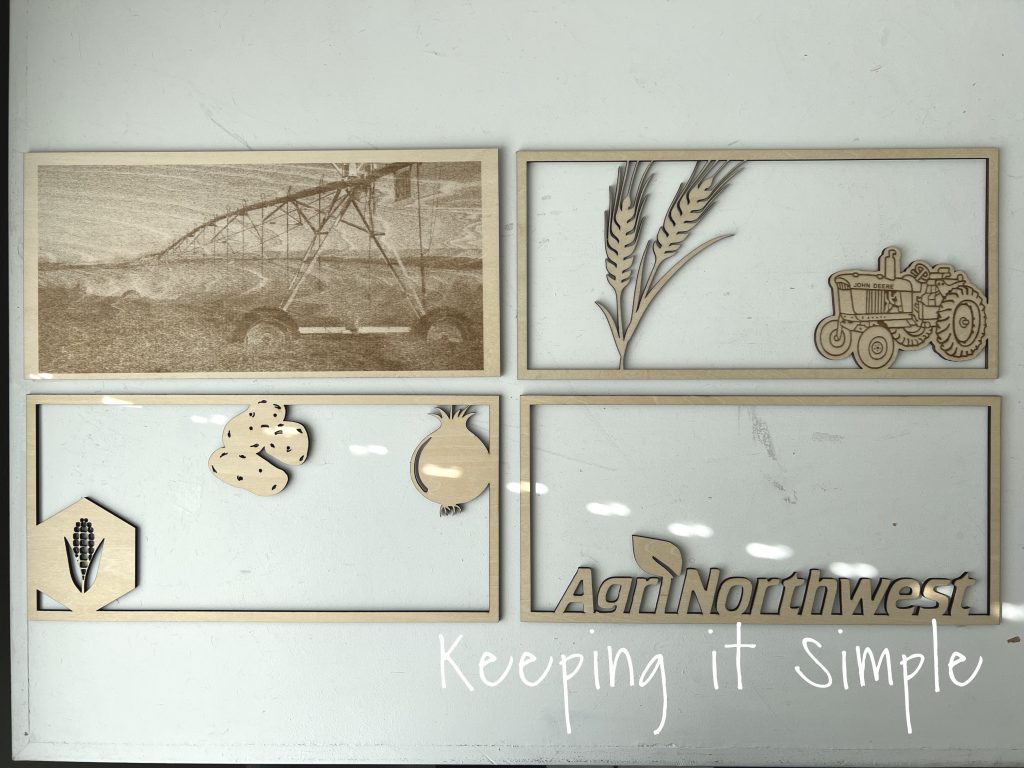
The farm picture looks so cool, I love that you can really see the pivot and that you can tell it’s a farm. I tried a few other photos as the background and I learned that you need a picture that has a lot of light and dark features, not just the same color. We tried to engrave a picture of a harvester in sweet corn. The majority of the image was the sweet corn and there wasn’t enough contrast in the picture, so when it was engraved, you really couldn’t tell what it was. This picture of the pivot worked because the pivot was against the blue sky.
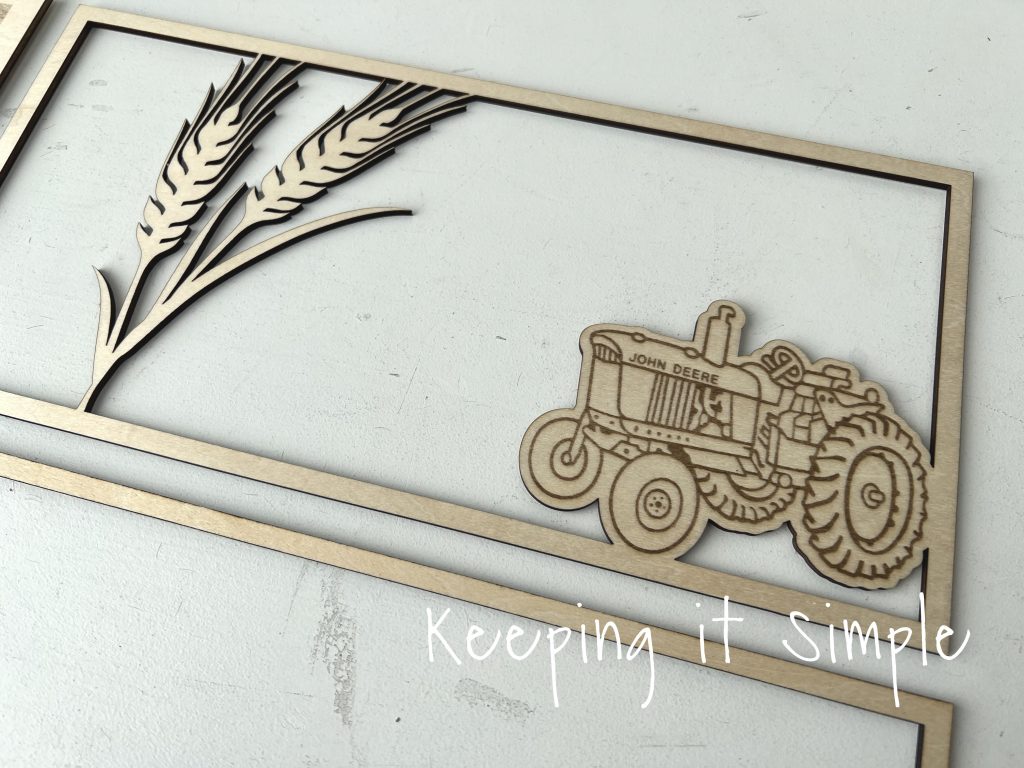
The next layer of the wood farm sign was the wheat and tractor. Since I engraved and cut the tractor at the same time, it lined up perfectly and it looks so good!
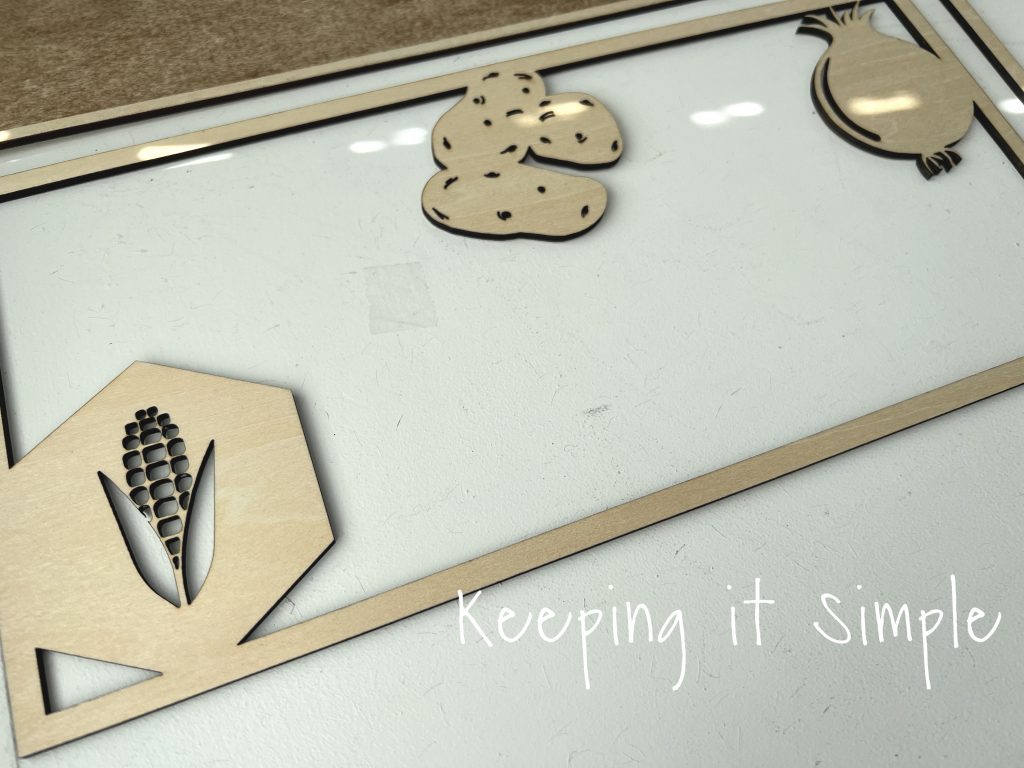
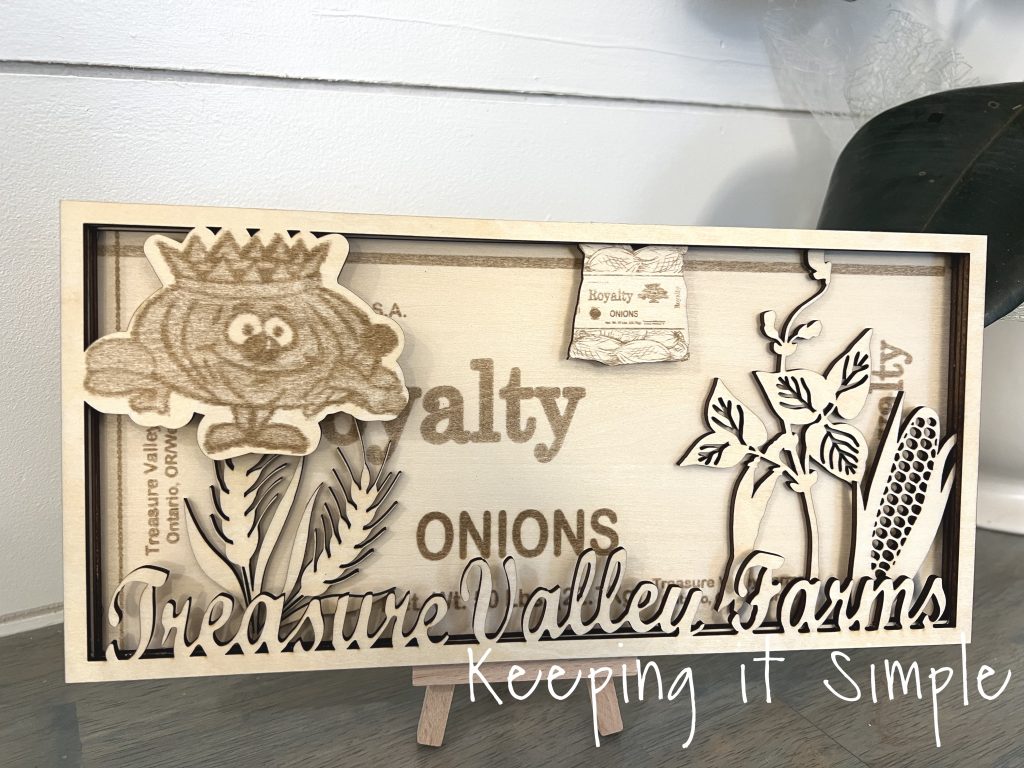
My husband wanted all of the different kinds of crops, so I added onions and potatoes. Then I used their corn logo to resemble the corn they grow.
The top layer is the farm’s logo. It looks so good cut out of the wood.

Using E6000 glue, I glued all of the layers together. Sometimes the plywood is a little warped, so it doesn’t lay flat. To get the layers to stick together, I used binder clips to help keep all the layers together until the glue has time to set. You do have to be careful not to damage the frame with the clips, so just be gentle. 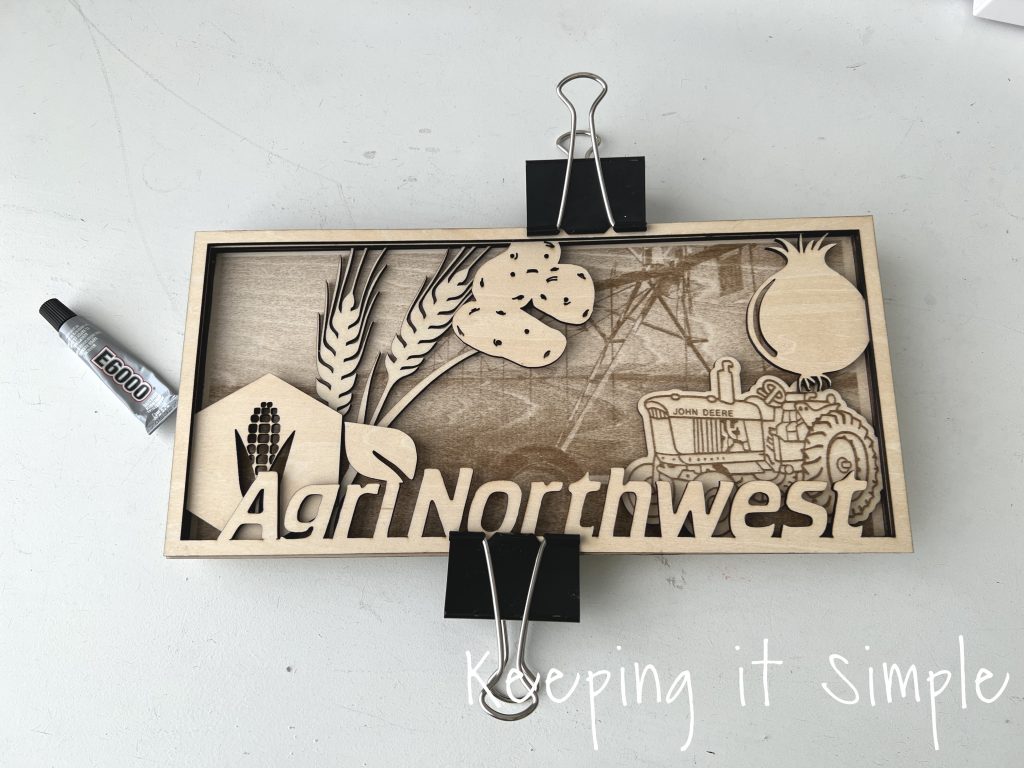
And that’s it! I put the farm sign onto a mini easel but it can also be put onto the wall with command strips.
Look at all those little details, especially with the wheat. The xTool M1-10W machine does amazingly with the intricate details.
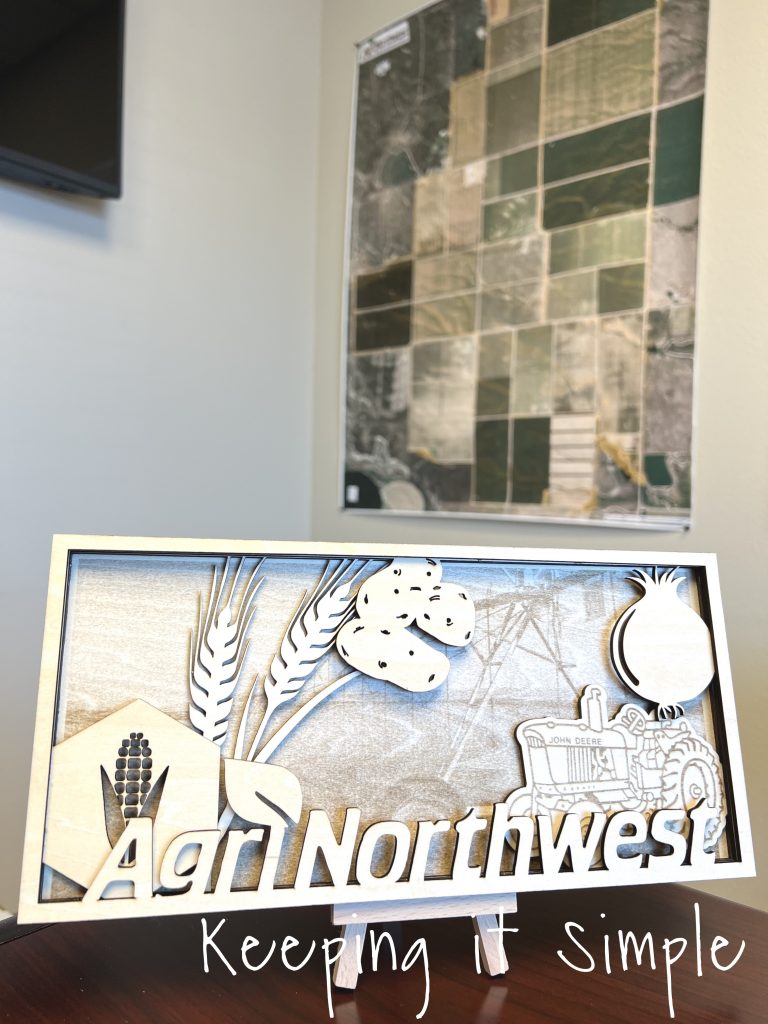
This is what it looks like in his office.
He also requested that I make one with the logo of Treasure Valley Farms, another farm he works for.
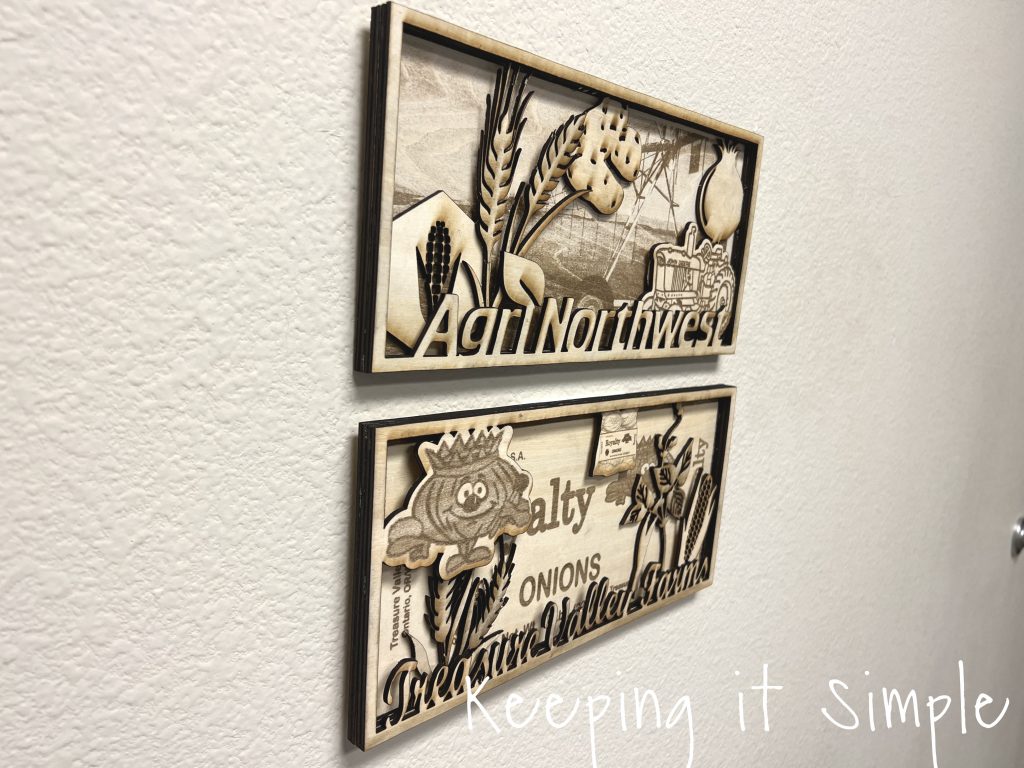
So I actually made these layered wood farm signs a couple months ago, before I got my air assist attachment. The air assist does so well at taking away the scorch marks, I made the signs again using the air assist. Here are the signs without the air assist.
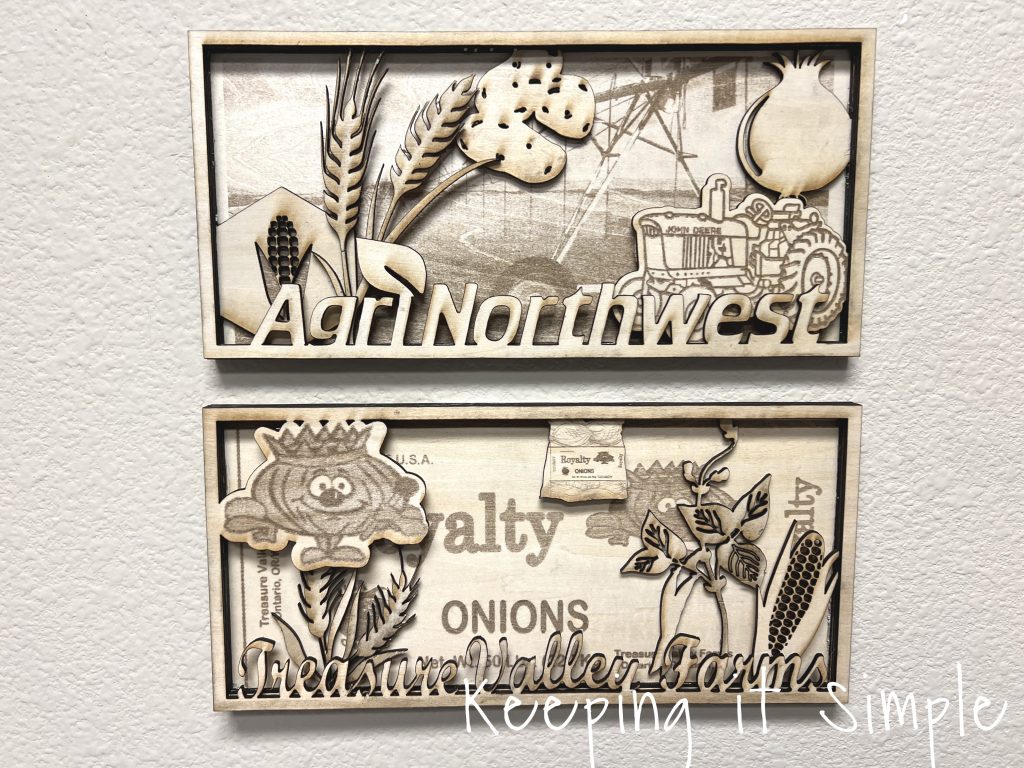
Although these farm signs still look amazing, they just look dirty compared to the ones I made with the air assist attachment.
***UPDATE***
I decided to make this sign again, but this time instead of engraving the pivot image onto the wood, I transferred the image onto the wood using tattoo paper. I just used followed the instructions on the packaging and it worked out great!
![]()
Here is the sign all put together.
![]()
I actually love the look of both. I love that the engraved image makes it feel rustic and I love the colors and details of the colored image.
![]()
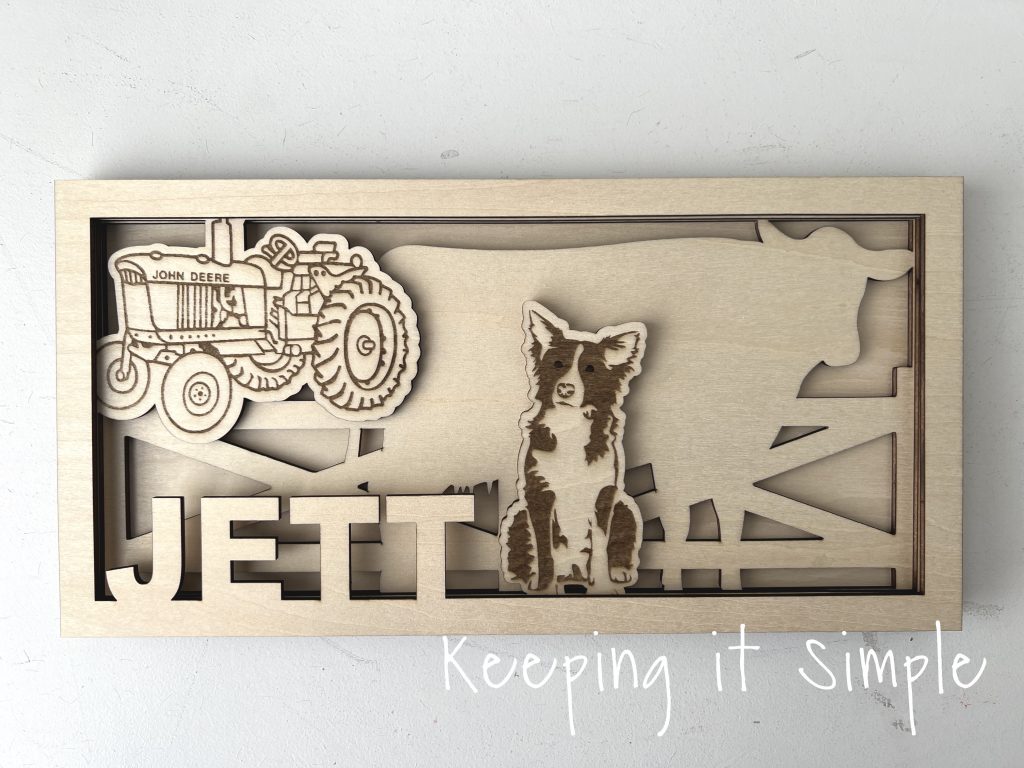
I had a friend request that I make her grandsons some layered wooden signs. She told me what their interests were and I designed them. The first one she said that he liked cows, border collies and tractors. Here are the 4 layers I did for this one. Since it is going to a child, I wanted the cuts to be thicker, so it’s not as fragile as the other ones. For the tractor and border collie, I engraved it and cut it at the same time.
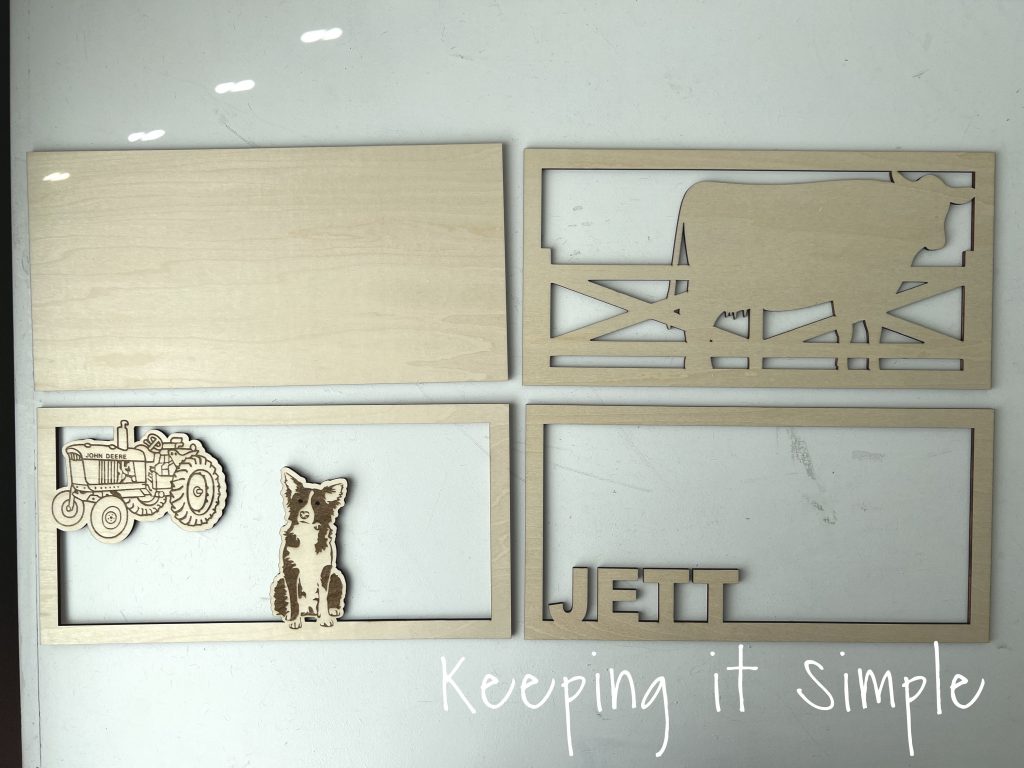
Here are the 4 layers put together.
For her other grandson, she told me that they are alfalfa farmers and they like horses, dogs and tractors. She then told me that they had 3 different kinds of dogs, so I made it a little more personalized with the dogs. Once again, I engraved and cut at the same time. It is so great that xTool allows you to do that, it saves a lot of time and hassle!
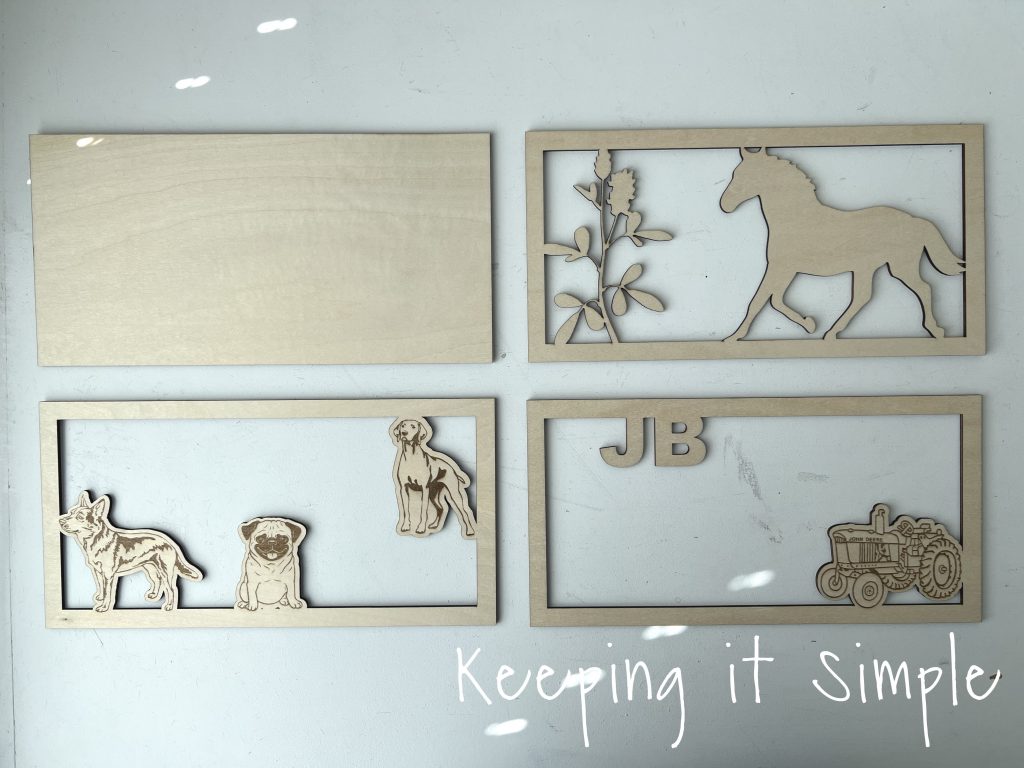
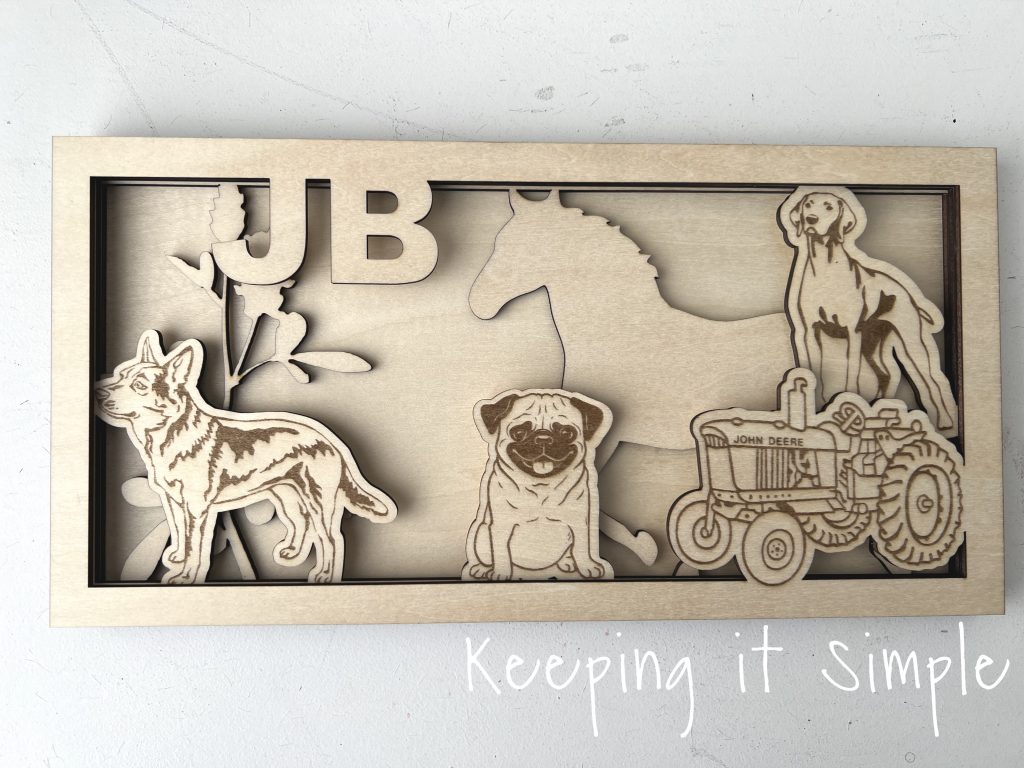
Here are the 4 layers put together. I love how they both turned out!
If you are wondering what else xTool can do, check out all the other projects I have made with this awesome laser cutter! You can see all those projects here.
This post contains affiliate links.
Leave a Reply
You must be logged in to post a comment.