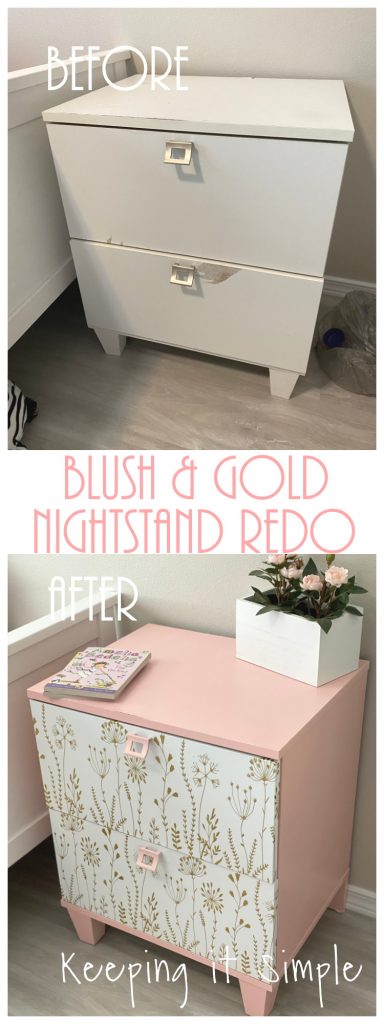
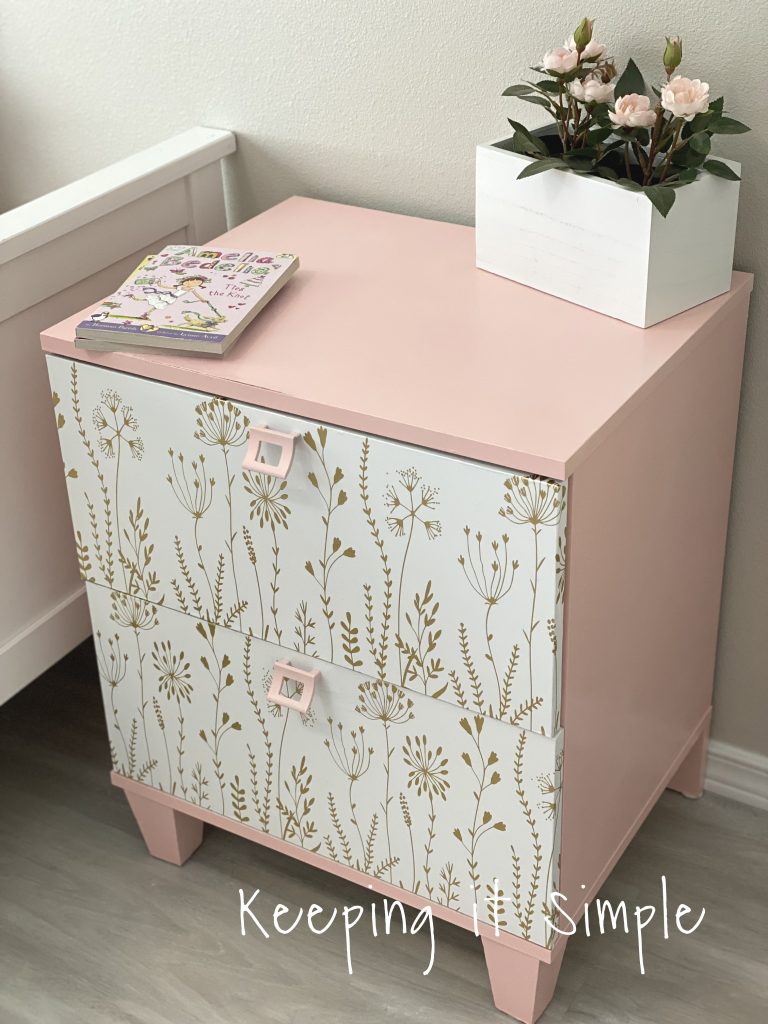
Blush and Gold Nightstand Makeover
For the past couple weeks, I have been redoing my daughter’s room. She is now 10, so she is gradually moving out of the little girl stage, into the tween stage. So we painted over the rainbows and unicorns in her room and are adding more “grown-up” pieces. She choose colors for her new room, blush, cyan and gold. As we were redoing everything, I went looking for nightstands to replace her little white one because it wasn’t looking too great. I thought a cute little pink one would look great in there. As I did some looking around, I found that nightstands with drawers were usually more than $100! No way I was going to pay that much for a little nightstand. So I went back to her white nightstand and gave it a much needed makeover. All I had to buy for it was a can of spray paint, everything else I had on hand. So instead of $100, this nightstand only cost me about $5 and a couple hours of my time. Definitely worth it, especially since we could make it exactly how we wanted it.
This is how I did this blush and gold nightstand makeover.
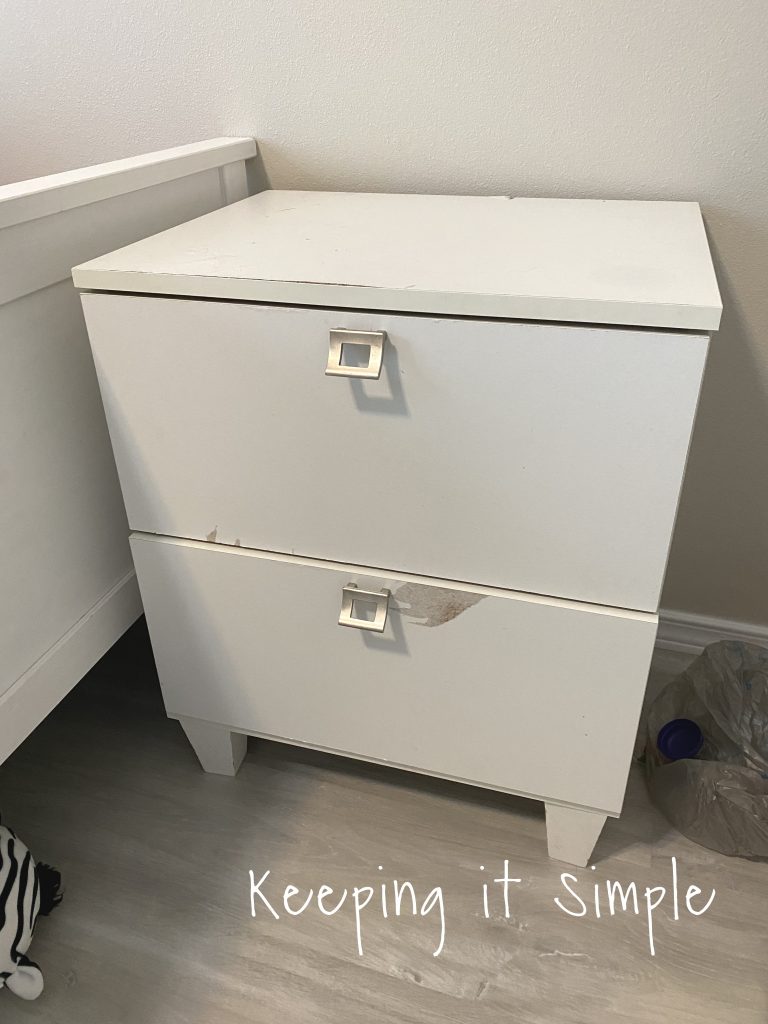
Here is the before. I got this little nightstand for my son about 6 years ago. It had some stickers on it, so when I took off the little shield on it, it pulled off a layer of the wood. So it stayed that way for several years. I knew that I couldn’t just paint over it, so I decided that wallpaper was the way to go.
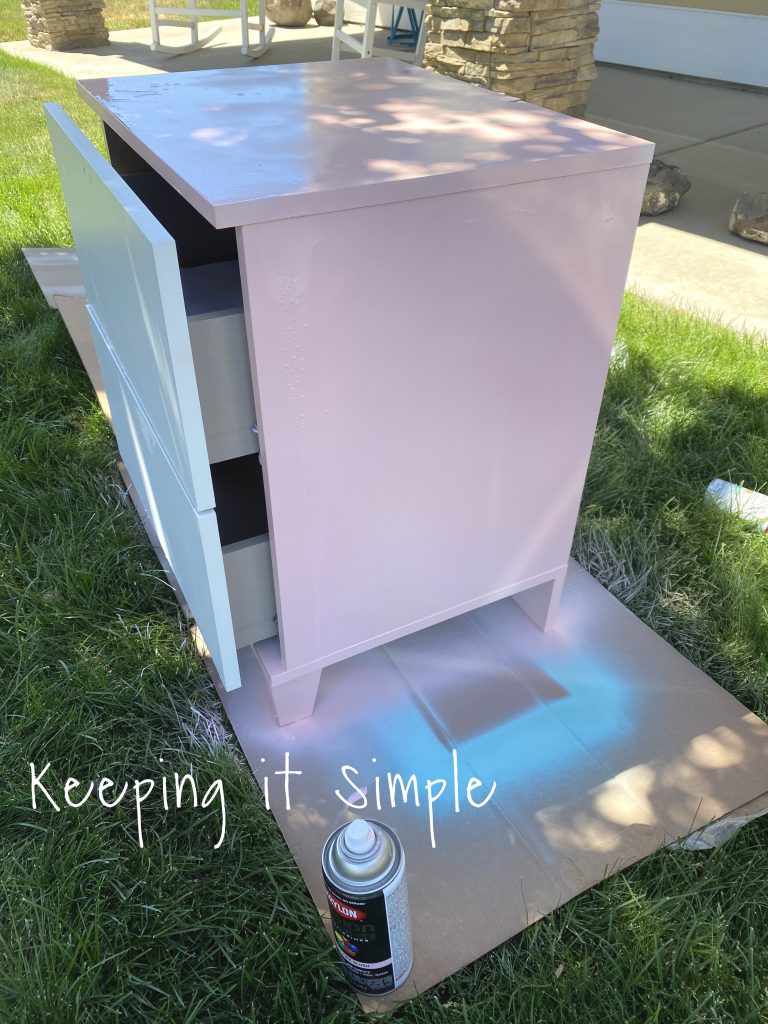
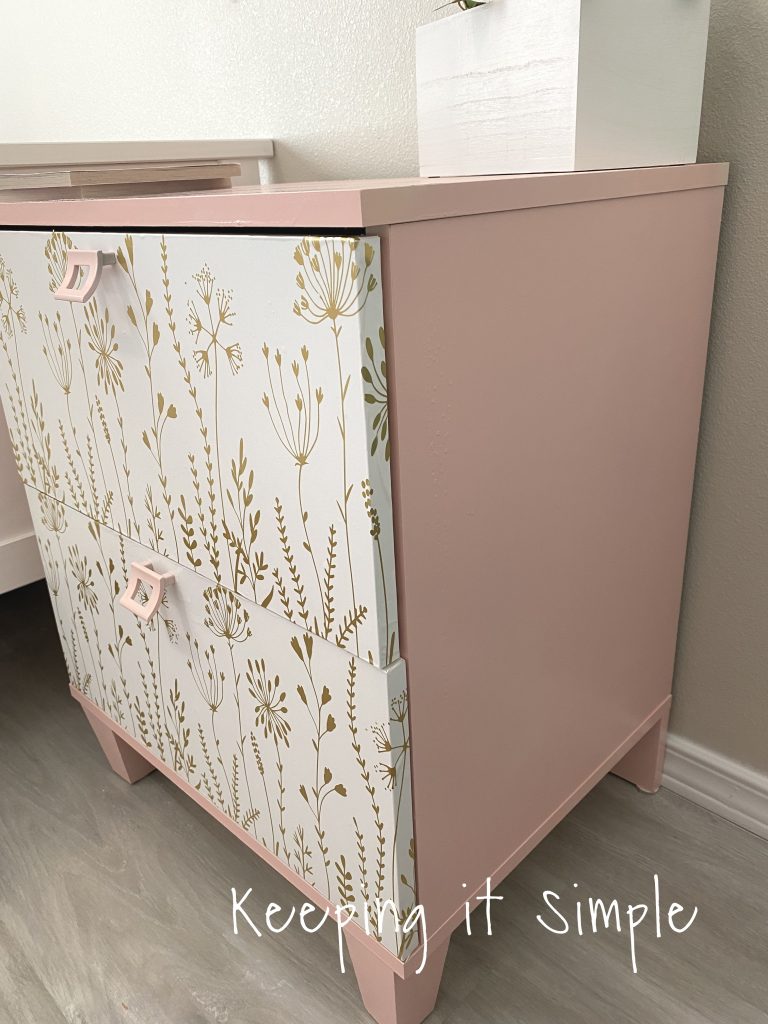
I painted the outside of the nightstand with a really pretty blush pink color. It’s a Krylon spray paint called Gloss Pink Blush. I painted everything besides the drawer doors. I couldn’t figure out how to take out the drawers, so I used paper to block the paint from getting on them. Normally I would remove the drawers before painting.
Now time for the drawers. I wanted a white and gold wallpaper to put into the drawers. So I ordered this one. When it arrived in the mail, it wasn’t as gold as we had hoped. We were hoping for a shiny gold or at least a metallic gold. This one was matte and looked more yellow than gold. So I went to my vinyl stash and found a pretty metallic gold. I decided to make my own “wallpaper” with vinyl instead. And I’m so glad that I did because I love how it turned out. Using my Silhouette CAMEO, I cut flowers out of the gold vinyl, this one is called Gold Chrome Brushed.
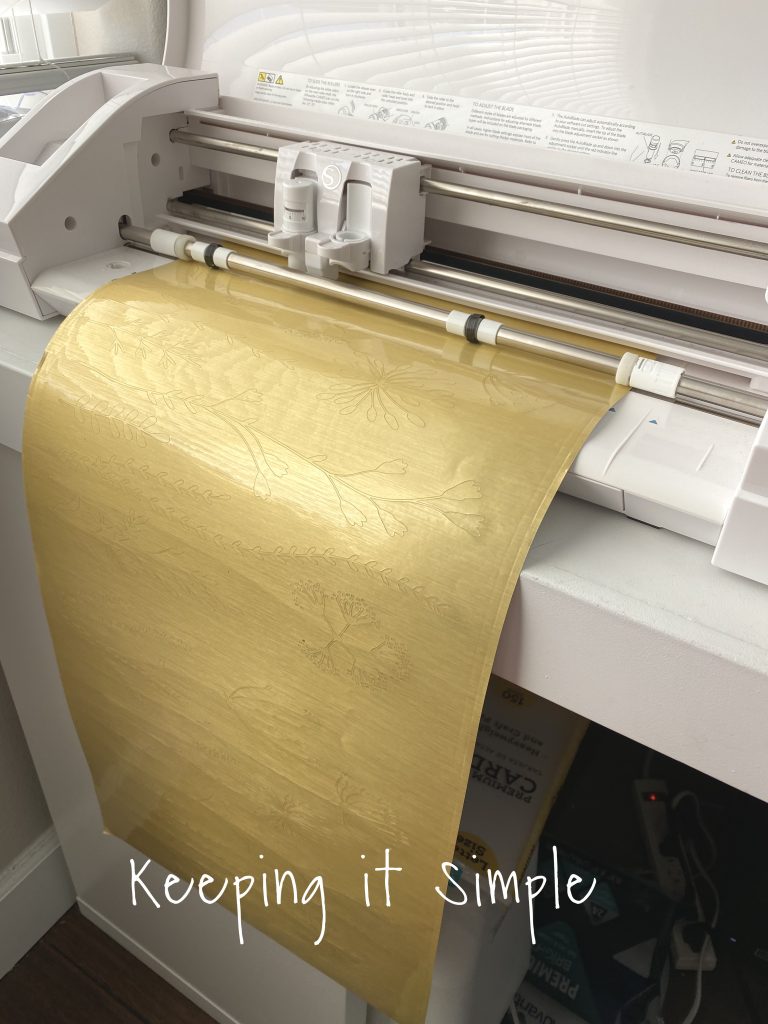
I cut out the flowers on two sheets and then weeded them. I also used two sheets for white Oracal 651, in matte white. The Oracal 651 series is a permanent vinyl and is stronger than the 631 series.
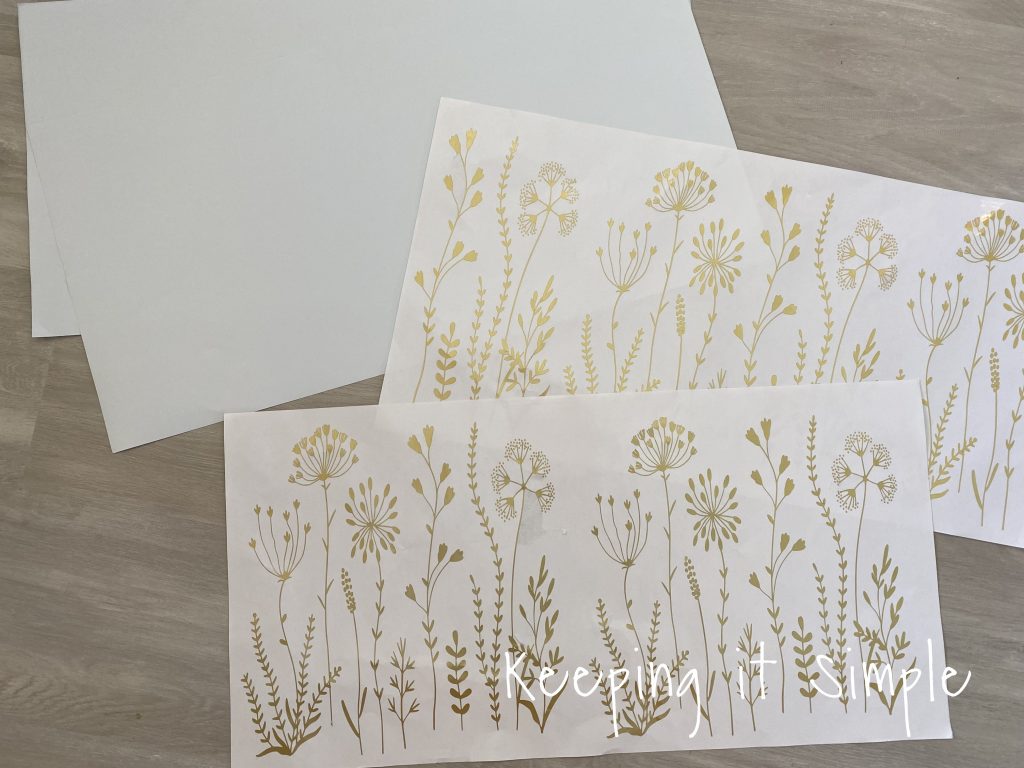
Using a gridded clear transfer tape, I put the flowers onto the white vinyl. I didn’t put all the flowers on at the same time, I split it up into 12 inch sections. It’s a lot easier to manage the transfer with the smaller size. Less chance of the vinyl sticking together or it not laying flat. I used the application tool to really make sure the flowers were pressed down good onto the white vinyl.

Now time to put the vinyl onto the nightstand. I used the hinge method to put it on. The way the hinge method works is you fold the backing paper in half, this way you can determine the middle of your design. Then you put the middle onto the middle of the drawer and then pressed down the one half. Then, you slowly remove the rest of the backing paper and press the vinyl as you go. It’s a much easier method to use when you are putting on something bigger than a couple inches.
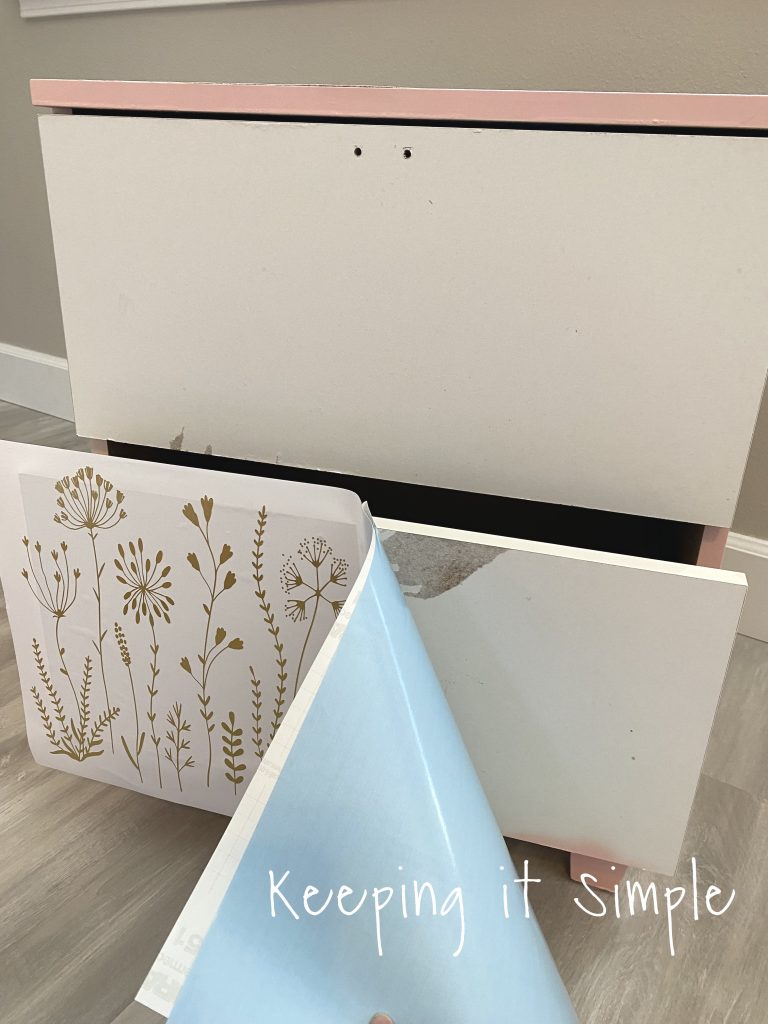
Once I had the whole piece of vinyl onto the drawer, I cut down the edges and then folded the vinyl over the top and sides. I had to cut slits on the top and bottom of the sides so I could make it look nicer on the side. I just folded it over the top and bottom parts.
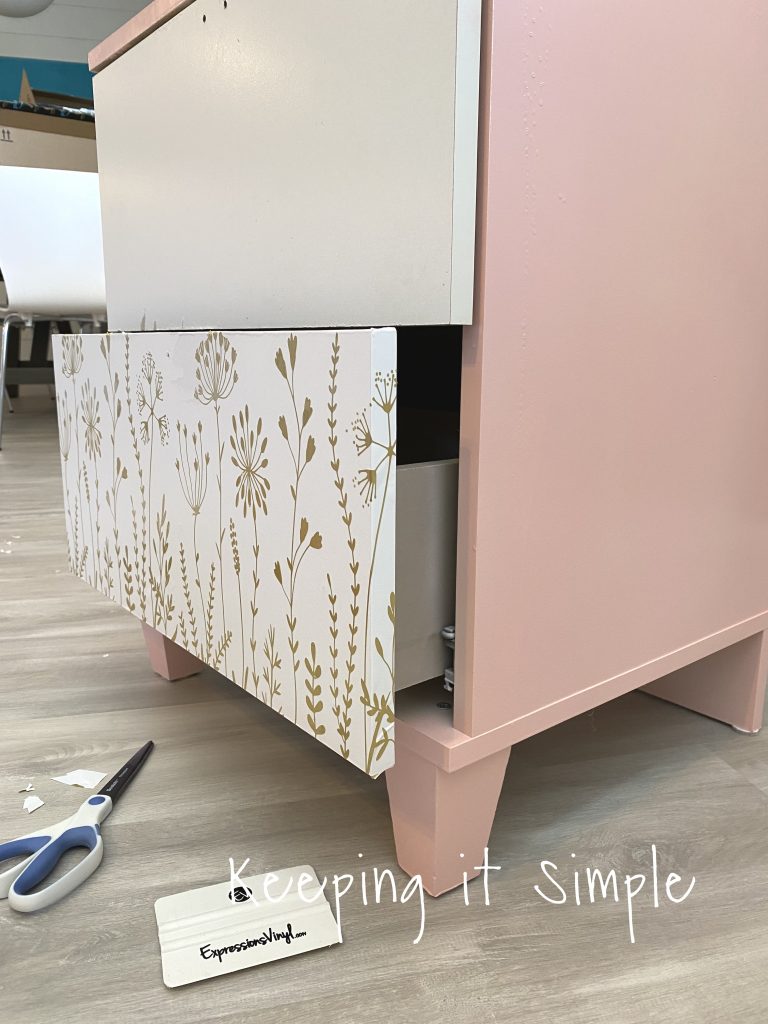
I added the other piece of vinyl and then added the handles back on. I love how my vinyl “wallpaper” looks on the drawers. It did a good job of covering up the ripped parts of the doors.
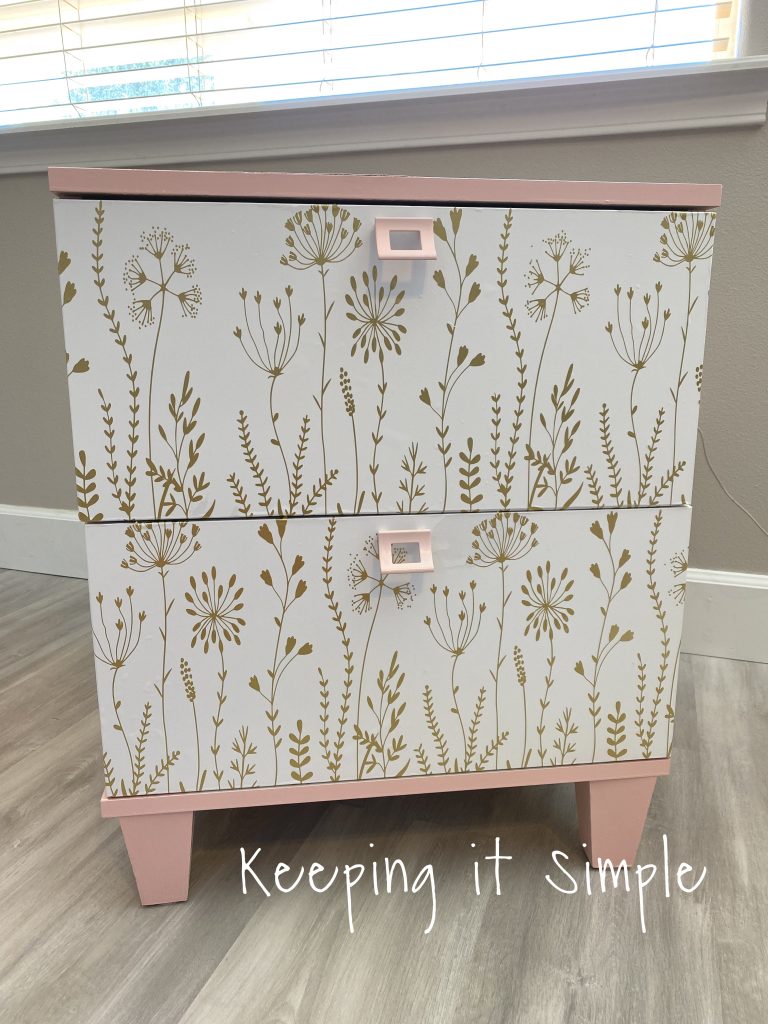
And that’s it! We love this cute blush and gold nightstand! It took a little bit of time to make the white and gold flower wallpaper but I love how it turned out!
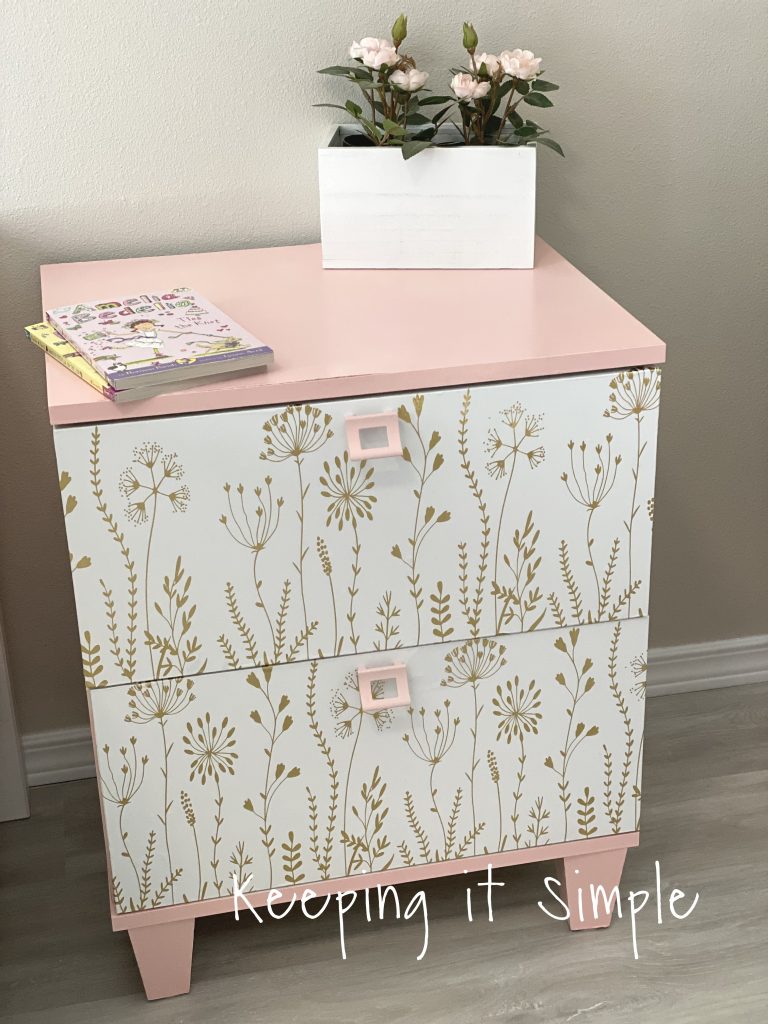
This cute little pink and gold nightstand is perfect for her new tween bedroom.
The sides look great too!
Make sure to check out my other home decor ideas!
Leave a Reply
You must be logged in to post a comment.