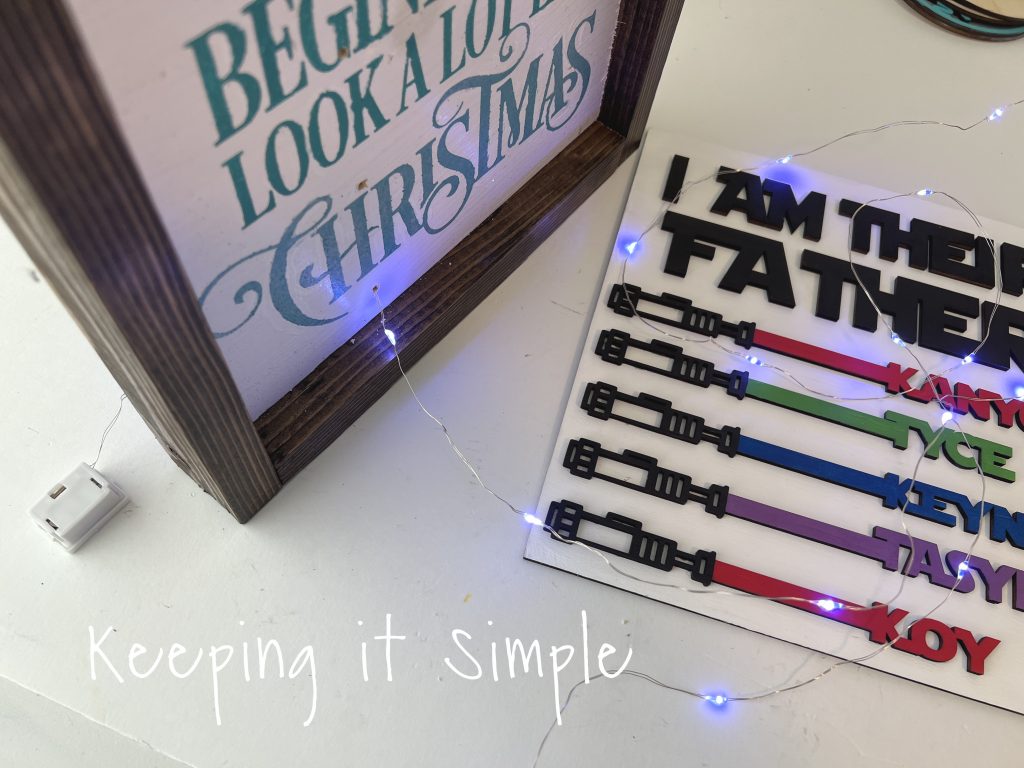
Father’s Day Gift Idea- Light Up Star Wars Sign with Personalized Light Sabers made with xTool M1
I love making things for Father’s Day. I especially love making things for my husband with our children’s names on it. He loves his kid and is one proud Dad, so having things with their names is really fun for him. Over the years I had done a lot with their names and handprints, you can see all of those fun ideas here. I have made him so many shirts that I thought it was time to something a little different. Now that I have my awesome xTool laser cutter, I wanted to make him something fun out of wood. I thought that putting the kids’ name into light sabers would make a perfect Father’s day gift. I also thought that lighting up those light sabers would make the sign an epic Father’s Day gift!

Here is a quick video to show you the process of how I made this light up Star Wars sign.
If you are new to laser cutters and xTool machines, check out my beginner’s guide to xTool.
This is how I made this light up Star Wars sign.
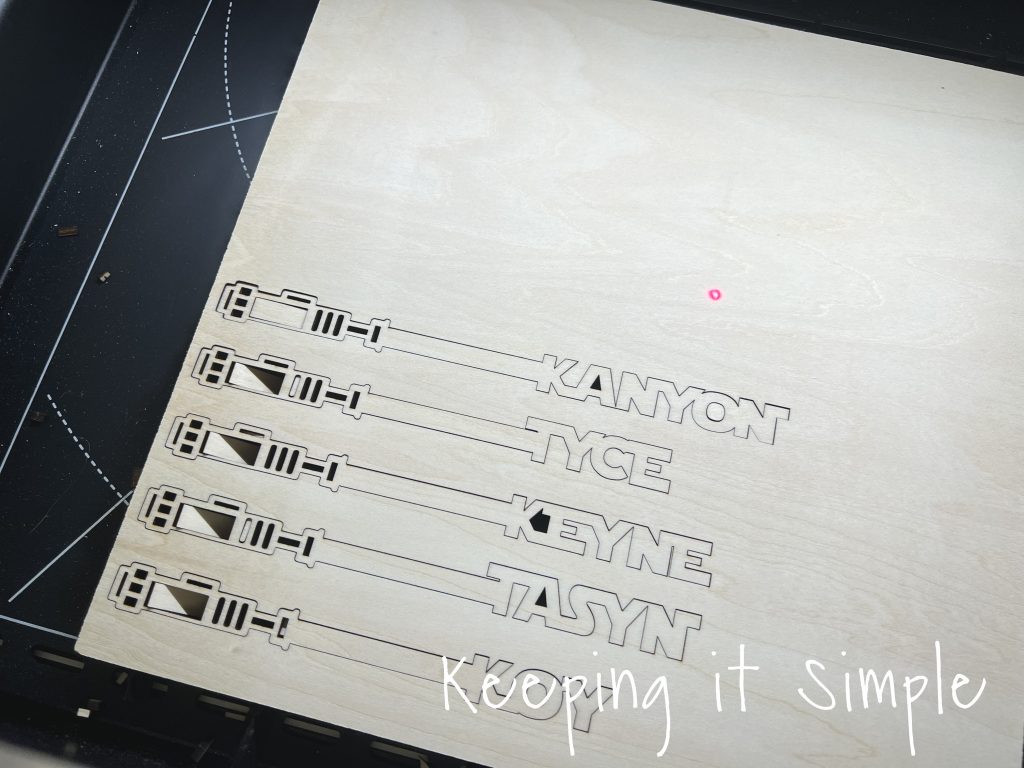
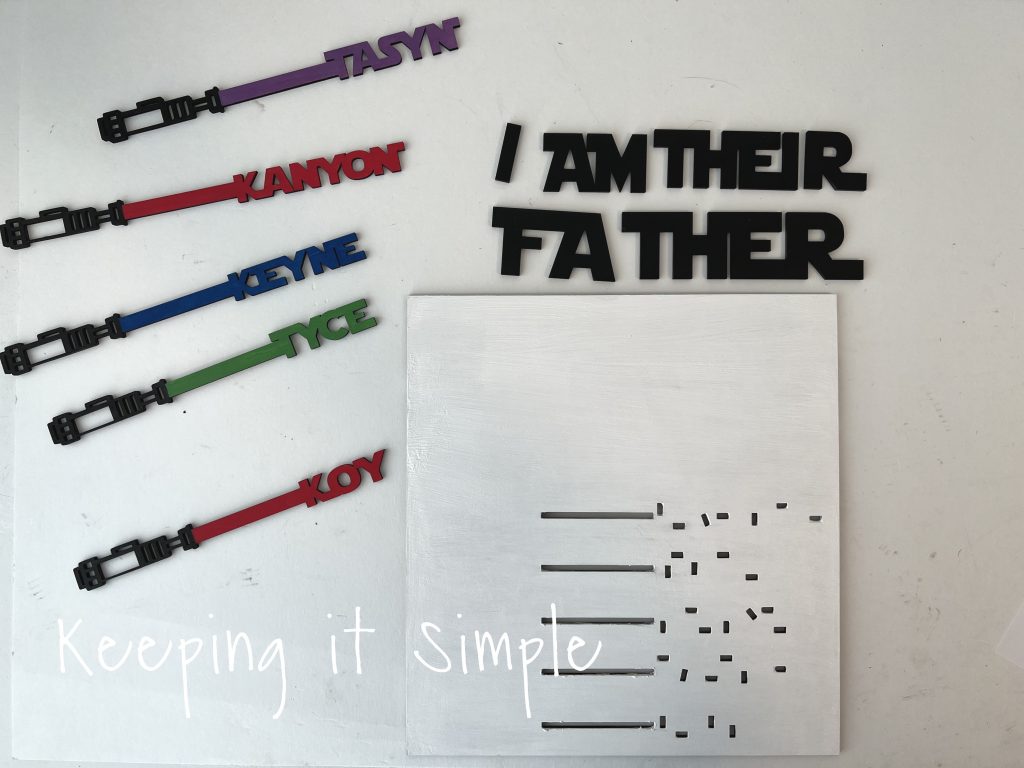
For the light sabers, I used the same light saber that I used in this Star Wars sign. There is a cut file within that post if you want it. For the words, I used the font called Star Jedi. To make the personalized light sabers, I used the Star Jedi font and typed out the name. Then I used the SVG file from the Star Wars sign and using the combine button, I combined the name and light saber together. I then used the font and typed out the words, I am their father. I then cut out a background piece with lots of little rectangles in it, I will get to those later. They do have a purpose :).

Once I got all of the design lined up and ready to go, I sent it to the xTool M1. I used a 12×12 3mm basswood plywood to cut out the words, background and light sabers. I used my air assist attachment so there were no scorch marks on the wood when I cut it.
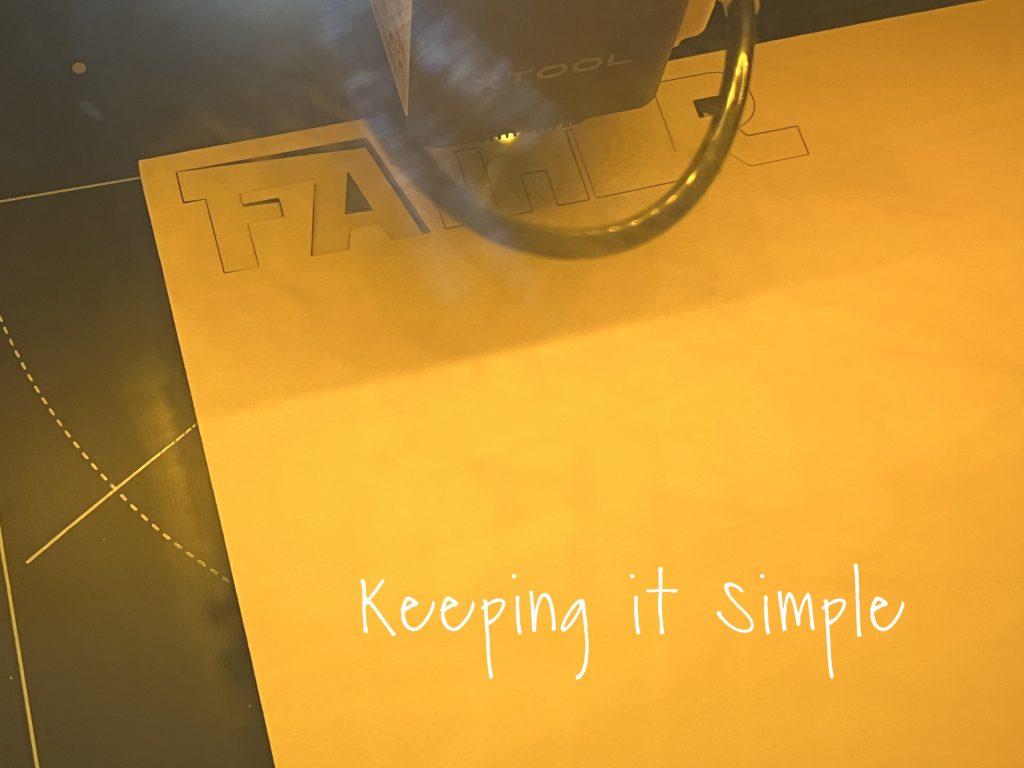
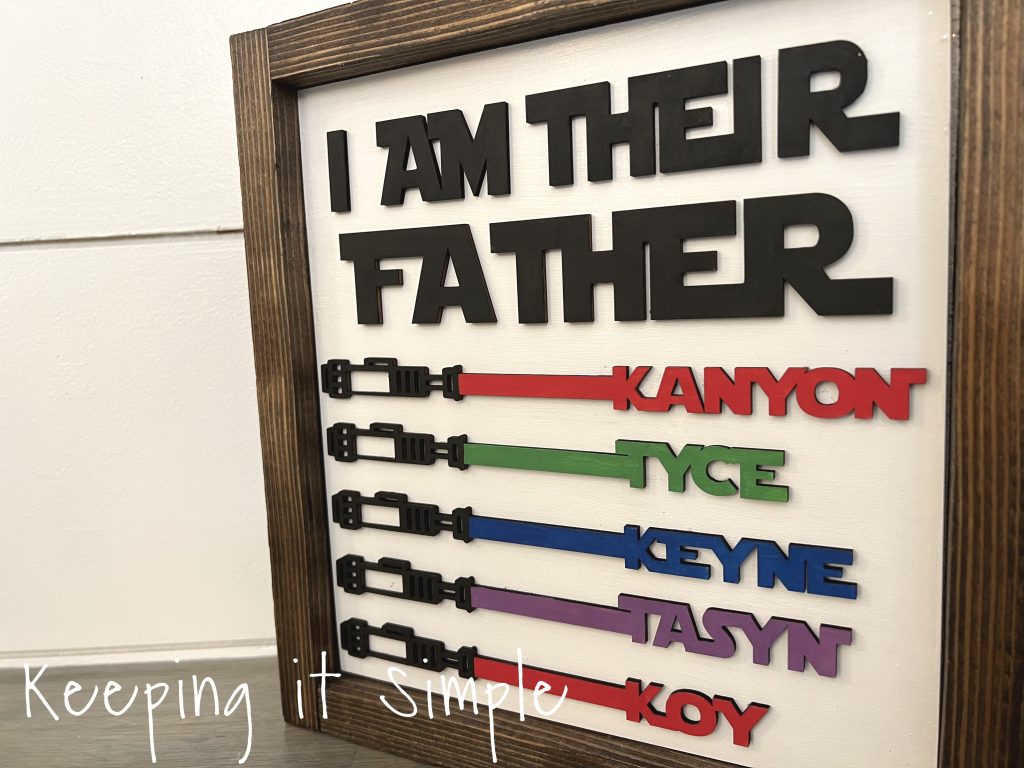
Here are the personalized light sabers, I love how they look so much! The xTool M1 cuts so well!
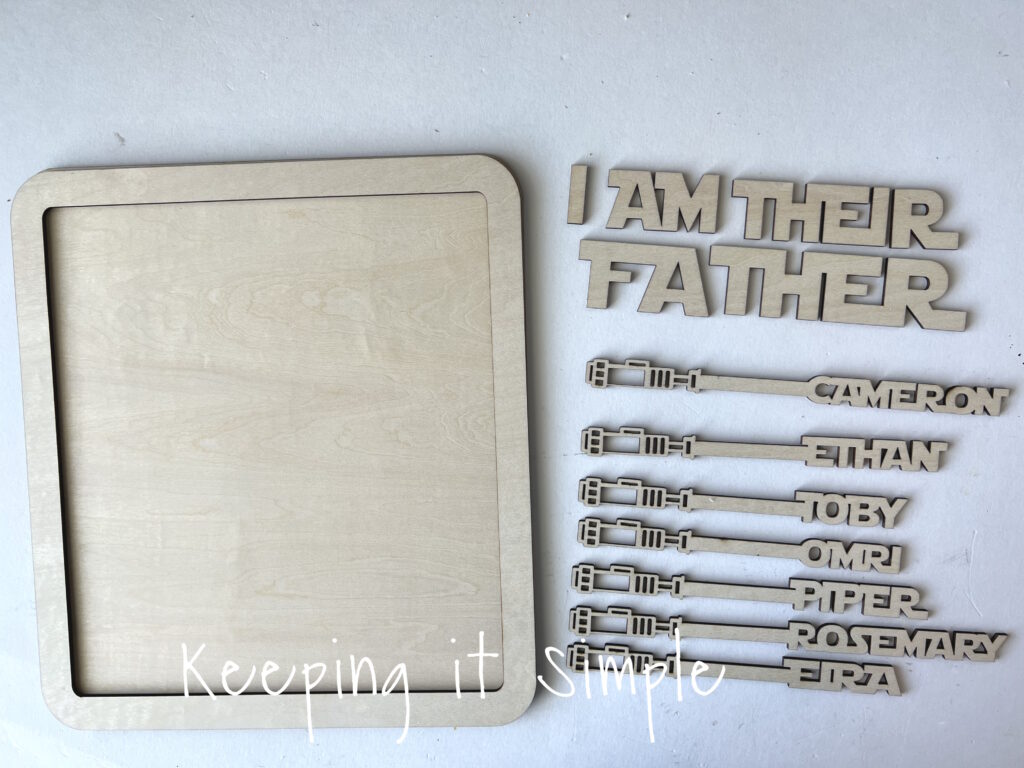
Here are all of the pieces cut out.
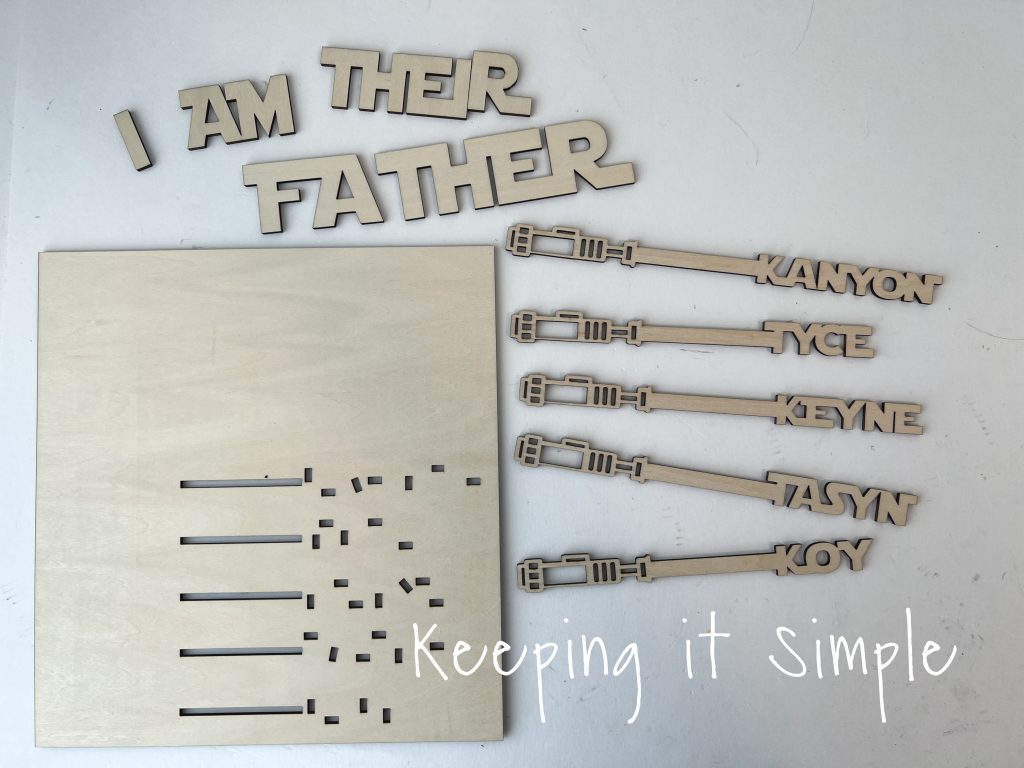
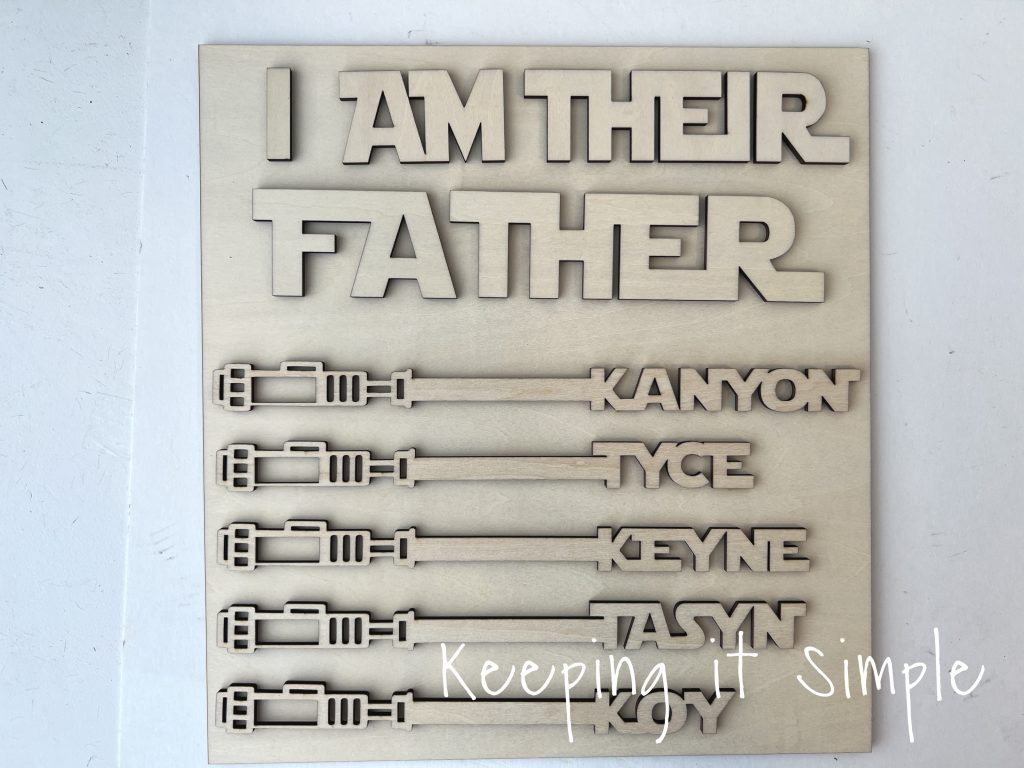
And here is what the Father’s Day Star Wars sign looks like without paint. It still looks pretty awesome, even without the color.
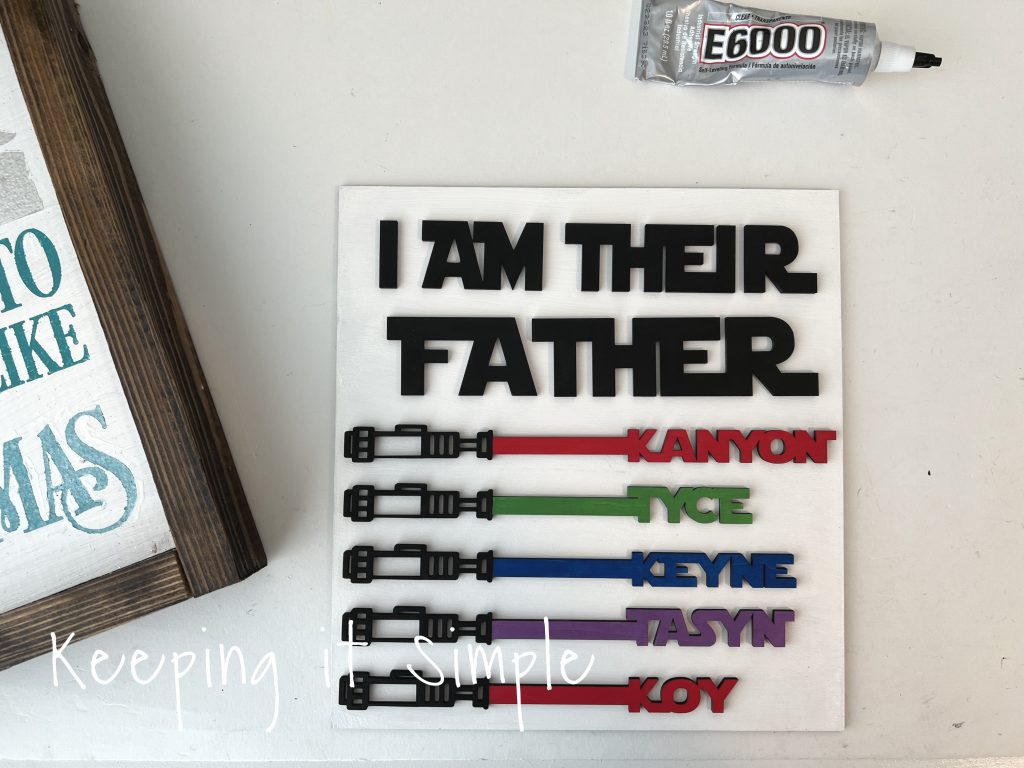
I then painted all of the pieces using acrylic paint.
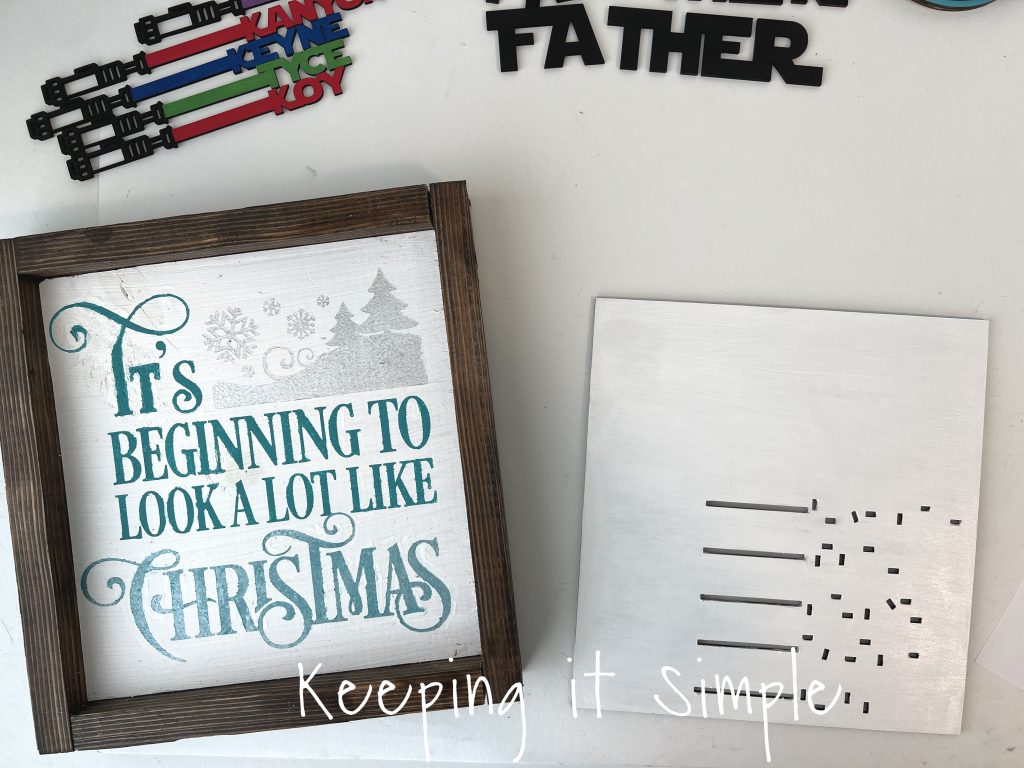
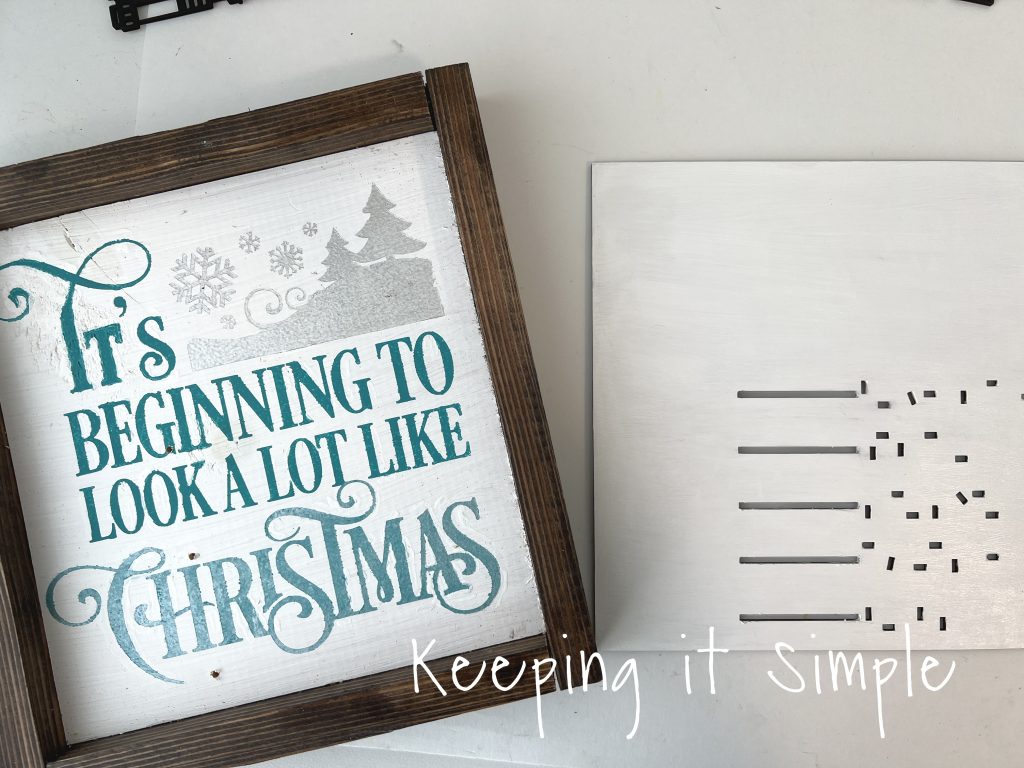
Now for the actually sign, I have made so many of these farmhouse signs that I decided to recycle one of them because I have so many of them. The background piece of wood is the same size as the inside of the farmhouse sign.
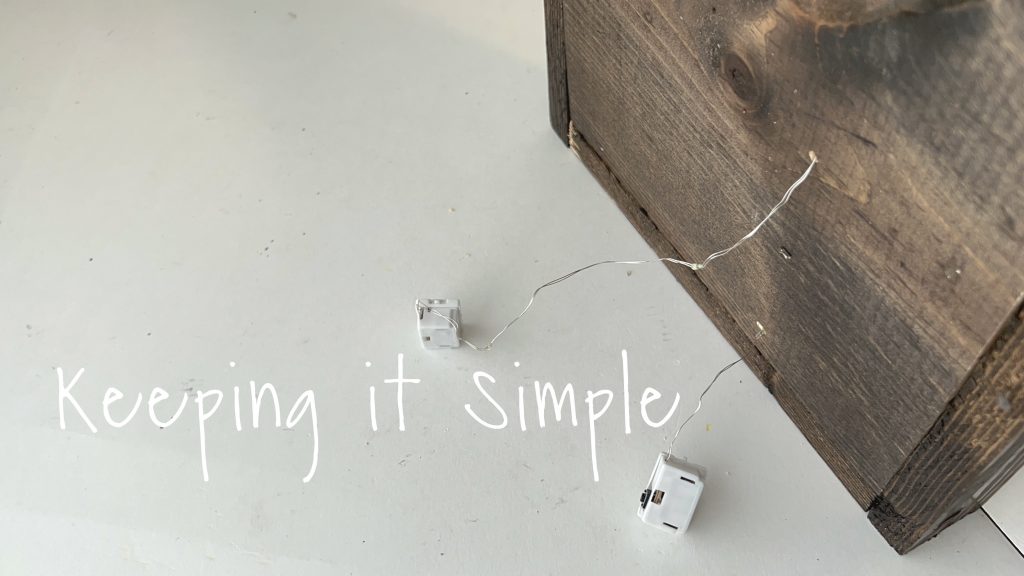
Since I want this to be a light up Star Wars sign, I need to drill a hole into the sign to add the twinkle lights. I put the background piece into the sign and then marked where I needed to drill a hole into the sign,.

Using a 7/64 drill bit, I drilled 3 holes into the sign (I only used 2 of them).
Using E6000 glue, I glued the personalized light sabers and words onto the back ground piece. I like E6000 glue because it holds firmly but it doesn’t set right away, so you have time to readjust the wood before it set. The holes in the background line up perfectly with the names in the light sabers.
Now to turn this into a light up Star Wars sign! I took the twinkle lights and strung them through the holes in the sign. I put the wire and lights through the hole from the back of the sign and then pulled the wire through, leaving just a small section of wire in the back.
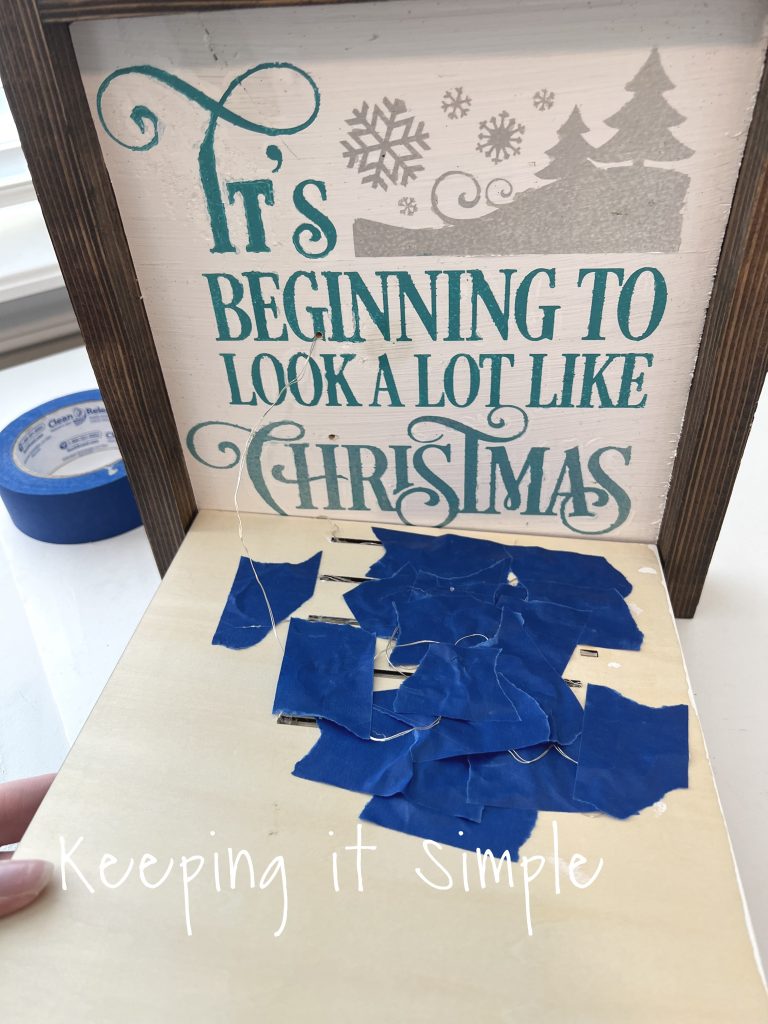
Now it’s time to address all of those crazy looking rectangles cut out of the background piece. They are for the twinkle lights! I did this because if I were to put the twinkle lights directly onto the personalized light sabers, then the light sabers would be raised up when I glued them onto the wood and I wanted them to lay flat (you can see what I mean with this graduation sign I made with twinkle lights). So I came up with the idea to make these rectangles so the lights would fit perfectly inside them. The rectangles are about the same size of the twinkles likes, .25 inches wide and .125 inches high. The longer ones are 1.25 inches high and 2.25 inches wide.
Using a glue gun, I put the twinkle lights into the rectangles. I just glued the lights down with the glue gun and didn’t worry about the wire. I continued gluing the lights into the holes until I ran out of wire and lights.
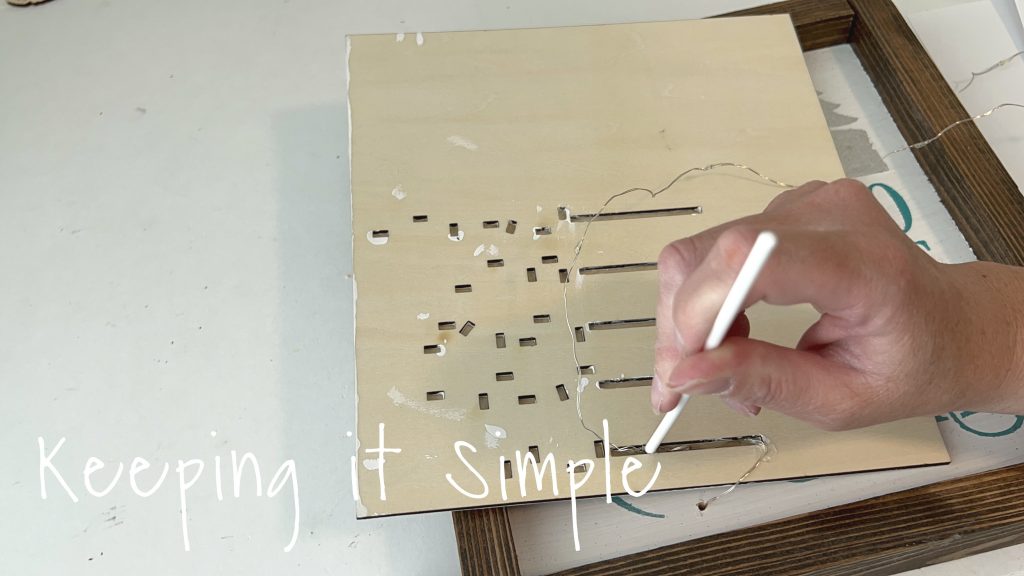
When I finished gluing the lights down, I used painters tape and taped the wires down. Nothing is going to be seen, so it doesn’t matter if it’s messy, just matters that it stays in place.
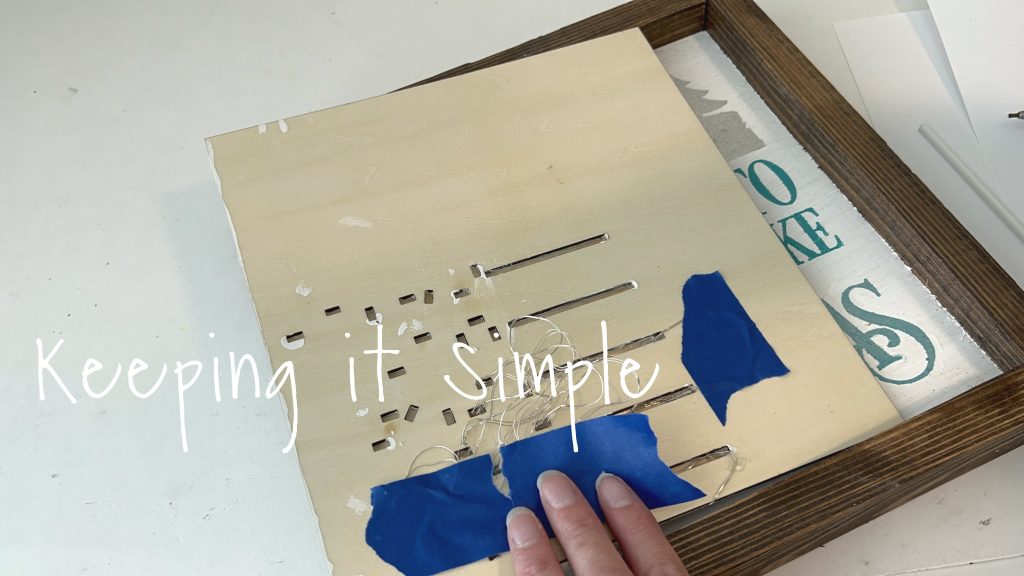
I needed another strand of twinkle lights, so I added another one. I put the wire through the highest hole but this time, I made sure to leave more wire out so there was room to turn the wood once all the lights were glued in.
I continued to glue the lights in place until all of the twinkle lights were in and then I taped all of the wires down. After that, I flipped the background piece around, put some glue onto it and then glued it onto the farmhouse sign.
And that’s it! This light up Star Wars sign is an awesome Father’s Day gift idea!

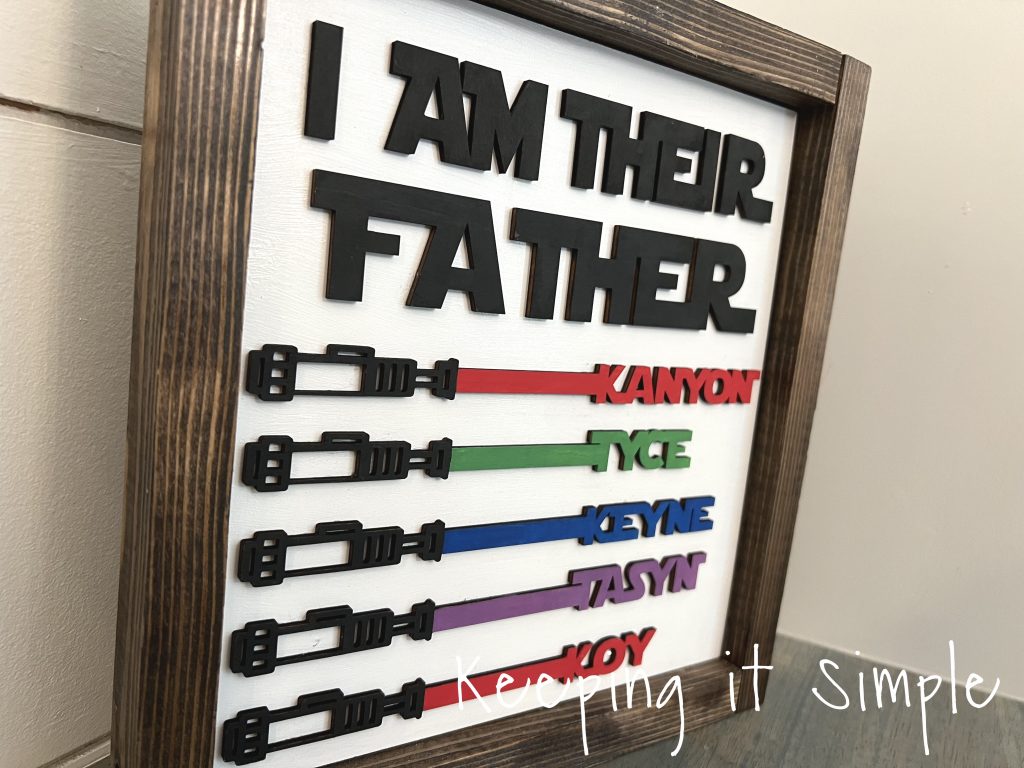
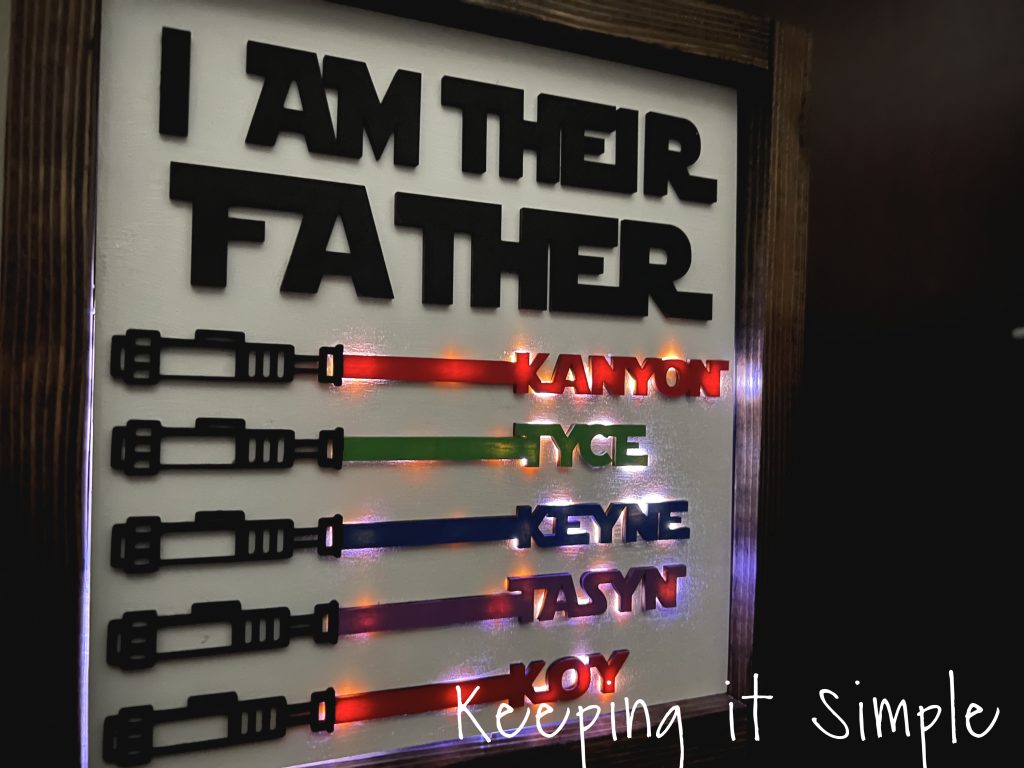
Here is a close up of it. The personalized light sabers look so good, I love how they turned out!
Here is another view of it. I love that you can’t even tell that there are lights behind the light sabers. The wood is flush against the background piece of wood and no one would ever know that they light up.
The twinkle lights are subtle but they make the personalized light sabers come to life!
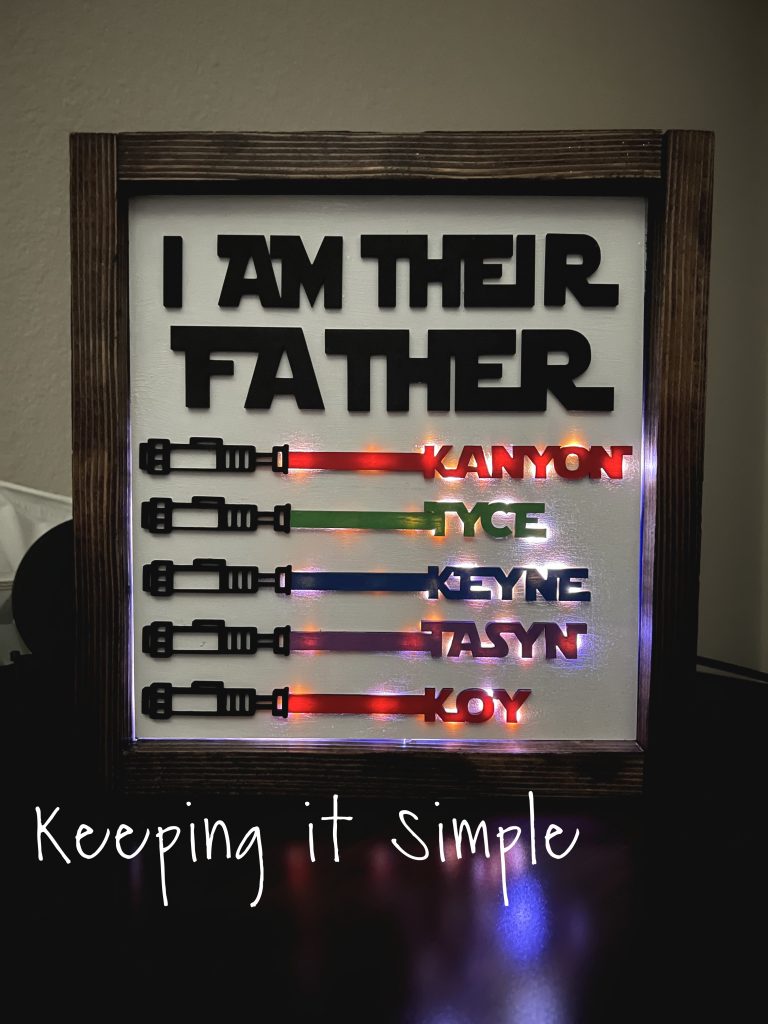
I love how the lights look with the paint, they glow the same color as the light saber.

Here is a close up of the light up Star Wars sign, I love it so much! It’s so cool that it’s just the light saber that lights up, not the handle but the sword part. Having the holes in the background piece really help keep the lights contained within the light saber .
Since the xTool M1 has a blade, you can also make a shirt with the personalized light sabers. I made it the same way, but instead of the light sabers being one continuous piece, I separated the handle from the sword and cut them out individually. If you could also make this Father’s Day Star Wars shirt with a Silhouette or Cricut.
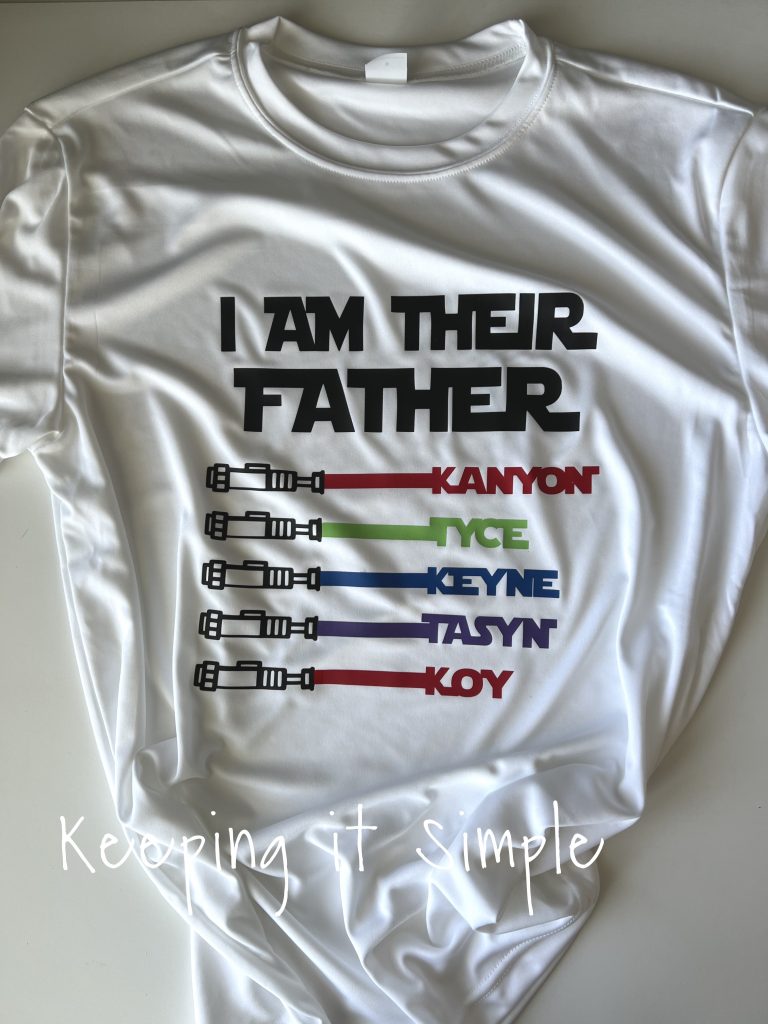
I used heat transfer vinyl in black, red, royal blue, lime and lavender. For a full tutorial on how to make shirts, check out this post.

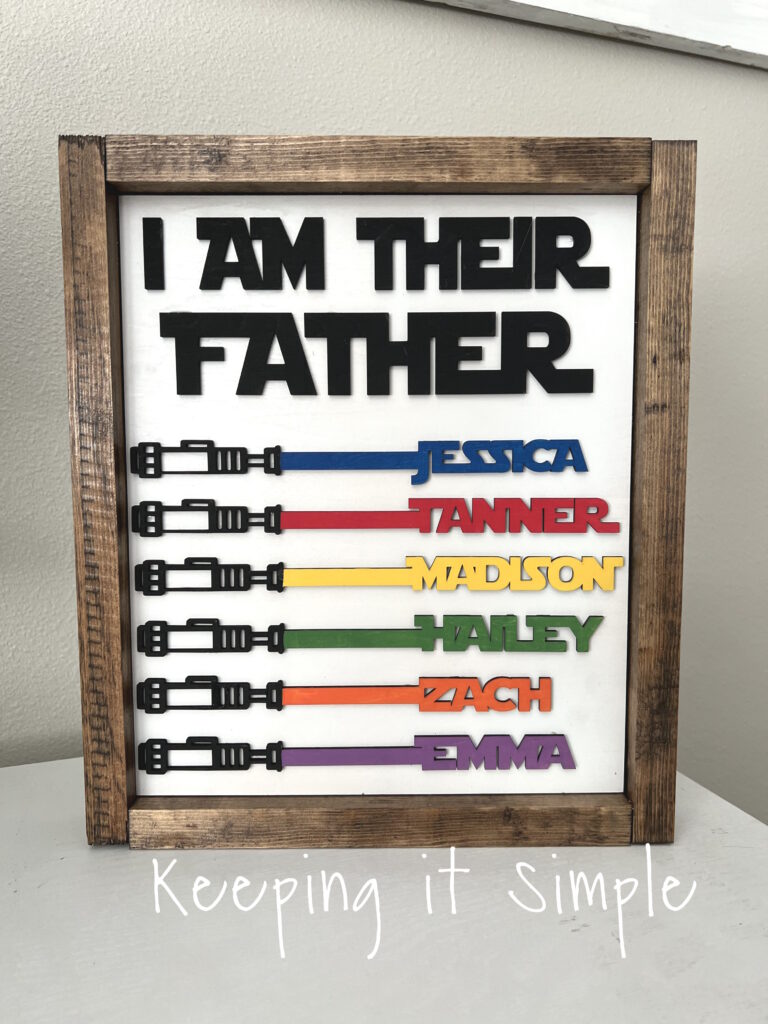
I had a few people ask me to make these for their husbands, so I did :). I actually made three different version of the sign and I wanted to share them with you. What is nice about making things, so you can personalize it exactly how you want, have it fit your personality or style.
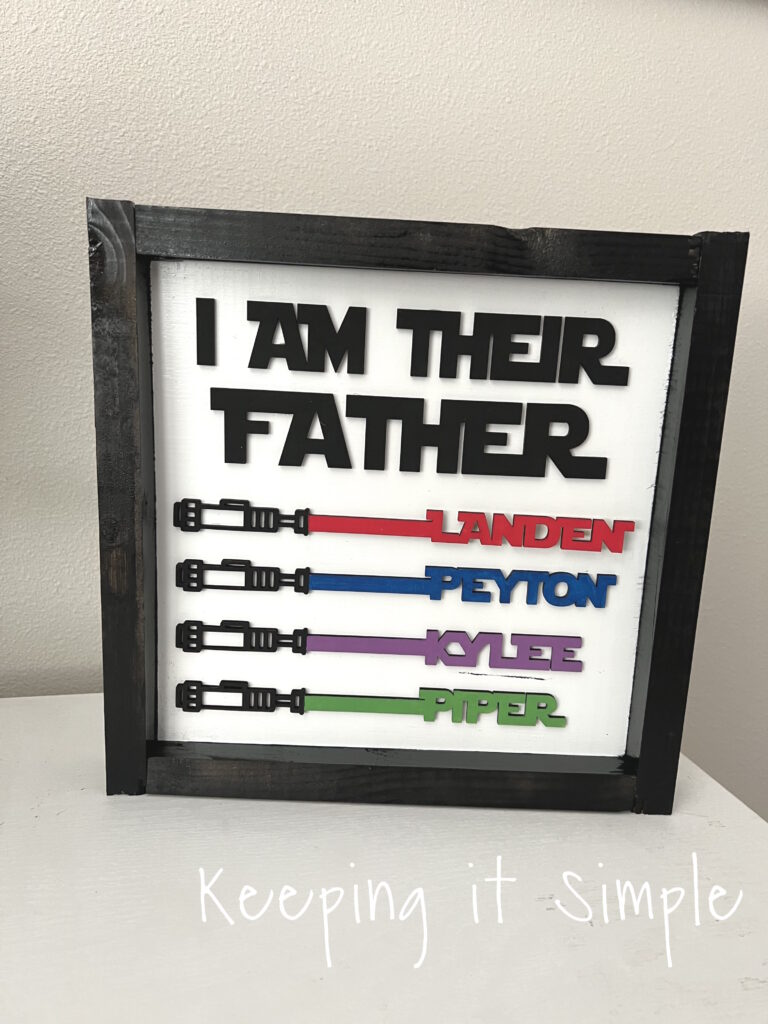
Here is one that I made that is basically the same as the one I made for my husband. I used 1×2 wood for the frame and stained it with espresso stain.
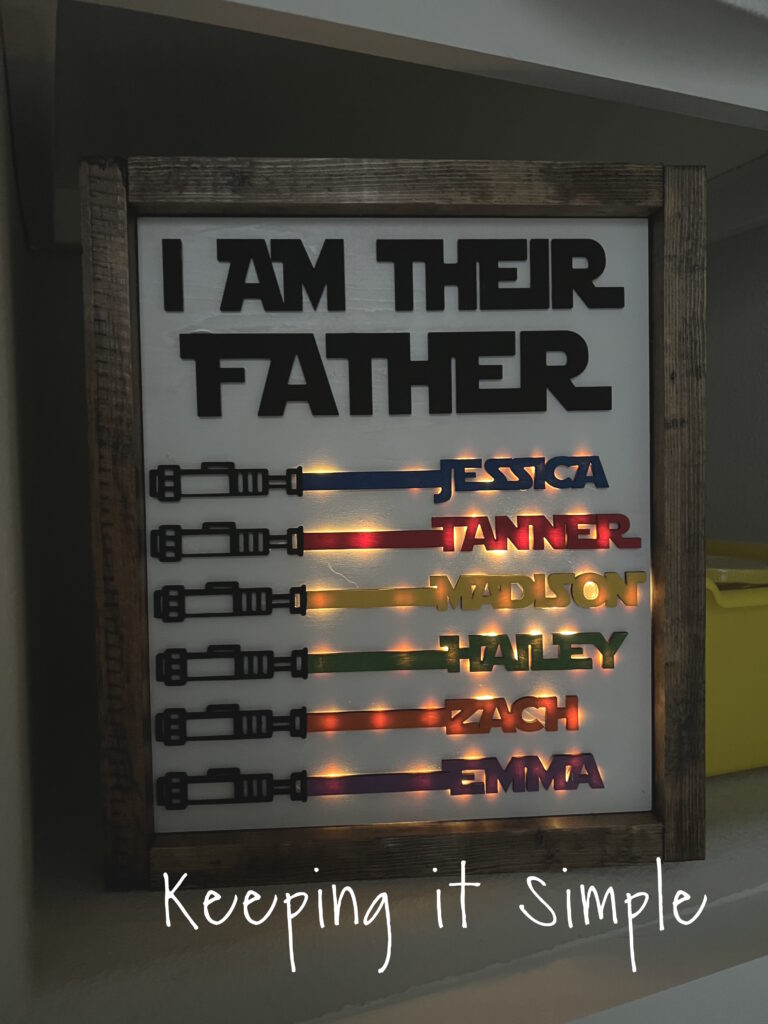
This one lights up too, I just love how these look with the lightsaber lit up!
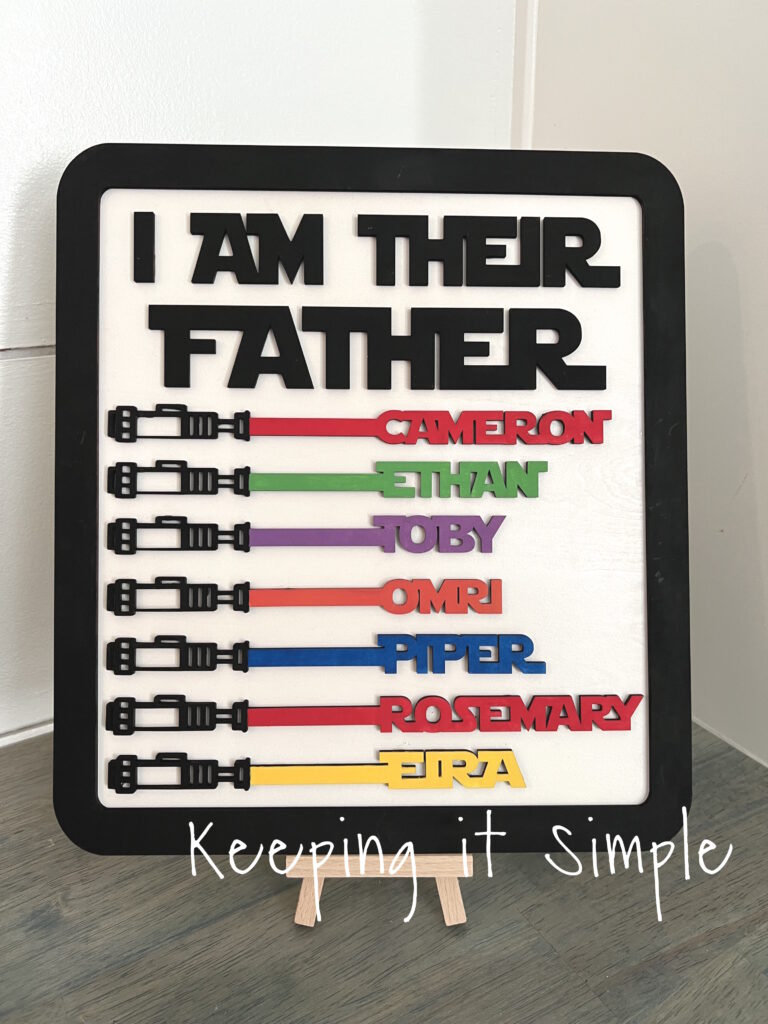
Here is another version, I made it the same way but instead of having a stained frame, I painted it black. This one does not have the light up lightsabers, but still looks awesome!
I also made a simpler version, instead of making the farmhouse style frame, I cut out the frame with my xTool, out of the 3mm plywood.
Even though the frame is more basic, the sign is still epic! It looks so good cut out of the 3mm plywood.
Make sure to check out all the other Father’s Day gift ideas I have posted about. You can see all of those crafts here.
Leave a Reply
You must be logged in to post a comment.