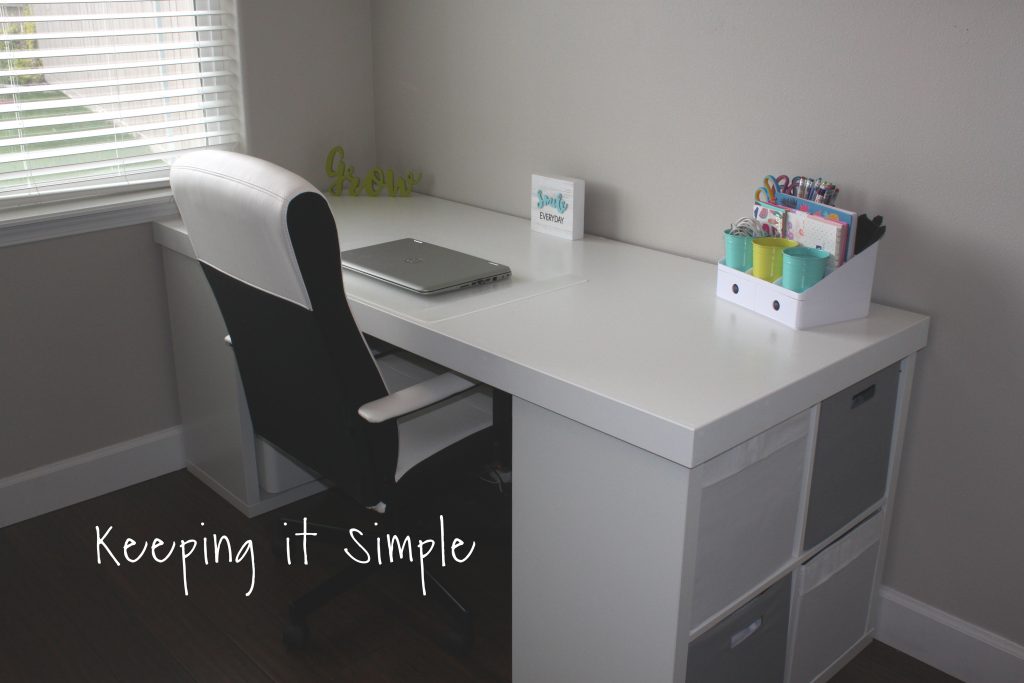
For the past year or so I have been remodeling our house. We are gradually getting everything to be more gray and whites instead of browns. Well one day I decided that I wanted a new modern barn door for my craft room. When we made it, it made me start thinking about redoing my whole craft room (I have been wanting to put wood flooring in it for about 2 years). Well we decided to just tackle it and redo the whole thing. I did some rearranging and so I needed a new computer desk/craft table. The majority of my craft is from Ikea, so I knew I wanted to do some kind of Ikea hack. I wanted a massive desk to create on, so I decided to build my own from two Kallax shelves and I love it!
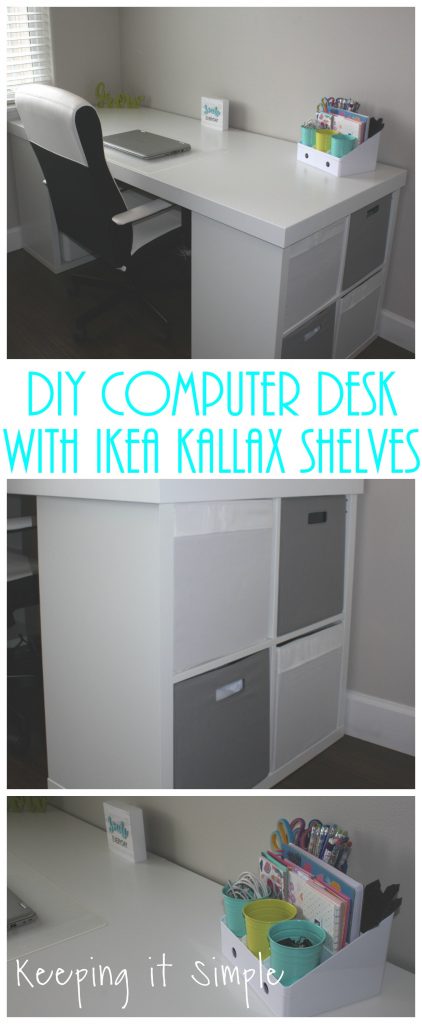
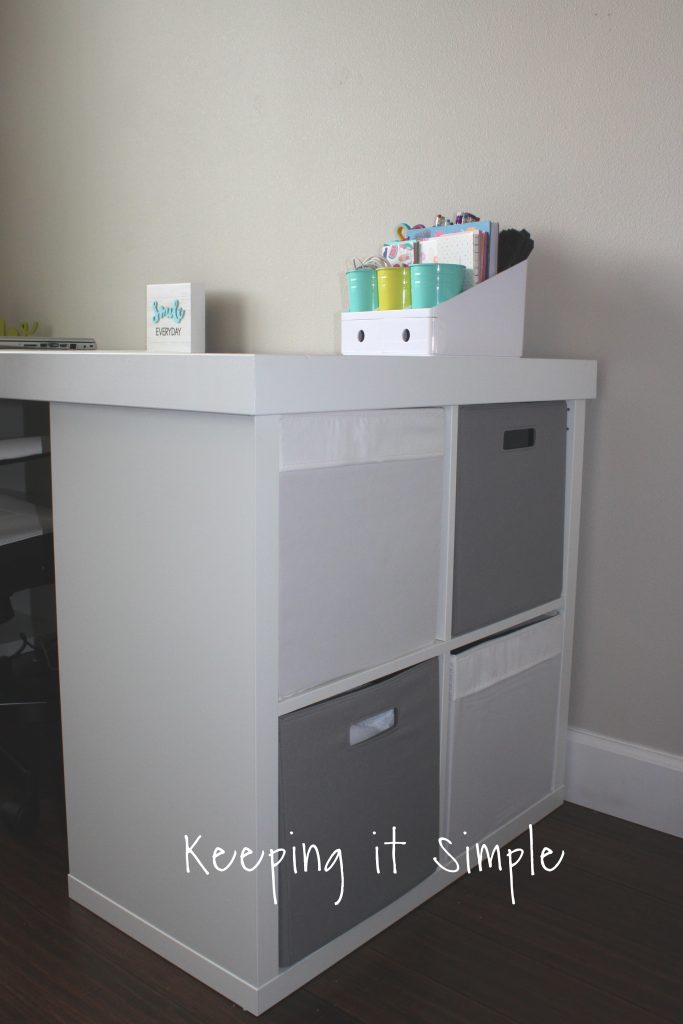
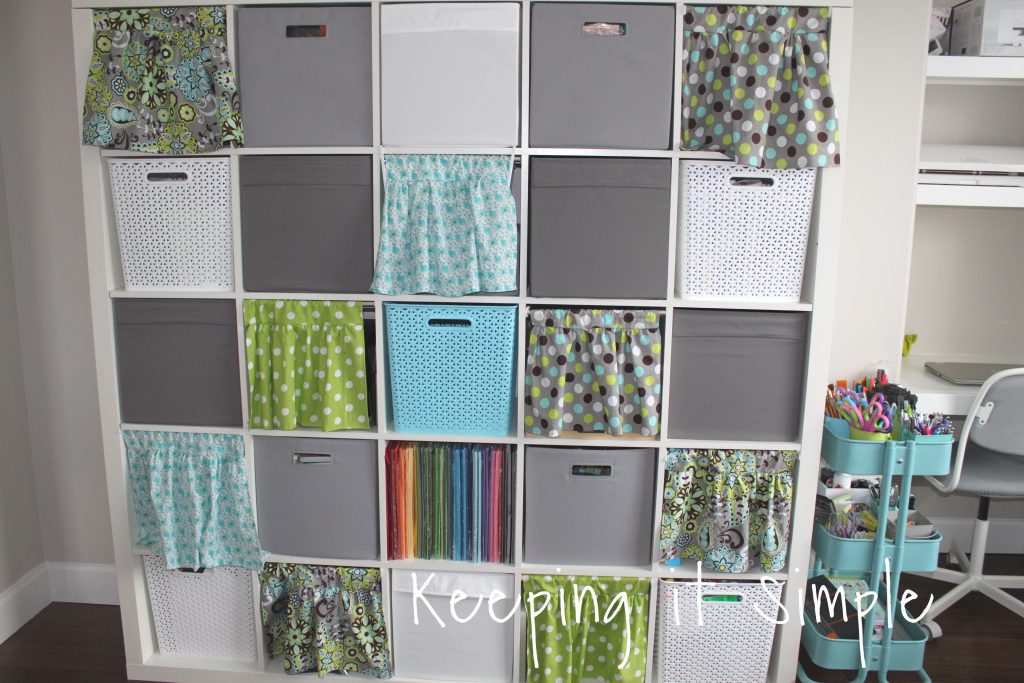
I LOVE these cube organizers, they are so great for storage and are inexpensive. I used the Kallax from Ikea but Walmart, Target and Amazon all have their own versions of it too and so you can use them too. One thing that is nice about these shelves is that they come in a variety of colors, so you could really have fun with it! I used white but another color would be so much fun!
This is how we made it:
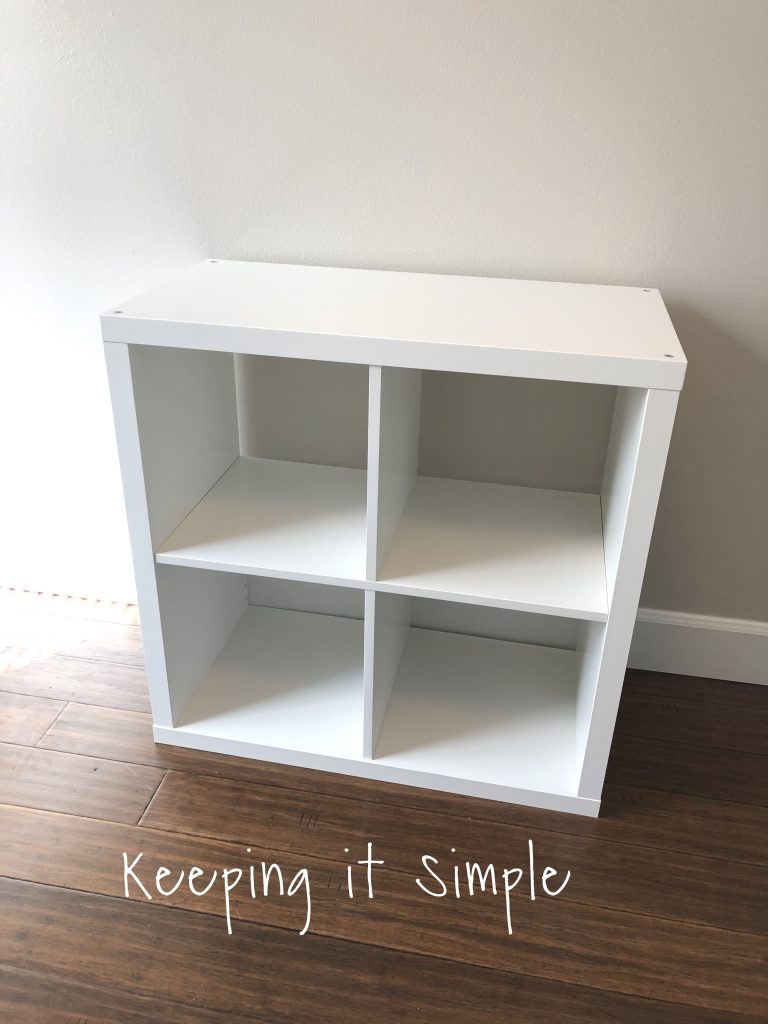
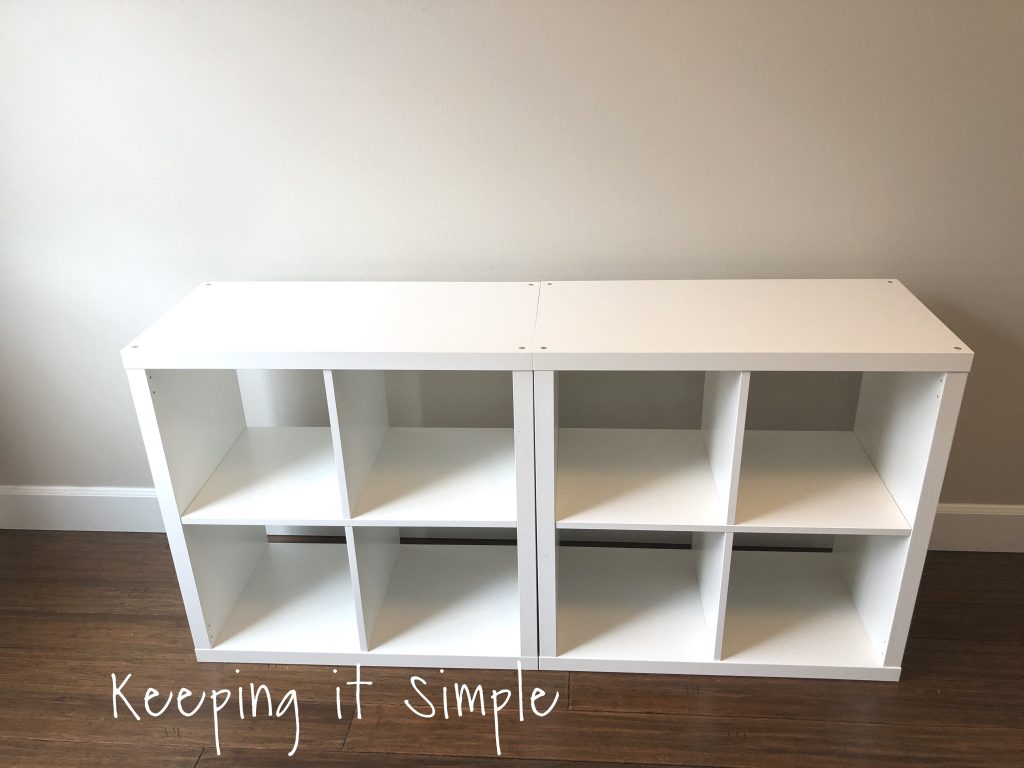
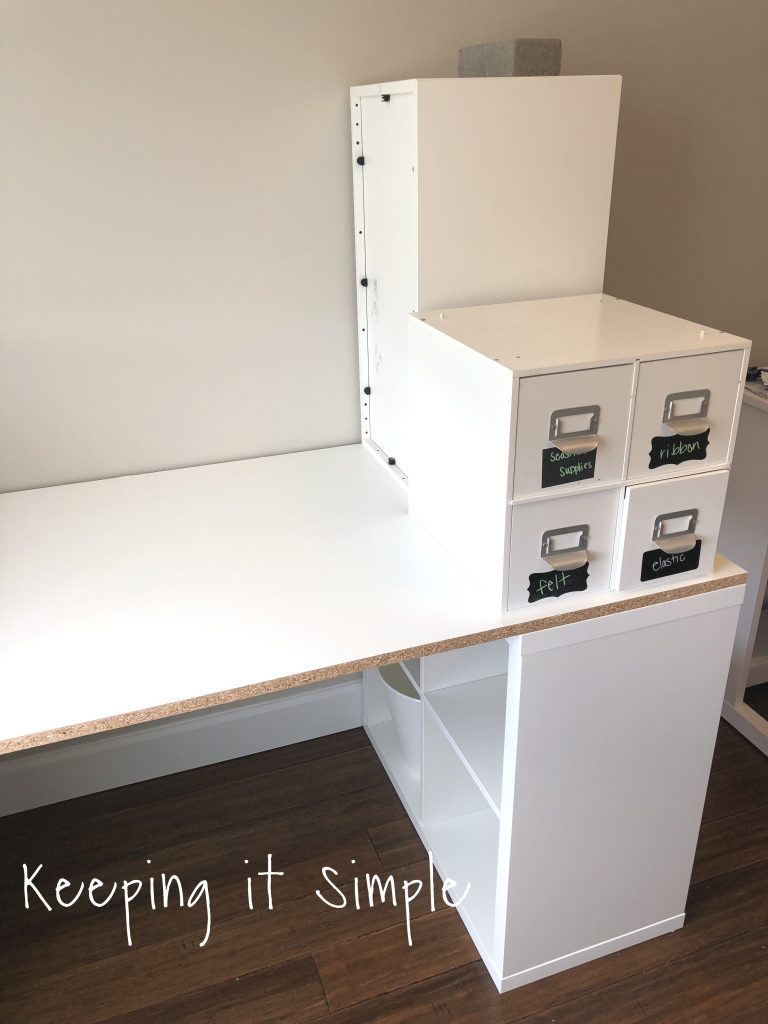
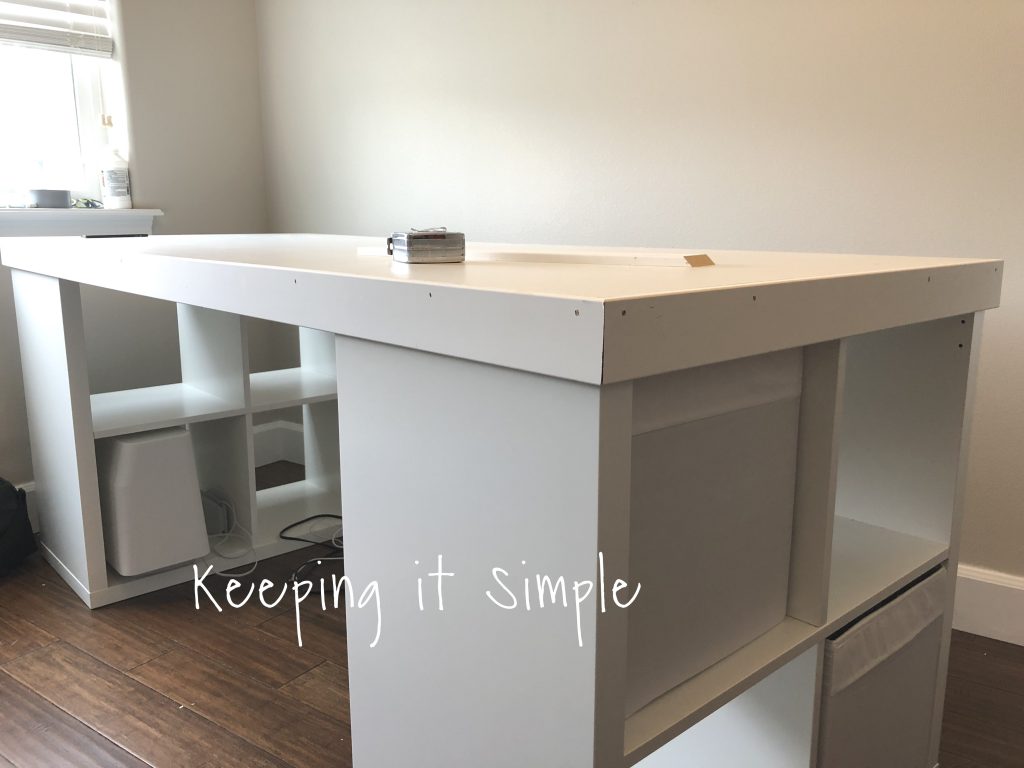
First you start with two of the 4 cube organizers. Assembly them according to their instructions.
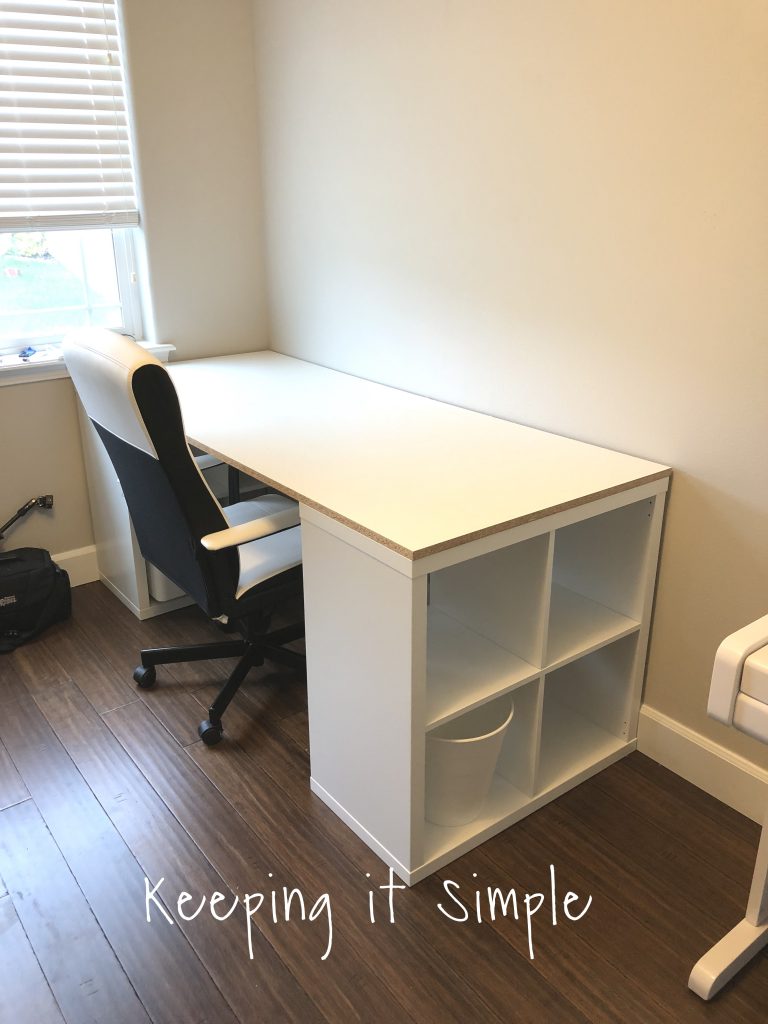
Next for the top we got a 3/4″ 4 x 8 foot piece of melamine and had it cut at the store to the exact size. We had them cut it 30 1/4″ deep and then 72″ wide. This is the joy of building your own desk, you can make it as wide as you want. I wanted a big space so I went with 6 feet but you can go bigger or smaller.
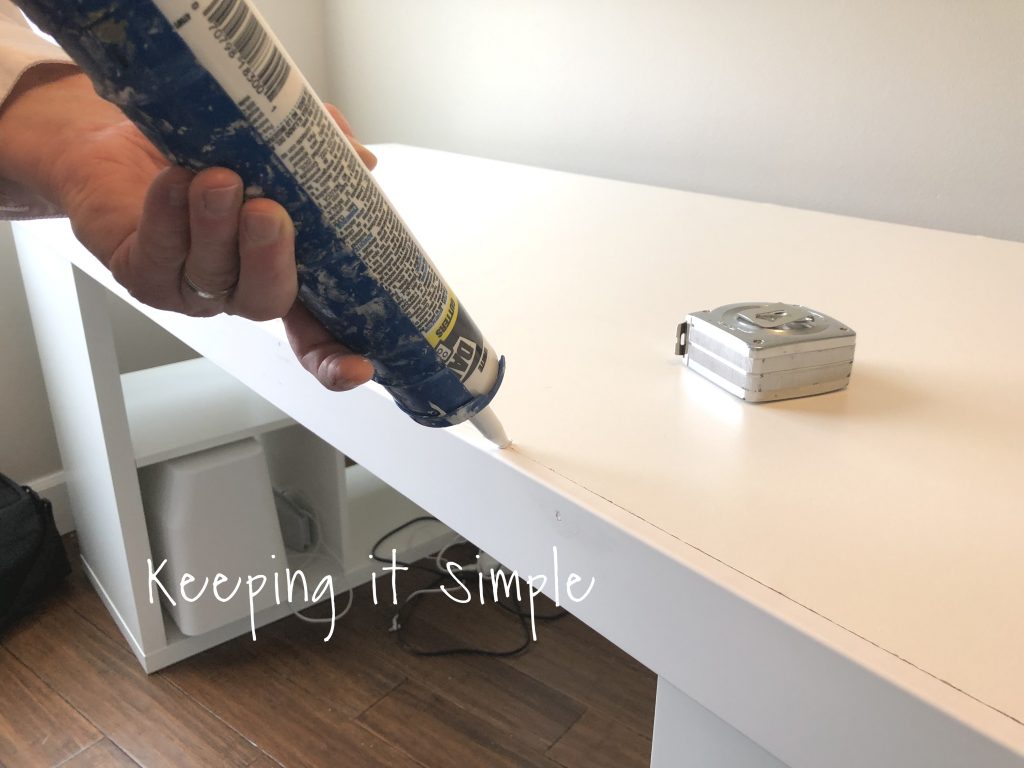
We then got some liquid nails to put the top of the desk onto the shelves. Because the shelves are hallow, normal screws and nails don’t always work on them.
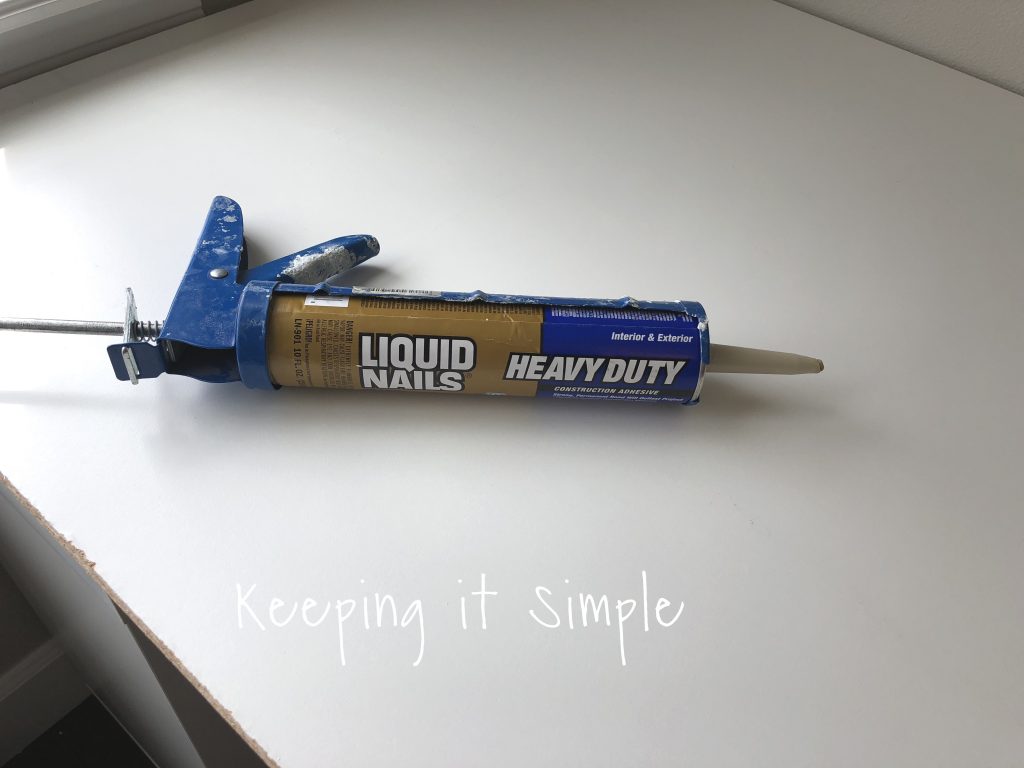
Using a caulking gun, we put the liquid nails onto the top of the shelves. We just did around the outside but you can do the middle if you want to (we didn’t feel like it was needed).
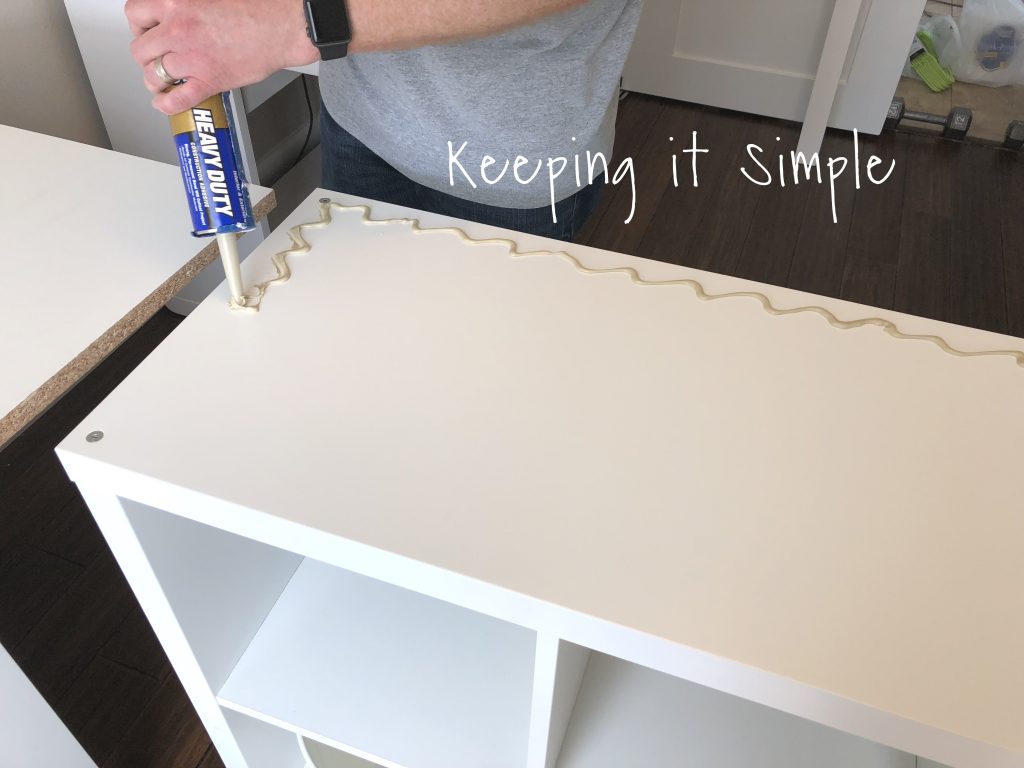
Once the top was in place, we put some heavy things on top of it to really press it down so it could adhere and dry. We let it dry for several hours (like 5-6 hours) just to make sure that it was nice and secure.
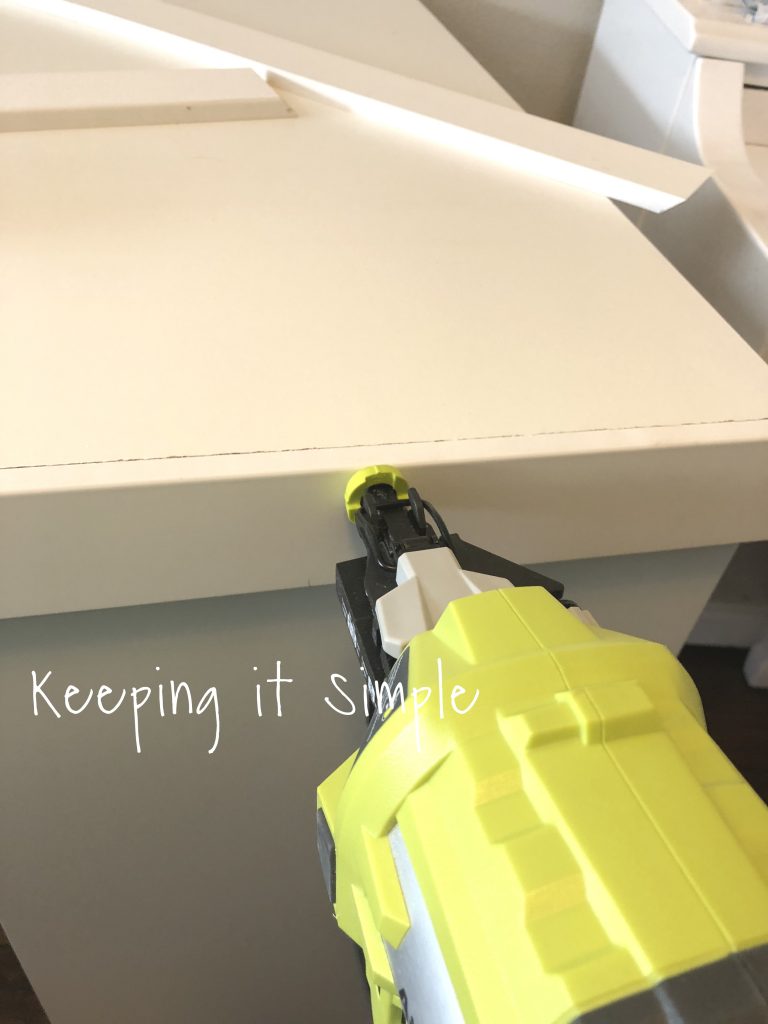
Once the top was on, we then put on the trim around the edge to get it a pretty look. We used a 1 x 3 inch MDF trim that was only 1/2″ thick for the trim. I had to buy 2 8 foot pieces for it. For the edges we did a 45 degree angle to give a really nice finished look.
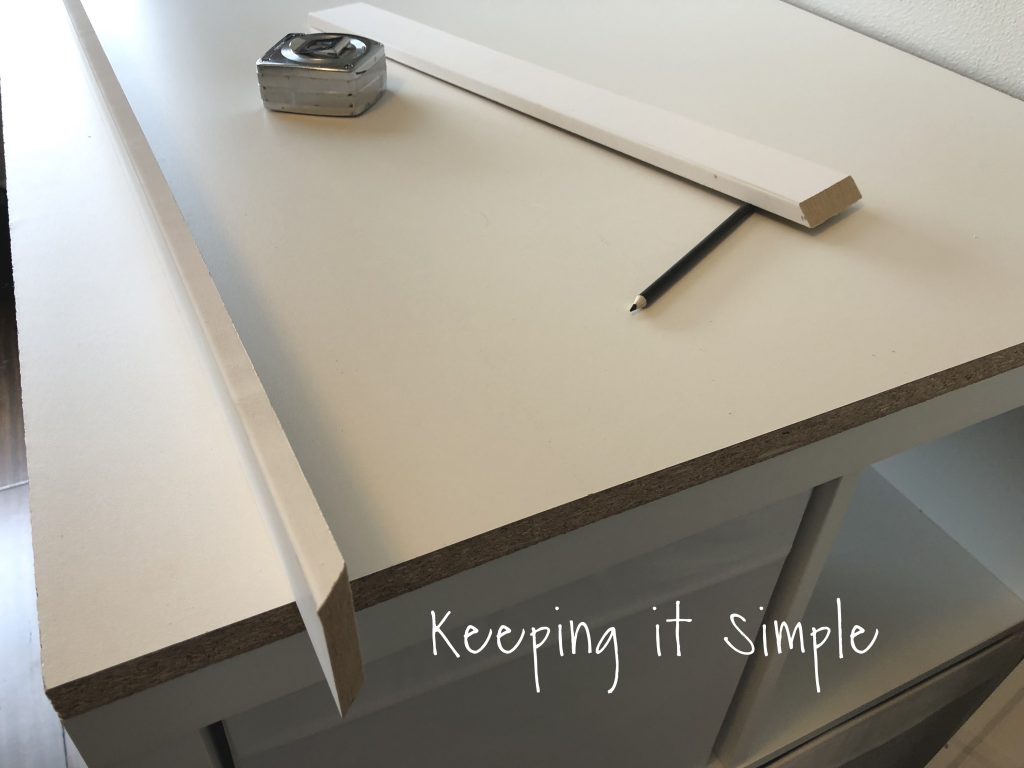
Using a nail gun and finishing nails (we used 1 1/2″ nails), we then nailed the trim onto the top of the desk. We only did three sides (we didn’t do the back) but you can do all 4 sides very easily. Because we only did three sides, the side pieces are a straight cut at the back of the desk.
Here it is with all of the trim nailed in, doesn’t it look so good?!
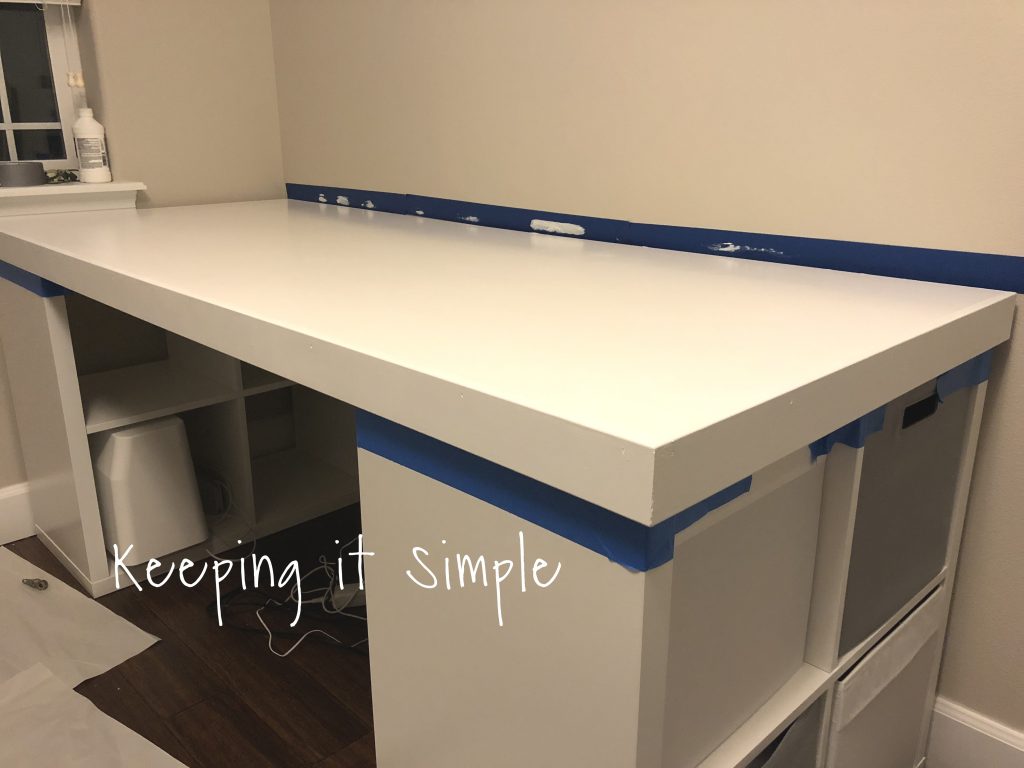
Using painted caulk and wood filler, we filled in all of the seams and nail holes.
Then using a bright white paint, we then painted the top. This is where you could get creative, you can paint it any color that you want. And if you want a stained look, you could easily get a nice plywood and stain it. The possibilites are endless, that’s what I love about it!
One of my favorite things about this desk/craft table is that it didn’t cost too much money. When I was looking for a computer desk the only ones that I could find that I liked were around $200 and weren’t that big or didn’t have very much storage. This desk cost me about $125 and has lots of storage! Here is the break down of the costs:
2 shelves at $35 each= $70.00
1 4 x 8 foot melamine board= $30.00
2 1 x 3 inch by 8 foot MDF trim at $3.50 each= $7.00
Liquid nails = $5.00
Paint and supplies = $15.00
Total= Roughly $125
Of course your total might be different depending on what you build and what you have on hand. 🙂

And that’s it!! It is actually a very easy project, it only took a couple hours to make (not including drying time) and it looks amazing!!
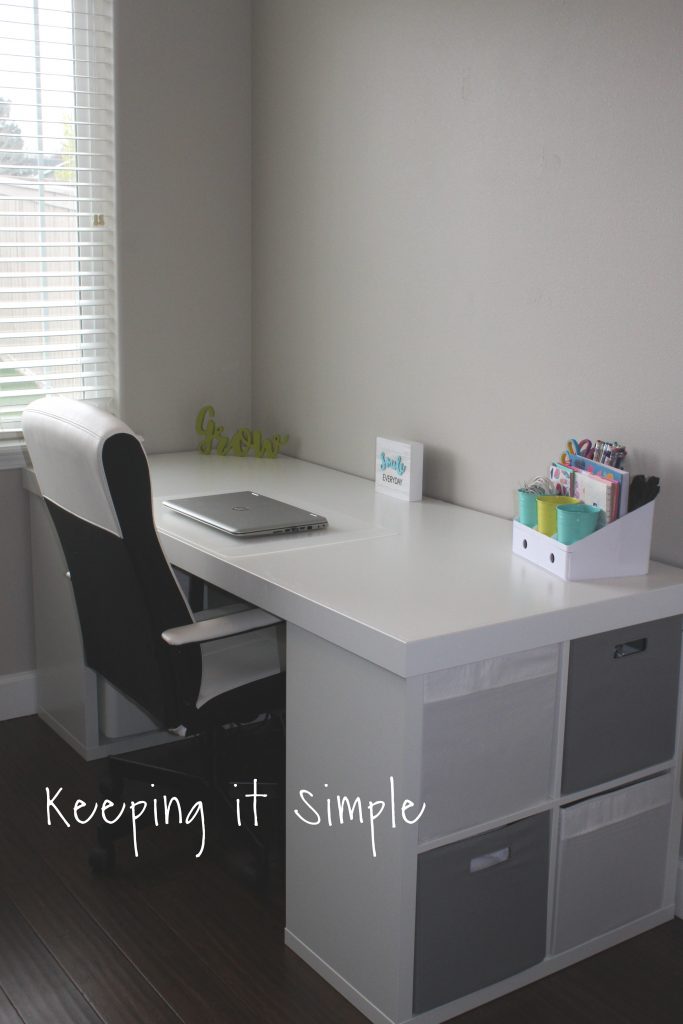
I used the fabric storage bins in the shelves. Two of them are from Ikea and two of them are from Walmart. I love these bins, they are big and you can store so much stuff in them! On the other side I have my sewing machine (yes it fits inside the cube!) and my printer (if you have a big printer it won’t fit) and some magazine holders that are filled with paper and office supplies.
I am excited to use this as a computer desk but I am also excited for it to be my craft table, lots and crafts are going to be created on this space.
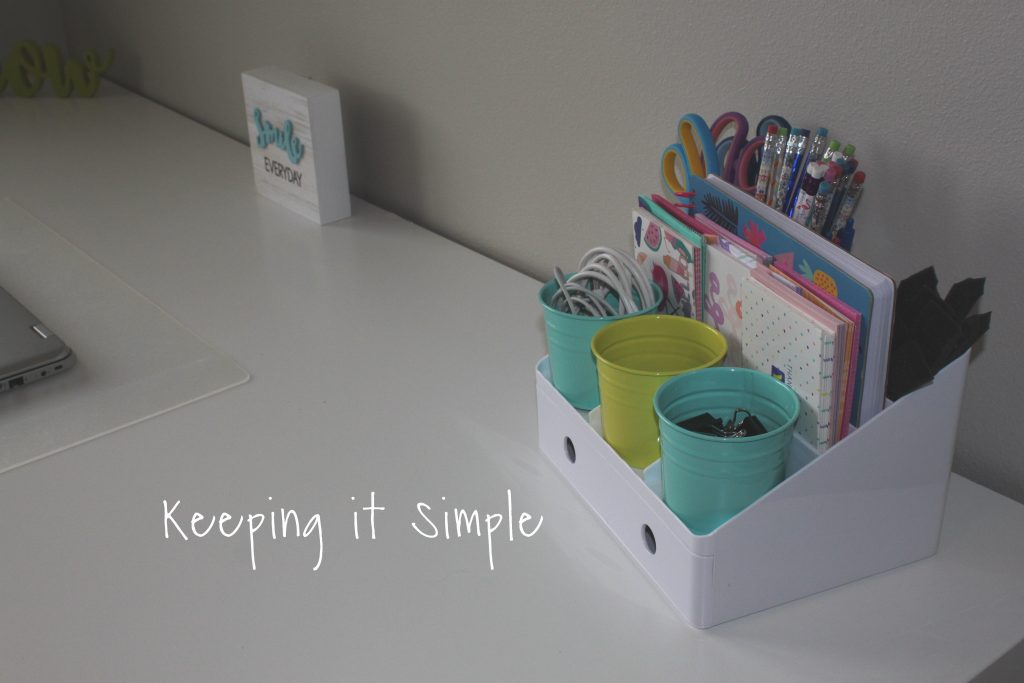
To organize all of my office supplies (and some craft supplies) I got this cute desk organizer. You can fit a lot of things in it and I love the little drawers that it has too!
I seriously love how wide and big it is!!

Now it’s time to sit back and create and enjoy my new computer desk/craft table!

I loved this desk so much, that I made another one for my vinyl! It’s a great crafting table! You can get all the details about it here.

Check out the rest of my craft room!


This post contains affiliate links.
Leave a Reply
You must be logged in to post a comment.