Interchangeable Welcome to Our Home Sign made With xTool M1
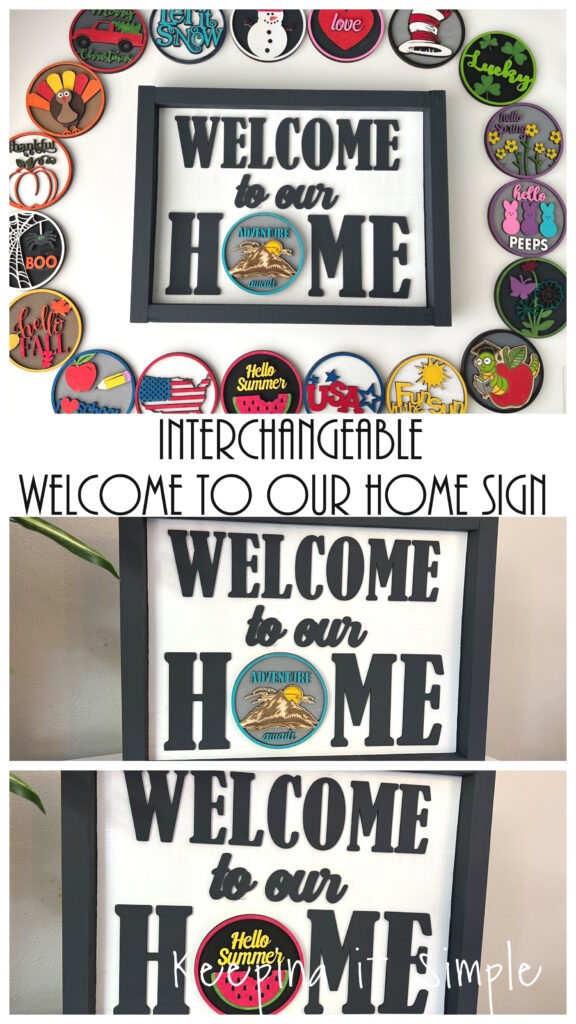
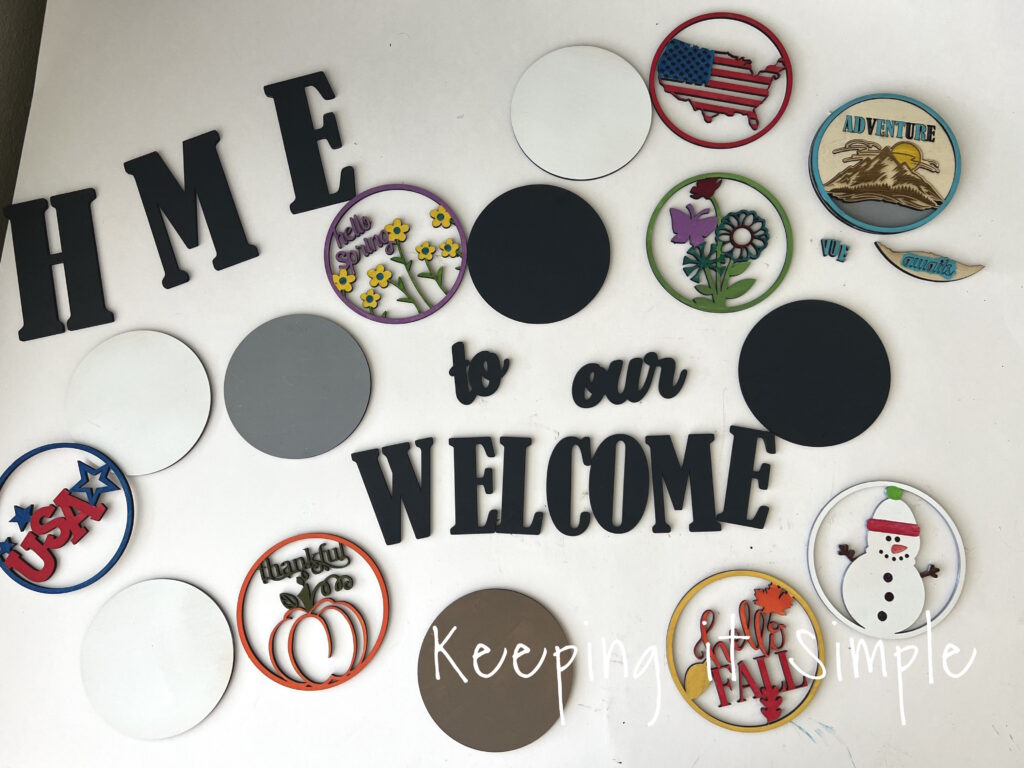
I love making signs and décor for my house. I love being able to make something that you can’t find in the store and being able to add a personal touch to my home décor. I especially love home décor that can be use all year round, even with the holiday décor. A few weeks ago I made this interchangeable teacher sign with my xTool laser cutter. I liked how it turned out so much that I decided that I wanted to make something like it for me. I went with an interchangeable welcome to our home sign and I love how it turned out. I put the laser cut outs onto a farmhouse sign and made 20 different holiday signs to change up through out the year. I made about 2 for each month, so if the holiday is early in the month, I can put another design up for the rest of the month. I love how it turned out and I can’t wait to use it all year round.
Here is a quick video of how I made the interchangeable teacher sign, I didn’t make one for the welcome to our home sign but it’s the same process, just the frame is a little different.
If you are new to laser cutters, check out my xTool beginner’s guide.
This is how I made up the interchangeable welcome to our home sign.
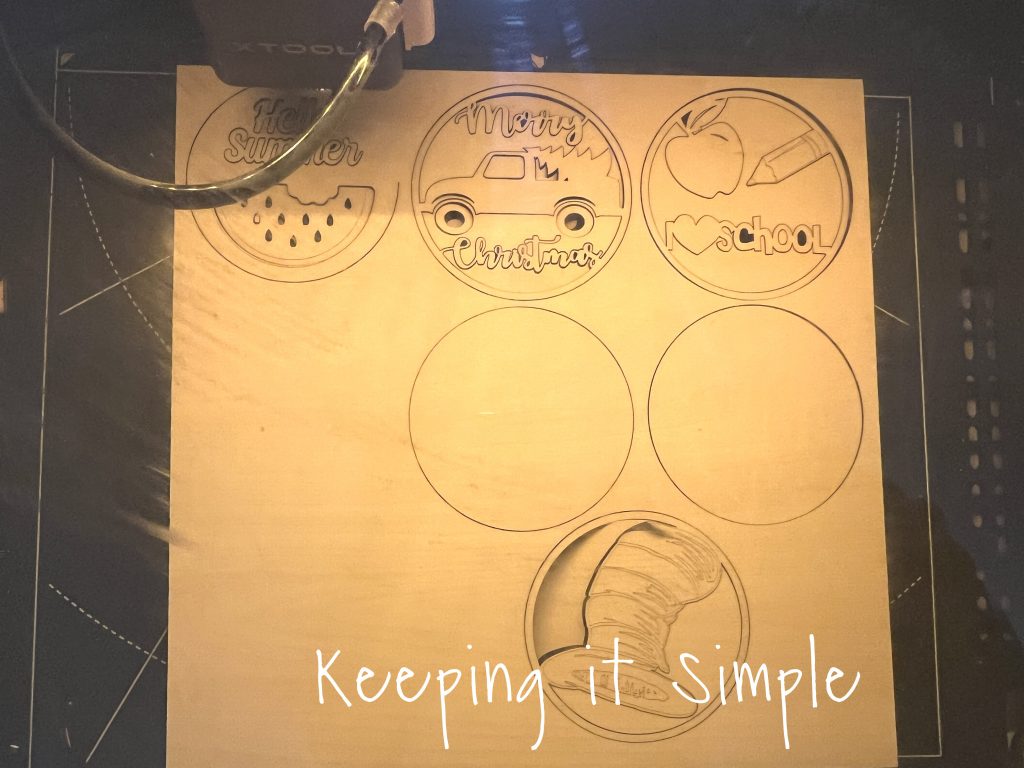
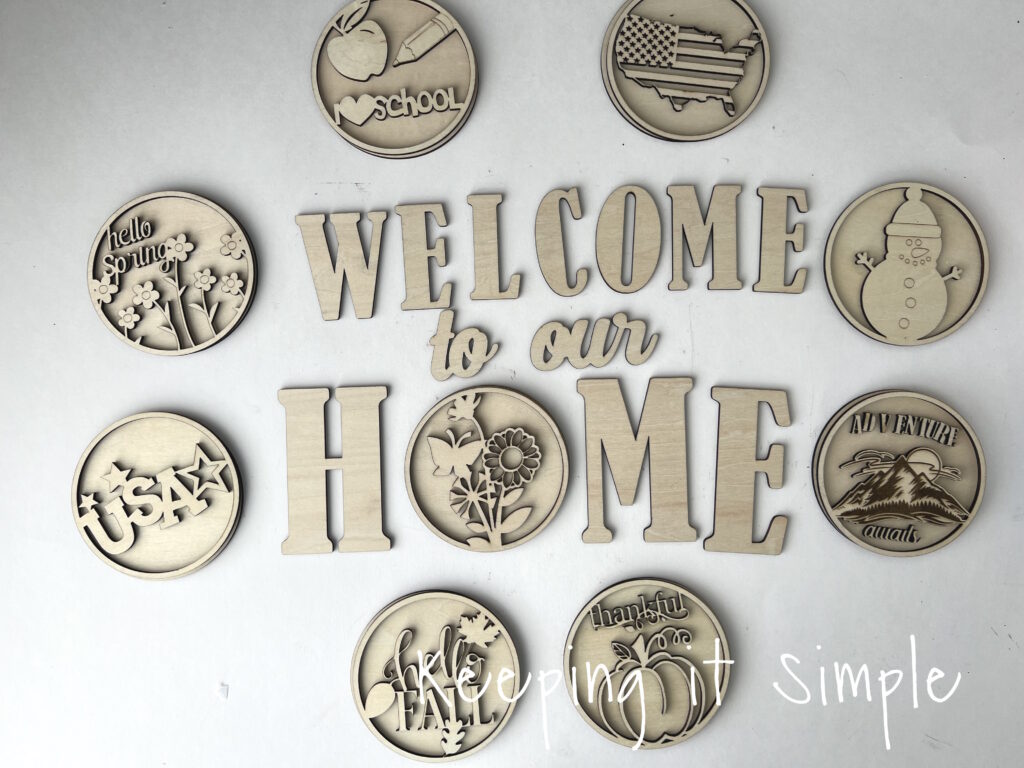
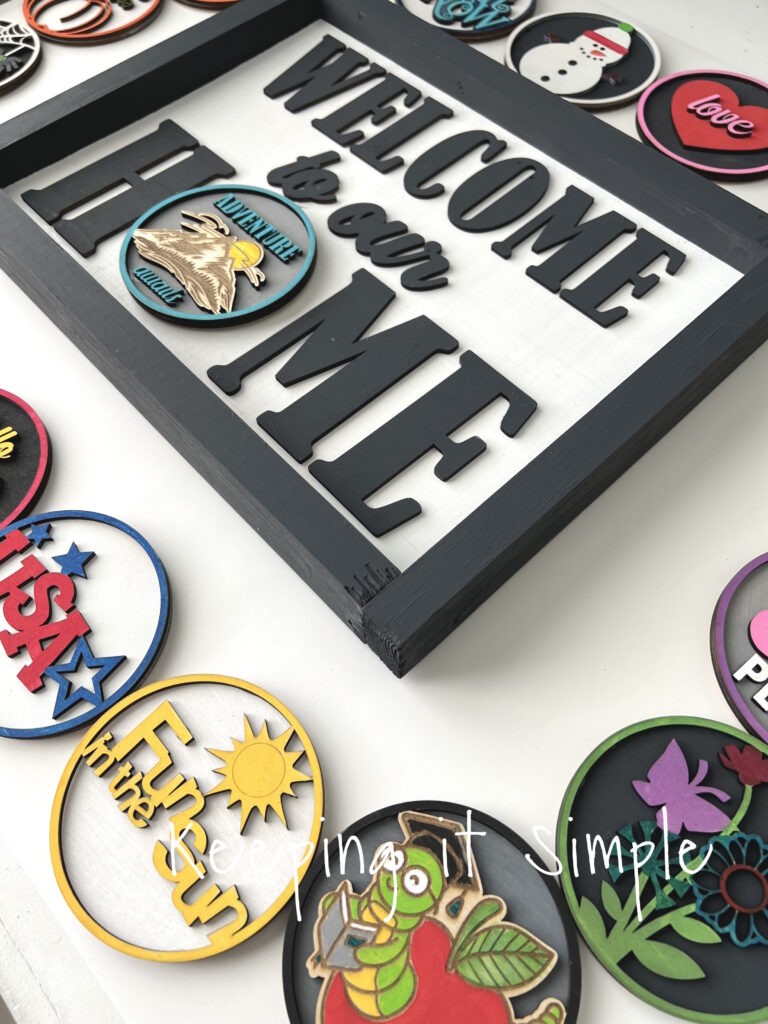
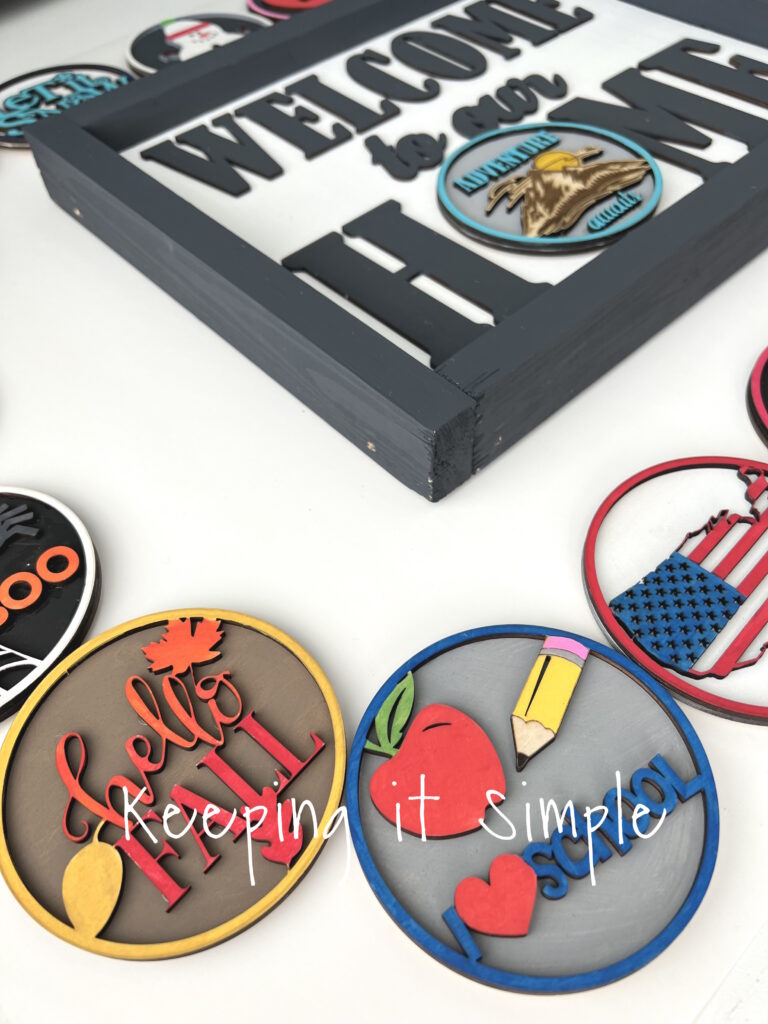
The first thing I did was design the different holiday signs. Each one has two circles, a base layer and then the top where the actually design is. Most of the holiday designs I cut out the whole design, but a few of them I used the engraved and/or score option. It’s so nice that you can cut, engrave and score all at the same time on xTool. I was able to fit 8 circles onto one 12 x 12 inch 3mm plywood, which is 4 complete circles. I made the holiday circles 3.75 inches x 3.75 inches. 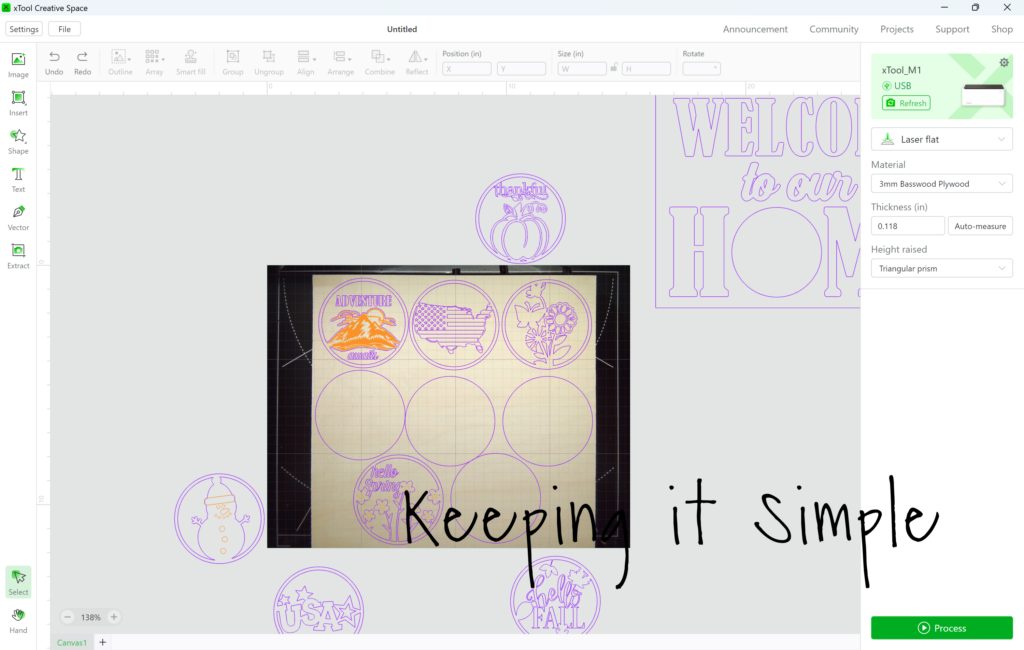
The xTool M1 machine does a GREAT job cutting out al the intricate details of the designs. I love how they turned out! I used my air assist attachment to help with the cutting and to prevent the burn marks around the cuts. I used the 3mm basswood plywood for this interchangeable welcome to our home sign because it’s the perfect thickness for layering.
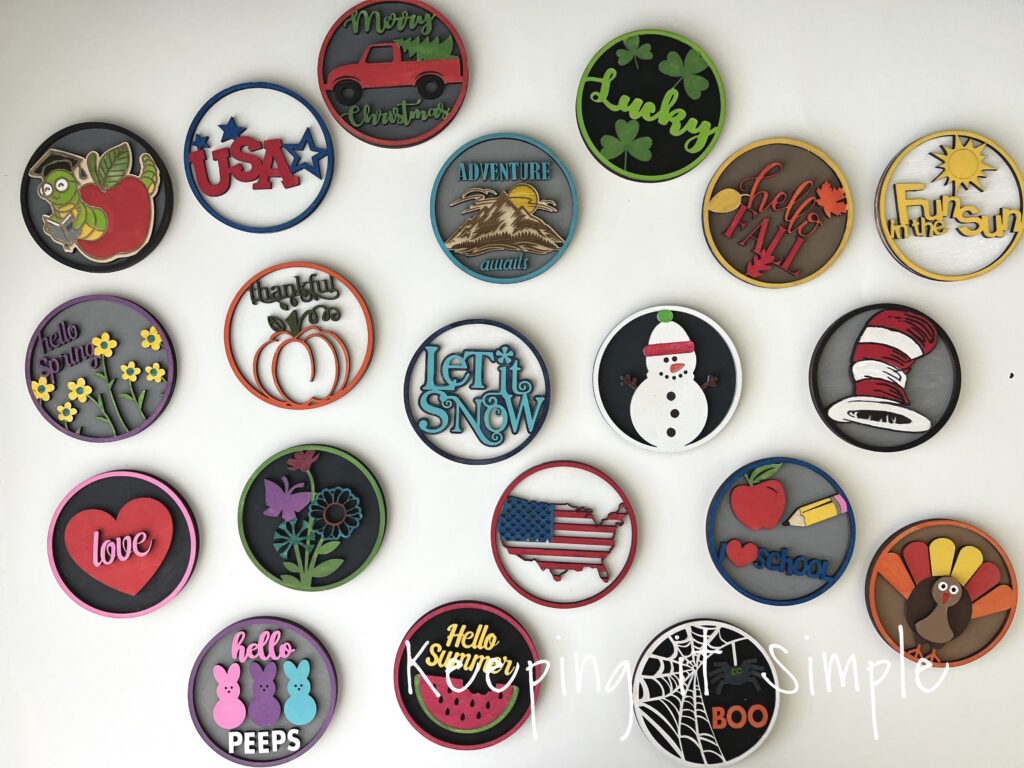
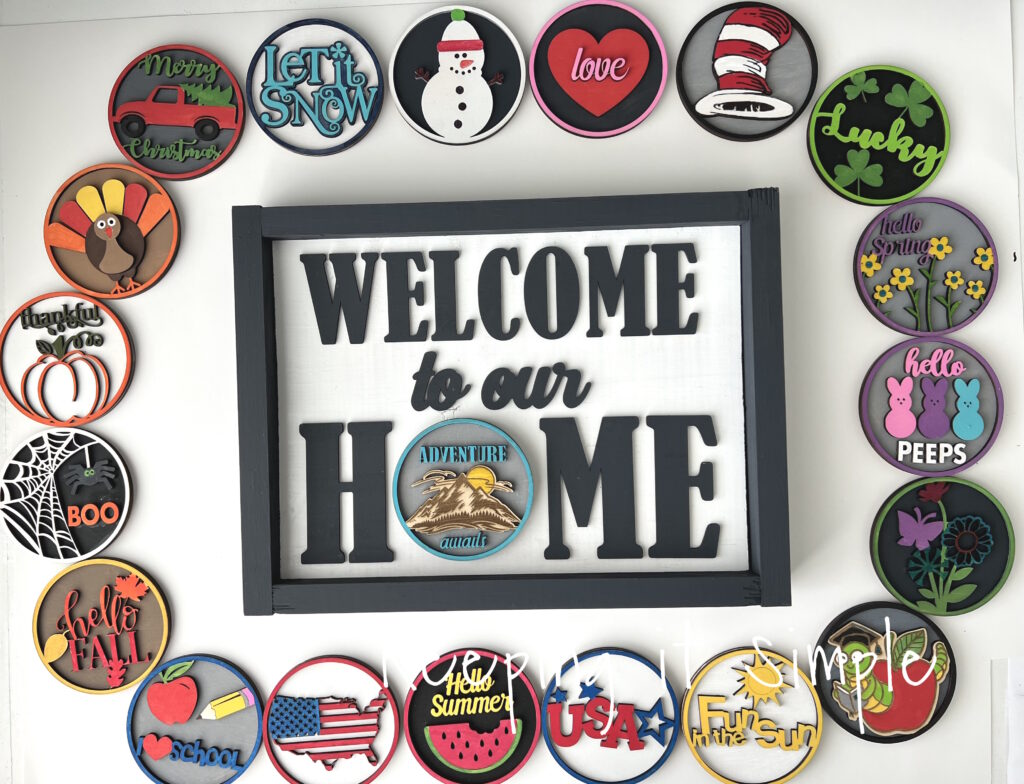
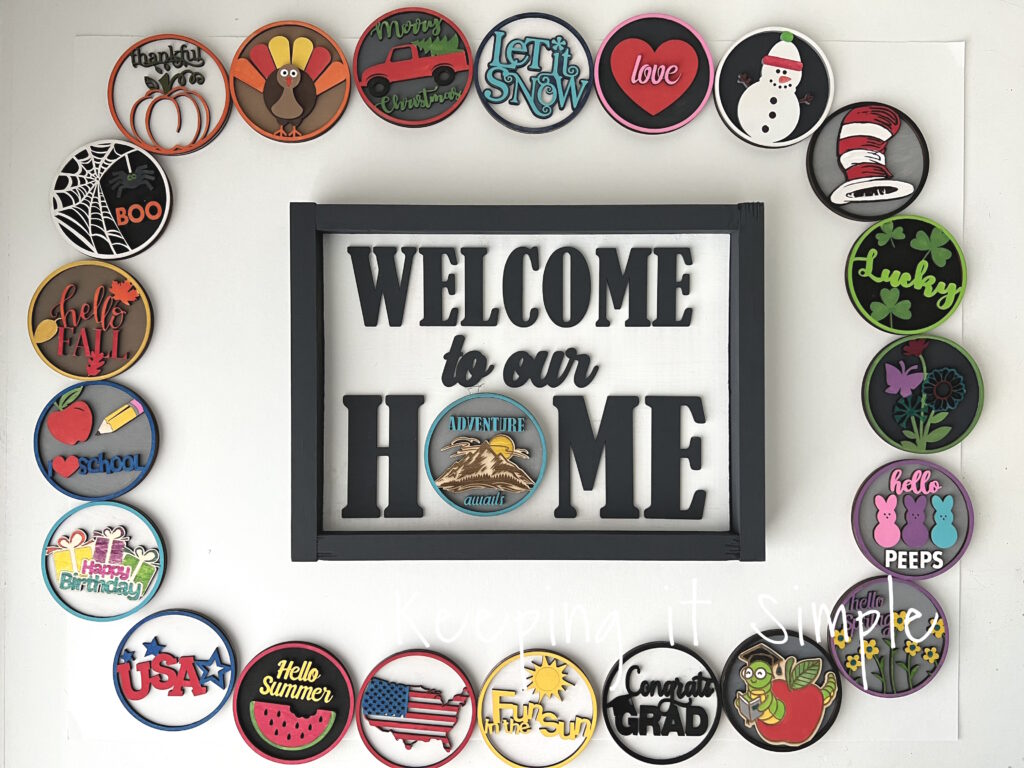
Here are the new holiday designs that I made for the welcome home sign. All the other designs are from the classroom sign. I could have made even more circles. I was thinking about making a happy birthday one and one for graduation (since that is happening this weekend!). There are just so many possibilities for these interchangeable signs.
I painted all the circles and letters for the welcome to our home sign. For the paint, I used a variety of acrylic paints in a variety of colors. I also used Sharpies markers and Sharpie pens to color in the little details that would be tricky to paint.
Here are all of the holiday circle designs. Oh how I love how they turned out! I love that each one is a little different and colorful.
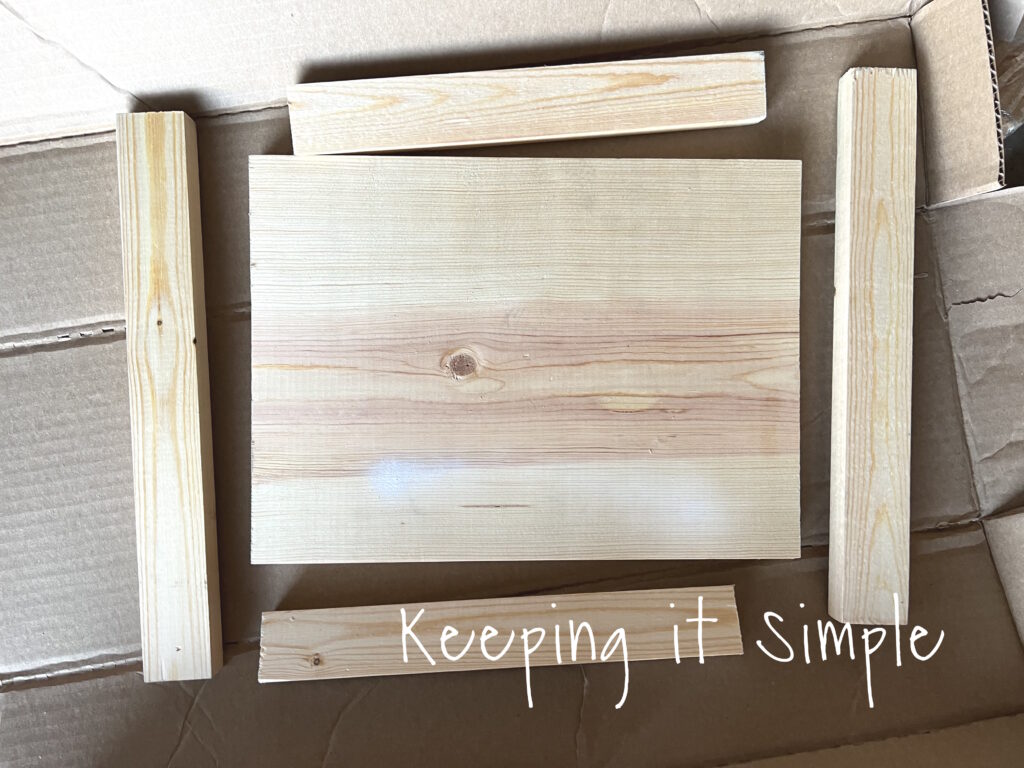
Now time for the farmhouse sign. I used a piece of 1×10 common board for the back of the sign and then a piece of 1×2 wood for the frame. The background piece of the sign is 12 1/2 inches wide and 9 3/16 inches high. For the frame, I cut two pieces that were 9 3/16 wide and then the other two are roughly 10 11/16 inches. I say roughly because I don’t actually measure them, I use the piece of the common board to do my measurements. For a full tutorial of how to make a farmhouse sign, check out this post.
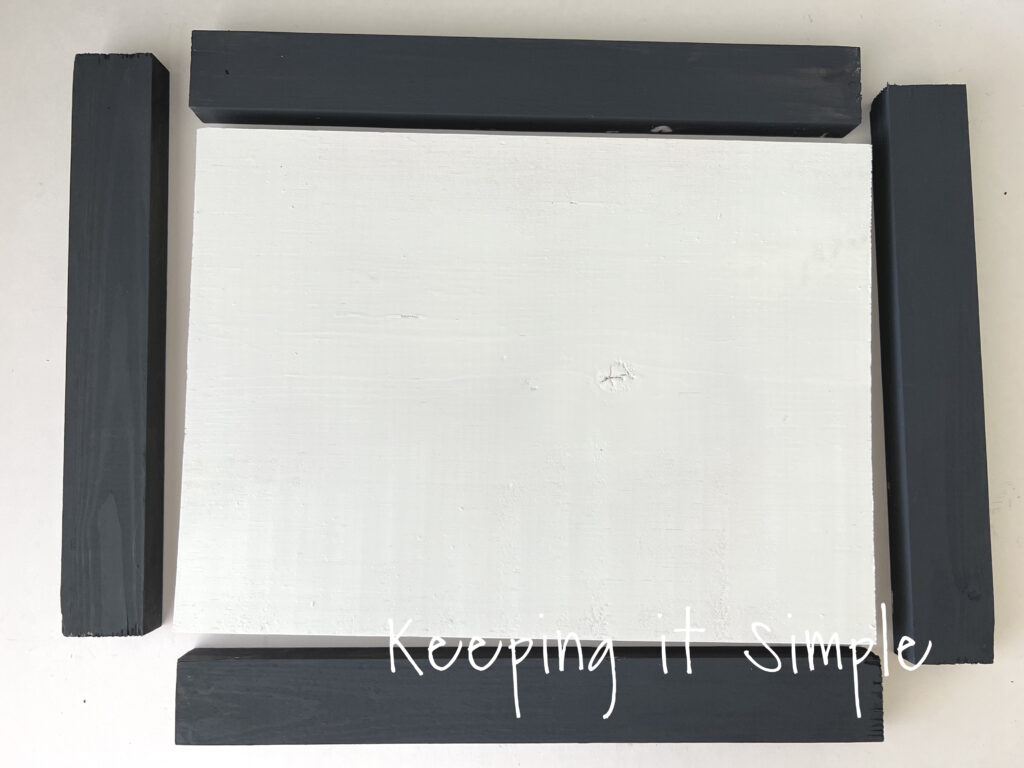
I then painted the wood of the sign. I painted the frame a dark gray and the common board white. I then nailed the frame together using a nail gun. I started with the top and bottom pieces and then nailed the side ones on.
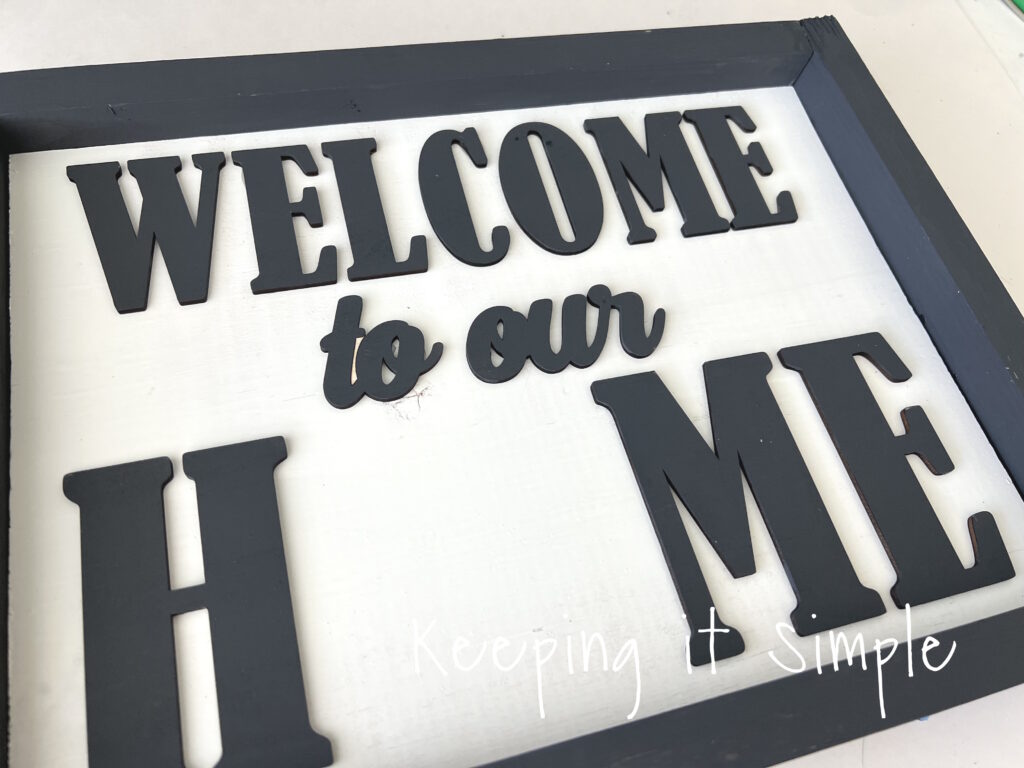
Now it’s time to glue all the wood letters onto the farmhouse sign. I like to use the 3mm plywood for a guide when putting on individual letters. I just put the plywood onto the sign, put glue onto the letter and gently put it onto the opening. I then press down the letters to make sure the glue set. I then pull off the plywood very carefully, making sure that I don’t bump the letters.
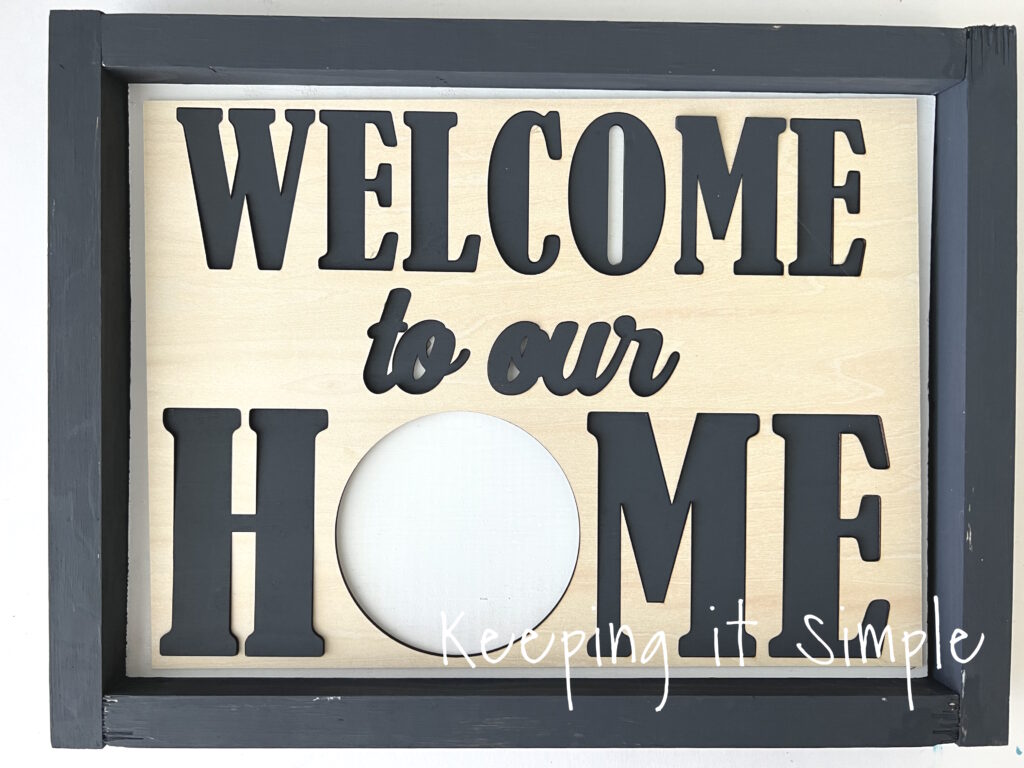
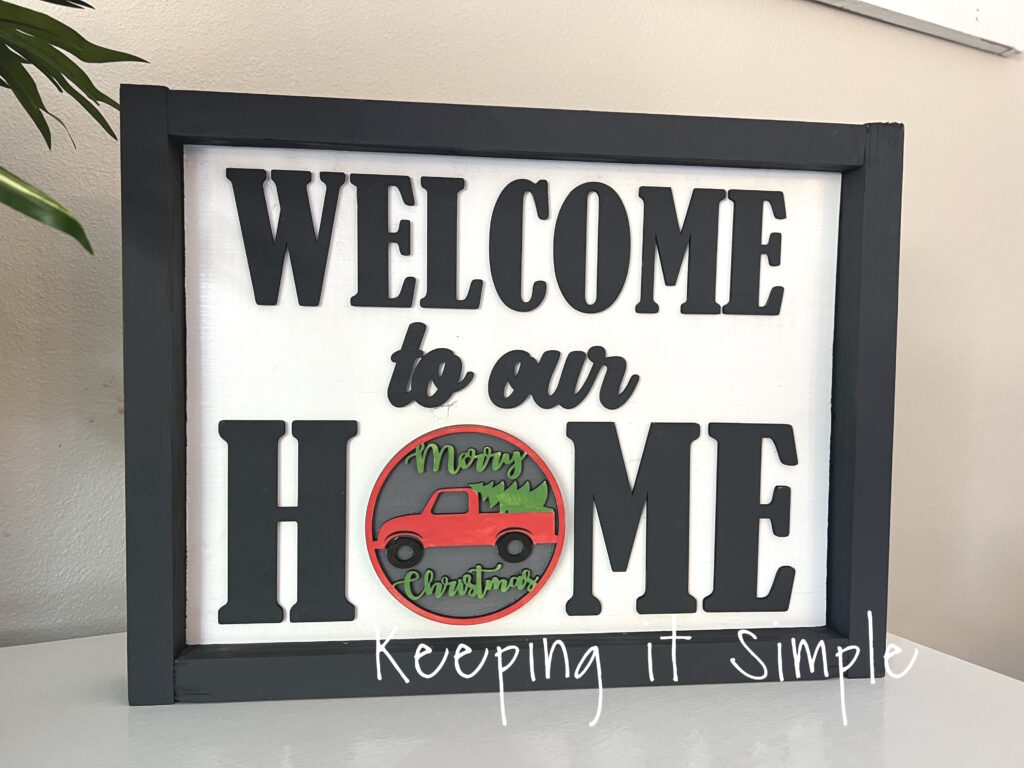
The welcome to our home sign is really starting to come together!
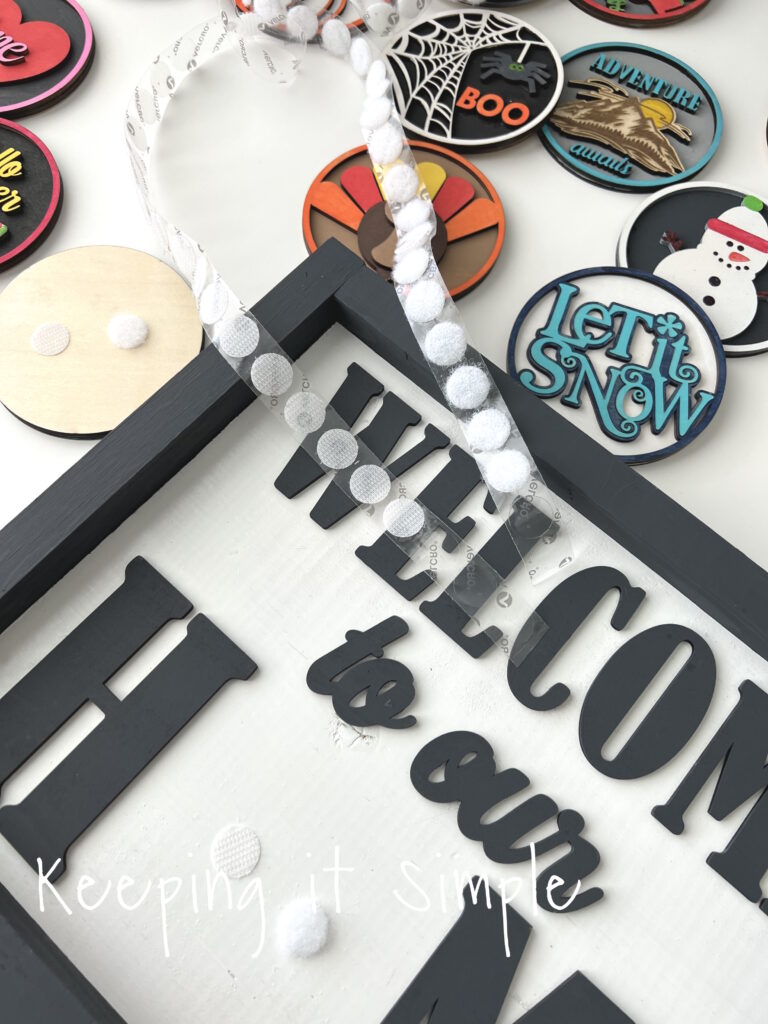
Now to make it possible for the holidays circles to be interchangeable. I did this by added a couple Velcro dots onto the back of each circle and then in between the H and M on the welcome home sign.
And that’s it!! I love how this interchangeable welcome to our home sign turned out!
Here is a quick video to show you how easy it is to change out the different holiday circles.
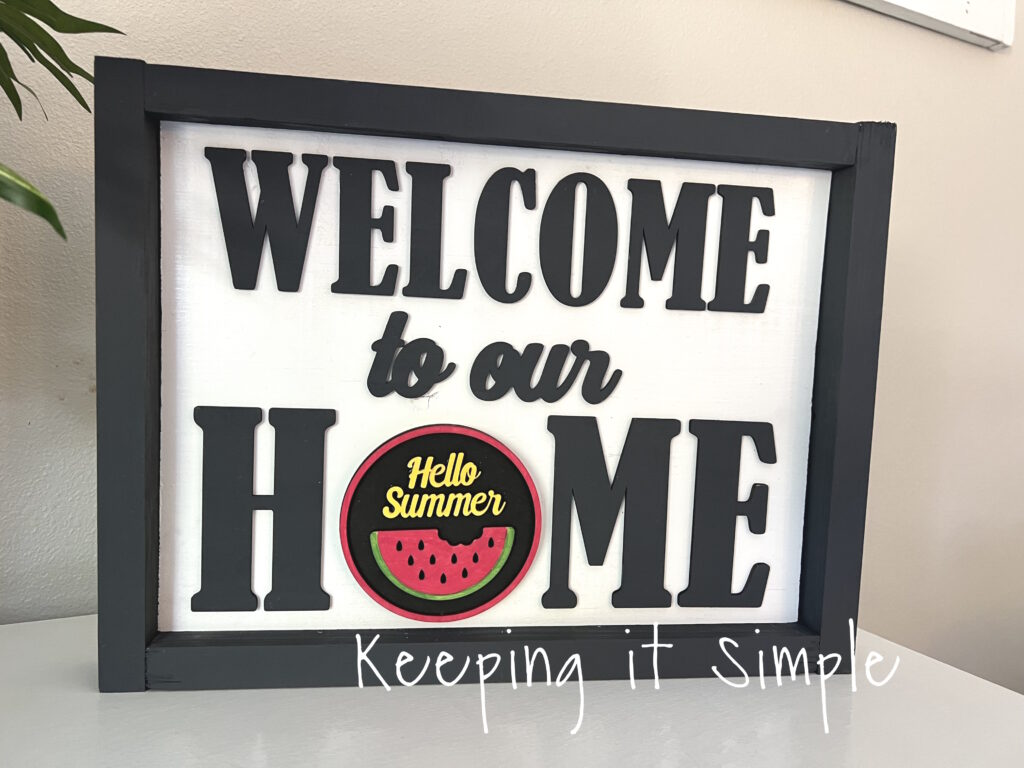
It looks great on any shelf! I especially love this adventure awaits circle, that is perfect for our family.
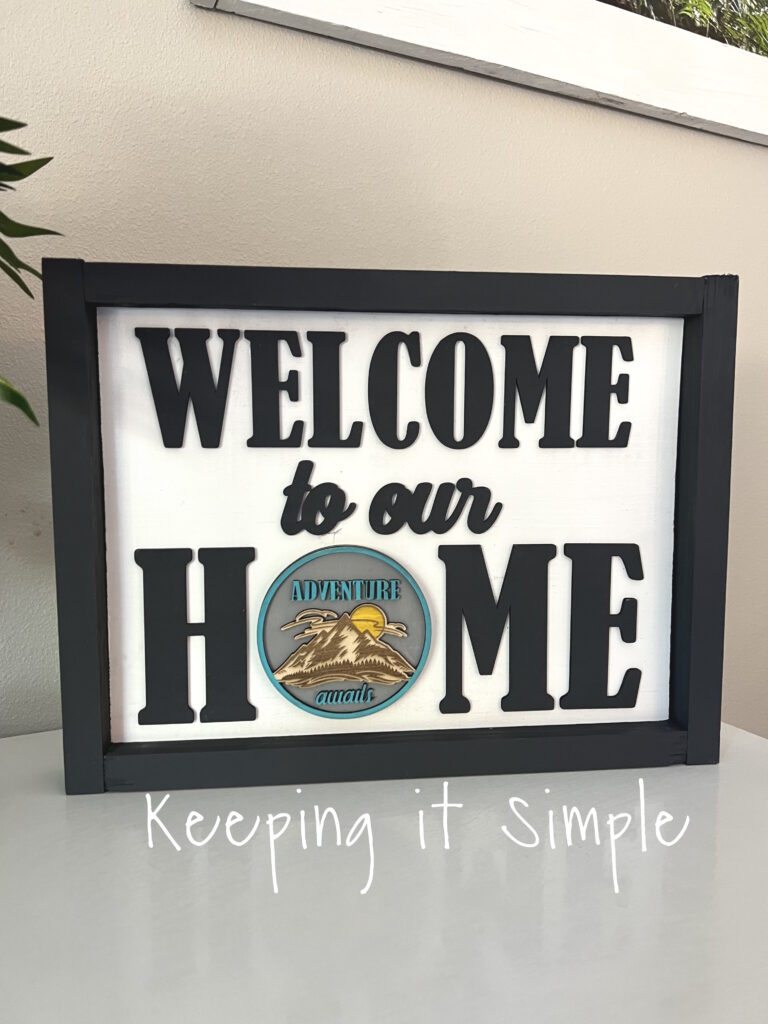
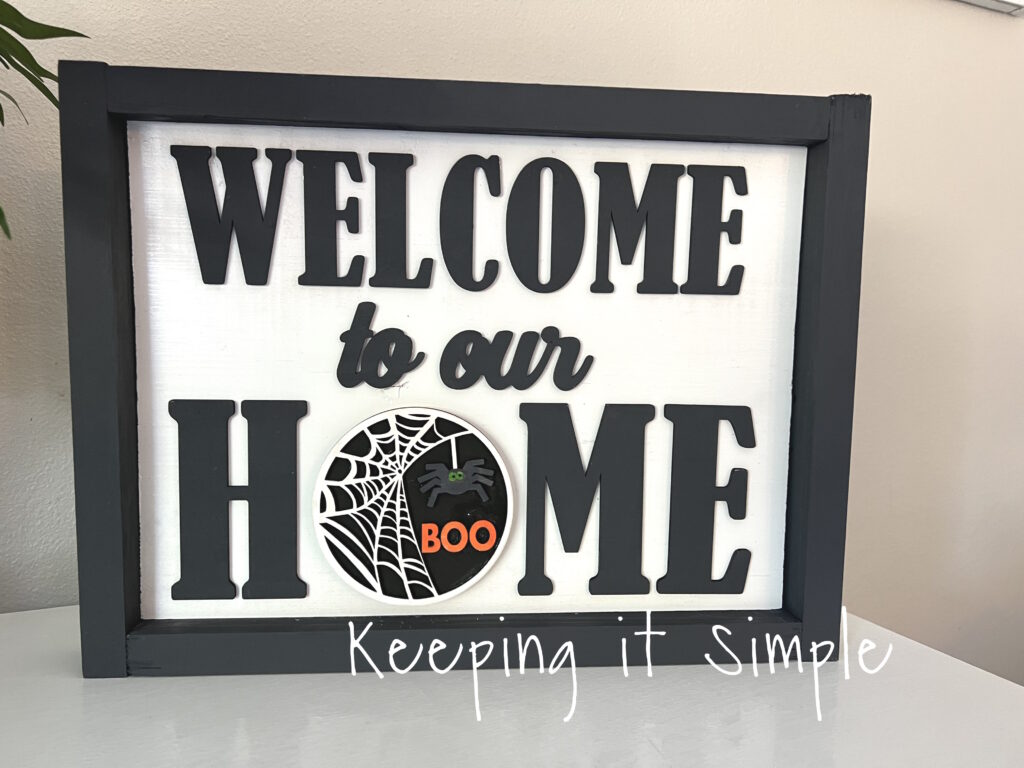
The sign looks great with any of the holiday circles.
**UPDATE**
I decided to make the graduation and happy birthday designs for this welcome to our home sign. So now I have 22 holiday circles to change out through out the year. I love all of them and can’t wait to use them. Knowing me, I’ll make even more because I love coming up with different designs :).
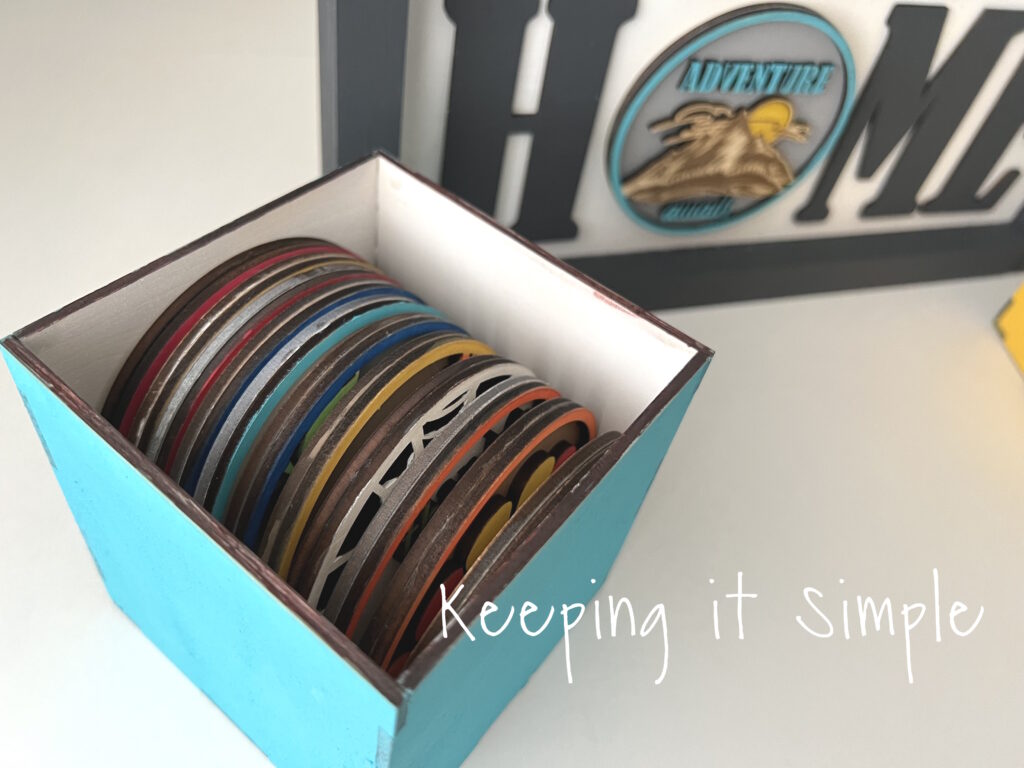
I also made up a couple wooden boxes to hold all of the holiday circles. I used this SVG cut file to make the wooden boxes. I then painted them to make my décor in my entry way.
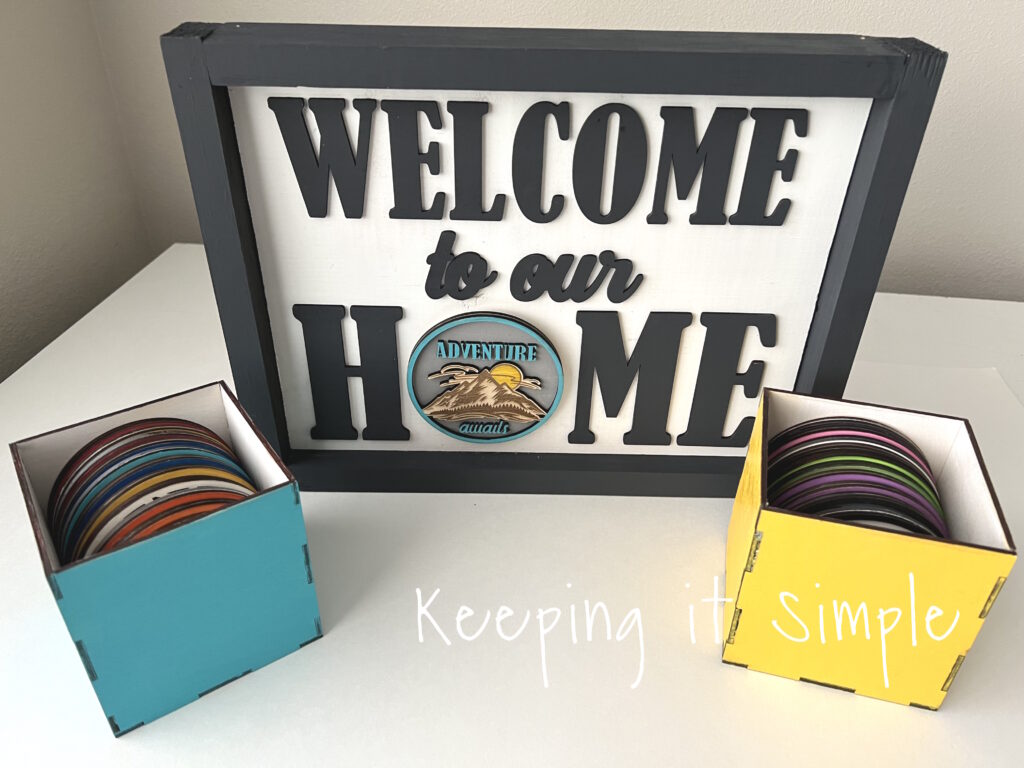
Here is a close up of the box, I was so excited to see that they all fit. I can fit 10-12 of them in there.

Here is the other one. I have them separated, one box has the spring/summer holiday circles and the other one has the fall/winter ones.
Make sure to check out all of the other signs I have made and all the other amazing projects I have made with my xTool!
This post contains affiliate links.
Leave a Reply
You must be logged in to post a comment.